
How to Repair GRUB2 When Ubuntu Won’t Boot
Ubuntu and many other Linux distributions use the GRUB2 boot loader. If GRUB2 breaks—for example, if you install Windows after installing Ubuntu, or overwrite your MBR—you won’t be able to boot into Ubuntu.
You can easily restore GRUB2 from a Ubuntu live CD or USB drive. This process is different from restoring the legacy GRUB boot loader on older Linux distributions.
This process should work on all versions of Ubuntu. It’s been tested on Ubuntu 16.04 and Ubuntu 14.04.
The Graphical Method: Boot Repair
Boot Repair is a graphical tool that can repair GRUB2 with a single click. This is the ideal solution to boot problems for most users.
If you have the media you installed Ubuntu from, insert it into your computer, restart, and boot from the removable drive. If you don’t, download a Ubuntu live CD and burn it to a disc or create a bootable USB flash drive.
When Ubuntu boots, click “Try Ubuntu” to get a usable desktop environment.
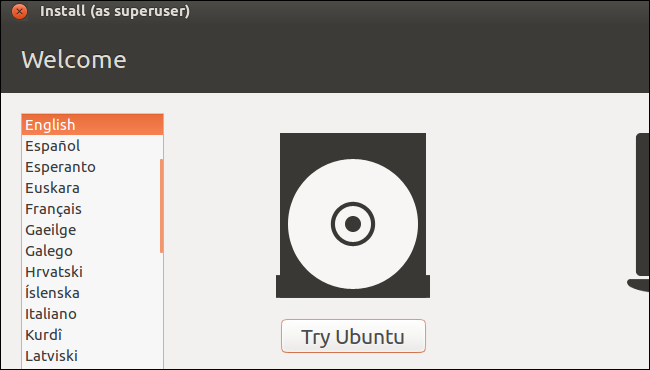
Ensure you have an Internet connection before continuing. You may need to choose a Wi-Fi network and enter its passphrase.
Open a Terminal window from the Dash and run the following commands to install and launch Boot Repair:
sudo apt-add-repository ppa:yannubuntu/boot-repair

sudo apt-get update

sudo apt-get install -y boot-repair

boot-repair
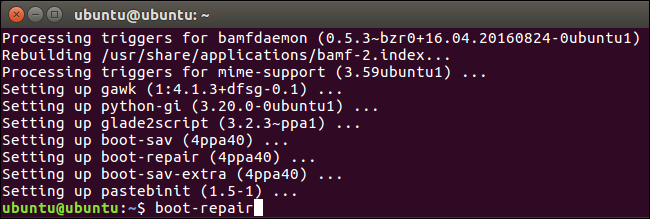
The Boot Repair window will automatically scan your system after you run the boot-repair command. After it scans your system, click the “Recommended repair” button to repair GRUB2 with a single click.
You can choose to use the advanced options here, but Ubuntu’s wiki recommends you not use the advanced options unless you know what you’re doing. The recommended repair option can fix most problems automatically, and you could mess up your system even more by selecting the wrong advanced options.

Boot Repair will begin working. It may ask you to open a Terminal and copy/paste a few commands into it.
Just follow the instructions that appear on your screen. Perform the instructions Boot Repair wants you to and click “Forward” to continue through the wizard. The tool will walk you through everything you need to do.
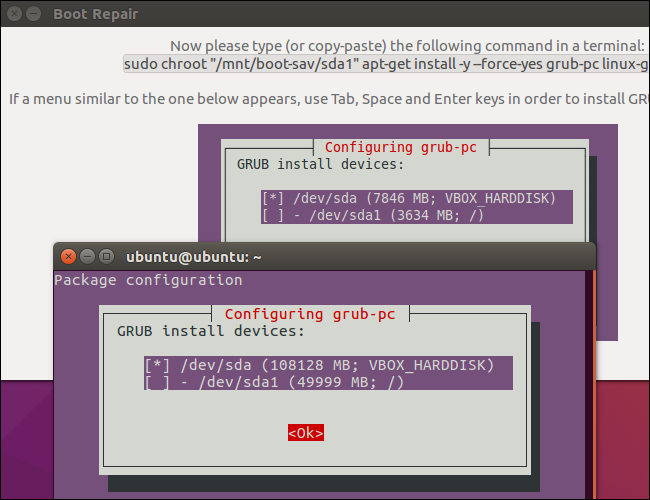
Restart your computer after the Boot Repair tool finishes applying its changes. Ubuntu should boot up normally.
The Terminal Method
If you’d rather get your hands dirty, you can do this yourself from a terminal. You’ll need to boot from a live CD or USB drive, as in the graphical method above. Ensure the version of Ubuntu on the CD is the same as the version of Ubuntu installed on your computer. For example, if you have Ubuntu 14.04 installed, ensure you use a Ubuntu 14.04 live CD.
Open a terminal after booting into the live environment. Identify the partition Ubuntu is installed on using one of the following commands:
sudo fdisk -l

sudo blkid
Here’s the output of both commands. In the fdisk -l command, the Ubuntu partition is identified by the word Linux in the System column. In the blkid command, the partition is identified by its ext4 file system.
If you have multiple Linux ext4 partitions, you can get an idea of which is which by viewing the size of the partitions and their order on the disk here.

Run the following commands to mount the Ubuntu partition at /mnt/ubuntu, replacing/dev/sdX# with the device name of your Ubuntu partition from the above commands:
sudo mkdir /mnt/ubuntu

sudo mount /dev/sdX# /mnt/ubuntu
In the screenshot above, our Ubuntu partition is /dev/sda1. This means the first partition on the first hard disk device.
Important: If you have a separate boot partition, skip the above command and mount the boot partition at /mnt/ubuntu/boot instead. If you don’t know whether you have a separate boot partition, you probably don’t.

Run the following command to reinstall grub from the live CD, replacing /dev/sdX with the device name of the hard disk above. Omit the number. For example, if you used/dev/sda1 above, use /dev/sda here.
sudo grub-install --boot-directory=/mnt/ubuntu/boot /dev/sdX

Restart your computer and Ubuntu should boot properly.
How to Repair GRUB2 When Ubuntu Won’t Boot的更多相关文章
- ubuntu下提示/boot空间不足,解决办法
在安装 ubuntu的时候 , 给/boot文件目录分配空间的时候,是100M,/boot可以单独分成一个区,也可以不单独分,在/(根目录)下也会自动为其创建一个boot目录.顺便提一下,linux分 ...
- Ubuntu提示卷boot仅剩0字节的硬盘空间,解决办法
查看当前安装的linux内核版本号 dpkg --get-selections |grep linux-image 查看当前使用的内核版本号 uname -a 卸载不需要的内核 sudo apt-ge ...
- 安装ubuntu时将boot目录单独挂载的意义
只有一个意义那就是当你的情况是:单个硬盘里面安装多个系统. 如果不是这样,就别动它.
- Ubuntu升级出现/boot空间不足解决
经常升级Linux内核,导致更新时警告/boot分区空间不足.这是以为多次升级内核后,导致内核版本太多,清理一下没用的内核文件就行了.命令如下: zht@zht-Ubuntu:~$ dpkg -l ' ...
- ubuntu更新提示/boot空间不足
1. 查看当前使用的内核版本 uname -a 2.在终端下察看已经安装的旧的内核: ctrl+alt+t——>进入终端——>输入命令: dpkg --get-selections|gre ...
- Ubuntu升级出现/boot空间不足解决(转)
经常升级Linux内核,导致更新时警告/boot分区空间不足.这是以为多次升级内核后,导致内核版本太多,清理一下没用的内核文件就行了.命令如下: zht@zht-Ubuntu:~$ dpkg -l ' ...
- ubuntu修改grub2
转自修改系统启动项 grub2配置的方法 ubuntu 在早期的Ubuntu中,使用Grub作为系统的启动引导程序,想修改系统启动项非常简单,只要用gedit打开系统菜单设定文件( sudo gedi ...
- 修改系统启动项 grub2配置的方法 ubuntu[转]
在 早期的Ubuntu中,使用Grub作为系统的启动引导程序,想修改系统启动项非常简单,只要用gedit打开系统菜单设定文件( sudo gedit /boot/grub/menu.lst ),修改该 ...
- 使用 boot-repair 对 Windows + Ubuntu 双系统引导修复
问题描述: 由于在windows上进行更新/重装/修改了引导设置以后,windows会“自私”地重写引导,导致Ubuntu系统引导消失而无法选择Ubuntu启动.
随机推荐
- 自学Zabbix6.1 Event acknowledgment 事件确认
自学Zabbix6.1 Event acknowledgment 事件确认 1 概述以往服务器出现报警,运维人员处理完事之后,报警自动取消,但是下一次出现同样一个错误,但是换了一个运维人员,他可能需要 ...
- 【BZOJ2302】[HAOI2011]Problem C(动态规划)
[BZOJ2302][HAOI2011]Problem C(动态规划) 题面 BZOJ 洛谷 题解 首先如果\(m=0\)即没有特殊限制的话,那么就和这道题目基本上是一样的. 然而这题也有属于这题的性 ...
- [CF1132F]Clear the String
题意 给你一个串s,每次可以花费1的代价删去一个子串,要求子串的每一位为同一个字符. 求删去整个串的最小代价. 分析 这是一道非常简单的区间\(DP\)问题,我们定义\(f[i][j]\)表示删去子串 ...
- Spring Cloud(三) --- hystrix
Hystrix 说到Hystrix就得先说一下产生的背景等等,那就是雪崩效应. 在微服务中肯定存在多个服务层之间的调用,基础服务的故障可能会导致级联故障,进而造成整个系统不可用的情况,这种现象被称为服 ...
- android广播(内部类)使用
1.广播定义在一个单独的文件中 源码: public class MessageReceiver extends BroadcastReceiver{ @Override public void on ...
- 【洛谷P5020】货币系统 完全背包
题目大意:给定 N 个数,求在这 N 个数中至少选出几个数能表示出所有数字,输出最少的个数. 题解:由于只有小的数字可以表示大的数字,因此首先需要对这 N 个数字进行从小到大排序.排序之后就变成一道不 ...
- [luoguU42591][小T的面试题]
luoguU42591 题意: n个不超过n的正整数中,其中有一个数出现了两次,其余的数都只出现了一次, 求这个出现两次的数. 思路: 这个题的亮点在于内存限制1MB.明显不能再用数组储存了,肯定是用 ...
- poj 2763(RMQ+BIT\树链剖分)
传送门:Problem 2763 https://www.cnblogs.com/violet-acmer/p/9686774.html 题意: 一对夫妇居住在xx村庄,小屋之间有双向可达的道路,不会 ...
- java代码示例(7-1)
Dog类 /*** * 宠物狗狗类,使用权限修饰符private和public进行封装 * @author chenyanlong * 日期:2017/10/15 */ package com.hp. ...
- Python基础【day03】:集合进阶(四)
本节内容 1.关系测试(特殊符号) 1.交集2.并集3.差集4.对称差集5.是否是子集6.是否是父集 2.基本操作 1.add2.update3.remove VS pop vs discard4.l ...