grub.conf解析
一、grub简介
系统启动引导管理器,是在计算机启动后运行的第一个程序,他是用来负责加载、传输控制到操作系统的内核,一旦把内核挂载,系统引导管理器的任务就算完成退出,系统引导的其它部份,比如系统的初始化及启动过程则完全由内核来控制完成。
二、grub的配置文件grub.conf
[root@server ~]# cat /boot/grub/grub.conf
# grub.conf generated by anaconda
#
# Note that you do not have to rerun grub after making changes to this file
# NOTICE: You have a /boot partition. This means that
# all kernel and initrd paths are relative to /boot/, eg.
# root (hd0,6)
# kernel /vmlinuz-version ro root=/dev/mapper/vg0-root
# initrd /initrd-[generic-]version.img
#boot=/dev/sda
default=0
timeout=5
splashimage=(hd0,6)/grub/splash.xpm.gz
#hiddenmenu
title Red Hat Enterprise Linux (2.6.32-220.el6.x86_64)
root (hd0,6)
kernel /vmlinuz-2.6.32-220.el6.x86_64 ro root=/dev/mapper/vg0-root rd_NO_LUKS LANG=en_US.UTF-8 rd_NO_MD quiet SYSFONT=latarcyrheb-sun16 rhgb crashkernel=auto rd_LVM_LV=vg0/root KEYBOARDTYPE=pc KEYTABLE=us rd_NO_DM
initrd /initramfs-2.6.32-220.el6.x86_64.img
title Windows 7 Ultimate
rootnoverify (hd0,0)
chainloader +1
解释:
GRUB要求设备名被括在一个括号中。fd表示软盘,hd 表示硬盘(不区分IDE还是SCSI)。其次设备是从0开始编号。分区也是如此,分区和设备之间用一个逗号分开。
default 启动系统时在人为不干预的情况下,默认读取哪一个title,如果安装了多个不同版本内核或者安装了不用的操作系统,会产生多个title,0表示第一个,1第二个,以此类推。
timeout 开机等待用户的超时时间,单位为秒。在超时时间结束时,如果用户没有人为选择,则以default指定的title读取。
hiddenmenu:用于启动时隐藏菜单,除非在timeout之前按下任意键才能看到菜单。
title:定义引导项名称。
root:指定boot分区所在磁盘及分区,如:root (hd0,6)。
kernel:指定kernel文件所在绝对目录地址,如:kernel /vmlinuz-2.6.32-220.el6.x86_64 ,这里的/表示root(hd0,6)分区
initrd:指定ramdisk盘所在绝对目录地址,如:initrd /initramfs-2.6.32-220.el6.x86_64.img
【详解kernel】
kernel /vmlinuz-2.6.32-220.el6.x86_64 ro root=/dev/mapper/vg0-root rd_NO_LUKS LANG=en_US.UTF-8 rd_NO_MD quiet SYSFONT=latarcyrheb-sun16 rhgb crashkernel=auto rd_LVM_LV=vg0/root KEYBOARDTYPE=pc KEYTABLE=us rd_NO_DM
kernel /vmlinuz-2.6.32-220.el6.x86_64 :制定内核文件的位置
ro:刚开始以只读方式挂载根文件系统
root=/dev/mapper/vg0-root:root根分区设备位置
rd_NO_LUKS LANG=en_US.UTF-8 rd_NO_MD:为了加速引导启动进程,可以指定磁盘是否加密、语言环境、不启用LVM、RAID、键盘等等,节省dracut查找的时间
SYSFONT=latarcyrheb-sun16 KEYTABLE=us:对于有加密磁盘的系统启动,可以指定键盘规格和字体显示等
quiet:启动过程中只有重要信息显示,类似硬件自检的消息不回显示
rhgb:RedHat graphics boot,就是会看到图片来代替启动过程中显示的文本信息,这些信息在启动后用dmesg也可以看到
【注意】
kernel与initrd这两个设置项中,指定的路径都是绝对路径。因为这两个文件都存放在/boot目录。而且/boot所在的分区已经指定,所以就无需再指明kernel与initrd在哪个分区了。如果boot分区为独立分区,那么前面的/boot省略掉。如果boot分区为非独立分区,那么必须加上/boot。
【例如】
独立分区:kernel /vmlinuz-2.6.32-220.el6.x86_64
非独立分区:kernel /boot/vmlinuz-2.6.32-220.el6.x86_64
三、grub与stage文件
1、stage文件
[root@client ~]# ll /boot/grub/
total 259
-rw-r--r--. 1 root root 63 Mar 27 16:43 device.map
-rw-r--r--. 1 root root 13204 Mar 27 16:43 e2fs_stage1_5
-rw-r--r--. 1 root root 12516 Mar 27 16:43 fat_stage1_5
-rw-r--r--. 1 root root 11748 Mar 27 16:43 ffs_stage1_5
-rw-------. 1 root root 783 Mar 27 16:43 grub.conf
-rw-r--r--. 1 root root 11756 Mar 27 16:43 iso9660_stage1_5
-rw-r--r--. 1 root root 13220 Mar 27 16:43 jfs_stage1_5
lrwxrwxrwx. 1 root root 11 Mar 27 16:43 menu.lst -> ./grub.conf
-rw-r--r--. 1 root root 11940 Mar 27 16:43 minix_stage1_5
-rw-r--r--. 1 root root 14300 Mar 27 16:43 reiserfs_stage1_5
-rw-r--r--. 1 root root 1341 May 7 2010 splash.xpm.gz
-rw-r--r--. 1 root root 512 Mar 27 16:43 stage1
-rw-r--r--. 1 root root 113044 Mar 27 16:43 stage2
-rw-r--r--. 1 root root 12008 Mar 27 16:43 ufs2_stage1_5
-rw-r--r--. 1 root root 11364 Mar 27 16:43 vstafs_stage1_5
-rw-r--r--. 1 root root 13932 Mar 27 16:43 xfs_stage1_5
***stage1 是用于引导GURB的一个必须的映象文件。通常它是被嵌入到 MBR。或者一个分区的引导扇区之中。因为 PC 的引导扇区是 512 字节,所以 stage1也是512字节。stage1的作用就是从一个本地磁盘加载stage 2 或者stage1_5 。因为大小的限制,stage1 对stage2 或者stage1_5的位置进行编码。
***在这个目录下还有很多stage1_5的文件,而且都是以文件系统格式命名的。它们的目的是在stage1和stage2之间搭建一个桥梁,也就是stage1加载stage1_5, 然后stage1_5加载stage2。stage1 和stage1_5的不同之处是 stage1无法识别文件系统,stage1_5可以。因为 Stage2 太大了,无法被嵌入到某个固定的区域,而stage1_5可以安装在 MBR 之后的位置。
2、grub启动方式
a、stage1-> stage1_5 -> stage2
首先监测是否有合适的文件系统的驱动,如果有就使用文件系统逻辑的方式加载stage2 ;如果找不到就用blocklist的方式再找stage2,找到了挂起来,找不到报错。
b、stage1 -> stage2
如果确认stage1_5没有被安装在MBR之后, stage1就会使用记录的stage2的blocklist寻找stage2,找到后挂起来,找不到报错。
四、grub的三种安装方式
在linux系统中可以执行grub命令。进入grub的命令界面,在这里面可以使用一些常用的命令。
可以输入命令help查看帮助
[root@client ~]# grub
Probing devices to guess BIOS drives. This may take a long time.
GNU GRUB version 0.97 (640K lower / 3072K upper memory)
[ Minimal BASH-like line editing is supported. For the first word, TAB
lists possible command completions. Anywhere else TAB lists the possible
completions of a device/filename.]
grub> help
help
blocklist FILE boot
cat FILE chainloader [--force] FILE
clear color NORMAL [HIGHLIGHT]
configfile FILE device DRIVE DEVICE
displayapm displaymem
find FILENAME geometry DRIVE [CYLINDER HEAD SECTOR [
halt [--no-apm] help [--all] [PATTERN ...]
hide PARTITION initrd FILE [ARG ...]
kernel [--no-mem-option] [--type=TYPE] makeactive
map TO_DRIVE FROM_DRIVE md5crypt
module FILE [ARG ...] modulenounzip FILE [ARG ...]
pager [FLAG] partnew PART TYPE START LEN
parttype PART TYPE quit
reboot root [DEVICE [HDBIAS]]
rootnoverify [DEVICE [HDBIAS]] serial [--unit=UNIT] [--port=PORT] [--
setkey [TO_KEY FROM_KEY] setup [--prefix=DIR] [--stage2=STAGE2_
grub will attempt to avoid printing an terminal [--dumb] [--no-echo] [--no-ed
terminfo [--name=NAME --cursor-address testvbe MODE
unhide PARTITION uppermem KBYTES
vbeprobe [MODE]
grub> help root
help root
root: root [DEVICE [HDBIAS]]
Set the current "root device" to the device DEVICE, then attempt
to mount it to get the partition size (for passing the partition
descriptor in `ES:ESI', used by some chain-loaded bootloaders),
the BSD drive-type (for booting BSD kernels using their native
boot format), and correctly determine the PC partition where a
BSD sub-partition is located. The optional HDBIAS parameter is a
number to tell a BSD kernel how many BIOS drive numbers are on
controllers before the current one. For example, if there is an
IDE disk and a SCSI disk, and your FreeBSD root partition is on
the SCSI disk, then use a `1' for HDBIAS.
rootnoverify: rootnoverify [DEVICE [HDBIAS]]
Similar to `root', but don't attempt to mount the partition. This
is useful for when an OS is outside of the area of the disk that
GRUB can read, but setting the correct root device is still
desired. Note that the items mentioned in `root' which derived
from attempting the mount will NOT work correctly.
1、install命令
install: install [--stage2=STAGE2_FILE] [--force-lba] STAGE1 [d] DEVICE STAGE2 [ADDR] [p] [CONFIG_FILE] [REAL_CONFIG_FILE]
STAGE1:指定stage1文件所在绝对路径。
DEVICE:指定vstage1装载的位置。
STAGGE2:指定stage2文件所在绝对路径。
ADDR:指定装载stage2的位置,如果不写,系统自动决定。
例如:
boot为独立分区时:
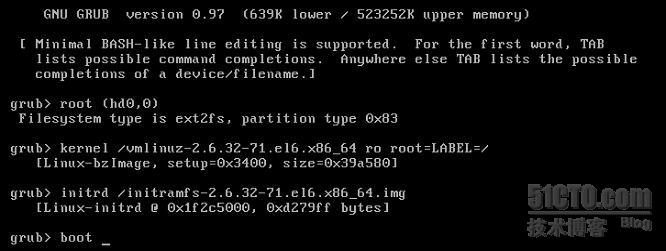
grub> root (hd0,0)
root (hd0,0)
Filesystem type is ext2fs, partition type 0x83
grub> install /grub/stage1 (hd0) /grub/stage2 p /grub/grub.conf
install /grub/stage1 (hd0) /grub/stage2 p /grub/grub.conf
boot为非独立分区时:
grub>root (hd0,0)
grub>install /boot/grub/stage1 (hd0) /boot/grub/stage2 p /boot/grub/grub.conf
2、setup命令
setup [--prefix=DIR] [--stage2=STAGE2_FILE] [--force-lba] INSTALL_DEVICE [IMAGE_DEVICE]
INSTALL_DEVICE:指定安装grub的位置。
IMAGE_DEVICE:指定要安装的镜象文件。
例如:
grub> root (hd0,0)
root (hd0,0)
Filesystem type is ext2fs, partition type 0x83
grub> setup (hd0)
setup (hd0)
Checking if "/boot/grub/stage1" exists... no
Checking if "/grub/stage1" exists... yes
Checking if "/grub/stage2" exists... yes
Checking if "/grub/e2fs_stage1_5" exists... yes
Running "embed /grub/e2fs_stage1_5 (hd0)"... 26 sectors are embedded.
succeeded
Running "install /grub/stage1 (hd0) (hd0)1+26 p (hd0,0)/grub/stage2 /grub/grub.conf"... succeeded
Done.
3、grub-install命令
grub-install拷贝grub镜象文件到DIR/boot目录中(可以通过参数--root-directory指定目录),并用grub shell安装grub到MBR中。
grub-install [OPTION] install_device
例如:
[root@client ~]# grub-install hd0 (或者是grub-install /dev/sda也行)
Installation finished. No error reported.
This is the contents of the device map /boot/grub/device.map.
Check if this is correct or not. If any of the lines is incorrect,
fix it and re-run the script `grub-install'.
# this device map was generated by anaconda
(hd0) /dev/sda
注意:
grub-install命令安装grub到MBR中的时候利用的安装源是/usr/share/grub/x86_64-RedHat/下的stage1、stage2和各种stage1_5。它利用stage1_5 -> stage2 方式的文件系统方式去查找,如果stage2不存在,那么系统就不能启动。
install、setup命令安装grub的安装源是/boot/grub目录中的stage1、stage2和各种stage1_5。所以这两种安装方法来安装grub到MBR中的时候,确保/boot/grub目录中的stage1、stage2和各种stage1_5必须存在。setup命令利用stage1_5 -> stage2方式去查找stage2,首先监测是否有合适的文件系统驱动,存在就使用文件系统逻辑的方式查找stage2 ;如果不存在就用blocklist的方式再找stage2。Install命令利用stage1 -> stage2方式去查找。
五、模拟故障解决
1、grub-install方式解决
使用情况:1、grub被擦掉的时候。2、/boot/grub目录下的所有镜像文件都给删除时。 3、使用grub-install命令安装的grub并且boot/grub目录下stage2文件被误删除时(拷贝过去的stage2没有效果)。
[root@client ~]# df -h
Filesystem Size Used Avail Use% Mounted on
/dev/sda3 2.9G 1.6G 1.2G 56% /
tmpfs 246M 260K 246M 1% /dev/shm
/dev/sda1 97M 26M 67M 28% /boot
可以看出boot分区为独立分区,重新安装grub(系统默认为install方式)
[root@client ~]# grub-install hd0
Installation finished. No error reported.
This is the contents of the device map /boot/grub/device.map.
Check if this is correct or not. If any of the lines is incorrect,
fix it and re-run the script `grub-install'.
# this device map was generated by anaconda
(hd0) /dev/sda
删除/boot/grub 下的stage2文件,或者移到其它目录下,然后重启
[root@client ~]# rm -f /boot/grub/stage2

[root@client ~]# reboot
这个时候我们只能进入linux rescue模式对系统进行修复了,而且只可以使用grub-install命令对系统进行修复。因为/boot/grub下的stage2文件已经被我们删掉了。原因是的安装源已被破坏。可以选择光盘安装,这里是pxe网络引导。局域网搭建见“pxe+kickstart搭建局域网环境”。


一路下一步来到这里


这里选择shell Start shell

OK
进到linux rescue模式

然后重启,bios选择Hard Disk启动,可以看到启动成功了

2、setup方式解决
使用setup方式重装grub
[root@client ~]# grub
Probing devices to guess BIOS drives. This may take a long time.
GNU GRUB version 0.97 (640K lower / 3072K upper memory)
[ Minimal BASH-like line editing is supported. For the first word, TAB
lists possible command completions. Anywhere else TAB lists the possible
completions of a device/filename.]
grub> root (hd0,0)
root (hd0,0)
Filesystem type is ext2fs, partition type 0x83
grub> setup (hd0)
setup (hd0)
Checking if "/boot/grub/stage1" exists... no
Checking if "/grub/stage1" exists... yes
Checking if "/grub/stage2" exists... yes
Checking if "/grub/e2fs_stage1_5" exists... yes
Running "embed /grub/e2fs_stage1_5 (hd0)"... 26 sectors are embedded.
succeeded
Running "install /grub/stage1 (hd0) (hd0)1+26 p (hd0,0)/grub/stage2 /grub/grub.conf"... succeeded
Done.
grub> quit
[root@client ~]# rm -f /boot/grub/stage2
[root@client ~]# reboot
实验证明,当grub使用setup方式写入MBR中时,删除stage2之后,同样使用setup方式修复grub没有用,还得用grub-install?这是为什么,有清楚请告知一下。


当执行下面操作之后,只能使用grub-install方式修复了
[root@client grub]# shred -v stage2
shred: stage2: pass 1/3 (random)...
shred: stage2: pass 2/3 (random)...
shred: stage2: pass 3/3 (random)...
[root@client grub]# rm -fr stage2
[root@client grub]# reboot
3、install方式解决
[root@client ~]# grub
Probing devices to guess BIOS drives. This may take a long time.
GNU GRUB version 0.97 (640K lower / 3072K upper memory)
[ Minimal BASH-like line editing is supported. For the first word, TAB
lists possible command completions. Anywhere else TAB lists the possible
completions of a device/filename.]
grub> root (hd0,0)
root (hd0,0)
Filesystem type is ext2fs, partition type 0x83
grub> install /grub/stage1 (hd0) /grub/stage2 p /grub/grub.conf
install /grub/stage1 (hd0) /grub/stage2 p /grub/grub.conf
grub> quit
[root@client ~]# rm -f /boot/grub/stage2
[root@client ~]# reboot
可以看到使用install安装的grub当删除stage2之后还能重启成功。
[root@client grub]# shred -v stage2
shred: stage2: pass 1/3 (random)...
shred: stage2: pass 2/3 (random)...
shred: stage2: pass 3/3 (random)...
[root@client grub]# reboot
这个时候系统不能再启动了,类似上面的用grub-install方式修复grub
4、删除grub.conf文件,修复系统
[root@client ~]# rm -f /boot/grub/grub.conf
[root@client ~]# reboot
GRUB笔记:grub.conf解析 stage介绍 grub故障及安装
grub.conf解析的更多相关文章
- 【转】/etc/grub.conf文件详解
转自:http://leejia.blog.51cto.com/4356849/788902 grub.conf是grub的主配置文件,通过这个配置文件,grub才能找到kernel,系统才能正常启动 ...
- ubuntu_linux /boot/grub/grub.conf
==========================================UBUNTU /boot/grub/grub.conf文件============================ ...
- vm安装centos 老是出现 grub.conf 配置问题
vm 环境 11 centos 6.5 最开始用的是vm12 发现安装软件一会就出现 客户机操作系统已禁用 cpu.请关闭或重置虚拟机 以为是新机器的cpu或者主板有问题,换vm,换系统依然会出现这 ...
- grub.conf文件参数详解
Grub是Linux的下系统启动器之一(另一个名为Lilo),grub.conf相当于 windows下的boot.ini,都是存放启动项设置和信息的,如果你熟悉boot.ini的设置的话相信也可以很 ...
- /etc/grub.conf
http://leejia.blog.51cto.com/4356849/788902 grub.conf是grub的主配置文件,通过这个配置文件,grub才能找到kernel,系统才能正常启动. # ...
- /boot/grub/grub.conf 内容诠释
linux的启动配置文件GRUB启动时会在 /boot/grub 中寻找一个名字为grub.conf的配置文件,如果找不到此配置文件则不进入菜单模式而直接进入命令行模式. grub.conf是一个纯文 ...
- 解读grub.conf文件
我们将来看看grub.conf文件内语句,(注:...)内的东西是我们的解读内容. # grub.conf generated by anaconda # # Note that you do not ...
- host.conf - 解析配置文件
DESCRIPTION (描述) 文件 /etc/host.conf 包含了为解析库声明的配置信息. 它应该每行含一个配置关键字, 其后跟着合适的配置信息. 系统识别的关键字有: order, tri ...
- grub配置文件grub.conf详细说明
说明:只供学习交流 default行,是指grub启动时默认菜单项.0表示第一项,如果是多系统可以修改此选项改变默认光标停留位置. timeout行,是指菜单到自动启动系统前的停留时间,单位时间为se ...
随机推荐
- epoch、 iteration和batchsize区别
转自: https://blog.csdn.net/qq_27923041/article/details/74927398 深度学习中经常看到epoch. iteration和batchsize,下 ...
- java 处理上传exl数据 并导入数据库
思路:处理上传exl表格,并读取文件,数据,讲数据放去集合,循环插入数据库. 重点,读取文件时需要读数据,格式和数据是否正确,(因为只是把整条路打通,所以这块没有细弄): 项目使用ssm框架, str ...
- Android系统启动概要
注:Java系统服务与本地系统服务标注反了 1.Linux内核 Android系统启动时,首先通过BootLoader(系统加载器)加载Linux内核,在Linux加载启动时,首先初始化内核,再调用i ...
- EasyUI-datebox设置开始日期小于结束日期,并且结束日期小于当前日期
datebox设置开始日期小于结束日期,并且结束日期小于当前日期 //日期控制扩展选择日期小于等于当前日期,开始日期小于等于结束日期 $("#datebox1").datebox( ...
- docker--Dockerfile-nginx
# 基础镜像 FROM alpine # 作者信息 MAINTAINER NGINX Docker Maintainers "1024331014@qq.com" # 修改源 RU ...
- ContOS7切换国内源
ContOS更换国内下载源 一,什么是yum源? yum,是Yellow dog Updater, Modified 的简称,是杜克大学为了提高RPM 软件包安装性而开发的一种软件包管理器.起初是由y ...
- Python中的numpy模块解析
numpy 1. 创建对象 维度(dimensions):轴 轴的个数:秩(rank) Numpy最重要的一个特点就是其N维数组对象(即ndarray) 创建数组最简单的函数就是用array函数: ...
- readlink: command not found 解决方案
/c/Program Files (x86)/Yarn/bin/yarn: line 3: readlink: command not found 用gitbash运行yarn时提示这个错误,但没有直 ...
- 聊聊GarbageCollectionNotificationInfo
序本文主要研究一下GarbageCollectionNotificationInfo CompositeDatajava.management/javax/management/openmbean/C ...
- 配置日志中显示IP
package com.demo.conf; import ch.qos.logback.classic.pattern.ClassicConverter; import ch.qos.logback ...