IDEA community + Gradle + Gretty 调试 servlet 应用 + war包部署到tomcat
参考:https://guides.gradle.org/building-java-web-applications
1.运行和调试
IDEA创建gradle项目,项目结构如下

各个文件:
build.gradle
// https://guides.gradle.org/building-java-web-applications

plugins {

    id 'java'

    id 'war'

    id 'org.akhikhl.gretty' version '1.4.2'

}

group 'ServletDemo'

version '1.0-SNAPSHOT'

sourceCompatibility = 1.8

repositories {

    mavenCentral()

}

dependencies {

    // https://mvnrepository.com/artifact/javax.servlet/javax.servlet-api

    providedCompile group: 'javax.servlet', name: 'javax.servlet-api', version: '3.1.0'

    testCompile group: 'junit', name: 'junit', version: '4.12'

}
HelloServlet.java
package servlets;

import javax.servlet.ServletException;

import javax.servlet.annotation.WebServlet;

import javax.servlet.http.HttpServlet;

import javax.servlet.http.HttpServletRequest;

import javax.servlet.http.HttpServletResponse;

import java.io.IOException;

@WebServlet(name = "HelloServlet", urlPatterns = {"hello"}, loadOnStartup = 1)

public class HelloServlet extends HttpServlet {

    int i = 0; // Servlet "persistence"

    protected void doGet(HttpServletRequest request, HttpServletResponse response)

            throws IOException {

        response.getWriter().print("Hello, World! " + i++);

    }

    protected void doPost(HttpServletRequest request, HttpServletResponse response)

            throws ServletException, IOException {

        String name = request.getParameter("name");

        if (name == null) name = "World";

        request.setAttribute("user", name);

        request.getRequestDispatcher("response.jsp").forward(request, response);

    }

} ///:~
index.html
<!DOCTYPE html>

<html lang="en">

<head>

    <meta charset="UTF-8">

    <title>Servlet Demo</title>

</head>

<body>

    <p>Say <a href="hello">Hello</a></p>

    <form method="post" action="hello">

        <h2>Name:</h2>

        <input type="text" id="say-hello-text-input" name="name" />

        <input type="submit" id="say-hello-button" value="Say Hello" />

    </form>

</body>

</html>
response.jsp
<%@ page contentType="text/html;charset=UTF-8" language="java" %>

<html>

    <head>

        <title>Hello Page</title>

    </head>

    <body>

        <h2>Hello, ${user}!</h2>

    </body>

</html>
然后点击左侧的Gradle面板,选择任务gretty.appRun就可以启动app,通过localhost:8080访问
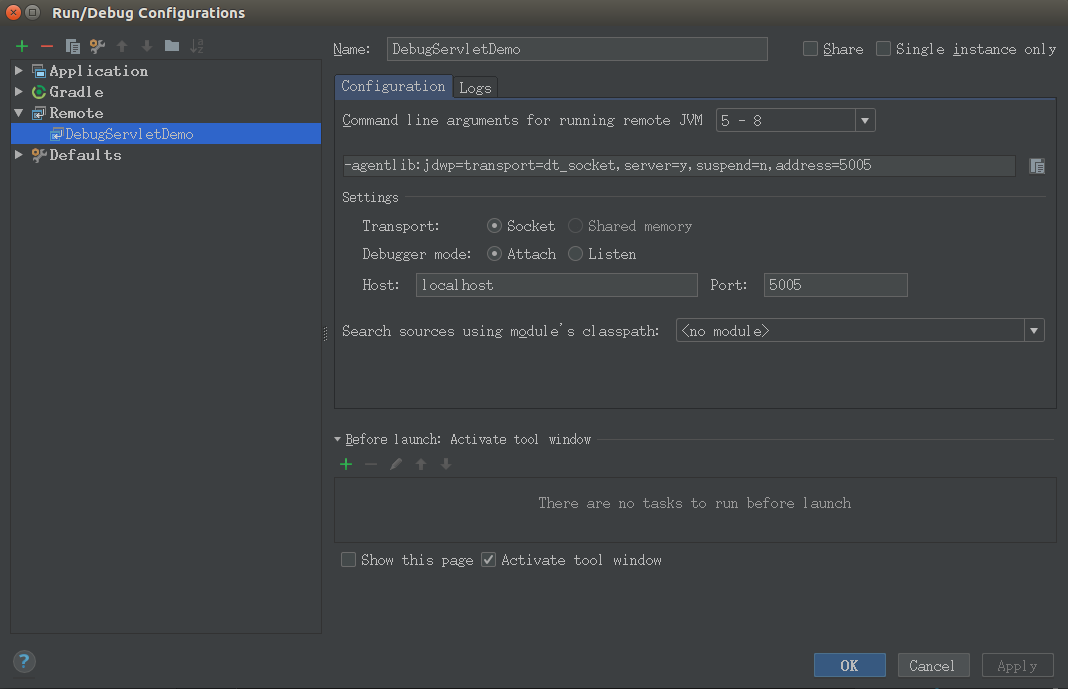
如果要 调试,那么在Gradle面板中选择任务gretty.appRunDebug,启动该任务后,选择Run->Edit Configurations 然后添加一个Remote Run/Debug,如下图,名为DebugServletDemo,根据gretty官方文档,默认debug port是5005,所以这里填好host和port
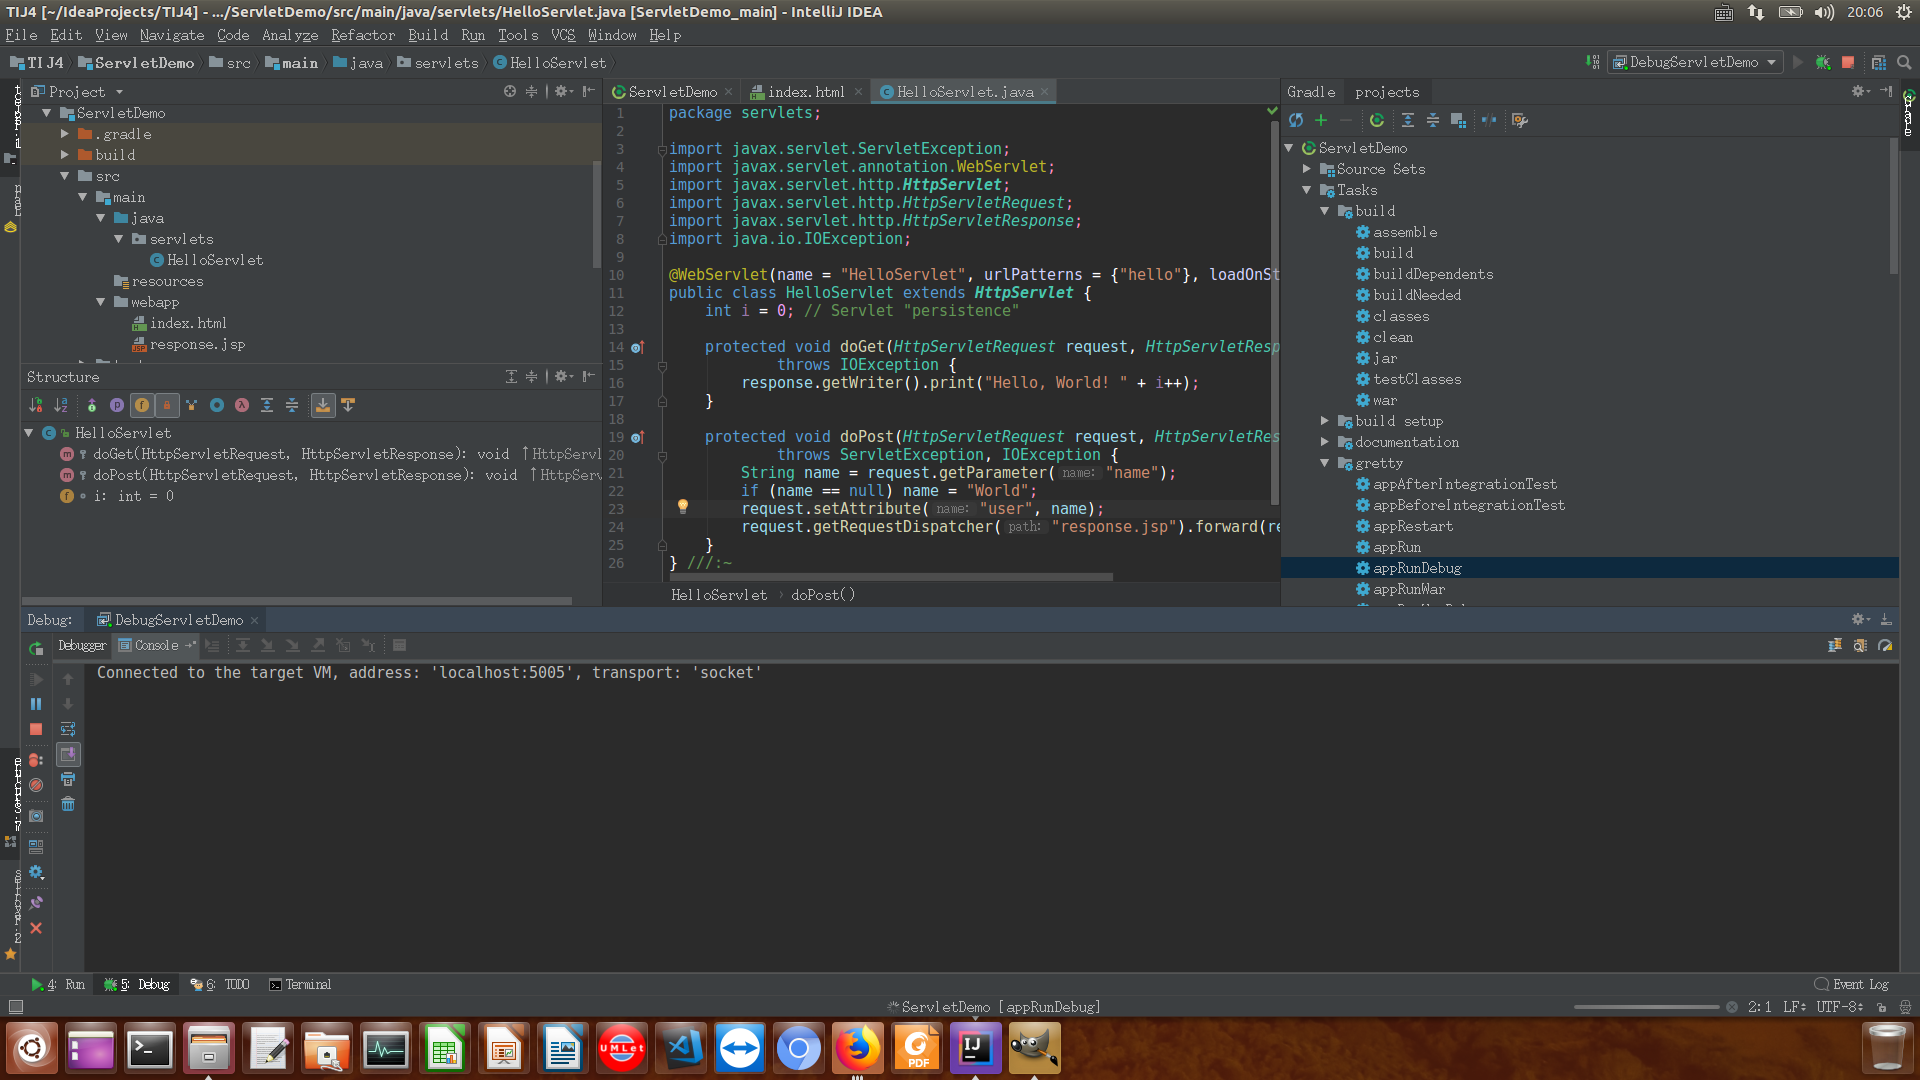
然后在Gradle面板中启动任务gretty.appRunDebug,如下图Run选项卡中所示,在5005端口等待Debugger的连接

接下来再启动Run->Debug->DebugServletDemo,如下图Debug选项卡中所示,Debugger已连接上5005端口
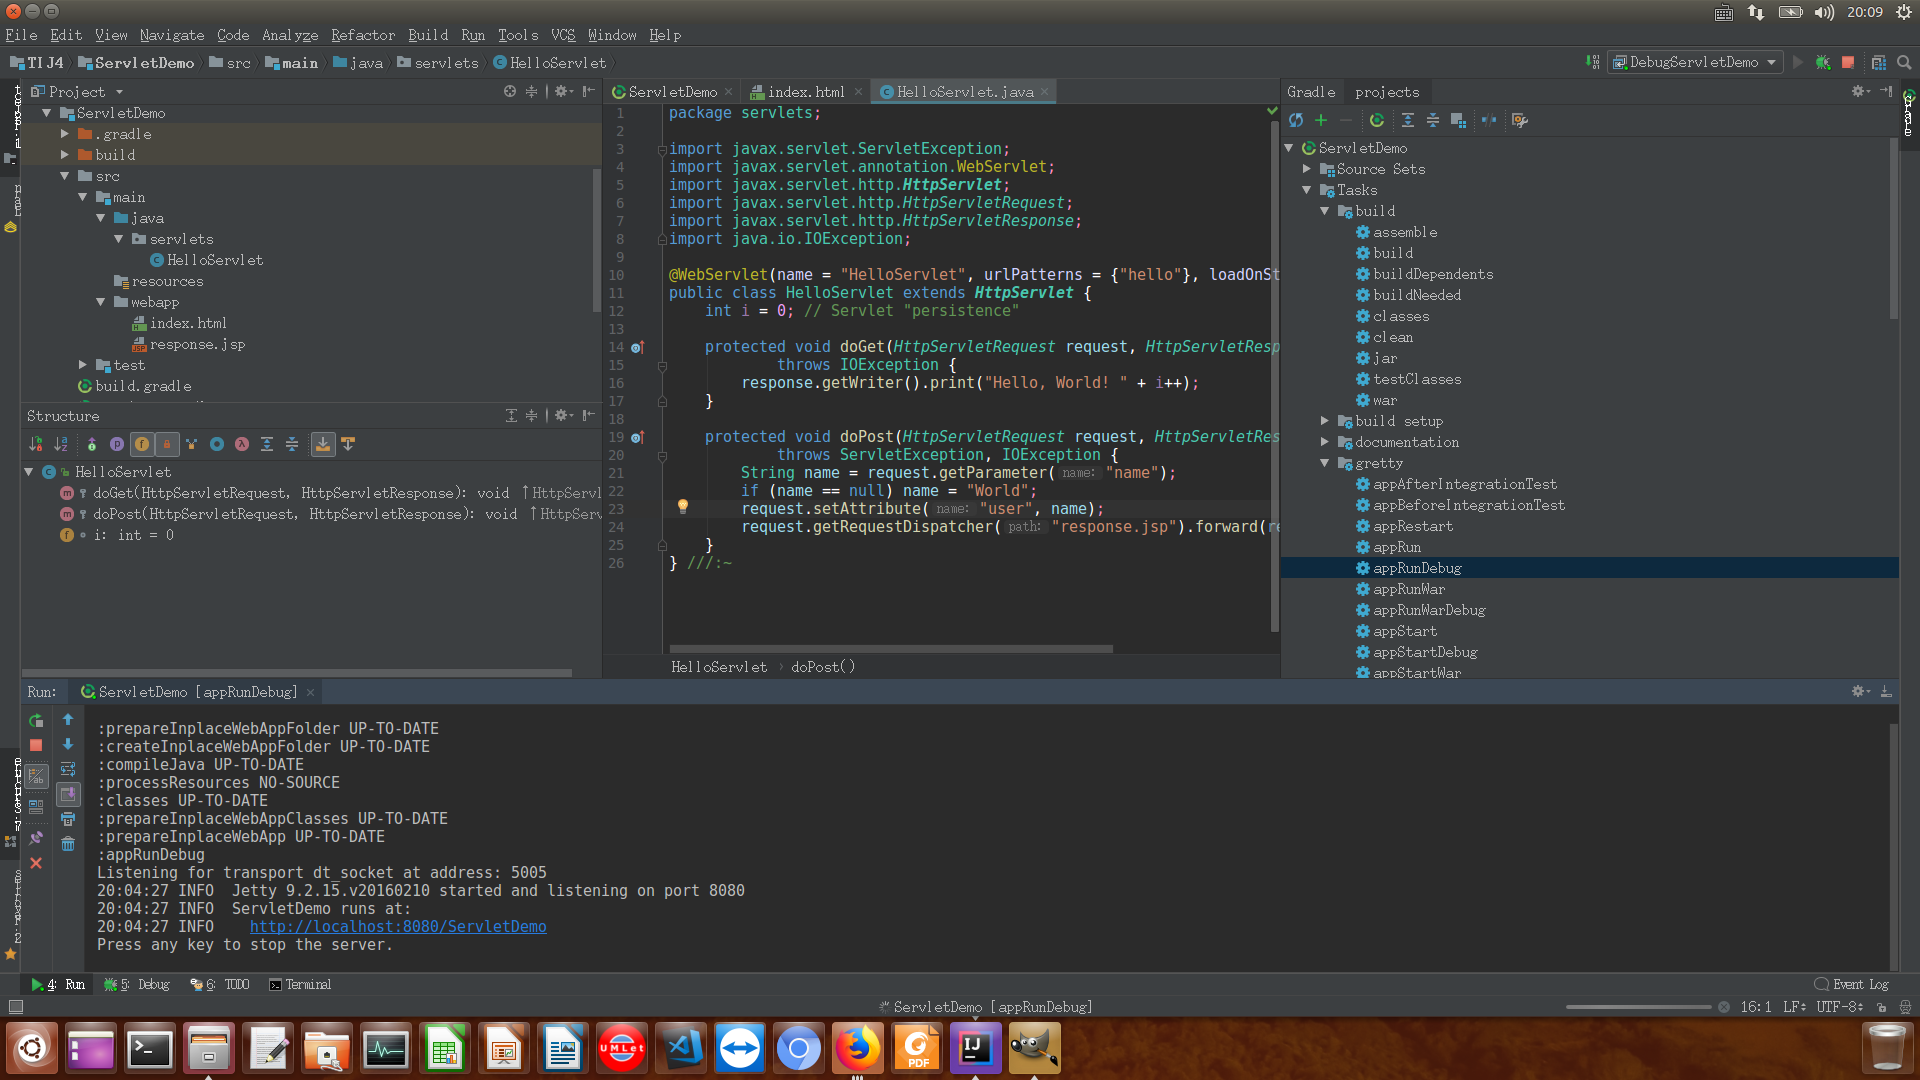
此时再次查看Run选项卡,会发现其中内容如下,点击该http链接开始调试
2.部署到tomcat
2.1. 打包war只需要Gradle面板中选择build.build任务即可,然后把war包放到tomcat安装目录的webapps/目录下,这里我的war包名为ServletDemo-1.0-SNAPSHOT.war
2.2. 修改tomcat安装目录下的conf/tomcat-users.xml,如下内容,从而可以使用tomcat的管理权限
<?xml version="1.0" encoding="UTF-8"?>

<!--

  Licensed to the Apache Software Foundation (ASF) under one or more

  contributor license agreements.  See the NOTICE file distributed with

  this work for additional information regarding copyright ownership.

  The ASF licenses this file to You under the Apache License, Version 2.0

  (the "License"); you may not use this file except in compliance with

  the License.  You may obtain a copy of the License at

      http://www.apache.org/licenses/LICENSE-2.0

  Unless required by applicable law or agreed to in writing, software

  distributed under the License is distributed on an "AS IS" BASIS,

  WITHOUT WARRANTIES OR CONDITIONS OF ANY KIND, either express or implied.

  See the License for the specific language governing permissions and

  limitations under the License.

-->

<tomcat-users xmlns="http://tomcat.apache.org/xml"

              xmlns:xsi="http://www.w3.org/2001/XMLSchema-instance"

              xsi:schemaLocation="http://tomcat.apache.org/xml tomcat-users.xsd"

              version="1.0">

<!--

  NOTE:  By default, no user is included in the "manager-gui" role required

  to operate the "/manager/html" web application.  If you wish to use this app,

  you must define such a user - the username and password are arbitrary. It is

  strongly recommended that you do NOT use one of the users in the commented out

  section below since they are intended for use with the examples web

  application.

-->

<!--

  NOTE:  The sample user and role entries below are intended for use with the

  examples web application. They are wrapped in a comment and thus are ignored

  when reading this file. If you wish to configure these users for use with the

  examples web application, do not forget to remove the <!.. ..> that surrounds

  them. You will also need to set the passwords to something appropriate.

-->

<!--

  <role rolename="tomcat"/>

  <role rolename="role1"/>

  <user username="tomcat" password="<must-be-changed>" roles="tomcat"/>

  <user username="both" password="<must-be-changed>" roles="tomcat,role1"/>

  <user username="role1" password="<must-be-changed>" roles="role1"/>

-->

    <role rolename="manager-gui"/>

    <user username="admin" password="1qaz2WSX" roles="manager-gui"/>

</tomcat-users>
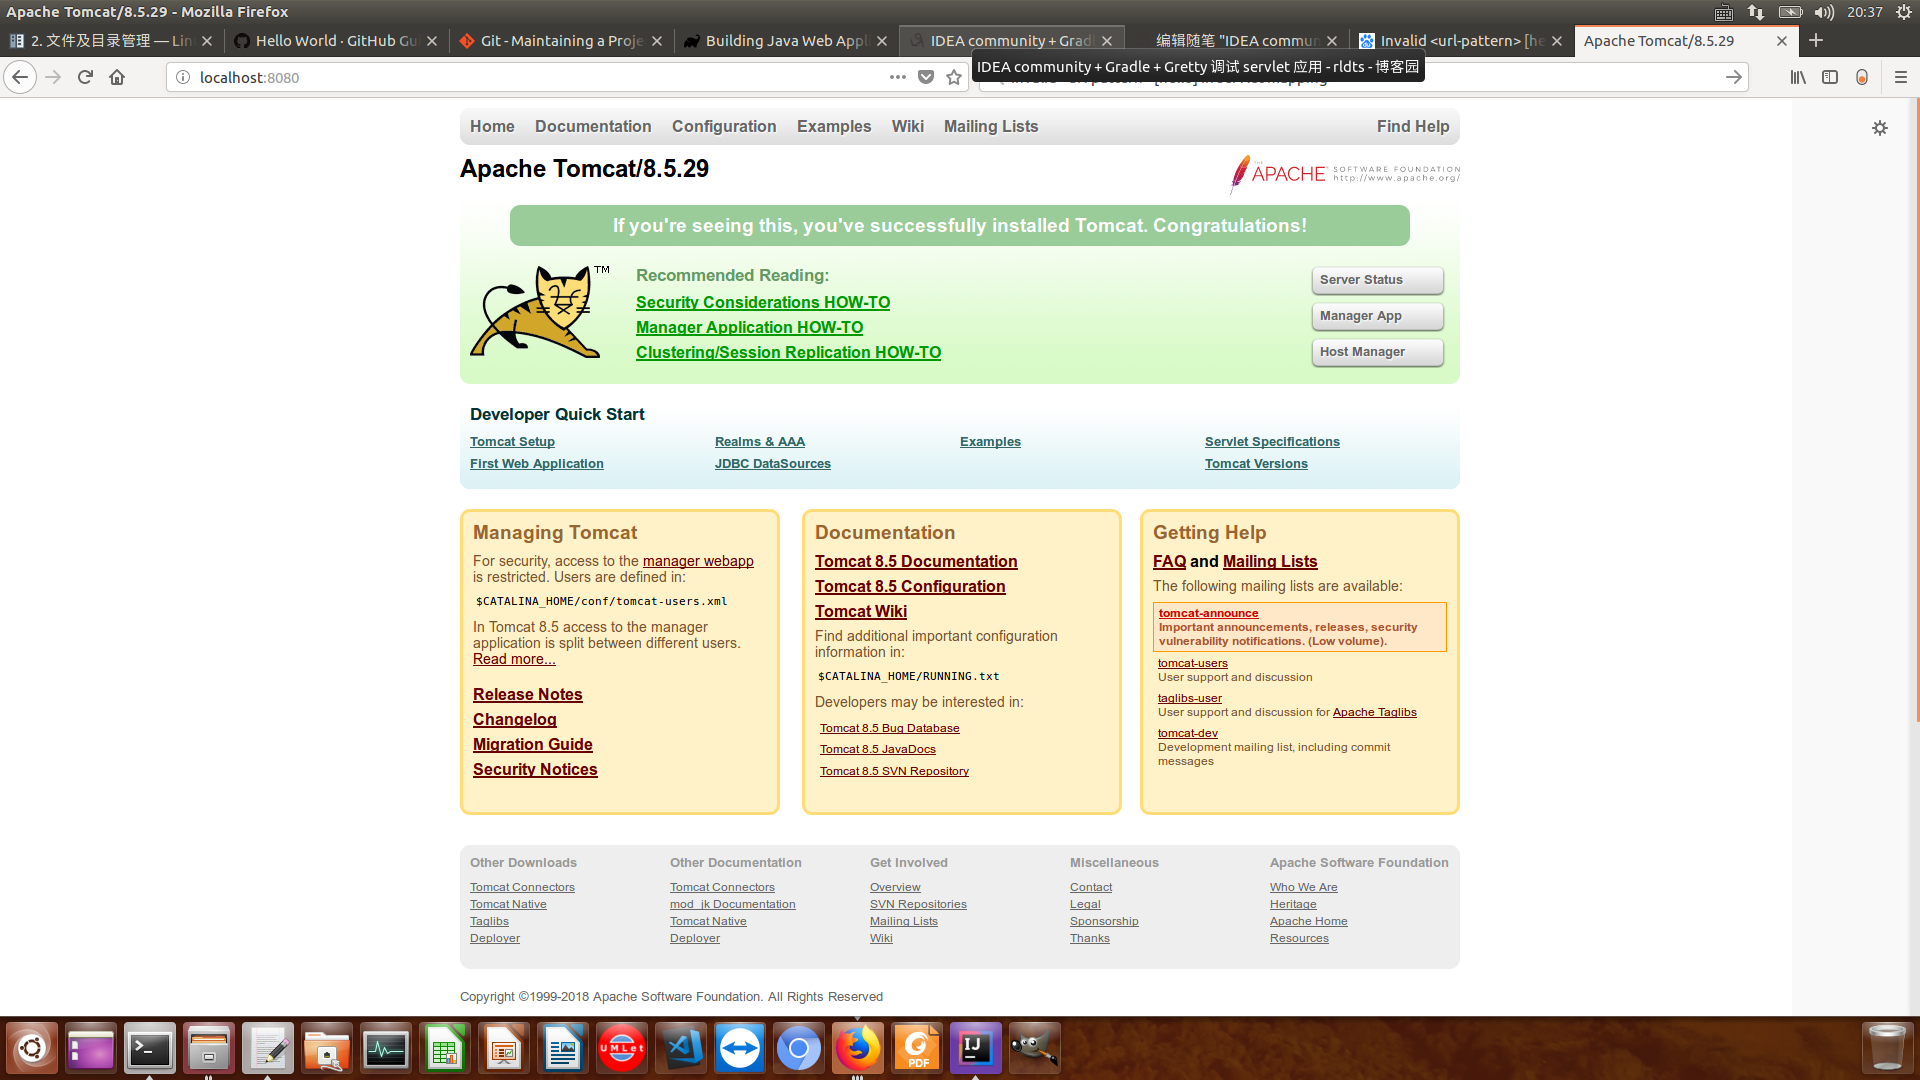
2.3. 启动tomcat,访问localhost:8080,如下:
2.4. 点击"Manager App"按钮,进入如下页面,然后start ServletDemo-1.0-SNAPSHOT即可访问
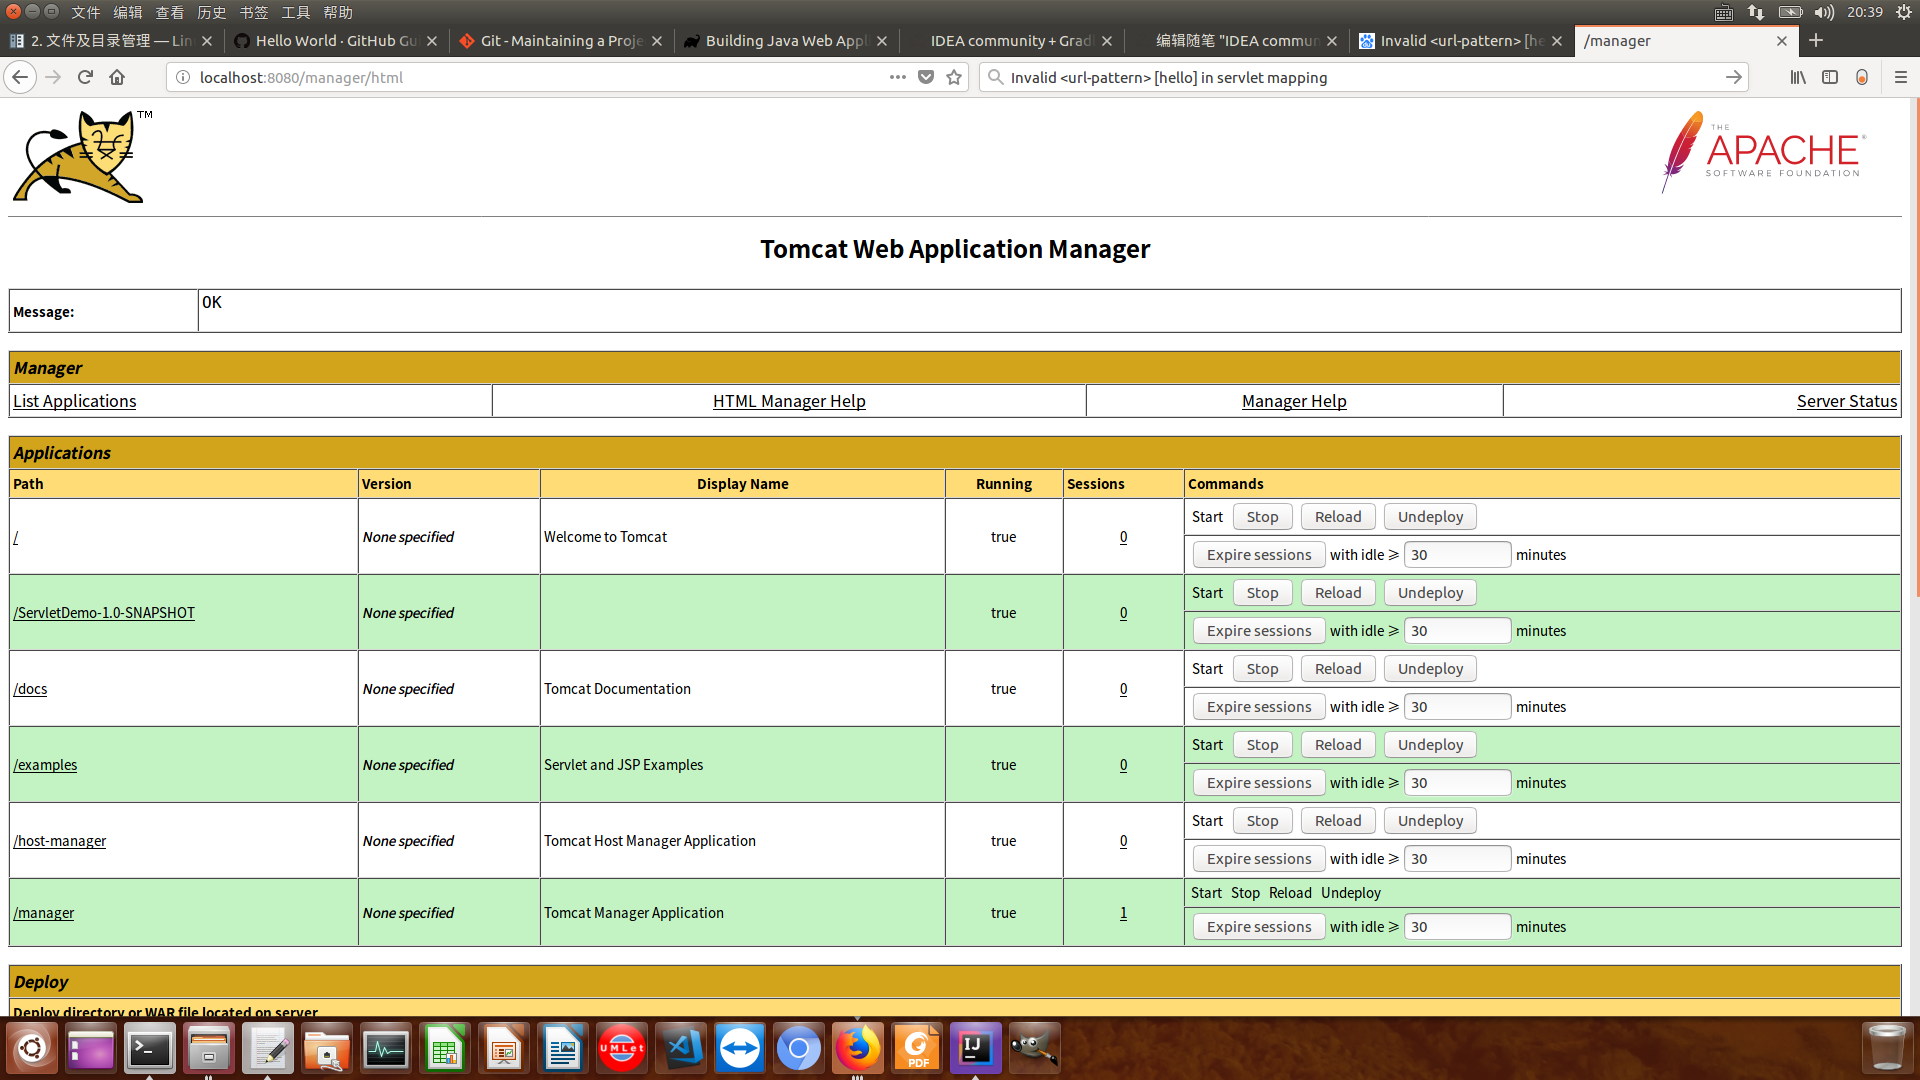
2.4.1. 这里我发现war包的app不能启动,在tomcat的logs/manager.2018.xx.xx.log中发现报错Invalid <url-pattern> [hello] in servlet mapping,去HelloServlet.java中把urlPatterns="hello"改为urlPatterns="/hello"即可}改为
IDEA community + Gradle + Gretty 调试 servlet 应用 + war包部署到tomcat的更多相关文章
- SpringBoot之打成war包部署到Tomcat
正常情况下SpringBoot项目是以jar包的形式,正常情况下SpringBoot项目是以jar包的形式,并且SpringBoot是内嵌Tomcat服务器,所以每次重新启动都是用的新的Tomcat服 ...
- 将Web项目War包部署到Tomcat服务器
1. 配置Java运行环境 1.1 下载并安装JDK 从官网上下载最新的JDK:http://java.sun.com/javase/downloads/index.jsp ,下载后安装,选择想把JD ...
- 将web项目打成war包部署在tomcat步骤
将web项目打成war包部署在tomcat步骤 1.将自己的项目打成war包. 2.将打包好的war复制到${tomcat.home}/webapps项目下. 3.在${tomcat.hom}/con ...
- IntelliJ IDEA打包WAR并部署运行(mac osx)将Web项目War包部署到Tomcat服务器基本步骤(完整版)
用IntelliJ IDEA做web开发体验很好,但导出war包比eclipse麻烦了不少,以下是解决方案: 打包:1.自动打包:File —> Project Structure —> ...
- 将Web项目War包部署到Tomcat服务器基本步骤
参考来源: http://www.cnblogs.com/pannysp/archive/2012/03/07/2383364.html 1. 常识: 1.1 War包 War包一般是在进行Web ...
- 将Web项目War包部署到Tomcat服务器基本步骤(完整版)
1. 常识: 1.1 War包 War包一般是在进行Web开发时,通常是一个网站Project下的所有源码的集合,里面包含前台HTML/CSS/JS的代码,也包含Java的代码. 当开发人员在自己 ...
- war包部署到tomcat
1.maven web app打包成app.war.打包命令:mvn clean package Dmaven.test.skip=true war 是什么?里面有什么东西?a.web.app所有必 ...
- Spring Boot Jar包转War包 部署到Tomcat下
原文:https://my.oschina.net/sdlvzg/blog/1562998 我们都知道springBoot中已经内置了tomcat,是不需要我们额外的配置tomcat服务器的,但是有时 ...
- Springboot-技术专区-war包部署在Tomcat上并修改默认端口
springboot项目内置Tomcat,直接打成jar包在dos下运行即可,但有时我们需要用war包以非内嵌Tomcat的方式来部署,以下是本人的实际经验 1.首先需要修改pom.xml文件 < ...
随机推荐
- Linux 系统分级及root权限相关
单用户模式修改用户密码 救援模式 让我们先来了解一下linux的运行步骤 1. Linux系统引导的顺序掌握Linux系统引导的顺序:BIOSMBRKernelinit其中,BIOS的工作是检查计算机 ...
- 56.两数之和.md
描述 给一个整数数组,找到两个数使得他们的和等于一个给定的数 target. 你需要实现的函数twoSum需要返回这两个数的下标, 并且第一个下标小于第二个下标.注意这里下标的范围是 0 到 n-1. ...
- 虚拟机中操作系统的克隆方法及ip修改及硬件地址修改
1.把复制的操作系统关机 2.点击右键->管理->克隆->下一步->虚拟机当前状态->创建完整虚拟机->修改虚拟机名称 位置 3.修改主机名 4.修改主机名与ip ...
- mybatis自动生成mapper和pojo
1.在resources下新建generatorConfig.xml <?xml version="1.0" encoding="UTF-8"?> ...
- (Android系统目录结构)目录预览
Android系统进入设备后,查看根目录下文件系统,如下: 重要目录和文件说明:mnt 挂载点目录etc 系统主要配置文件system Android 系统文件sys Linux 内核文件proc 运 ...
- Java技能提升之路
James收集Java技能提升方面的资料,分为:基础篇.提高篇.高级篇… 给出“入口”,自我提升 1. Java工程师成神之路:http://www.hollischuang.com/archives ...
- 面试题fugui
1.什么是栈溢出,在什么情况下可能会出现 栈溢出是由于C语言系列没有内置检查机制来确保复制到缓冲区的数据不得大于缓冲区的大小,因此当数据足够大时,将会溢出缓冲区的范围. python函数调用是通过栈这 ...
- C++程序设计方法3:default修饰符
编译器自动生成的成员函数 如果以下成员函数用户都没有为类实现,则编译器会自动为类生成他们的缺省的实现 默认构造函数,空函数,什么也不做 析构函数,空函数,什么也不做: 拷贝构造函数-按bit位复制对象 ...
- numpy快速入门
numpy快速入门 numpy是python的科学计算的核心库,很多更高层次的库都基于numpy.博主不太喜欢重量级的MATLAB,于是用numpy进行科学计算成为了不二选择. 本文主要参考Scipy ...
- weak_ptr_c++11
unique_ptr 替代了原来的auto_ptr,指向对象具有唯一性,即同一时间只能有unique_ptr指向给定对象(和auto_ptr不同是禁止拷贝语义,通过移动语义替代) unique_ptr ...