NavigationController
前面的一篇文章《iOS开发16:使用Navigation Controller切换视图》中的小例子在运行时,屏幕上方出现的工具栏就是Navigation Bar,而所谓UINavigationItem就可以理解为Navigation Bar中的内容,通过编辑UINavigationItem,我们可以使得在Navigation Bar中显示想要的东西,比如设置标题、添加按钮等。
这篇博客将会以一个小例子来演示如何设置UINavigationItem。
现在我用的是Xcode 4.3,在使用上跟Xcode 4.2差不多。
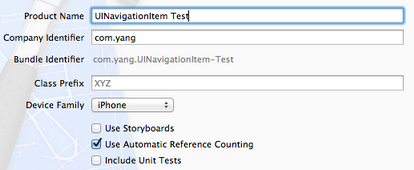
1、首先运行Xcode 4.3,创建一个Single View Application,名称为UINavigationItem Test:
2、其次,我们要使得程序运行时能够显示Navigation Bar:
2.1 单击AppDelegate.h,向其中添加属性:
@property (strong, nonatomic) UINavigationController *navController;
2.2 打开AppDelegate.m,在@synthesize viewController = _viewController;之后添加代码:
@synthesize navController;

#pragma mark -

#pragma mark Application lifecycle
2.3 修改didFinishLaunchingWithOptions方法代码如下:
- (BOOL)application:(UIApplication *)application didFinishLaunchingWithOptions:(NSDictionary *)launchOptions

{

    self.window = [[UIWindow alloc] initWithFrame:[[UIScreen mainScreen] bounds]];

    // Override point for customization after application launch.

    self.viewController = [[ViewController alloc] initWithNibName:@"ViewController" bundle:nil];

    self.navController = [[UINavigationController alloc] initWithRootViewController:self.viewController];

    [self.window addSubview:navController.view];

    [self.window makeKeyAndVisible];

    return YES;

}
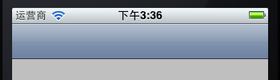
此时运行程序,会发现出现了Navigation Bar:
下面讲一下关于NavigationItem的简单设置。
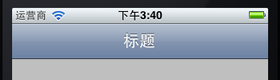
3、设置标题:
打开ViewController.m,在viewDidLoad方法中[super viewDidLoad];之后添加代码:
self.navigationItem.title = @"标题";
运行:
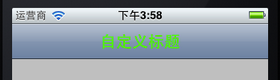
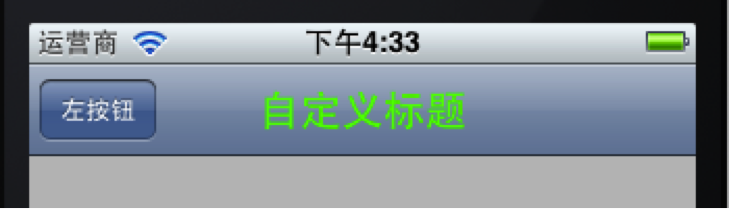
4、自定义标题,设置titleView:
如果我们想改变标题的颜色和字体,就需要自己定义一个UILabel,并且已经设置好这个Label的内容,可以设置自己想要的字体、大小和颜色等。然后执行self.navigationItem.titleView = myLabel;就可以看到想要的效果。
4.1 打开ViewController.h,向其中添加属性:
@property (strong, nonatomic) UILabel *titleLabel;
4.2 打开ViewController.m,在@implementation ViewController下面一行添加代码:
@synthesize titleLabel;
4.3 在viewDidLoad方法中,去掉self.navigationItem.title = @"标题";,并添加代码:
//自定义标题

titleLabel = [[UILabel alloc] initWithFrame:CGRectMake(0, 0 , 100, 44)];

titleLabel.backgroundColor = [UIColor clearColor];  //设置Label背景透明

titleLabel.font = [UIFont boldSystemFontOfSize:20];  //设置文本字体与大小

titleLabel.textColor = [UIColor colorWithRed:(0.0/255.0) green:(255.0 / 255.0) blue:(0.0 / 255.0) alpha:1];  //设置文本颜色

titleLabel.textAlignment = UITextAlignmentCenter;

titleLabel.text = @"自定义标题";  //设置标题

self.navigationItem.titleView = self.titleLabel;
运行:
实际上,不仅仅可以将titleView设置成Label,只要是UIView的对象都可以设为titleView,例如,将4.3中的代码改成:
UIButton *button = [UIButtonbuttonWithType: UIButtonTypeRoundedRect];

[button setTitle: @"按钮" forState: UIControlStateNormal];

[button sizeToFit];

self.navigationItem.titleView = button;
则运行起来效果如下:

5、为Navigation Bar添加左按钮
以下是进行leftBarButtonItem设置的代码:
self.navigationItem.leftBarButtonItem = (UIBarButtonItem *)

self.navigationItem.leftBarButtonItems = (UIBarButtonItem *)

self.navigationItemsetLeftBarButtonItem:(UIBarButtonItem *)

self.navigationItemsetLeftBarButtonItem:(UIBarButtonItem *) animated:(BOOL)

self.navigationItemsetLeftBarButtonItems:(NSArray *)

self.navigationItemsetLeftBarButtonItems:(NSArray *) animated:(BOOL)
其实很简单,只要定义好一个UIBarButtonItem,然后执行上述某行代码就行了。
5.1 为了使得运行时不出错,我们在ViewController.m中添加一个空方法,由将要创建的左右按钮使用:
//空方法

-(void)myAction {

}
5.2 添加一个左按钮:
在ViewDidLoad方法最后添加代码:
//添加左按钮

UIBarButtonItem *leftButton = [[UIBarButtonItem alloc]

                                        initWithTitle:@"左按钮"

                                        style:UIBarButtonItemStylePlain

                                        target:self

                                        action:@selector(myAction)];

[self.navigationItem setLeftBarButtonItem:leftButton];
运行效果如下:
创建一个UIBarButtonItem用的方法主要有:
[UIBarButtonItemalloc]initWithTitle:(NSString *) style:(UIBarButtonItemStyle) target:(id) action:(SEL)

[UIBarButtonItemalloc]initWithBarButtonSystemItem:(UIBarButtonSystemItem) target:(id) action:(SEL)
在第一个方法中,我们可以使用的按钮样式有:
UIBarButtonItemStyleBordered

UIBarButtonItemStyleDone

UIBarButtonItemStylePlain
效果分别如下:


看上去第一个和第三个样式效果是一样的。
6、添加一个右按钮
在ViewDidLoad方法最后添加代码:
//添加右按钮

UIBarButtonItem *rightButton = [[UIBarButtonItem alloc]

                                initWithBarButtonSystemItem:UIBarButtonSystemItemUndo

                                target:self

                                action:@selector(myAction)];

self.navigationItem.rightBarButtonItem = rightButton;
运行如下:

这里创建UIBarButtonItem用的方法是
[UIBarButtonItemalloc]initWithBarButtonSystemItem:(UIBarButtonSystemItem) target:(id) action:(SEL)
用了系统自带的按钮样式,这些样式的标签和效果如下:
| 标签 | 效果 | 标签 | 效果 |
| UIBarButtonSystemItemAction |  |
UIBarButtonSystemItemPause |  |
| UIBarButtonSystemItemAdd |  |
UIBarButtonSystemItemPlay |  |
| UIBarButtonSystemItemBookmarks |  |
UIBarButtonSystemItemRedo |  |
| UIBarButtonSystemItemCamera |  |
UIBarButtonSystemItemRefresh |  |
| UIBarButtonSystemItemCancel |  |
UIBarButtonSystemItemReply |  |
| UIBarButtonSystemItemCompose |  |
UIBarButtonSystemItemRewind |  |
| UIBarButtonSystemItemDone |  |
UIBarButtonSystemItemSave |  |
| UIBarButtonSystemItemEdit |  |
UIBarButtonSystemItemSearch |  |
| UIBarButtonSystemItemFastForward |  |
UIBarButtonSystemItemStop |  |
| UIBarButtonSystemItemOrganize |  |
UIBarButtonSystemItemTrash |  |
| UIBarButtonSystemItemPageCurl |  |
UIBarButtonSystemItemUndo |  |
注意,UIBarButtonSystemItemPageCurl只能在Tool Bar上显示。
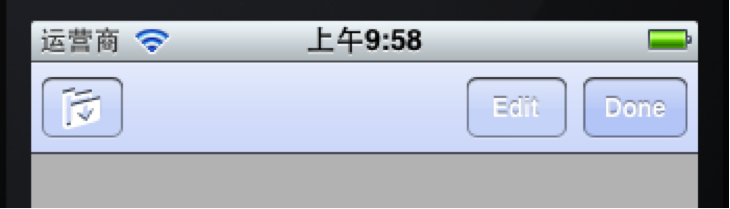
7、添加多个右按钮
在ViewDidLoad方法中最后添加代码:
//添加多个右按钮

UIBarButtonItem *rightButton1 = [[UIBarButtonItem alloc]

                                initWithBarButtonSystemItem:UIBarButtonSystemItemDone

                                target:self

                                action:@selector(myAction)];

UIBarButtonItem *rightButton2 = [[UIBarButtonItem alloc]

                                 initWithBarButtonSystemItem:UIBarButtonSystemItemFixedSpace

                                 target:nil

                                 action:nil];

UIBarButtonItem *rightButton3 = [[UIBarButtonItem alloc]

                                 initWithBarButtonSystemItem:UIBarButtonSystemItemEdit

                                 target:self

                                 action:@selector(myAction)];

UIBarButtonItem *rightButton4 = [[UIBarButtonItem alloc]

                                 initWithBarButtonSystemItem:UIBarButtonSystemItemFlexibleSpace

                                 target:nil

                                 action:nil];

UIBarButtonItem *rightButton5 = [[UIBarButtonItem alloc]

                                 initWithBarButtonSystemItem:UIBarButtonSystemItemOrganize

                                 target:self

                                 action:@selector(myAction)];

NSArray *buttonArray = [[NSArray alloc]

                        initWithObjects:rightButton1,rightButton2,

                        rightButton3,rightButton4,rightButton5, nil];

self.navigationItem.rightBarButtonItems = buttonArray;
为了更好的显示效果,把设置titleView以及设置leftBarButtonItem的代码注释掉,运行效果如下:

上面的UIBarButtonSystemItemFixedSpace和UIBarButtonSystemItemFlexibleSpace都是系统提供的用于占位的按钮样式。
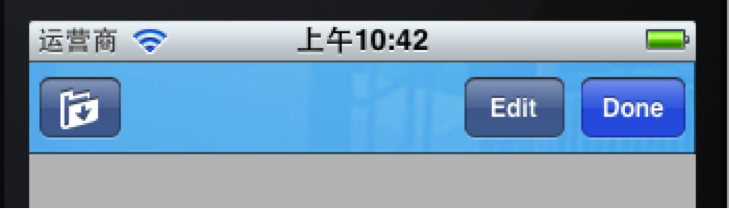
8、设置Navigation Bar背景颜色
在viewDidLoad方法后面添加代码:
//设置Navigation Bar颜色

self.navigationController.navigationBar.tintColor = [UIColor colorWithRed:(218.0/255.0) green:(228.0 / 255.0) blue:(250.0 / 255.0) alpha:1];
运行如下:
9、设置Navigation Bar背景图片
首先将准备好作为背景的图片拖到工程中,我用的图片名称是title_bg.png。
将上面的代码改成:
//设置Navigation Bar背景图片

UIImage *title_bg = [UIImage imageNamed:@"title_bg.png"];  //获取图片

CGSize titleSize = self.navigationController.navigationBar.bounds.size;  //获取Navigation Bar的位置和大小

title_bg = [self scaleToSize:title_bg size:titleSize];//设置图片的大小与Navigation Bar相同

[self.navigationController.navigationBar

     setBackgroundImage:title_bg

     forBarMetrics:UIBarMetricsDefault];  //设置背景
之后,在ViewController.m中添加一个方法用于调整图片大小:
//调整图片大小

- (UIImage *)scaleToSize:(UIImage *)img size:(CGSize)size{

    UIGraphicsBeginImageContext(size);

    [img drawInRect:CGRectMake(0, 0, size.width, size.height)];

    UIImage* scaledImage = UIGraphicsGetImageFromCurrentImageContext();

    UIGraphicsEndImageContext();

    return scaledImage;

}
运行:
NavigationController的更多相关文章
- iOS7 NavigationController 手势问题
在iOS7中,如果使用了UINavigationController,那么系统自带的附加了一个从屏幕左边缘开始滑动可以实现pop的手势.但是,如果自定义了navigationItem的leftBarB ...
- navigationController 去掉背景图片、去掉底部线条
//去掉背景图片 [self.navigationController.navigationBar setBackgroundImage:[[UIImage alloc] init] forBarMe ...
- navigationController 的返回按钮自定义
1: navigationController 的返回按钮自定义 SecondViewController *secondVC = [SecondViewController new]; ...
- navigationController 返回前N个视图
前提是,由N个视图跳转过来的. //返回前n个 NSInteger index=[[self.navigationController viewControllers]indexOfObject:se ...
- iOS中关于NavigationController中preferredStatusBarStyle一直不执行的问题
重点:真的能改吗?跑起来毛用没有. 1.还要在plist文件里把View controller-based status bar appearance设置成YES. 2.一定要写UINavigatio ...
- 整合TabBarController与NavigationController
一.项目结构 一开始创建一个空的项目
- 通过navigationController跳转界面时隐藏navigationBar上的元素
@import url(http://i.cnblogs.com/Load.ashx?type=style&file=SyntaxHighlighter.css);@import url(/c ...
- iOS navigationcontroller pop 回到上一层视图 如何刷新
1.从视图A中navigation controller push到视图B,当视图B navigationcontroller pop回到视图A时,并不会调用A的viewDidLoad,但是会调用vi ...
- navigationController pop的几种方法
一,popViewControllerAnimated [self.navigationController popViewControllerAnimated:YES]; 二,popToRootVi ...
随机推荐
- [转]Struts2理解--动态方法和method属性及通配符_默认Action
众所周知,默认条件下,在浏览器输入indexAction!execute.action,便会执行indexAction类里的execute方法,这样虽然方便,但可能带来安全隐患,通过url可以执行Ac ...
- Android网络文件下载模块整理
一.知识基础 tomcat服务器配置 理解http协议 理解javaIO操作相关知识 SDcard操作知识 Android 权限配置 二.实现步骤 1.从网上获取资源 public String do ...
- bzoj2555: SubString
SAM+LCT维护parent tree版本 虽然说子树维护那套理论需要ETT 不过parent tree的根是固定的,所以用lct加一些奇怪的乱搞就行了 //随手拖个SAM的板子和LCT的板子,然后 ...
- IIS如何配置可以下载APK、IPA文件
解决步骤: 1).打开IIS服务管理器,找到服务器,右键-属性,打开IIS服务属性: 2.单击MIME类型下的“MIME类型”按钮,打开MIME类型设置窗口: 3).单击“新建”,建立新的MIME类型 ...
- a版本冲刺第五天
队名:Aruba 队员: 黄辉昌 李陈辉 林炳锋 鄢继仁 张秀锋 章 鼎 运动会这几天两位同学准备比赛也确实比较忙,两位同学又刚好有事回家去了,由于之前git解决一次冲突后,远程我们还不能很好地 ...
- Win7旗舰版-X86-X64-快速装机版
装机版作品简介 Win7 32/64位旗舰版 6.5z 专注于Win7,致力于做更好用的系统!一如既往的品质,不流氓,不欺骗,不夸大!一直在改进,只为做得更好!万千用户的信赖,作者的品质保证! 作品摘 ...
- apt-get upgarde和dist-upgrade的差别
apt-get upgarde和dist-upgrade的差别 apt-get upgarde和dist-upgrade的差别 Debian/Ubuntu Linux都使用apt,升级时都是: ...
- CocoaPods 升级
也不知道是什么时候,ruby.taobao开始不能用了,在公司的电脑上一直装不上,还卡在那里, 旁边的老大投来了异样的目光,或者我是应该提升下技术了-- 一.升级gem gem update --sy ...
- ASP.NET WEB API路由机制
(一)路由原理 (二)路由设计架构分析 RouteBase
- 【转】 解读EOF
解读EOF 标签: fplinuxc语言filestream 2012-01-31 22:05 439人阅读 评论(0) 收藏 举报 分类: C.C++_程序设计(20) 我学习C语言的时候,遇到 ...