day39-Spring 16-Spring的JDBC模板:设置参数到属性文件
<?xml version="1.0" encoding="UTF-8"?>

<!-- 引入beans的头 -->

<beans xmlns="http://www.springframework.org/schema/beans"

       xmlns:xsi="http://www.w3.org/2001/XMLSchema-instance"

       xsi:schemaLocation="

http://www.springframework.org/schema/beans http://www.springframework.org/schema/beans/spring-beans.xsd">

    <!-- 配置Spring默认的连接池 -->

    <!-- 这个类由Spring来帮我们创建,它默认情况下只创建一次,因为是单例的. -->

    <bean id="dataSource" class="org.springframework.jdbc.datasource.DriverManagerDataSource">

        <property name="driverClassName" value="com.mysql.jdbc.Driver"></property>

        <property name="url" value="jdbc:mysql:///spring3_day02"></property>

        <property name="username" value="root"></property>

        <property name="password" value=""></property>

    </bean>

    <!-- 配置DBCP连接池 -->

    <bean id="dataSource1" class="org.apache.commons.dbcp.BasicDataSource">

        <property name="driverClassName" value="com.mysql.jdbc.Driver"></property>

        <property name="url" value="jdbc:mysql:///spring3_day02"></property>

        <property name="username" value="root"></property>

        <property name="password" value=""></property>

    </bean>

    <!-- 配置C3P0连接池 -->

    <bean id="dataSource2" class="com.mchange.v2.c3p0.ComboPooledDataSource">

        <property name="driverClass" value="com.mysql.jdbc.Driver"></property>

        <property name="jdbcUrl" value="jdbc:mysql:///spring3_day02"></property>

        <property name="user" value="root"></property>

        <property name="password" value=""></property>

    </bean>

    <!-- 定义jdbctemplate -->

    <bean id="jdbcTemplate" class="org.springframework.jdbc.core.JdbcTemplate">

          <property name="dataSource" ref="dataSource2"></property><!-- 把上面定义好的连接池注入进来了 -->

    </bean>

</beans>
每一次去修改里面的参数都要修改Spring的核心配置文件.


第一种方式要写的东西比较多,所以一般会使用context标签.

要使用context标签就要引入context标签的头.在配置文件xsd-config.html中找到context标签的头.

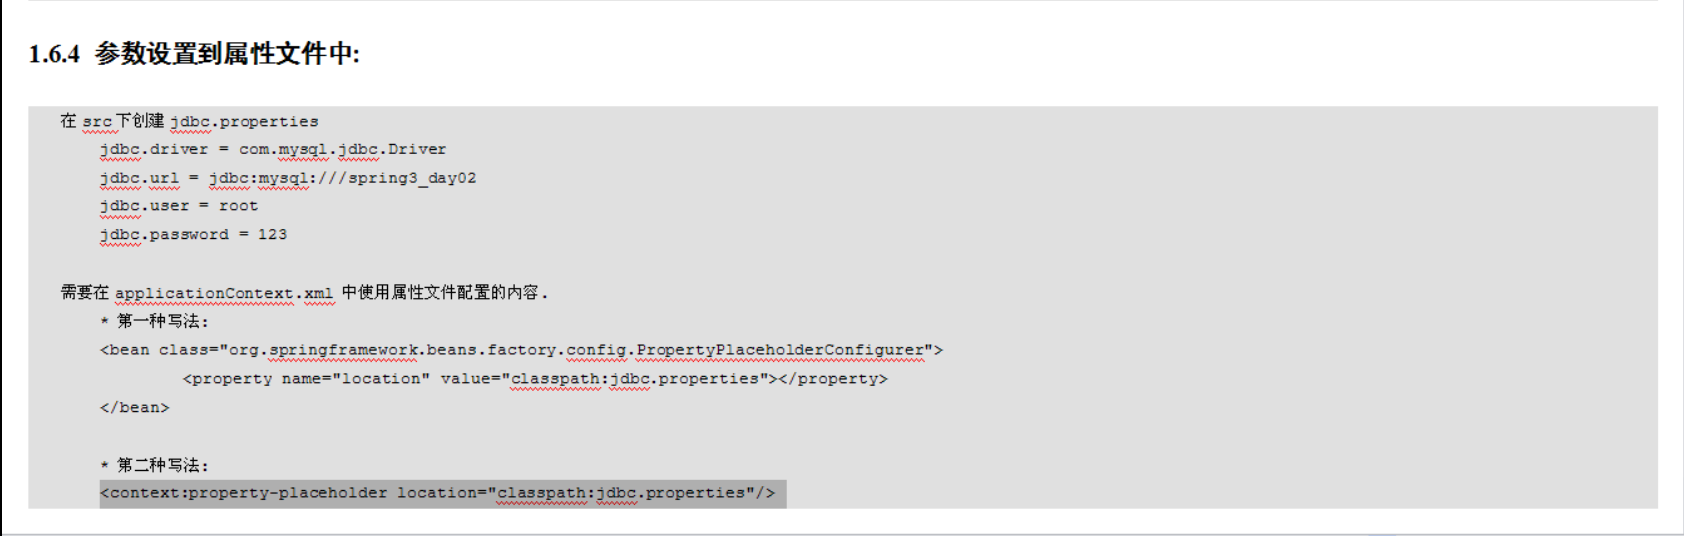
<context:property-placeholder location="classpath:jdbc.properties"/>
<?xml version="1.0" encoding="UTF-8"?>

<!-- 引入beans的头 -->

<beans xmlns="http://www.springframework.org/schema/beans"

       xmlns:xsi="http://www.w3.org/2001/XMLSchema-instance"

              xmlns:context="http://www.springframework.org/schema/context"

       xsi:schemaLocation="

http://www.springframework.org/schema/beans http://www.springframework.org/schema/beans/spring-beans.xsd

http://www.springframework.org/schema/beans http://www.springframework.org/schema/beans/spring-beans.xsd

http://www.springframework.org/schema/context http://www.springframework.org/schema/context/spring-context.xsd">

    <!-- 配置Spring默认的连接池 -->

    <!-- 这个类由Spring来帮我们创建,它默认情况下只创建一次,因为是单例的. -->

    <bean id="dataSource" class="org.springframework.jdbc.datasource.DriverManagerDataSource">

        <property name="driverClassName" value="com.mysql.jdbc.Driver"></property>

        <property name="url" value="jdbc:mysql:///spring3_day02"></property>

        <property name="username" value="root"></property>

        <property name="password" value=""></property>

    </bean>

    <!-- 配置DBCP连接池 -->

    <bean id="dataSource1" class="org.apache.commons.dbcp.BasicDataSource">

        <property name="driverClassName" value="com.mysql.jdbc.Driver"></property>

        <property name="url" value="jdbc:mysql:///spring3_day02"></property>

        <property name="username" value="root"></property>

        <property name="password" value=""></property>

    </bean>

    <!--

    <bean class="org.springframework.beans.factory.config.PropertyPlaceholderConfigurer">

    <property name="location" value="classpath:jdbc.properties">--><!-- jdbc.properties也是在src下 --><!-- </property>

    </bean>

    -->

    <context:property-placeholder location="classpath:jdbc.properties"/>

    <!-- 配置C3P0连接池 -->

    <bean id="dataSource2" class="com.mchange.v2.c3p0.ComboPooledDataSource">

    <!--

        <property name="driverClass" value="com.mysql.jdbc.Driver"></property>

        -->

        <property name="driverClass" value="${jdbc.driver}"></property>

        <!--

        <property name="jdbcUrl" value="jdbc:mysql:///spring3_day02"></property>

        -->

        <property name="jdbcUrl" value="${jdbc.url}"></property>

        <!--

        <property name="user" value="root"></property>

        -->

        <property name="user" value="${jdbc.user}"></property>

        <!--

        <property name="password" value=""></property>

        -->

        <property name="password" value="${jdbc.password}"></property>

    </bean>

    <!-- 定义jdbctemplate -->

    <bean id="jdbcTemplate" class="org.springframework.jdbc.core.JdbcTemplate">

          <property name="dataSource" ref="dataSource2"></property><!-- 把上面定义好的连接池注入进来了 -->

    </bean>

</beans>
package cn.itcast.spring3.demo1;

import java.sql.DriverManager;

import org.junit.Test;

import org.junit.runner.RunWith;

import org.springframework.beans.factory.annotation.Autowired;

import org.springframework.beans.factory.annotation.Qualifier;

import org.springframework.jdbc.core.JdbcTemplate;

import org.springframework.jdbc.datasource.DriverManagerDataSource;

import org.springframework.test.context.ContextConfiguration;

import org.springframework.test.context.junit4.SpringJUnit4ClassRunner;

import org.springframework.transaction.jta.SpringJtaSynchronizationAdapter;

@RunWith(SpringJUnit4ClassRunner.class)

@ContextConfiguration("classpath:applicationContext.xml")

public class SpringTest1 {

    @Autowired

    @Qualifier("jdbcTemplate")

    private JdbcTemplate jdbcTemplate;//注入Jdbc模板

    @Test

    public void demo2(){

        jdbcTemplate.execute("create table user (id int primary key auto_increment,name varchar(20))");

    }

    @Test

    public void demo1(){

        // 创建连接池:

        DriverManagerDataSource dataSource = new DriverManagerDataSource();//Spring自带的连接池

        // 设置参数:

        dataSource.setDriverClassName("com.mysql.jdbc.Driver");

        dataSource.setUrl("jdbc:mysql:///spring3_day02");

        dataSource.setUsername("root");

        dataSource.setPassword("");

        //使用JDBC的模板:

        //JdbcTemplate jdbcTemplate = new JdbcTemplate();

        //jdbcTemplate.setDataSource(dataSource);

        JdbcTemplate jdbcTemplate = new JdbcTemplate(dataSource);

        jdbcTemplate.execute("create table user (id int primary key auto_increment,name varchar(20))");

    }

}
jdbc.driver = com.mysql.jdbc.Driver

jdbc.url = jdbc:mysql:///spring3_day02

jdbc.user = root

jdbc.password =
day39-Spring 16-Spring的JDBC模板:设置参数到属性文件的更多相关文章
- 十八 Spring的JDBC模板:引入外部属性文件
配置外部属性文件 配置文件里引入属性文件,两种方式 第一种: 第二种: 引入属性文件的值: 测试: <?xml version="1.0" encoding="UT ...
- Spring - 配置Bean - 自动装配 关系 作用域 引用外部属性文件
1 Autowire自动装配1.1 使用:只需在<bean>中使用autowire元素<bean id="student" class="com.kej ...
- spring与jpa整合 简化persistence.xml配置文件 使用属性文件 数据源dbcp访问数据库
===========appliction.xml配置文件======================= <?xml version="1.0" encoding=" ...
- spring(16)------spring的数据源配置
在spring中,通过XML的形式实现数据源的注入有三种形式. 一.使用spring自带的DriverManagerDataSource 使用DriverManagerDataSource配置数据源与 ...
- Spring入门(三)— AOP注解、jdbc模板、事务
一.AOP注解开发 导入jar包 aop联盟包. aspectJ实现包 . spring-aop-xxx.jar . spring-aspect-xxx.jar 导入约束 aop约束 托管扩展类和被扩 ...
- Spring 框架的JDBC模板技术
1. 概述 Spring 框架提供了很多持久层的模板类来简化编程; Spring 框架提供的JDBC模板类: JdbcTemplate 类; Spring 框架提供的整合 Hibernate 框架的模 ...
- Spring 框架系列之 JDBC 整合实例
微信公众号:compassblog 欢迎关注.转发,互相学习,共同进步! 有任何问题,请后台留言联系! 1.Spring框架整合 DAO 模板 JDBC:org.springframework.jdb ...
- day39-Spring 15-Spring的JDBC模板:C3P0连接池配置
<!-- 配置C3P0连接池 --> <bean id="dataSource2" class="com.mchange.v2.c3p0.ComboPo ...
- day39-Spring 14-Spring的JDBC模板:DBCP连接池配置
一般常用的连接池是DBCP和C3P0. package cn.itcast.spring3.demo1; import java.sql.DriverManager; import org.junit ...
随机推荐
- 微信小程序——tab导航栏
wxml: <view class="tab"> <view class="tab-left" bindtap="tabFun&q ...
- PhpStorm中terminal窗口字体修改
在PhpStorm–File–Settings–Tools–Terminal中可以看到terminal调用的系统的cmd.exe程序 因此需要做的就是修改系统的cmd.exe中的字体,如下: CMD命 ...
- compareTo)--list 根据某字段排序
Collections.sort(actList, new Comparator<Act>() { @Override public int compare(Act o1, Act o2) ...
- PL/SQl连接数据库ORA-12154错误
先说说我遇到的问题: 1.在sql/plus下可以正确连接到数据库(oracle10g): 2.检查我机器(64)位环境变量的配置,没问题.path环境变量没问题(C:\oraclexe\app\or ...
- Python玩转人工智能最火框架 TensorFlow应用实践
Python玩转人工智能最火框架 TensorFlow应用实践 整个课程都看完了,这个课程的分享可以往下看,下面有链接,之前做java开发也做了一些年头,也分享下自己看这个视频的感受,单论单个知识点课 ...
- java导入导出excel
maven <!--POI--> <dependency> <groupId>org.apache.poi</groupId> <artifact ...
- javascript基础:bom
一.BOM 1.概念:Browser Object Model 浏览器对象模型 * 将浏览器的各个组成部分封装成对象 2.组成: * Window:窗口对象 1 ...
- 【vue】imitate-beautiful-thing
我从未见过这么美妙的项目,当然与我接触的项目少有关,但是这个项目满满的艺术气息,让人沉醉,让人忍不住的去研究代码. 先放项目地址:https://github.com/eidonlon/imitate ...
- 如何处理HTML5新标签的浏览器兼容问题?
方法一 : 1.使用静态资源的html5shiv包 <!--[if lt IE9]> <script src="http://cdn.static.runoob.com/l ...
- Django项目:CRM(客户关系管理系统)--36--28PerfectCRM实现King_admin编辑限制
#admin.py # ————————01PerfectCRM基本配置ADMIN———————— from django.contrib import admin # Register your m ...