[CoentOS] MySQL删除和安装
删除 MySQL
yum remove  mysql mysql-server mysql-libs mysql-server;

find / -name mysql  将找到的相关东西delete掉(rm -rf /var/lib/mysql)

rpm -qa|grep mysql(查询出来的东东yum remove掉)

rm /etc/my.cnf
查看是否还有mysql软件:
rpm -qa|grep mysql
如果存在的话,继续删除即可。
[root@localhost opt]# rpm -qa | grep -i mysql

MySQL-server-5.6.17-1.el6.i686

MySQL-client-5.6.17-1.el6.i686
卸载mysql

[root@localhost local]# rpm -e MySQL-server-5.6.17-1.el6.i686

[root@localhost local]# rpm -e MySQL-client-5.6.17-1.el6.i686
删除mysql服务

[root@localhost local]# chkconfig --list | grep -i mysql

[root@localhost local]# chkconfig --del mysql
删除分散mysql文件夹

[root@localhost local]# whereis mysql 或者 find / -name mysql

mysql: /usr/lib/mysql /usr/share/mysql
清空相关mysql的所有目录以及文件
rm -rf /usr/lib/mysql
rm -rf /usr/share/mysql
rm -rf /usr/my.cnf
通过以上几步,mysql应该已经完全卸载干净了.
安装MySQL
1、配置YUM源
在MySQL官网中下载YUM源rpm安装包:http://dev.mysql.com/downloads/repo/yum/
# 下载mysql源安装包

wget http://dev.mysql.com/get/mysql57-community-release-el7-8.noarch.rpm

# 安装mysql源

yum localinstall mysql57-community-release-el7-8.noarch.rpm
2. 检查mysql源是否安装成功
shell> yum repolist enabled | grep "mysql.*-community.*"
3. 安装服务
yum install mysql-server

yum install mysql-devel
4. 打开服务
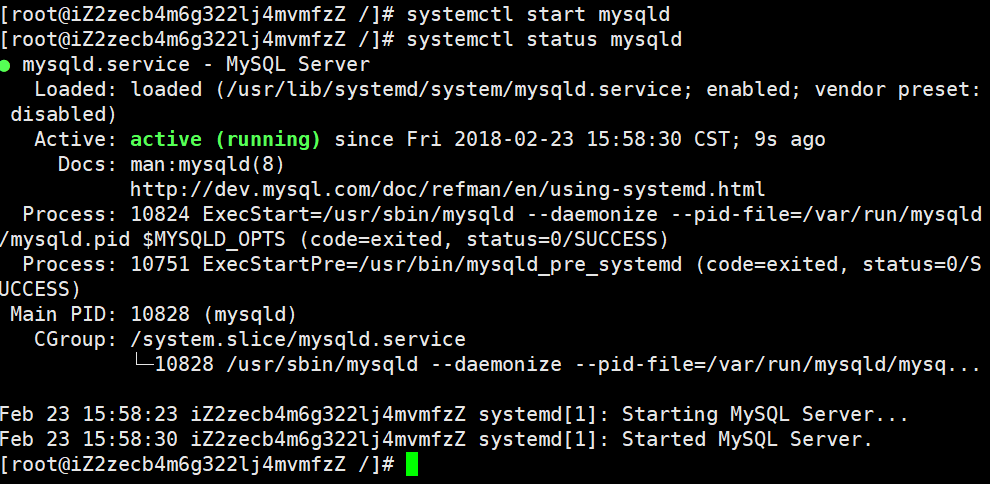
systemctl start mysqld //打开MySQL服务
5. 检测服务状态(可省略)
systemctl status mysqld //可以查看MySQL服务是否正常打开(可省略)
6. 查看安装时自动设置的随机密码
grep "temporary password" /var/log/mysqld.log
CentOS系统用yum安装MySQL的朋友,请使用 grep "temporary password" /var/log/mysqld.log 命令,返回结果最后引号后面的字符串就是root的默认密码。

如图可以看出,我这次安装的MySQL的初始密码是【S+NwpxfZt0o;】
7. 相关配置
#######安装成功后,将其加入开机启动

[root@typecodes ~]# systemctl enable mysqld

#######启动mysql服务进程

[root@typecodes ~]# systemctl start mysqld

#######配置mysql(设置密码等)

[root@typecodes ~]# mysql_secure_installation
NOTE: RUNNING ALL PARTS OF THIS SCRIPT IS RECOMMENDED FOR ALL MySQL

  SERVERS IN PRODUCTION USE! PLEASE READ EACH STEP CAREFULLY!

In order to log into MySQL to secure it, we'll need the current

password for the root user. If you've just installed MySQL, and

you haven't set the root password yet, the password will be blank,

so you should just press enter here.

Enter current password for root (enter for none):

OK, successfully used password, moving on...

Setting the root password ensures that nobody can log into the MySQL

root user without the proper authorisation.
Set root password? [Y/n] y     [设置root用户密码]

New password:

Re-enter new password:

Password updated successfully!

Reloading privilege tables..

 ... Success!

By default, a MySQL installation has an anonymous user, allowing anyone

to log into MySQL without having to have a user account created for

them. This is intended only for testing, and to make the installation

go a bit smoother. You should remove them before moving into a

production environment.

Remove anonymous users? [Y/n] y     [删除匿名用户]

 ... Success!

Normally, root should only be allowed to connect from 'localhost'. This

ensures that someone cannot guess at the root password from the network.

Disallow root login remotely? [Y/n] y  [禁止root远程登录]

 ... Success!

By default, MySQL comes with a database named 'test' that anyone can

access. This is also intended only for testing, and should be removed

before moving into a production environment.

Remove test database and access to it? [Y/n] y   [删除test数据库]

 - Dropping test database...

ERROR 1008 (HY000) at line 1: Can't drop database 'test'; database doesn't exist

 ... Failed! Not critical, keep moving...

 - Removing privileges on test database...

 ... Success!

Reloading the privilege tables will ensure that all changes made so far

will take effect immediately.

Reload privilege tables now? [Y/n] y   [刷新权限]

 ... Success!

All done! If you've completed all of the above steps, your MySQL

installation should now be secure.

Thanks for using MySQL!

Cleaning up...
8. 可能有效的MySQL配置优化
在原始配置文件 /etc/my.cnf 基础上,在 [mysqld] 节内增加配置参数。实际应用中,请按硬件及负载酌情修改。
#add by feng 120418 --------------------------

#skip-locking

skip-name-resolve

skip-external-locking

key_buffer_size = 256M

#table_cache = 3072

table_open_cache = 3072

read_buffer_size = 2M

read_rnd_buffer_size = 2M

sort_buffer_size = 2M

myisam_sort_buffer_size = 256M

thread_cache_size = 8

query_cache_size= 512M

query_cache_limit= 5M

tmp_table_size=1024M

max_heap_table_size=3000M

max_allowed_packet = 16M

innodb_buffer_pool_size = 512M

innodb_log_file_size = 512M

innodb_additional_mem_pool_size=512M

innodb_log_buffer_size=64M

max_connections=2000

max_user_connections=800

join_buffer_size = 8M

open_files_limit = 65535

#tmpdir=/dev/shm

max_connect_errors=1000

#add by feng 120418 end ---------------------
9. 其它命令
1:安装完成路径:

    1、数据库目录

    /var/lib/mysql/

    2、配置文件

    /usr/share/mysql(mysql.server命令及配置文件)

    3、启动脚本

    /etc/rc.d/init.d/(启动脚本文件mysql的目录)

    4、相关命令

    /usr/bin(mysqladmin mysqldump等命令)

    注:1~3安装server安装后存在,4mysqladmin mysqldump在client安装后存在

b、停止

service mysqld stop

c、重启

service mysqld restart

y

d, 启动

service mysqld start

e, 强行关闭MySQL

killall mysqld

f, 查看是否启动成功,进程mysql启动,网络端口3306开启为ok.

ps aux | grep mysql

g, 登录

mysql -u root -p

f, 查看MySQL中all user

SELECT DISTINCT CONCAT('User: ''',user,'''@''',host,''';') AS query FROM mysql.user;

h, 允许远程机器用root用户连接MySQL服务器数据库

GRANT ALL PRIVILEGES ON *.* TO 'root'@'%' IDENTIFIED BY 'youpassword' WITH GRANT OPTION;

FLUSH PRIVILEGES;
或

UPDATE USER SET HOST = '%' WHERE HOST='127.0.0.1' AND USER='root'
参考文章:
https://blog.csdn.net/zleiw/article/details/78242912
[CoentOS] MySQL删除和安装的更多相关文章
- 安装linux版qq,安装二进制包编译器,安装mysql-5.6.11,删除已安装或安装失败的mysql-5.6.11,简单mysql练习题
上午[root@localhost ~]# ./test3.sh dev1^C[root@localhost ~]# groupadd dev1[root@localhost ~]# vim /etc ...
- 彻底删除与安装MySQL
一.下载msi安装版:https://dev.mysql.com/downloads/mysql/ 二.安装前一定要彻底删除已有的MySQL:(从未安装过,忽略此步) 1.计算机处右键快捷菜单,管理, ...
- 关于mysql的删除和安装
mysql删除不干净大概有两点1.文件残留 2.注册表 删除:https://www.cnblogs.com/solargen/p/6838657.html 安装:https://www.cnblog ...
- mysql安装和mysql图形界面安装以及文本文件导入mysql
本人大一大二一直使用windows系统,被微软爸爸给惯坏了,一看到cmd命令行就吓尿.现在用ubuntu,每一个操作都是语句,也是得到锻炼(个jb). ubuntu安装mysql和python代码 s ...
- [转] Linux学习之CentOS(十三)--CentOS6.4下Mysql数据库的安装与配置
from: http://www.cnblogs.com/xiaoluo501395377/archive/2013/04/07/3003278.html 如果要在Linux上做j2ee开发,首先得 ...
- Linux学习之CentOS--CentOS6.4下Mysql数据库的安装与配置【转】
如果要在Linux上做j2ee开发,首先得搭建好j2ee的开发环境,包括了jdk.tomcat.eclipse的安装(这个在之前的一篇随笔中已经有详细讲解了Linux学习之CentOS(七)--C ...
- Linux学习之CentOS(十三)--CentOS6.4下Mysql数据库的安装与配置
原文:http://www.cnblogs.com/xiaoluo501395377/archive/2013/04/07/3003278.html 如果要在Linux上做j2ee开发,首先得搭建好j ...
- mysql 的rmp安装
新文档/* GitHub stylesheet for MarkdownPad (http://markdownpad.com) *//* Author: Nicolas Hery - http:// ...
- Linux学习之CentOS6下Mysql数据库的安装与配置
转自:http://www.cnblogs.com/xiaoluo501395377/archive/2013/04/07/3003278.html 如果要在Linux上做j2ee开发,首先得搭建好j ...
随机推荐
- css样式 float的理解
float w3cSchool里解释说, 浮动的框可以向左或向右移动,直到它的外边缘碰到包含框或另一个浮动框的边框为止.由于浮动框不在文档的普通流中,所以文档的普通流中的块框表现得就像浮动框不存在一样 ...
- java1.8操作日期
java1.8获取年份: int year = Calendar.getInstance().get(Calendar.YEAR); StringBuilder code = new StringBu ...
- $.grep()的用法
grep()方法用于数组元素过滤筛选 grep(array,callback,invert) array:待过滤数组; callback:处理数组中的每个元素,并过滤元素,该函数中包含两个参数,第一个 ...
- tomcat源码阅读之容器(Container)
一. 实现容器的接口是Container接口,Tomcat中共有四种类型的容器: 1.Engine:表示整个Catalina Servlet引擎: 2.Host:表示含有一个或者多个Context容器 ...
- ORA-25205: the QUEUE SYS.KUPC$S_1_20180123193821 does not exist
[oracle@hbjfdba:/oratmp]#expdp \'XXX as sysdba\' DIRECTORY=TMP_DUMP_DIR DUMPFILE=NEW_LOCAL_HB_DMN_%U ...
- chrome 小技巧:保持元素的hover状态
审查元素,选中需要hover的标签 点击"Styles"菜单中的":hov",弹出 Force element state 选中相应的 :hover :acti ...
- vue 知识点
Vue 中的 slot: 概念:槽/slot是组件在模板中为调用者预留的位置,使用<slot>元素声明一个 槽.在最终的视图中,调用者模板中被调用组件的内容,将填充<slot> ...
- JSP 执行流程
一.jsp执行流程 1. 发送请求 ,请求访问jsp文件. 2. 服务器(Tomcat)提供的jsp parser 解析器解将jsp转化为java文件. jsp本质上是一个servlet. 3.ser ...
- mySQL 教程 第2章 安装和介绍mySQL
设置mySQL字符集 支持中文的字符集是utf8,该设置可以更改mySQL配置文件进行全局设置,也可以针对数据库设置,也可以针对表设置,也可以针对列设置.字符集更改后新插入的数据生效,对以前不生效. ...
- 使用gulp 合并压缩打包,实时监控文件,实现本地server
今天不讲webpack,就说说gulp是怎么进行压缩合并打包 首先你的安装gulp : npm install gulp -g --save-dev 然后最基本的你因该知道gulp 的四个方法, gu ...