MySQL安装、基本账户安全(5.0以后版本)
|
博文目录: 1.Mysql-5.0.40.tar.gz 4.Mysql-5.6.36tar.gz 5.Mysql-5.7.28.tar.gz 附: 1.账号安全 |
-----------MySQL 5.0以后版本的安装-----------
MySQL安装
安装包学习的必杀绝技——就是阅读包的安装说明(readme & install)文档。
----------
# rm /etc/my.cnf (安装前执行一下)
----------
1.Mysql-5.0.40.tar.gz
1.1.Source Installation Overview(lines 74 of install-source)
|
系统默认可能会安装三个mysql的包: mysql-libs mysql mysql-devel 从下往上依赖关系。 |
- 源码包安装mysql
#检查环境

rpm -aq | grep mysql

rpm -ql mysql

rpm -qf /etc/my.conf

rpm -qc mysql-libs

rpm -qR mysql-libs

rpm -qd mysql

rpm -qi mysql

netstat -nlt

find / -name mysql

find / -name my.conf

cat /etc/passwd | grep mysql

cat /etc/group |

rpm -qa | grep gcc

rpm -qa | grep make

ls /home

添加用户

groupadd -r mysql

useradd -g mysql -M -r -s /sbin/nologin mysql

开始安装

vi INSTALL-SOURCE

./configure --prefix=/usr/local/mysql

echo $?

make

echo $?

make install

echo $?

配置文件

cp support-files/my-medium.cnf /etc/my.conf

目录权限

cd /usr/local/mysql

chown -R mysql .

chgrp -R mysql .

初始化数据库

bin/mysql_install_db --user=mysql

开机启动

cp /support-files/mysql.server /etc/init.d/mysqld

chmod  /etc/init.d/mysqld

安全启动服务/把数据库的数据文件定义到其他磁盘设备上

bin/mysqld_safe --user=mysql --datadir=/dell/mysql_data
1.2.Typical ‘configure’ Options(lines 265 of install-source)
- 配置
./configure --help

./configure -h

#仅仅编译客户端程序

./configure --without-server

#默认安装的目录/usr/local(数据目录/usr/local/var)。可以改写为:

./configure --prefix=/usr/local/mysql

./configure --prefix=/usr/local/ --localstatedir=/usr/local/mysql/data

#使用unix的套接字方式连接数据库:

./configure --with-unix-socket-path=/usr/local/mysql/tmp/mysql.sock

#有gcc,没有c++库,可以使用gcc来作为c++的编译器:

CC=gcc CXX=gcc ./configure

./configure --with-charset=gb2312

./configure --with-charset=utf8

./configure --with-charset=latin1(这个是默认值)

./configure --with-collation=latin1_swedish_ci(这个是排序方法的默认值)

./configure --with-extra-charsets=(空格分开)

./configure --with-extra-charsets=all

#重新编译一个源码树时:

rm config.cache

make clean

make dist
_____________
Mysql-5.1.72.tar.gz
安装方法跟上边的大同小异。
_____________
2.Mysql-5.5.22.tar.gz
2.1.Installing MySQL from Generic Binaries on Unix/Linux
| 系统默认可能会安装三个mysql的包: mysql-libs mysql mysql-devel 从下往上依赖关系。 |
- 二进制文件安装mysql
#检查环境

rpm -aq | grep mysql

rpm -ql mysql

rpm -qf /etc/my.conf

rpm -qc mysql-libs

rpm -qR mysql-libs

rpm -qd mysql

rpm -qi mysql

netstat -nlt

find / -name mysql

find / -name my.conf

cat /etc/passwd | grep mysql

cat /etc/group |

rpm -qa | grep gcc

rpm -qa | grep make

ls /home

#添加用户

groupadd mysql

useradd -r -g mysql -M -s /sbin/nologin mysql

#开始安装

cd /usr/local

tar -zxvf ……

cd mysql

chown -R mysql .

chgrp -R mysql .

#初始化数据库

scripts/mysql_install_db --user=mysql

chown -R root .

chown -R mysql data

#配置操作

cp support-files/my-medium.cnf  /etc/my.cnf

cp support-files/mysql.server  /etc/init.d/mysqld

chmod  /etc/init.d/mysqld

#启动服务

bin/mysqld_safe --user=mysql --datadir=/dell/mysql_data - my.cnf
   [mysqld]

   basedir=/mysql/mysql

   datadir=/mysql/mysql/data
2.2.Installing MySQL from Source
- 源码包安装mysql
#检查环境

rpm -aq | grep mysql

rpm -ql mysql

rpm -qf /etc/my.conf

rpm -qc mysql-libs

rpm -qR mysql-libs

rpm -qd mysql

rpm -qi mysql

netstat -nlt

find / -name mysql

find / -name my.conf

cat /etc/passwd | grep mysql

cat /etc/group |

rpm -qa | grep gcc

rpm -qa | grep make

ls /home

#添加用户

groupadd mysql

useradd -r -g mysql -M -s /sbin/nologin mysql

#配置、编译

ccmake .(先进行交互式配置)

cmake .

make

make install

cd /usr/local/mysql

chown -R mysql .

chgrp -R mysql .

#初始化数据库

scripts/mysql_install_db --user=mysql

chown -R root .

chown -R mysql data

cp support-files/my-medium.cnf  /etc/my.cnf

cp support-files/mysql.server  /etc/init.d/mysqld

chmod  /etc/rc.d/init.d/mysqld

启动服务

bin/mysqld_safe --user=mysql --datadir=/dell/mysql_data
2.3.To list the configuration options,use one of the following.
- 配置选项
cmake . -L# overview

cmake . -LH# overview with help text

cmake . -LAH# all params with help text

ccmake .# interactive display

make clean

rm CMakeCache.txt
2.4.rpm
- To see all files in an RPM packet,run a command like this:
rpm -qpl MySQL-server-VERSION.glibc23.i386.rpm

rpm -ivh MySQL-server-VERSION.glibc23.i386.rpm

rpm -ivh MySQL-client-VERSION.glibc23.i386.rpm

# Start from a source RPM,run:

rpmbuild --rebuild --clean MySQL-VERSION.src.rpm
2.5.安装Cmake-2.8.12.tar.gz
- cmake
vi Readme.txt

./bootstrap

make

make install
3.Mysql-5.5.34.tar.gz
3.1. Installing MySQL on Unix/Linux Using Generic Binaries
- 二进制包安装mysql
#检查当前环境配置

rpm -aq | grep mysql

rpm -ql mysql

rpm -qf /etc/my.conf

rpm -qc mysql-libs

rpm -qR mysql-libs

rpm -qd mysql

rpm -qi mysql

netstat -nlt

find / -name mysql

find / -name my.conf

cat /etc/passwd | grep mysql

cat /etc/group |

rpm -qa | grep gcc

rpm -qa | grep make

#添加用户

groupadd mysql

useradd -r -g mysql -M -s /sbin/nologin mysql

cd /usr/local

#开始安装

tar -zxvf ……

cd mysql

#设定目录权限

chown -R mysql .

chgrp -R mysql .

#初始化数据库

scripts/mysql_install_db --user=mysql

#设定库文件目录权限

chown -R root .

chown -R mysql data

#添加配置文件

cp support-files/my-medium.cnf /etc/my.cnf

cp support-files/mysql.server /etc/init.d/mysqld

chmod  /etc/init.d/mysqld

#启动服务

bin/mysqld_safe --user=mysql --datadir=/dell/mysql_data
3.2.Installing MySQL Using a Standard Source Distribution
- 源码包安装mysql
rpm -aq | grep mysql

rpm -ql mysql

rpm -qf /etc/my.conf

rpm -qc mysql-libs

rpm -qR mysql-libs

rpm -qd mysql

rpm -qi mysql

netstat -nlt

find / -name mysql

find / -name my.conf

cat /etc/passwd | grep mysql

cat /etc/group |

rpm -qa | grep gcc

rpm -qa | grep make

ls /home

groupadd mysql

useradd -r -g mysql -M -s /sbin/nologin mysql

cd mysql

ccmake . #没有这一步也过去了

cmake .

make

make install

cd /usr/local/mysql

chown -R mysql .

chgrp -R mysql .

scripts/mysql_install_db --user=mysql

chown -R root .

chown -R mysql data

cp support-files/my-medium.cnf /etc/my.cnf

cp support-files/mysql.server /etc/init.d/mysqld

chmod  /etc/init.d/mysqld

bin/mysqld_safe --user=mysql --datadir=/dell/mysql_data
4.Mysql-5.6.36.tar.gz
- 二进制包安装mysql
#添加用户

[root@tri blog]# groupadd -g  mysql

[root@tri blog]# useradd -r -u  -g  -d /data02/blog/mysql_data -s /sbin/nologin mysql

#开始安装

[root@tri local]# tar -xf /opt/data01/tars/mysql-5.6.-linux-glibc2.-x86_64.tar.gz

[root@tri local]# ln -s mysql-5.6.-linux-glibc2.-x86_64/ mysql

[root@tri local]# cd mysql

[root@tri mysql]# chown -R mysql:mysql .

[root@tri mysql]# scripts/mysql_install_db --user=mysql

[root@tri mysql]# chown -R root .

[root@tri mysql]# chown -R mysql data/

#标准启动

[root@tri mysql]# bin/mysqld_safe --user=mysql

#直接启动

[root@tri mysql]# bin/mysqld_safe --user=mysql --bind-address=127.0.0.1 --port

#解包后查看文件,编译时配置“-prefix=”

[root@tri mysql]# vi docs/INFO_BIN

CMAKE_INSTALL_PREFIX:PATH=/usr/local/mysql

MYSQL_DATADIR:PATH=/usr/local/mysql/data

#添加启动时打开服务

[root@tri mysql]# cp support-files/mysql.server /etc/init.d/mysql

#打开上述文件(提示配置文件、主目录、数据目录)

[root@tri mysql]# vi /etc/init.d/mysql

# If you install MySQL on some other places than /usr/local/mysql, then you

# have to do one of the following things for this script to work:

#

# - Run this script from within the MySQL installation directory

# - Create a /etc/my.cnf file with the following information:

#   [mysqld]

#   basedir=<path-to-mysql-installation-directory>

# - Add the above to any other configuration file (for example ~/.my.ini)

#   and copy my_print_defaults to /usr/bin

# - Add the path to the mysql-installation-directory to the basedir variable

#   below.

#

# If you want to affect other MySQL variables, you should make your changes

# in the /etc/my.cnf, ~/.my.cnf or other MySQL configuration files.

# If you change base dir, you must also change datadir. These may get

# overwritten by settings in the MySQL configuration files.

basedir=

datadir=
5.Mysql-5.7.28.tar.gz
- 二进制包安装mysql
shell> groupadd mysql

shell> useradd -r -g mysql -s /bin/false mysql

shell> cd /usr/local

shell> tar zxvf /path/to/mysql-VERSION-OS.tar.gz

shell> ln -s full-path-to-mysql-VERSION-OS mysql

shell> cd mysql

shell> mkdir mysql-files

shell> chown mysql:mysql mysql-files

shell> chmod  mysql-files

shell> bin/mysqld --initialize --user=mysql

shell> bin/mysql_ssl_rsa_setup

shell> bin/mysqld_safe --user=mysql &

# Next command is optional

shell> cp support-files/mysql.server /etc/init.d/mysql.server
附:1.账号安全
-----------MySQL 安装完成后的帐号安全问题-----------
问题描述
刚安装好的系统, root 默认密码为空;默认空用户(空密码)也可以在本地登录;
查看系统中有那些账户:
无用户名、密码本地登录
[work@tri ~]$ mysql
- 使用有用户名的方式登录
[work@tri ~]$ mysql -u root -h localhost
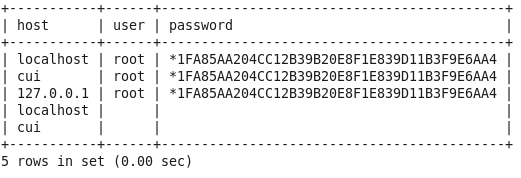
mysql> select host,user,password from mysql.user;
mysql> select host,user,password from mysql.user;
+-----------+------+----------+
| host | user | password |
+-----------+------+----------+
| localhost | root | |
| tri | root | |
| 127.0.0.1 | root | |
| :: | root | |
| localhost | | |
| tri | | |
+-----------+------+----------+
rows in set (0.00 sec)
显示结果,表示有多个 root 用户;有两个 空用户。没有一个有密码。
这就需要为每一个用户设定密码;同样需要为空用户设定密码,或者删除。
mysql.db 中的某些行,允许所有用户(包括没有密码的空账户;anonymous)访问测试数据库或者其
他以 “test_” 开头的数据库。(这个默认设置是为了测试的)
-------
- 修改 root 密码
shell> mysql -u root

mysql> SET PASSWORD = PASSWORD('newpwd');

mysql> SET PASSWORD FOR 'root'@'localhost' = PASSWORD('newpwd');

mysql> SET PASSWORD FOR 'root'@'127.0.0.1' = PASSWORD('newpwd');

mysql> SET PASSWORD FOR 'root'@'host_name' = PASSWORD('newpwd');

mysql> select host,user,password from mysql.user;
shell> mysql -u root

mysql> UPDATE mysql.user SET password = PASSWORD('newpwd)

    -> WHERE user = 'root';

(没有这步,就得重启后才能生效)

mysql> FLUSH PRIVILEGES;

shell> mysqladmin -u root password "newpwd"

shell> mysqladmin -u root -h host_name password "newpwd"

mysqladmin 无法对127.0.0.1起作用。

shell> mysqladmin -u root -p shutdown
-------
修改 anonymous 密码

shell> mysql -u root -p

mysql> SET PASSWORD FOR ''@'localhost' = PASSWORD('newpwd');

mysql> SET PASSWORD FOR ''@'host_name' = PASSWORD('newpwd');

shell> mysql -u root -p

mysql> UPDATE mysql.user SET password = PASSWORD('newpwd')

    -> WHERE user = '';

mysql> FLUSH PRIVILEGES;
-------
删除 anonymous 用户

shell> mysql -u root -p

mysql> DROP USER ''@'localhost';

mysql> DROP USER ''@'host_name';

mysql> select host,user,password from mysql.user;

-------
拒绝任意用户访问测试数据库
shell> mysql -u root -p

mysql> DELETE FROM mysql.db WHERE db LIKE 'test%';

mysql> FLUSH PRIVILEGES;

mysql> DROP DATABASE test;    (* 再进一步,连测试库都干掉)
-----------------------------
使用 RPM 包安装数据库
RPM 包可以是官方提供的,也可以是其他作者提供的;可能有所不同(文件结构)。
标准安装,需要 MySQL-server & MySQL-client 。(其他的包在标准安装中不需要)
4109 行有关于各种包(名称)代表含义的详细说明。(包对 CPU 是有选择的 4208 )
查看 RPM 包里的文件:
shell> rpm -qpl MySQL-server-VERSION.glibc23.i386.rpm
-------
* Red Hat Linux, Fedora, CentOS
root-shell> yum install mysql mysql-server mysql-libs

root-shell> service mysqld start

root-shell> chkconfig --levels 235 mysqld on
-------
Debian,Ubuntu,Kubuntu
root-shell> apt-get install mysql-client-5.1 mysql-server-5.1

root-shell> service mysql start | stop
-----------------------------
优化从编译个出色的mysqld开始
   使用最好的编译器、和最佳的编译选项;使用静态模板编译。这个很重要,性能能提升10-30%。

   直接在官网下载的二进制包,包含所有的字符集;自己编译可以选择需要的字符集。

  Here is a list of some measurements that we have made:

    * If you link dynamically (without -static), the result is 13%

      slower on Linux. Note that you still can use a dynamically

      linked MySQL library for your client applications. It is the

      server that is most critical for performance.

    * For a connection from a client to a server running on the same

      host, if you connect using TCP/IP rather than a Unix socket

      file, performance is 7.5% slower. (On Unix, if you connect to

      the host name localhost, MySQL uses a socket file by default.)

    * For TCP/IP connections from a client to a server, connecting

      to a remote server on another host is 8% to 11% slower than

      connecting to a server on the same host, even for connections

      faster than 100Mb/s Ethernet.

    * When running our benchmark tests using secure connections (all

      data encrypted with internal SSL support) performance was 55%

      slower than with unencrypted connections.

    * On a Sun UltraSPARC-IIe, a server compiled with Forte 5.0 is

      4% faster than one compiled with gcc 3.2.

    * On a Sun UltraSPARC-IIe, a server compiled with Forte 5.0 is

      4% faster in 32-bit mode than in 64-bit mode.

    * Compiling on Linux-x86 using gcc without frame pointers

      (-fomit-frame-pointer or -fomit-frame-pointer -ffixed-ebp)

      makes mysqld 1% to 4% faster.
这段保留一点原汁原味
MySQL安装、基本账户安全(5.0以后版本)的更多相关文章
- Windows下MySQL安装流程,8.0以上版本ROOT密码报错及修改
官网下载MySQL安装后,解压,添加环境变量,以管理员方式运行cmd,运行以下命令 mysqld --initialize --console mysqld -install net start my ...
- mysql 安装流程 兼容8.0.0以上版本 解决修改密码规则问题
背景介绍: 第一次安装mysql服务端,版本8.0.6 遇到了问题:1:不知道流程:2:8.0以上版本密码加密规则修改的解决方案: 1:下载mysql 服务端 https://dev.mysql. ...
- Linux环境——MySQL安装及配置(5.7版本)
数据库安装包下载地址:https://dev.mysql.com/downloads/mysql/ 我的环境是Linux Red Hat Enterprlse Linux (64位),本次安装的是M ...
- Linux下安装配置MongoDB 3.0.x 版本数据库
说明: 操作系统:CentOS 5.X 64位 IP地址:192.168.21.128 实现目的: 安装配置MongoDB数据库 具体操作: 一.关闭SElinux.配置防火墙 1.vi /etc/s ...
- windows7 64位安装tensorflow 1.4.0 CPU版本
机器学习和深度学习真是新生代的宠儿,我也被安排来搞这个了,这下是真的从0开始了.看了几天ppt,想跑跑代码试试,装个环境. 都说tensorflow很火很好用,反正我什么也不懂,准备把这些框架一个一个 ...
- 关于8.0.15版本的mysql下载与安装
下载MYSQL 官网下载MYSQL8.0.15版本,链接地址https://www.mysql.com/downloads/,流程如下 点击进入后,网页滑到最下面,根据自己电脑的型号下载相应的版本 安 ...
- 关于IOS新手在安装cocoa pods失败,因为ruby版本过低的解决方法+ (void) {升级ruby}
http://blog.csdn.net/zhaoen95/article/details/51995520 现在: 使用 OS 系统, 正在学习iOS 需要配置cocoapods 命令行中显 ...
- ML.NET 0.9 版本发布---.net下的机器学习引擎
欢迎来到 2019年!在过去的9个月里, 我们一直在为ML.NET添加新的特征和改进相关功能.在提交1.0版本之前,我们将专注于包的整体稳定性并对API进行不断优化, 扩大测试的覆盖面并对开发文档进行 ...
- MySQL安装 8.0.15版本
windows下MySQL 8.0.15的安装和设置 MySQL下载地址:https://dev.mysql.com/downloads/mysql/ 我的百度网盘下载(win64位):链接:http ...
随机推荐
- OK335xS pwm device register hacking
/************************************************************************* * OK335xS pwm device regi ...
- chapter02 K近邻分类器对Iris数据进行分类预测
寻找与待分类的样本在特征空间中距离最近的K个已知样本作为参考,来帮助进行分类决策. 与其他模型最大的不同在于:该模型没有参数训练过程.无参模型,高计算复杂度和内存消耗. #coding=utf8 # ...
- Spring如何解析XML文件——Spring源码之XML初解析
首先,在我的这篇博客中已经说到容器是怎么初步实现的,并且要使用XmlBeanDefinitionReader对象对Xml文件进行解析,那么Xml文件是如何进行解析的,将在这片博客中进行一些陈述. 数据 ...
- Django的DateTimeField和DateField
一.DateField: class DateField(auto_now=False, auto_now_add=False, **options)[source] auto_now:每次保存时,都 ...
- 【JVM】jvm的jps命令
jps -- Java Virtual Machine Process Status Tool 可以列出本机所有java进程的pid jps [ options ] [ hostid ] 选项 -q ...
- hiho1622 有趣的子区间(YY)
题目链接:http://hihocoder.com/problemset/problem/1622?sid=1230113 #1622 : 有趣的子区间 时间限制:10000ms 单点时限:1000m ...
- USB设备驱动_WDS
1. usb_alloc_dev中的 bus_type 中指定了匹配函数,和uevent中的环境参数. ====>不同的bus_type的匹配函数可能是不同的,uevent的环境变量参数也可能是 ...
- sql 分组后显示每组的前几条记录
sql 分组后显示每组的前几条记录 如 表中记录是 code serialno A1 1 ...
- 转 MetaWeblog API 编写
如今,许多人都熟悉个人和公司或业界主办的博客.后者明显成为了传统公司和行业网站的下一代新兴产物.博客的内容涉及从简洁的特制产品公告和公共关系到实用且深刻的主题探索,这些主题可能对公司的产品或行业的未来 ...
- Javascript 正则验证带 + 号的邮箱地址
很多邮箱地址是可以加上 + 加号为同一个邮箱地址. 比如 Gmail. 如果需要验证带 + 号的邮箱,如下: str = "65485+55@gmail.com"; documen ...