
伪元素:target
:target 伪类选择器
|
1
2
3
4
5
6
|
<ul class='nav'>
<li>列表1</li>
<li>列表2</li>
</ul>
<div>列表1内容:123456</div>
<div>列表2内容:abcdefgkijkl</div>
|
|
1
2
3
4
5
6
|
<ul class='nav'>
<li><a href="#content1">列表1</a></li>
<li><a href="#content2">列表2</a></li>
</ul>
<div id="content1">列表1内容:123456</div>
<div id="content2">列表2内容:abcdefgkijkl</div>
|
|
1
2
3
4
5
6
7
8
9
|
#content1,
#content2{
display:none;
}
#content1:target,
#content2:target{
display:block;
}
|
|
1
2
3
4
5
6
|
<div id="content1">列表1内容:123456</div>
<div id="content2">列表2内容:abcdefgkijkl</div>
<ul class='nav'>
<li><a href="#content1">列表1</a></li>
<li><a href="#content2">列表2</a></li>
</ul>
|
E~F{ cssRules } ,CSS3 兄弟选择符(E~F) ,选择 E 元素后面的所有兄弟元素 F。注意这里,最重要的一句话是 E~F 只能选择 E 元素 之后 的 F 元素,所以顺序就显得很重要了。
|
1
2
3
4
5
6
7
8
9
10
11
12
13
14
|
#content1:target ~ .nav li{
// 改变li元素的背景色和字体颜色
&:first-child{
background:#ff7300;
color:#fff;
}
}
#content2:target ~ .nav li{
// 改变li元素的背景色和字体颜色
&:last-child{
background:#ff7300;
color:#fff;
}
}
|
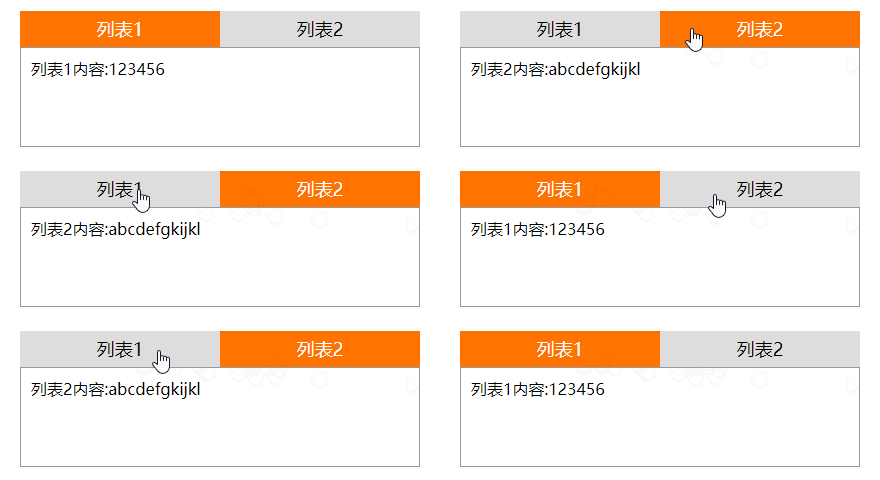
<!DOCTYPE html>

<html lang="en">

<head>

<meta charset="UTF-8">

<title>Title</title>

<style>

.container {

position: relative;

width: 400px;

margin: 50px auto;

box-sizing: border-box;

}

.nav {

position: relative;

overflow: hidden;

list-style: none;

padding: 0;

margin: 0;

}

ul li{

list-style: none;

}

li {

width: 50%;

float: left;

text-align: center;

background: #ddd;

}

li a {

display: block;

line-height: 36px;

font-size: 18px;

cursor: pointer;

text-decoration: none;

color: #000;

}

#content1, #content2 {

position: absolute;

overflow: hidden;

top: 36px;

height: 100px;

border: 1px solid #999;

box-sizing: border-box;

}

#content1, #content2 {

display: none;

width: 100%;

background: #fff;

}

#content1:target, #content2:target {

display: block;

}

#content1.active {

display: block;

}

.active ~ .nav li:first-child {

background: #ff7300;

color: #fff;

}

#content1:target ~ .nav li {

background: #ddd;

color: #000;

}

#content1:target ~ .nav li:first-child {

background: #ff7300;

color: #fff;

}

#content2:target ~ .nav li {

background: #ddd;

color: #000;

}

#content2:target ~ .nav li:last-child {

background: #ff7300;

color: #fff;

}

</style>

</head>

<body>

<div class="container">

<div id="content1" class="active">列表1内容:123456</div>

<div id="content2">列表2内容:abcdefgkijkl</div>

<ul class='nav'>

<li class="active"><a href="#content1">列表1</a></li>

<li><a href="#content2">列表2</a></li>

</ul>

</div>

</body>

</html>
法二:<input type="radio"> && <label for="">
|
1
2
3
4
5
|
<input class="nav1" type="radio">
<ul class='nav'>
<li>列表1</li>
</ul>
|
|
1
2
3
|
.nav1:checked ~ .nav li {
// 进行样式操作
}
|
同样用到了兄弟选择符 ~
|
1
2
3
4
5
|
<input class="nav1" id="li1" type="radio">
<ul class='nav'>
<li><label for="li1">列表1</label></li>
</ul>
|
label 标签中的 for 定义:for 属性规定 label 与哪个表单元素绑定。
|
1
2
3
|
input{
display:none;
}
|
|
1
2
3
4
5
6
7
8
9
10
11
12
|
<div class="container">
<input class="nav1" id="li1" type="radio" name="nav">
<input class="nav2" id="li2" type="radio" name="nav">
<ul class='nav'>
<li class='active'><label for="li1">列表1</label></li>
<li><label for="li2">列表2</label></li>
</ul>
<div class="content">
<div class="content1">列表1内容:123456</div>
<div class="content1">列表2内容:abcdefgkijkl</div>
</div>
</div>
|
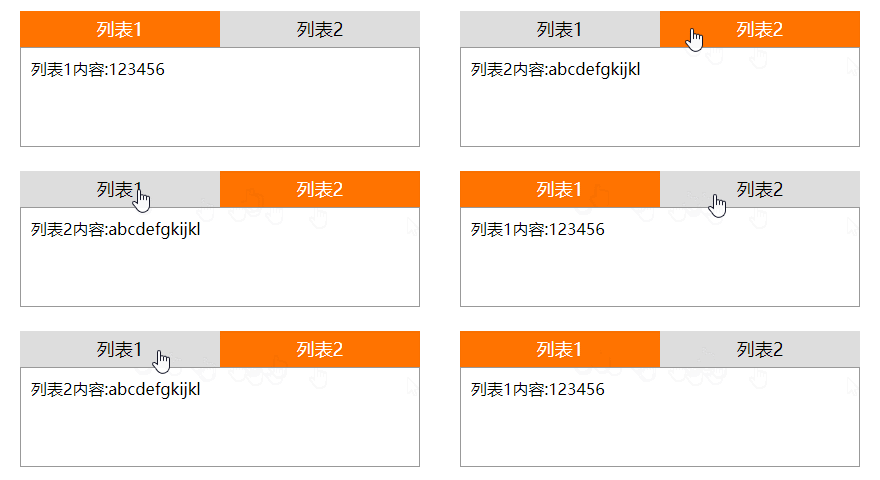
<!DOCTYPE html>

<html lang="en">

<head>

<meta charset="UTF-8">

<title>Title</title>

<style>

.container {

position: relative;

width: 400px;

margin: 50px auto;

}

input {

display: none;

}

.nav {

position: relative;

overflow: hidden;

}

* {

margin: 0;

padding: 0;

}

li {

float: left;

list-style: none;

text-align: center;

background: #ddd;

}

li label {

display: block;

width: 200px;

line-height: 36px;

font-size: 18px;

cursor: pointer;

}

.content {

position: relative;

overflow: hidden;

width: 400px;

height: 100px;

border: 1px solid #999;

box-sizing: border-box;

padding: 10px;

}

.content1,

.content2 {

display: none;

width: 100%;

height: 100%;

}

.nav1:checked ~ .nav li {

background: #ddd;

color: #000;

}

.nav1:checked ~ .nav li:first-child {

background: #ff7300;

color: #fff;

}

.nav2:checked ~ .nav li {

background: #ddd;

color: #000;

}

.nav2:checked ~ .nav li:last-child {

background: #ff7300;

color: #fff;

}

.nav1:checked ~ .content > div {

display: none;

}

.nav1:checked ~ .content > div:first-child {

display: block;

}

.nav2:checked ~ .content > div {

display: none;

}

.nav2:checked ~ .content > div:last-child {

display: block;

}

.active {

background: #ff7300;

color: #fff;

}

.default {

display: block;

}

</style>

</head>

<body>

<div class="container">

<input class="nav1" id="li1" type="radio" name="nav">

<input class="nav2" id="li2" type="radio" name="nav">

<ul class='nav'>

<li class='active'><label for="li1">列表1</label></li>

<li><label for="li2">列表2</label></li>

</ul>

<div class="content">

<div class="content1 default">列表1内容:123456</div>

<div class="content2">列表2内容:abcdefgkijkl</div>

</div>

</div>

</body>

</html>
伪元素:target的更多相关文章
- CSS笔记之伪类与伪元素
伪类分为两种:UI伪类 与 结构化伪类 UI伪类:a:link{} a:hover{} a:active{} a:visited{} input[type='text']:focus{} ...
- ::before和::after伪元素的用法
一.介绍 css3为了区分伪类和伪元素,伪元素采用双冒号写法. 常见伪类——:hover,:link,:active,:target,:not(),:focus. 常见伪元素——::first-let ...
- CSS伪类和伪元素
一.伪类 CSS伪类用于向某些选择器添加特殊的效果,在W3规范中,CSS伪类有如下几个: CSS2.1 :active:向被激活的元素添加样式(激活是指点击鼠标那一下) :focus:向拥有键盘输入焦 ...
- css伪类选择器及伪元素选择器
1.类选择器 在css中可以使用类选择器把相同的元素定义成不同的样式.比如: 结果如下: 标题背景未变 2.伪类选择器 类选择器和伪类选择器的区别在于,类选择器我们定义的,而伪类选择器是CSS中已经定 ...
- css3 -- 伪类与伪元素
伪类: 1.结构伪类 A:E : first-child{} E : nth-*(n){} E : first-*(even){} E : first-*(odd){} B:nth-child 是根 ...
- css伪元素选择器
<!DOCTYPE html><html lang="en"><head> <meta charset="UTF-8" ...
- CSS_03_04_CSS伪元素选择器
第01步:编写css代码:wei.css @charset "utf-8"; /* 伪元素选择器 :状态 效果顺序:L V H A */ a:link.lin_01{/*超链接,未 ...
- 使用css3伪元素制作时间轴并且实现鼠标选中高亮效果
利用css3来制作时间轴的知识要点:伪元素,以及如何在伪元素上添加锚伪类 1)::before 在元素之前添加内容. 2)::after 在元素之后添加内容. 提示:亦可写成 :before :aft ...
- CSS——伪元素与伪类
伪类与伪元素 伪类:在特殊性中占据0,0,1,0 :link 向未访问的链接添加特殊的样式.也就是说,链接所指的 URI 尚未出现在用户代理的历史中.这种状态与 :visited状态是互斥的. :vi ...
随机推荐
- 算法:LRU(最近最少使用)
算法:LRU(最近最少使用) 本文参考自小灰文章:https://mp.weixin.qq.com/s/B5xiVeW22ZumbI9KfrYJSg LRU算法 什么是LRU算法 LRU算法又称最近最 ...
- Kattis - cokolada【水】
Kattis - cokolada[水] 题意 有一个人想吃巧克力,但是巧克力都是按照 2 的幂次的数量包装的,然后他想吃一定数量块的巧克力,然后可以敲碎,每次敲碎都分成两半,比如四块装的分成两块就是 ...
- Firebug控制台详解(转)
本文转自:http://www.ruanyifeng.com/blog/2011/03/firebug_console_tutorial.html 作者: 阮一峰 日期: 2011年3月26日 Fir ...
- 【leetcode刷题笔记】Rotate Image
You are given an n x n 2D matrix representing an image. Rotate the image by 90 degrees (clockwise). ...
- python 异常的引发和捕捉处理
1.什么是异常(exception): 异常是python发现某个地方出现逻辑错误时,抛出一个信号,即异常的引发.如果有捕捉语句在,则异常信号被捕捉,如果没有则会传递到默认异常处理器(终止程序). ...
- 剑指offer题解02-10
02 单例模式 单例模式,是一种常用的软件设计模式.在它的核心结构中只包含一个被称为单例的特殊类.通过单例模式可以保证系统中,应用该模式的类一个类只有一个实例.即一个类只有一个对象实例. 从具体实现角 ...
- oracle时间的获取,前一天,上一个星期,上一个月
–前一天的开始时刻 SELECT to_date(to_char(TRUNC(SYSDATE-1),’yyyy-mm-dd’) || ‘00:00:00’,’yyyy-mm-dd hh24:mi:ss ...
- Linux(CentOS)中常用软件安装,使用及异常——XManager, 中文支持,JDK
XManager图形化界面远程连接 采用Xshell的方式可以不用在CentOS系统中配置即可以相连,主要原理就是SSH连接的方式,但是XManager图形化界面远程连接是需要修改CentOS系统的. ...
- C语言之非常简单的几道题
C语言之非常简单的几道题(还是写写),比较简单吧,主要有几道题的数据类型(如,第三题)和语句顺序(如,第二题)需要注意一小下下. 1. 求表达式S=1*2*3……*N的值大于150时,最小的N的值 / ...
- window cmd
切换目录盘 直接 d: (e: f:) 在目录下切换文件用cd 文件名(可以加绝对路径 绝对路径可以到复制 也可以加相对路径) javac XXX.java 编译成字节码 Ja ...