使用Nginx搭建图片服务器(windows)
知识点:在windows系统中,搭建图片上传服务器
参考博客:http://blog.csdn.net/u010942834/article/details/72953441
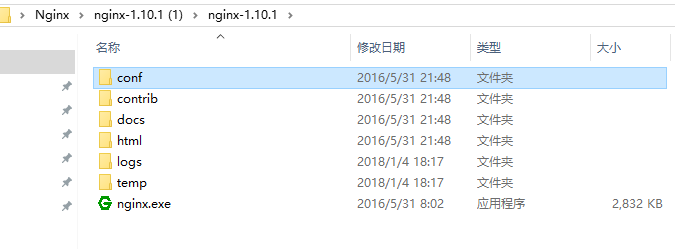
1.进入官网下载nginx压缩包,解压后目录如下
2.在解压后的conf/nginx.conf配置文件中,添加添加或者修改带有颜色地方的代码
#user nobody;
worker_processes 1;
#error_log logs/error.log;
#error_log logs/error.log notice;
#error_log logs/error.log info;
#pid logs/nginx.pid;
events {
worker_connections 1024;
}
http {
include mime.types;
default_type application/octet-stream;
#log_format main '$remote_addr - $remote_user [$time_local] "$request" '
# '$status $body_bytes_sent "$http_referer" '
# '"$http_user_agent" "$http_x_forwarded_for"';
#access_log logs/access.log main;
sendfile on;
#tcp_nopush on;
#keepalive_timeout 0;
keepalive_timeout 65;
#gzip on;
server {
listen ;
server_name localhost;
#charset utf-8;
#access_log logs/host.access.log main;
#添加博客的代码
location ~ .*\.(gif|jpg|jpeg|png)$ {
expires 24h;
root G:/images/;#指定图片存放路径
access_log G:/images/log;#图片路径
proxy_store on;
proxy_store_access user:rw group:rw all:rw;
proxy_temp_path G:/images/;#图片路径
proxy_redirect off;
proxy_set_header Host 127.0.0.1;
proxy_set_header X-Real-IP $remote_addr;
proxy_set_header X-Forwarded-For $proxy_add_x_forwarded_for;
client_max_body_size 10m;
client_body_buffer_size 1280k;
proxy_connect_timeout 900;
proxy_send_timeout 900;
proxy_read_timeout 900;
proxy_buffer_size 40k;
proxy_buffers 40 320k;
proxy_busy_buffers_size 640k;
proxy_temp_file_write_size 640k;
if ( !-e $request_filename)
{
proxy_pass http://169.254.140.133:8089; #代理访问地址
}
}
location / {
root html;
index index.html index.htm;
}
#error_page 404 /404.html;
# redirect server error pages to the static page /50x.html
#
error_page 500 502 503 504 /50x.html;
location = /50x.html {
root html;
}
# proxy the PHP scripts to Apache listening on 127.0.0.1:80
#
#location ~ \.php$ {
# proxy_pass http://127.0.0.1;
#}
# pass the PHP scripts to FastCGI server listening on 127.0.0.1:9000
#
#location ~ \.php$ {
# root html;
# fastcgi_pass 127.0.0.1:9000;
# fastcgi_index index.php;
# fastcgi_param SCRIPT_FILENAME /scripts$fastcgi_script_name;
# include fastcgi_params;
#}
# deny access to .htaccess files, if Apache's document root
# concurs with nginx's one
#
#location ~ /\.ht {
# deny all;
#}
}
# another virtual host using mix of IP-, name-, and port-based configuration
#
#server {
# listen 8000;
# listen somename:8080;
# server_name somename alias another.alias;
# location / {
# root html;
# index index.html index.htm;
# }
#}
# HTTPS server
#
#server {
# listen 443 ssl;
# server_name localhost;
# ssl_certificate cert.pem;
# ssl_certificate_key cert.key;
# ssl_session_cache shared:SSL:1m;
# ssl_session_timeout 5m;
# ssl_ciphers HIGH:!aNULL:!MD5;
# ssl_prefer_server_ciphers on;
# location / {
# root html;
# index index.html index.htm;
# }
#}
}
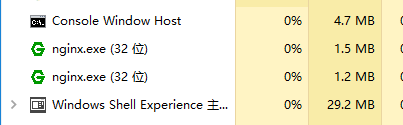
3.点击绿色的nginx.exe图标,启动服务器,在任务管理器看到如下,则启动成功
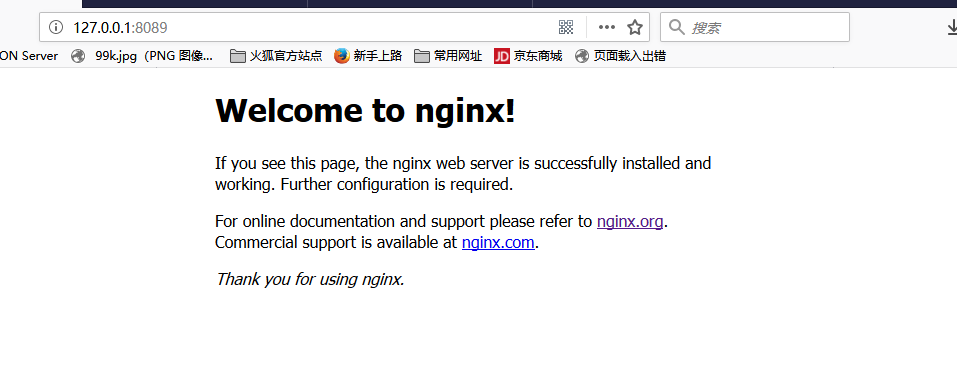
4.在浏览器中输入http://127.0.0.1:8089可以看到
5.在G:/images/下,放一个图片,在浏览器地址栏输入http://127.0.0.1:8089/img.jpg,就可以访问到服务器上的图片

使用Nginx搭建图片服务器(windows)的更多相关文章
- nginx 搭建图片服务器(windows 下,linux 下原理应该一样)
作者的心声:很多知道的.用过的东西,不写下来,下次还要百度查询,浪费时间和精力,故本次写下学习笔记,方便下次查阅. 题外话:如有读者通过我这篇博客解决了工作上的难题,可以给个评论,让我一起分享你的喜悦 ...
- Nginx,Nginx 搭建图片服务器
Nginx Nginx 概述 反向代理 工作流程 优点 1:保护了真实的web服务器,保证了web服务器的资源安全 2:节约了有限的IP地址资源 3:减少WEB服务器压力,提高响应速度 4:其他优点 ...
- Nginx 搭建图片服务器
Nginx 搭建图片服务器 本章内容通过Nginx 和 FTP 搭建图片服务器.在学习本章内容前,请确保您的Linux 系统已经安装了Nginx和Vsftpd. Nginx 安装:http://www ...
- Nginx搭建图片服务器
Nginx搭建图片服务器 标签(空格分隔): linux,nginx Nginx常用命令 ./nginx 启动 ./nginx -s reload 重载配置文件 ./nginx -s stop|sta ...
- nginx+ftp搭建图片服务器(Windows Server服务器环境下)
几种图片服务器的对比 1.直接使用ftp服务器,访问图片路径为 ftp://账户:密码@192.168.0.106/31275-105.jpg 不采用这种方式,不安全容易暴露ftp账户信息 2.直接使 ...
- ftp&nginx搭建图片服务器
下面使用ftp+nginx搭建一个简单的服务器 ftp用于文件的传输 nginx提供http服务 nginx服务器的安装和配置可以参照之前的教程:nginx安装及其配置详细教程 下面介绍ftp服务的安 ...
- 二、nginx搭建图片服务器
接上篇:Nginx安装手册 cd /usr/local/nginx/conf/ 配置图片服务器 方法一.在配置文件server{}中location /{} 修改配置: #默认请求 location ...
- ubuntu16.06+vsftpd+nginx搭建图片服务器
安装vsftpd 注:以下指令都在root账户下操作 # apt安装vsftpd apt-get install vsftpd #启动vsftpd service vsftpd start #新建用户 ...
- 【nginx】解决nginx搭建图片服务器访问图片404
图片通过ftp服务上传到/home/ftpuser/www/images目录下后访问 http://192.168.128.128/images/xxx.jpg 还是 404 NOT FOUND ,解 ...
随机推荐
- centos7常用命令集合
版权声明:本文为博主原创文章,未经博主允许不得转载. 目录(?)[+] CentOS7 常用命令集合 这两天一直在对CentOS 7.2进行初体验,各种学习命令肿么用,不过其实大多和DOS是一 ...
- GITLAB服务基础
1.GITLAB介绍 一个基于GIT的源码托管解决方案基于Ruby on rails开发集成了nginx postgreSQL redis sidekiq等组件 2. 资源 官网:https://ab ...
- logback.xml解读----日志配置解读
初次接触javaweb项目的日志是log4j文件,但是后来发现通过配置logback.xml文件实现日志输出非常好用.经过上午的学习,现总结如下: 直接上配置文件和注释: <?xml versi ...
- paintschainer项目
github:https://github.com/pfnet/PaintsChainer tensorflow实现:https://github.com/mizti/tensor_paint 在线测 ...
- MPI Maelstrom---poj1502(最短路模板)
题目链接:http://poj.org/problem?id=1502 题意:求从处理器1到其它处理器所需的最少时间是多少: 输入是下三角,如果是x表示A[i][j]不能直接联系: #include ...
- vue中获取客户端IP地址(不需要额外引入三方文件)
之前看了几种方法 ,都是引入腾讯,新浪,搜狐等的三方js文件来查询IP地址,但是我自己测试的时候IP地址不准确,所以就找了找,发现了这个方法,准确的获取到了IP地址和cmd的ipconfig获取到的I ...
- windbg遍历进程页表查看内存
2016-12-09 近期想查看下系统分配了的页的页表项的标志位,但是发现资料较少,所以还是记录下,希望可以对某些朋友有所帮助! 系统:win7 32位虚拟机 平台:KVM虚拟化平台 win7 32位 ...
- VC2005 warning C4819 消除方法
一. Warning C4819:The file contains a character that can ot be represented in the current code page(9 ...
- javascript 之 valueOf
var m = { i:10, toString:function () { console.log('toString'); return this.i; }, valueOf:function ( ...
- 从原型链看DOM--Element类型
Element类型用于表现XML或HTML元素,提供对元素标签名,子节点及特性的访问.原型链的继承关系为 某节点元素.__proto__->(HTML某元素Element.prototype)- ...