Spring Boot+BootStrap fileInput 多图片上传
<link rel="stylesheet" type="text/css" th:href="@{/js/bootstrap/css/bootstrap.css}">

<link rel="stylesheet" type="text/css" th:href="@{/js/bootstrap/fileinput/css/fileinput.css}">

<!-- 加入FileInput -->

<script th:src="@{/js/jquery-3.3.1.min.js}"></script>

<script th:src="@{/js/bootstrap/js/bootstrap.js}"></script>

<script th:src="@{/js/bootstrap/fileinput/js/fileinput.js}"></script>

<script th:src="@{/js/bootstrap/fileinput/js/zh.js}"></script>/*语言环境*/
二、表单
<form class="form" action="#" method="post" enctype="multipart/form-data"  id="pollutionForm">

    <!-- 注意事项:Input type类型为file class为样式 id随意 name随意

         multiple(如果是要多图上传一定要加上,不加的话每次只能选中一张图)-->

    图片:<input type="file" class="file" id="img" multiple name="images"><br>

</form>
三、JavaScript代码
<script>/**/

    var imageData = []; //多图上传返回的图片属性接受数组  这里是因为我在做表单其他属性提交的时候使用,在这里我没有将别的input写出来

    $("#img").fileinput({

        language : 'zh',

        uploadUrl : "/image/save-test",

        showUpload: true, //是否显示上传按钮

        showRemove : true, //显示移除按钮

        showPreview : true, //是否显示预览

        showCaption: false,//是否显示标题

        autoReplace : true,

        minFileCount: 0,

        uploadAsync: true,

        maxFileCount: 10,//最大上传数量

        browseOnZoneClick: true,

        msgFilesTooMany: "选择上传的文件数量 超过允许的最大数值!",

        enctype: 'multipart/form-data',

        // overwriteInitial: false,//不覆盖已上传的图片

        allowedFileExtensions : [ "jpg", "png", "gif" ],

        browseClass : "btn btn-primary", //按钮样式

        previewFileIcon : "<i class='glyphicon glyphicon-king'></i>"

    }).on("fileuploaded", function(e, data) {//文件上传成功的回调函数,还有其他的一些回调函数,比如上传之前...

        var res = data.response;

        console.log(res)

        imageData.push({

            "path": res.data.path,

            "date":res.data.date

        });

        console.log(imageData);

    });

</script>
四、后台代码
//图片类
import java.util.Date; /**
* 图片类
*/
public class Img { private String name;
private String path;
private Date date; public Img() {
} public Img(String path, Date date) {
this.path = path;
this.date = date;
} public Img(String name, String path, Date date) {
this.name = name;
this.path = path;
this.date = date;
} public String getName() {
return name;
} public void setName(String name) {
this.name = name;
} public String getPath() {
return path;
} public void setPath(String path) {
this.path = path;
} public Date getDate() {
return date;
} public void setDate(Date date) {
this.date = date;
} @Override
public String toString() {
return "Img{" +
"name='" + name + '\'' +
", path='" + path + '\'' +
", date=" + date +
'}';
}
} //图片上传Controller
public class UploadController { //fileinput 其实每次只会上传一个文件 多图上传也是分多次请求,每次上传一个文件 所以不需要循环
@RestController
//@RequestParam("images") 这里的images对应表单中name 然后MultipartFile 参数名就可以任意了
@RequestMapping(value = "/image/save-test",method = RequestMethod.POST)
public UploadResponseData saveImg(@RequestParam("images") MultipartFile file) throws IOException {
String pathname = "";
String returnPath = "";
if (!file.isEmpty()){
String fileName = file.getOriginalFilename();
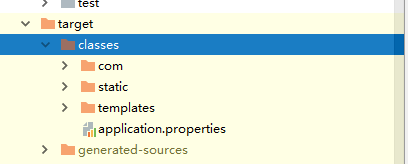
File path = new File(ResourceUtils.getURL("classpath:").getPath());//获取Spring boot项目的根路径,在开发时获取到的是/target/classes/
System.out.println(path.getPath());//如果你的图片存储路径在static下,可以参考下面的写法
File uploadFile = new File(path.getAbsolutePath(), "static/images/upload/");//开发测试模式中 获取到的是/target/classes/static/images/upload/
if (!uploadFile.exists()){
uploadFile.mkdirs();
}
//获取文件后缀名
String end = FilenameUtils.getExtension(file.getOriginalFilename());
DateFormat df = new SimpleDateFormat("yyyyMMddHHmmssSSS");
//图片名称 采取时间拼接随机数
String name = df.format(new Date());
Random r = new Random();
for(int i = 0 ;i < 3 ;i++){
name += r.nextInt(10);
}
String diskFileName = name + "." +end; //目标文件的文件名
pathname = uploadFile.getPath()+ "/" + diskFileName;
System.out.println(pathname);
returnPath = "images/upload/" + diskFileName;//这里是我自己做返回的字符串 file.transferTo(new File(pathname));//文件转存
}//UploadResponseData 自定义返回数据类型实体{int code, String msg, Object data}
return new UploadResponseData(CodeEnum.SUCCESS.getCode(),MsgEnum.SUCCESS.getMsg(),new Img(returnPath,new Date()));
} }
五、总结吧
最后在这里想说一些问题
1、spring boot路径获取问题:
ResourceUtils.getURL("classpath:").getPath(); 在开发环境下获取到的是项目根路径/target/class/

Spring Boot+BootStrap fileInput 多图片上传的更多相关文章
- bootstrap fileinput +springmvc图片上传-krajee
引入的文件 <link href="https://cdnjs.cloudflare.com/ajax/libs/bootstrap-fileinput/4.4.9/css/filei ...
- BootStrap fileinput.js文件上传组件实例代码
1.首先我们下载好fileinput插件引入插件 ? 1 2 3 <span style="font-size:14px;"><link type="t ...
- Bootstrap FileInput 多图上传插件 文档属性说明
Bootstrap FileInput 多图上传插件 原文链接:http://blog.csdn.net/misterwho/article/details/72886248?utm_source ...
- spring boot下MultipartHttpServletRequest如何提高上传文件大小的默认值
前言: 上传下载功能算是一个非常常见的功能,如果使用MultipartHttpServletRequest来做上传功能. 不配置上传大小的话,默认是2M.在有些场景,这个肯定不能满足条件. 上传代码: ...
- 从零开始的Spring Boot(3、Spring Boot静态资源和文件上传)
Spring Boot静态资源和文件上传 写在前面 从零开始的Spring Boot(2.在Spring Boot中整合Servlet.Filter.Listener的方式) https://www. ...
- Spring Boot 2.X 实现文件上传(三)
使用 SpringBoot 项目完成单个.多个文件的上传处理,并将上传的文件保存到指定目录下. 代码演示案例 所有的 HTML 页面文件 index.html <!DOCTYPE html> ...
- Bootstrap fileinput:文件上传插件的基础用法
官网地址:http://plugins.krajee.com/ 官网提供的样例:http://plugins.krajee.com/file-input/demo 基础用法一 导入核心CSS及JS文件 ...
- Spring Boot会员管理系统——处理文件上传
温馨提示 Spring Boot会员管理系统的中,需要涉及到Spring框架,SpringMVC框架,Hibernate框架,thymeleaf模板引擎.所以,可以学习下这些知识.当然,直接入门的话使 ...
- Spring Boot 静态资源映射与上传文件路由配置
默认静态资源映射目录 默认映射路径 在平常的 web 开发中,避免不了需要访问静态资源,如常规的样式,JS,图片,上传文件等;Spring Boot 默认配置对静态资源映射提供了如下路径的映射 /st ...
随机推荐
- Firefox 新增容器标签:可同时登录多个用户
Mozilla昨天在Firefox夜间构建版50.0a1中增加了一个名为“容器标签Container Tabs”的实验性功能. Mozilla的工程师称,该功能可以将用户的浏览会话分到不同的容器中.这 ...
- smarty 总结和分析
虽然smarty现在已经废弃不用,但是它的原理我们需要了解一下,这也是TP框架的一部分原理,它把前后端分离开,这样前端只需要写静态网页,后端只需要处理数据库和php文件就可以了,phpcms的思路也大 ...
- fopen与读写的标识r,r+,rb+,rt+,w+.....
FILE * fopen(const char * path,const char * mode); 参数mode字符串则代表着流形态. mode有下列几种形态字符串: r 打开只读文件,该文件必须存 ...
- Netty 应用程序的一个一般准则:尽可能的重用 EventLoop,以减少线程创建所带来的开销。
Netty 系列一(核心组件和实例). - JMCui - 博客园 https://www.cnblogs.com/jmcui/p/9154842.html 阅读目录 一.概念 二.核心组件 三.实例 ...
- 3 differences between Savepoints and Checkpoints in Apache Flink
https://mp.weixin.qq.com/s/nQOxsZUZSiPi7Sx40mgwsA 20181104 3 differences between Savepoints and Chec ...
- mysql 浏览器submit中文, shell乱码
w控制变量法. 初始 浏览器submit中文 成功执行 问题仍未解决 执行 SET character_set_database='latin1'; 再执行 SET character_set_res ...
- CSS语义化命名
CSS语义化命名 从上图我们可以大概看出这里有两种CSS的命名方式:1.结构化命名法:2.语义化命名法. 结构化命名法:根据页面中板块的位置而命名,如上图中的content-left,这时如果我们想把 ...
- LMAX Disruptor 原理
http://mechanitis.blogspot.com/search/label/disruptor http://ifeve.com/disruptor/, 并发框架Disruptor译文 h ...
- PHP的生命周期
了解PHP生命周期之前,先了解一下apache是怎么和php关联起来的吧~ 1.Apache运行机制剖析 ----------------------------- 总体示意图如下: Apache ...
- windows通过ssh连接虚拟机中的ubuntu步骤
linux端开启ssh服务 1.安装openssh-server包 sudo apt-get install openssh-server 2.启动ssh server sudo /etc/init. ...