
Mac007--Mysq服务端&客户端安装
一。安装Mysql服务端与Navicat Premium客户端
参见博客:https://blog.csdn.net/wtdask/article/details/79025674
安装mysql服务端:
Step1:使用brew命令安装 ($ brew install mysql)
安装完结果:
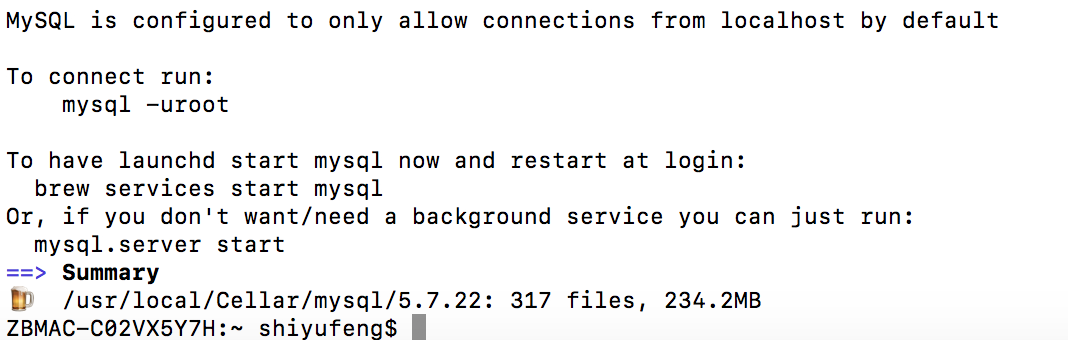
安装完成后:
1。启动mysql数据库
$ bash mysql.server start
$ sudo bash mysql.server start

注意:此时可能会报错:

此原因为:权限问题导致,可以应用下列命令修改权限。
sudo chmod -R a+rwx /usr/local/var/mysql
再执行
sudo mysql.server start
显示启动成功!

2。连接mysql数据库
mysql应用brew安装成功后,不需要密码,直接使用命令即可登录
$ mysql -uroot
修改,增加密码设置,输入如下命令
$ mysql_secure_installation
说明:
运行mysql_secure_installation会执行几个设置:
【1】。为root用户设置密码
【2】。删除匿名账号
【3】。取消root用户远程登录
【4】。删除test库和对test库的访问权限
【5】。刷新授权表使修改生效
代码如下:
 [root@server1 ~]# mysql_secure_installation

 NOTE: RUNNING ALL PARTS OF THIS SCRIPT IS RECOMMENDED FOR ALL MySQL

 SERVERS IN PRODUCTION USE! PLEASE READ EACH STEP CAREFULLY!

 In order to log into MySQL to secure it, we'll need the current

 password for the root user. If you've just installed MySQL, and

 you haven't set the root password yet, the password will be blank,

 so you should just press enter here.

 Enter current password for root (enter for none):<–初次运行直接回车

 OK, successfully used password, moving on…

 Setting the root password ensures that nobody can log into the MySQL

 root user without the proper authorisation.

 Set root password? [Y/n]<– 是否设置root用户密码,输入y并回车或直接回车

 New password:<– 设置root用户的密码

 Re-enter new password:<– 再输入一次你设置的密码

 Password updated successfully!

 Reloading privilege tables..

 … Success!

 By default, a MySQL installation has an anonymous user, allowing anyone

 to log into MySQL without having to have a user account created for

 them. This is intended only for testing, and to make the installation

 go a bit smoother. You should remove them before moving into a

 production environment.

 Remove anonymous users? [Y/n]<– 是否删除匿名用户,生产环境建议删除,所以直接回车

 … Success!

 Normally, root should only be allowed to connect from 'localhost'. This

 ensures that someone cannot guess at the root password from the network.

 Disallow root login remotely? [Y/n]<–是否禁止root远程登录,根据自己的需求选择Y/n并回车,建议禁止

 … Success!

 By default, MySQL comes with a database named 'test' that anyone can

 access. This is also intended only for testing, and should be removed

 before moving into a production environment.

 Remove test database and access to it? [Y/n]<– 是否删除test数据库,直接回车

 - Dropping test database…

 … Success!

 - Removing privileges on test database…

 … Success!

 Reloading the privilege tables will ensure that all changes made so far

 will take effect immediately.

 Reload privilege tables now? [Y/n]<– 是否重新加载权限表,直接回车

 … Success!

 Cleaning up…

 All done! If you've completed all of the above steps, your MySQL

 installation should now be secure.

 Thanks for using MySQL!

 [root@server1 ~]#
设置完,可以安装一个 MySQLWorkbench 就可以可视化操作数据库了。
3。关闭mysql数据库
sudo mysql.server stop
4。重启mysql数据库
sudo mysql.server restart
5。关于my.cnf
通过brew安装的mysql似乎默认并没有使用my.cnf,直接使用默认配置启动
my.cnf文件位置
mysql --help | grep 'Default options' -A 1

mysql会按照以上情况顺序加载mysql,所以就按需建立一个吧.
参考博客:
https://segmentfault.com/a/1190000007838188
https://www.jianshu.com/p/3996f6a2fa45
二。使用Sequel Pro连接操作数据库
注意:因数据库为弹性数据库。所以Navicat Premium不支持弹性数据库。所以应用Sequel Pro 。
1.安装Sequel Pro方式一:
下载网址:https://sequelpro.com/download
2.安装Sequel Pro方式二:
可用brew命令安装:brew cask install sequel-pro
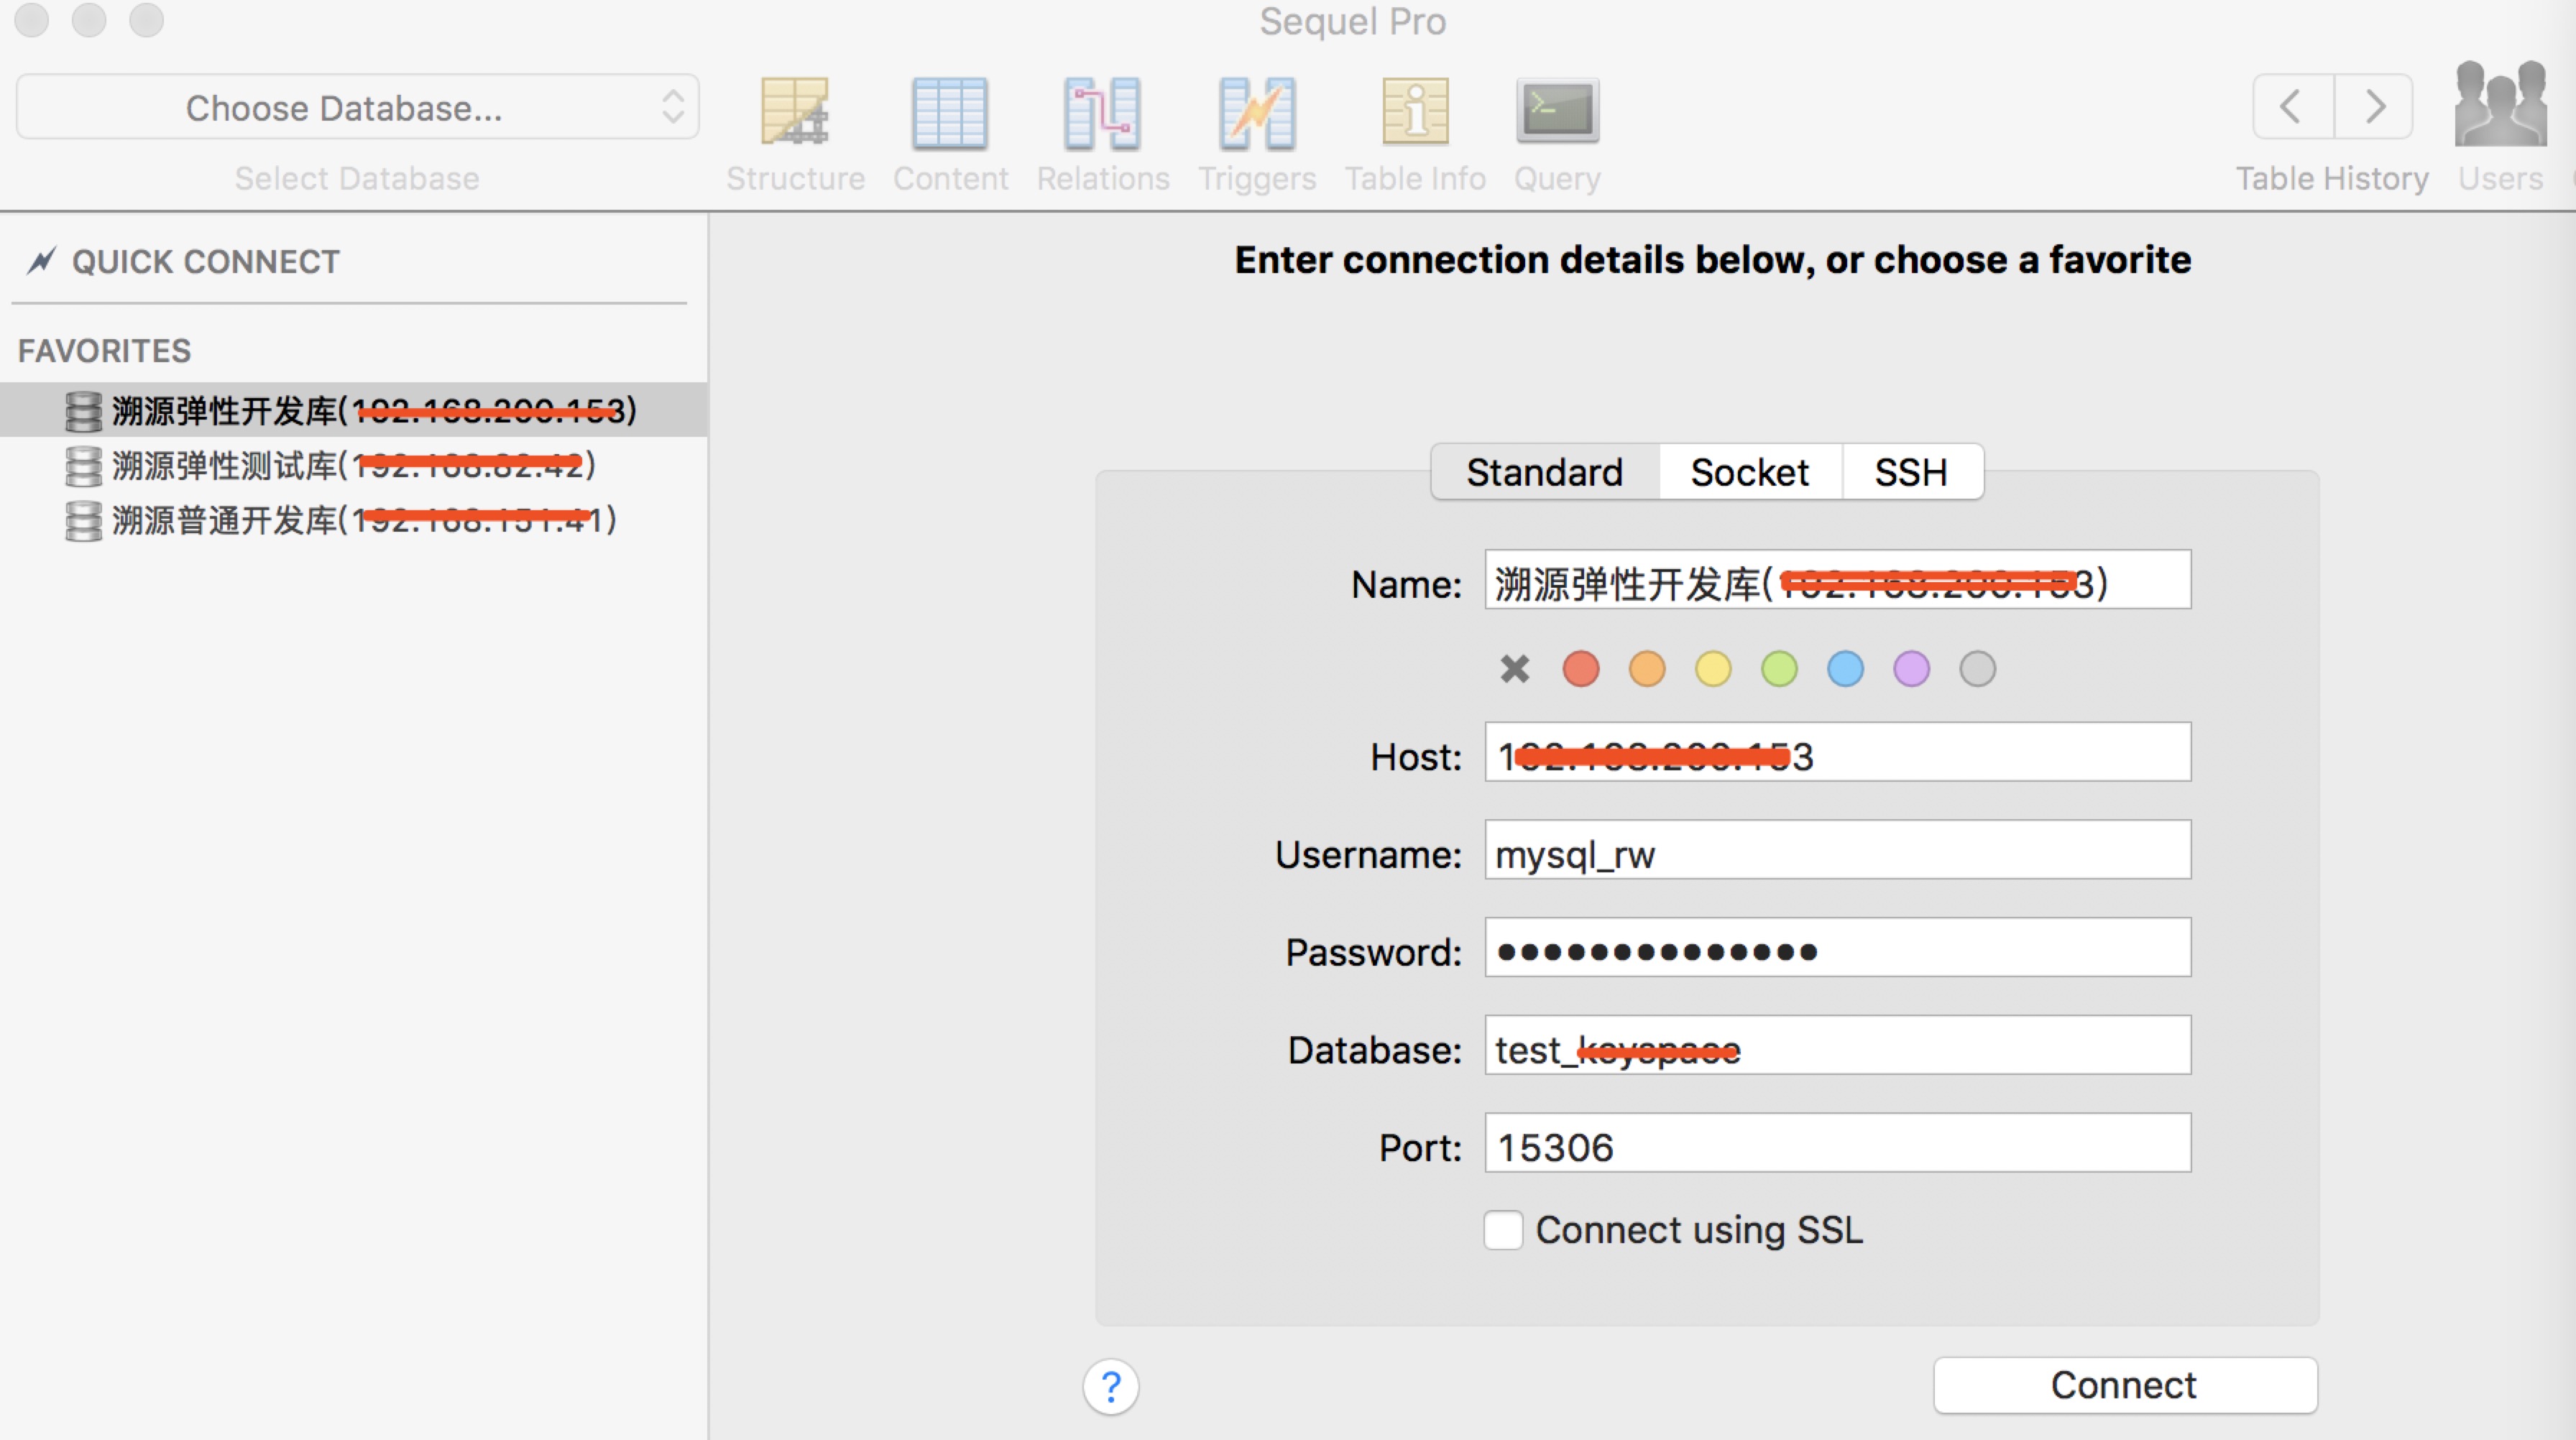
图形界面:
Mac007--Mysq服务端&客户端安装的更多相关文章
- chrony时间同步 服务端 客户端 安装配置
chrony时间同步 服务端 客户端 安装配置 原创内容http://www.cnblogs.com/elvi/p/7658021.html #!/bin/sh #运行环境 centos7 #chro ...
- NTP时间同步 服务端 客户端 自动化安装配置
NTP时间同步 服务端 客户端 自动化安装配置 原创内容 http://www.cnblogs.com/elvi/p/7657994.html #!/bin/sh #运行环境 centos6.cent ...
- SSR服务端一键安装脚本
支持新协议混淆,SSR服务端一键安装脚本 Shadowsocks-R 是项目 shadowsocks 的增强版,用于方便地产生各种协议接口.实现为在原来的协议外套一层编码和解码接口,不但可以伪装成 ...
- HubbleDotNet 最新绿色版,服务端免安装,基于eaglet 最后V1.2.8.9版本开发,bug修正,支持一键生成同步表
HubbleDotNet 是一个基于.net framework 的开源免费的全文搜索数据库组件.开源协议是 Apache 2.0.HubbleDotNet提供了基于SQL的全文检索接口,使用者只需会 ...
- TCP/IP网络编程之基于TCP的服务端/客户端(一)
理解TCP和UDP 根据数据传输方式的不同,基于网络协议的套接字一般分为TCP套接字和UDP套接字.因为TCP套接字是面向连接的,因此又称为基于流(stream)的套接字.TCP是Transmissi ...
- ORACLE服务端详细安装步骤(配图解)
ORACLE服务端的安装及配置 l 将下载的安装包解压缩,双击[setup.exe]文件,系统检查监听参数,耐心等待,完成后出现如下界面,电子邮件可不填,"我希望..."建议不勾选 ...
- react服务端/客户端,同构代码心得
FKP-REST是一套全栈javascript框架 react服务端/客户端,同构代码心得 作者:webkixi react服务端/客户端,同构代码心得 服务端,客户端同构一套代码,大前端的梦想, ...
- 基于JAX-WS的Web Service服务端/客户端 ;JAX-WS + Spring 开发webservice
一.基于JAX-WS的Web Service服务端/客户端 下面描述的是在main函数中使用JAX-WS的Web Service的方法,不是在web工程里访问,在web工程里访问,参加第二节. JAX ...
- JAVA WEBSERVICE服务端&客户端的配置及调用(基于JDK)
前言:我之前是从事C#开发的,因公司项目目前转战JAVA&ANDROID开发,由于对JAVA的各种不了解,遇到的也是重重困难.目前在做WEBSERVICE提供数据支持,看了网上相关大片的资料也 ...
随机推荐
- Ribbon远程调用
Ribbon是客户端的负载均衡机制,它有几种负载均衡机制.默认是轮询,我们也可以自定义规则.通过合理的分配网络请求来减小服务器的压力.项目都是注册到eureka服务器上.通过ribbon去调用其他服务 ...
- IOC详解
Ioc--控制反转详解(转载 http://www.cnblogs.com/qinqinmeiren/archive/2011/04/02/2151697.html) 本文转载与百度知道,简单例子让 ...
- vue自定义指令获取焦点及过滤器修改时间
<template id="comp3"> <div id="app"> <model :list="selectedl ...
- Python单例模式的设计与实现【完美版】
目录 1. 按 2. 本文地址 3. 通过继承单例父类来实现 4. 使用装饰器实现 4.1. 懒汉式 4.2. 饿汉式 4.2.1. 未加锁版 4.2.2. 加锁版 1. 按 众所周知,对象是解决继承 ...
- spring boot 加载指定xml
方法一:使用@ImportResource 方法二:在test中 @ContextConfiguration(locations = "classpath:spring-profile.xm ...
- Sql Server 压缩数据库占用空间
1.删除数据库库中不必要的数据2. 在数据库上右击,任务,收缩,文件,在收缩操作上选择在未使用的空间前重新组织页,将文件收缩到的最后一行为最小为XXM,在前面的输入框中填入该值,然后点击确定3.分离该 ...
- 发布程序包到Nuget
今天想着别人都把自己做的程序包发布到nuget上去开放给别人使用,那么我是否也能这么干呢,于是就研究了一番,发现还真可以,而且非常简单,接下来就介绍下发布自己的程序包到nuget上的方法. 一.创建公 ...
- fiddler 手机抓包,CS端抓包 使用记录
1.允许远程连接 2.忽略https证书错误 3.设置代理 4.重启fiddle 5.PC客户端抓包分工具FIddler+Proxifer https://blog.csdn.net/sunbo_cs ...
- [python 学习] 类
#!/usr/bin/python # -*- encoding:utf-8 -*- class Animal: animal_num = 0 class Dog(Animal): #类帮助文档 't ...
- Redis之数据类型
一.概念: Redis:一个开源.支持网络.基于内存.键值对存储数据库. 特点:它可以支持多种数据类型. 二.数据类型 1)Redis String 具体说明: 一般的普通的k到v一个映射是Strin ...