Version Controlling with Git in Visual Studio Code and Azure DevOps
Overview
Azure DevOps supports two types of version control, Git and Team Foundation Version Control (TFVC). Here is a quick overview of the two version control systems:
Team Foundation Version Control (TFVC): TFVC is a centralized version control system. Typically, team members have only one version of each file on their dev machines. Historical data is maintained only on the server. Branches are path-based and created on the server.
Git: Git is a distributed version control system. Git repositories can live locally (such as on a developer’s machine). Each developer has a copy of the source repository on their dev machine. Developers can commit each set of changes on their dev machine and perform version control operations such as history and compare without a network connection.
Git is the default version control provider for new projects. You should use Git for version control in your projects unless you have a specific need for centralized version control features in TFVC.
In this lab, you will learn how to establish a local Git repository, which can easily be synchronized with a centralized Git repository in Azure DevOps. In addition, you will learn about Git branching and merging support. You will use Visual Studio Code, but the same processes apply for using any Git-compatible client with Azure DevOps.
Prerequisites
Visual Studio Code with the C# extension installed.
Git for Windows 2.21.0 or later.
This lab requires you to complete task 1 from the prerequisite instructions.
Exercise 1: Configuring the lab environment
Task 1: Configuring Visual Studio Code
Open Visual Studio Code. In this task, you will configure a Git credential helper to securely store the Git credentials used to communicate with Azure DevOps. If you have already configured a credential helper and Git identity, you can skip to the next task.
From the main menu, select Terminal | New Terminal to open a terminal window.
Execute the command below to configure a credential helper.
git config --global credential.helper wincred
The commands below will configure your user name and email for Git commits. Replace the parameters with your preferred user name and email and execute them.
 git config --global user.name "John Doe"

 git config --global user.email johndoe@example.com
Exercise 2: Cloning an existing repository
Task 1: Cloning an existing repository
In a browser tab, navigate to your team project on Azure DevOps.
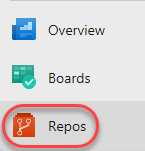
Getting a local copy of a Git repo is called “cloning”. Every mainstream development tool supports this and will be able to connect to Azure Repos to pull down the latest source to work with. Navigate to the Repos hub.
Click Clone.
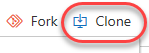
Click the Copy to clipboard button next to the repo clone URL. You can plug this URL into any Git-compatible tool to get a copy of the codebase.

Open an instance of Visual Studio Code.
Press Ctrl+Shift+P to show the Command Palette. The Command Palette provides an easy and convenient way to access a wide variety of tasks, including those provided by 3rd party extensions.
Execute the Git: Clone command. It may help to type “Git” to bring it to the shortlist.
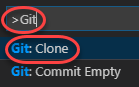
Paste in the URL to your repo and press Enter.

Select a local path to clone the repo to.
When prompted, log in to your Azure DevOps account.
Once the cloning has completed, click Open Repository. You can ignore any warnings raised about opening the projects. The solution may not be in a buildable state, but that’s okay since we’re going to focus on working with Git and building the project itself is not necessary.

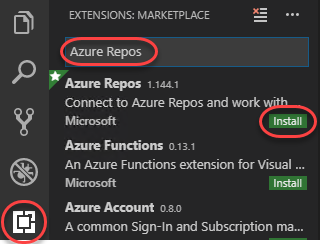
Task 2: Installing the Azure Repos extension for Visual Studio Code
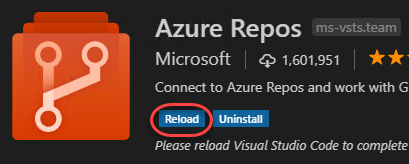
The Azure Repos extension provides convenient access to many features of Azure DevOps. From the Extensions tab, search for “Azure Repos” and click Install to install it.
Click Reload once the extension has finished installing. If this option is not available, reopen Visual Studio Code.
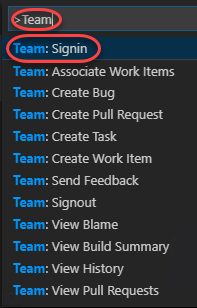
Press Ctrl+Shift+P to show the Command Palette.
Search for “Team” to see all the new commands that are now available for working with Azure Repos. Select Team: Signin.
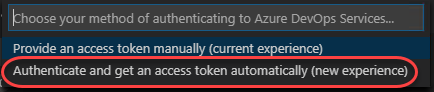
Select Authenticate and get an access token automatically. Note that you could alternatively provide the token created earlier if following the manual path.
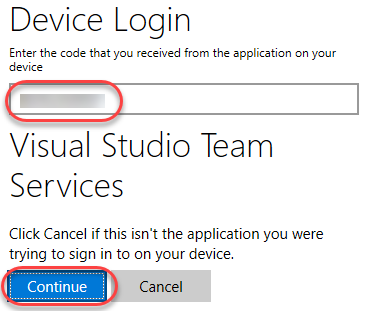
Copy the provided token and press Enter to launch a browser tab.

Paste the code in to the login box and click Continue.
Select the Microsoft account associated with your Azure DevOps account.
When the process has complete, close the browser tab.
Exercise 3: Saving work with commits
When you make changes to your files, Git will record the changes in the local repository. You can select the changes that you want to commit by staging the changes. Commits are always made against your local Git repository, so you don’t have to worry about the commit being perfect or ready to share with others. You can make more commits as you continue to work and push the changes to others when they are ready to be shared.
What’s in a commit?
Git commits consists of the following:
The file(s) changed in the commit. Git keeps the contents of all file changes in your repo in the commits. This keeps it fast and allows intelligent merging.
A reference to the parent commit(s). Git manages your code history using these references.
A message describing a commit. You give this message to Git when you create the commit. It’s a good idea to keep this message descriptive, but to the point.
Task 1: Committing changes
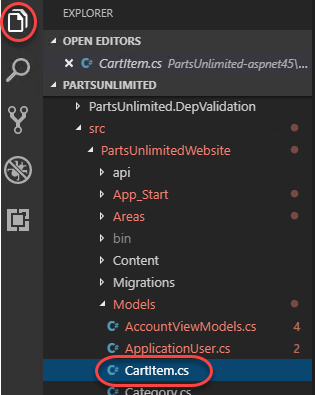
From the Explorer tab, open /PartsUnlimited-aspnet45/src/PartsUnlimitedWebsite/Models/CartItem.cs.
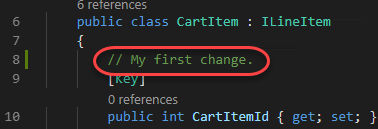
Add a comment to the file. It doesn’t really matter what the comment is since the goal is just to make a change. Press Ctrl+S to save the file.
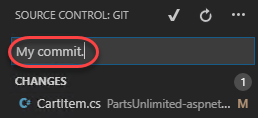
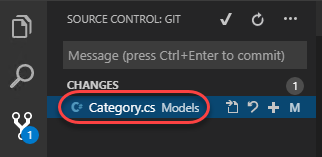
Select the Source Control tab to see the one change to the solution.

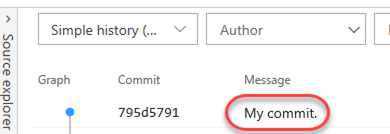
Enter a commit message of “My commit” and press Ctrl+Enter to commit it locally.
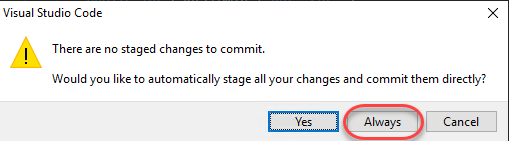
If asked whether you would like to automatically stage your changes and commit them directly, click Always. We will discuss staging later in the lab.
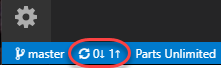
Click the Synchronize Changes button to synchronize your changes with the server. Confirm the sync if prompted.

Task 2: Reviewing commits
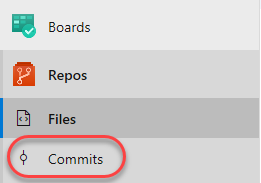
Switch to the Azure DevOps browser tab. You can review the latest commits on Azure DevOps under the Commits tab of the Repos hub.
The recent commit should be right at the top.
Task 3: Staging changes
Staging changes allows you to selectively add certain files to a commit while passing over the changes made in other files.
Return to Visual Studio Code.
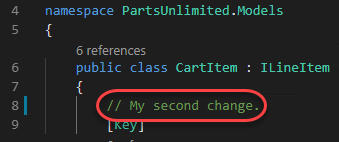
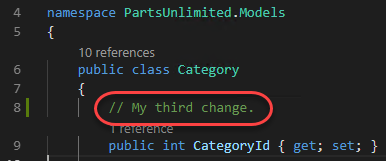
Update the open CartItem.cs class by editing the comment you made earlier and saving the file.
Open Category.cs as well.
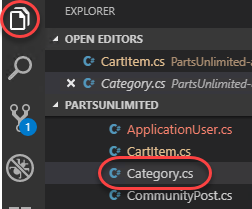
Add a new comment to Category.cs so there will be two files with changes. Save the file.
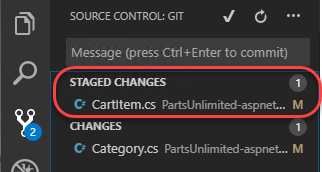
From the Source Control tab, click the Stage Changes button for CartItem.cs.
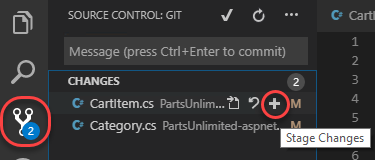
This will prepare CartItem.cs for committing without Category.cs.
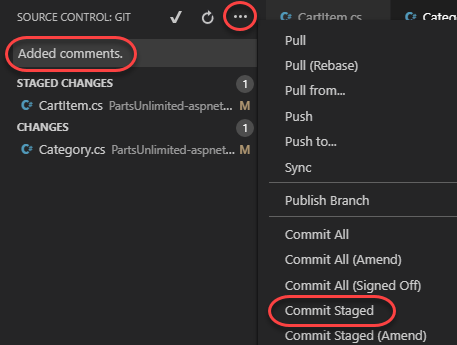
Enter a comment of “Added comments”. From the More Actions dropdown, select Commit Staged.
Click the Synchronize Changes button to synchronize the committed changes with the server. Note that since only the staged changes were committed, the other changes are still pending locally.
Exercise 4: Reviewing history
Git uses the parent reference information stored in each commit to manage a full history of your development. You can easily review this commit history to find out when file changes were made and determine differences between versions of your code using the terminal or from one of the many Visual Studio Code extensions available. You can also review changes using the Azure DevOps portal.
Git’s use of the Branches and Merges feature works through pull requests, so the commit history of your development doesn’t necessarily form a straight, chronological line. When you use history to compare versions, think in terms of file changes between two commits instead of file changes between two points in time. A recent change to a file in the master branch may have come from a commit created two weeks ago in a feature branch but was only merged yesterday.
Task 1: Comparing files
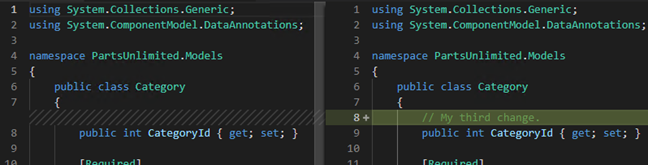
In the Source Control tab, select Category.cs.
A comparison view is opened to enable you to easily locate the changes you’ve made. In this case, it’s just the one comment.
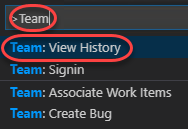
Press Ctrl|Shift+P to open the Command Palette.
Start typing “Team” and select Team: View History when it becomes available. This is a feature of the Azure Repos extension that makes it easy to jump right to the history of this file in a new browser tab.
Note the history of Category.cs. Close the newly created tab, which will should return you to the Commits tab from earlier.

Scroll down in the Commits view to locate some of the source branches and merges. These provide a convenient way to visualize when and how changes were made to the source.
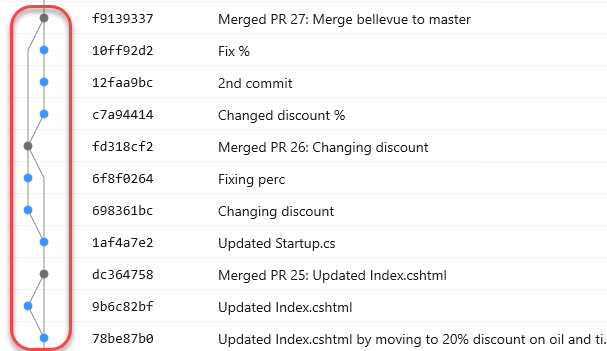
From the dropdown for Merged PR 27, select Browse Files.
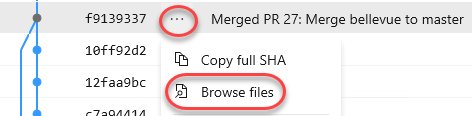
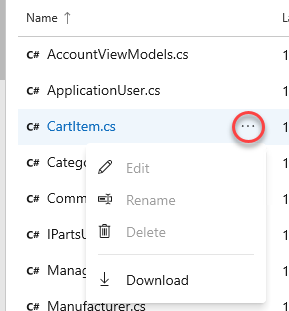
This view offers the ability to navigate around the state of the source at that commit so you can review and download those files.
Exercise 5: Working with branches
You can manage the work in your Azure DevOps Git repo from the Branches view on the web. You can also customize the view to track the branches you care most about so you can stay on top of changes made by your team.
Committing changes to a branch will not affect other branches and you can share branches with others without having to merge the changes into the main project. You can also create new branches to isolate changes for a feature or a bug fix from your master branch and other work. Since the branches are lightweight, switching between branches is quick and easy. Git does not create multiple copies of your source when working with branches, but rather uses the history information stored in commits to recreate the files on a branch when you start working on it. Your Git workflow should create and use branches for managing features and bugfixes. The rest of the Git workflow, such as sharing code and reviewing code with pull requests, all work through branches. Isolating work in branches makes it very simple to change what you are working on by simply changing your current branch.
Task 1: Creating a new branch in your local repository
Return to Visual Studio Code.
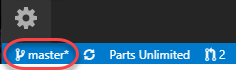
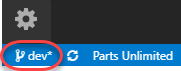
Click the master branch from the bottom left.
Select Create new branch from….
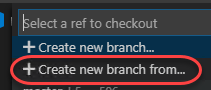
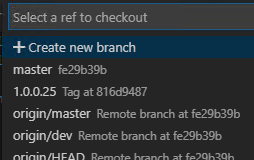
Enter the name “dev” for the new branch and press Enter.

Select the master as the reference branch.
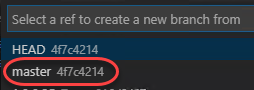
You are now working on that branch.
Task 2: Working with branches
Git keeps track of which branch you are working on and makes sure that when you checkout a branch your files match the most recent commit on the branch. Branches let you work with multiple versions of the source code in the same local Git repository at the same time. You can use Visual Studio Code to publish, check out and delete branches.
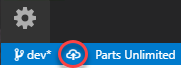
Click the Publish changes button next to the branch.
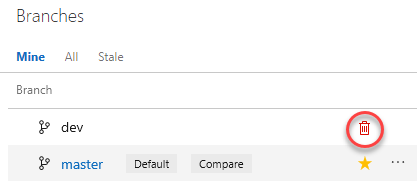
From the Azure DevOps browser tab, select Branches.
You should see the newly pushed dev branch. Click the Delete branch button to delete it. Confirm the delete.
Return to Visual Studio Code.
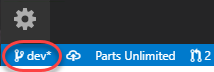
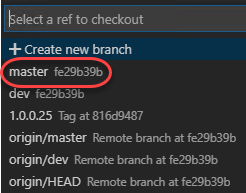
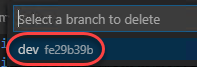
Click the dev branch.
Note that there are two dev branches listed. The local (dev) branch is there because it’s not deleted when the server branch is deleted. The server (origin/dev) is there because it hasn’t been pruned. Select the master branch to check it out.
Press Ctrl+Shift+P to open the Command Palette.
Start typing “Git: Delete” and select Git: Delete Branch when it becomes visible.
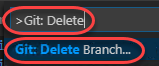
There is only one local branch to delete, so select it.
Click the master branch.

Note that the local dev branch is gone, but the remote origin/dev is still showing.
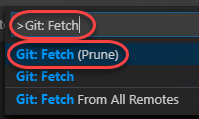
Press Ctrl+Shift+P to open the Command Palette.
Start typing “Git: Fetch” and select Git: Fetch (Prune) when it becomes visible. This command will update the origin branches in the local snapshot and delete those that are no longer there.
You can check in on exactly what these tasks are doing by selecting the Output window at the bottom of the screen.
Note that if you don’t see the Git logs in the output console, you may need to select Git as the source.

Click the master branch.
The origin/dev branch should no longer be in the list.
Exercise 6: Managing branches from Azure DevOps
In addition to all the functionality available in Visual Studio Code, you can also manage your repo branches from the Azure DevOps portal.
Task 1: Creating a new branch
Switch to the Azure DevOps browser tab.
Navigate to Repos | Branches. Click New branch.

Enter a name of “release” for the new branch. Use the Work items to link dropdown to select one or more work items to link to this new branch. Click Create branch to create it.

After the branch has been created, it will be available in the list.
Return to Visual Studio Code.
Press Ctrl+Shift+P to open the Command Palette.
Start typing “Git: Fetch” and select Git: Fetch when it becomes visible. This command will update the origin branches in the local snapshot.

Click the master branch.

Select origin/release. This will create a new local branch called “release” and check it out.

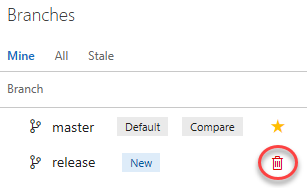
Task 2: Deleting a branch
Return to Azure DevOps and click the Delete button that appears when you hover over the release branch to delete it.
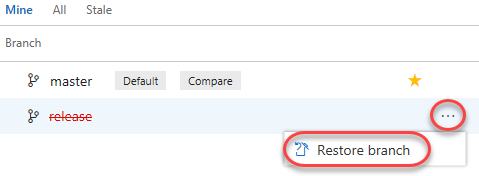
However, maybe we should keep it around for a little longer. From its context menu, select Restore branch.
Task 3: Locking a branch
Locking is ideal for preventing new changes that might conflict with an important merge or to place a branch into a read-only state. Alternatively, you can use branch policies and pull requests instead of locking if you just want to ensure that changes in a branch are reviewed before they are merged.
Locking does not prevent cloning of a repo or fetching updates made in the branch into your local repo. If you lock a branch, share with your team the reason why and make sure they know what to do to work with the branch after it is unlocked.
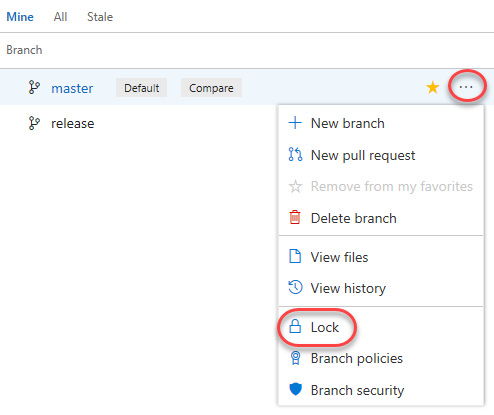
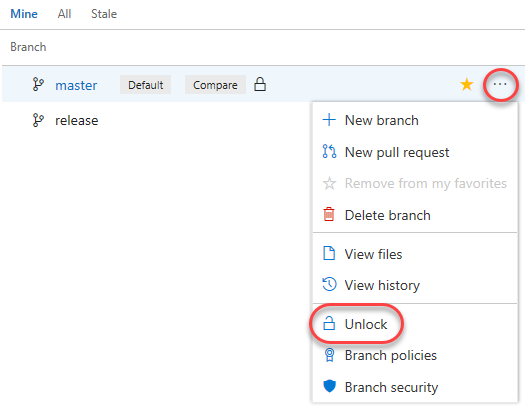
From the master context menu, select Lock.
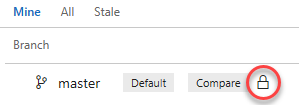
The branch is now locked.
Now Unlock the branch using the same process.
Task 4: Tagging a release
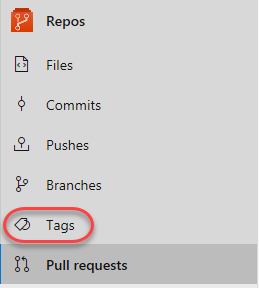
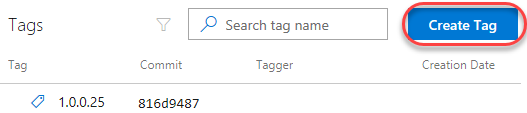
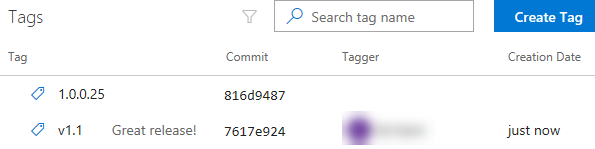
While it may not seem like much, the product team has decided that this version of the site is exactly what’s needed for v1.1. In order to mark it as such, navigate to the Tags tab.
Click Create Tag.
Enter a name of “v1.1” and a Description of “Great release!”. Click Create.
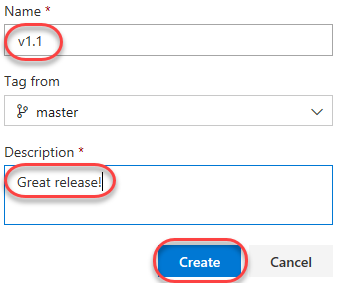
You have now tagged the project at this release. You could tag commits for a variety of reasons and Azure DevOps offers the flexibility to edit and delete them, as well as manage their permissions.
Exercise 7: Managing repositories
You can create Git repos in team projects to manage your project’s source code. Each Git repo has its own set of permissions and branches to isolate itself from other work in your project.
Task 1: Creating a new repo from Azure DevOps
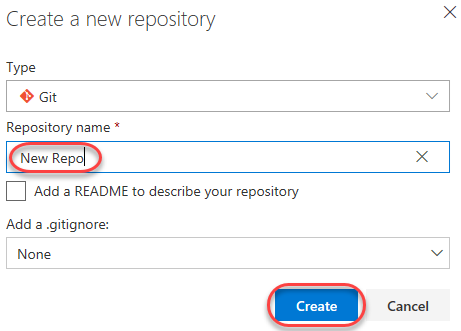
From the project Add dropdown, select New repository.

Set the Repository name to “New Repo”. Note that you also have the option to create a file named README.md. This would be the default markdown file that is rendered when someone navigates to the repo root in a browser. Additionally, you can preconfigure the repo with a .gitignore file. This file specifies which files, based on naming pattern and/or path, to ignore from source control. There are multiple templates available that include the common patterns and paths to ignore based on the project type you are creating. Click Create.
That’s it. Your repo is ready. You can now clone it with Visual Studio or your tools of choice.

Task 2: Deleting and renaming Git repos
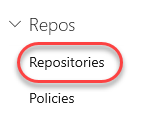
Sometimes you’ll have a need to rename or delete a repo, which is just as easy. Open Project settings.

Select Repositories under Repos.
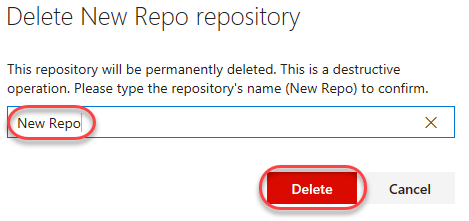
From the New Repo context menu, select Delete repository. Alternatively, you could rename it here.
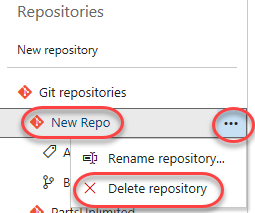
Enter the name “New Repo” to confirm the repo and click Delete.
来源:https://azuredevopslabs.com/labs/azuredevops/git/
Version Controlling with Git in Visual Studio Code and Azure DevOps的更多相关文章
- Visual Studio Code初探
作者:Grey 本文的GIF动画均使用ScreenToGif进行录制. 摘要 微软今年发布了一款运行于 OS X,Windows 和 Linux 之上的免费跨平台编辑器: Visual Studio ...
- Visual Studio Code 使用Git进行版本控制
Visual Studio Code 使用Git进行版本控制 本来认为此类教程,肯定是满网飞了.今天首次使用VS Code的Git功能,翻遍了 所有中文教程,竟没有一个靠谱的.遂动笔写一篇. 请确保你 ...
- Visual Studio Code 显示隐藏的.git文件和目录
在默认设置中,Visual Studio Code 将下列文件文件排除在显示列表中: "files.exclude": { "**/.git": true, & ...
- 如何在"Visual Studio Code"中使用" Git" 进行版本控制
如何在"Visual Studio Code"中使用" Git" 进行版本控制 本来认为此类教程,肯定是满网飞了.今天首次使用VS Code的Git功能,翻遍了 ...
- Visual Studio Code 配置指南
Visual Studio Code (简称 VS Code)是由微软研发的一款免费.开源的跨平台文本(代码)编辑器.在我看来它是「一款完美的编辑器」. 本文是有关 VS Code 的特性介绍与配置指 ...
- 打造TypeScript的Visual Studio Code开发环境
打造TypeScript的Visual Studio Code开发环境 本文转自:https://zhuanlan.zhihu.com/p/21611724 作者: 2gua TypeScript是由 ...
- 剖析并利用Visual Studio Code在Mac上编译、调试c#程序
0x00 前言 一周多以前的微软的Build大会上,微软发布了一个让很多人眼前一亮的工具,也是本文的主角——Visual Studio Code.很多使用Windows的朋友都很高兴,认为又多了一个很 ...
- ASP.NET Core 中文文档 第二章 指南(1)用 Visual Studio Code 在 macOS 上创建首个 ASP.NET Core 应用程序
原文:Your First ASP.NET Core Application on a Mac Using Visual Studio Code 作者:Daniel Roth.Steve Smith ...
- 剖析并利用Visual Studio Code在Mac上编译、调试c#程序【转】
0x00 前言 一周多以前的微软的Build大会上,微软发布了一个让很多人眼前一亮的工具,也是本文的主角——Visual Studio Code.很多使用Windows的朋友都很高兴,认为又多了一个很 ...
随机推荐
- java 用RGB生成图片动态命名
import java.awt.Color; import java.awt.Graphics2D; import java.awt.image.BufferedImage; import java. ...
- Codeforces Round #596 Div1 A~E题解
我好菜啊 A 题意: 定义p-二进制数为2^k-p,给出n和p,求用最小个数的p-二进制数来表示n 1<=n<=10^9,-1000<=p<=1000 题解: 猜结论,答案不会 ...
- 6389. 【NOIP2019模拟2019.10.26】小w学图论
题目描述 题解 之前做过一次 假设图建好了,设g[i]表示i->j(i<j)的个数 那么ans=∏(n-g[i]),因为连出去的必定会构成一个完全图,颜色互不相同 从n~1染色,点i的方案 ...
- 有关于TreeSet的自我理解
TreeSet是依靠TreeMap来实现的. TreeSet是一个有序集合,TreeSet中的元素将按照升序排列,缺省是按照自然排序进行排列,意味着TreeSet中的元素要实现Comparable接口 ...
- idea生成get/set方法
如图:
- SQL 基本查询语句
--使用数据库 use date go --创建表班级表 create table classInfo ( classNo ,),--主键约束使用primary key identity classN ...
- 修改mac默认python版本 为python3
mac一般自带python2.7 可以修改 ~/.bash_profile (具体的path取决于你的python3安装路径): vi ~/.bash_profile # 添加这一行 alias py ...
- malloc(50) 内存泄露 内存溢出 memory leak会最终会导致out of memory
https://en.wikipedia.org/wiki/Memory_leak In computer science, a memory leak is a type of resource l ...
- dojo 官方翻译 dojo/_base/array 版本1.10
官方地址:http://dojotoolkit.org/reference-guide/1.10/dojo/_base/array.html#dojo-base-array array模块dojo进行 ...
- Celery多任务结构
视图结构 pro_cel ├── celery_task# celery相关文件夹 │ ├── celery.py # celery连接和配置相关文件,必须叫这个名字 │ └── tasks1.py ...