【原创】bootstrap框架的学习 第八课 -[bootstrap表单]
Bootstrap 提供了下列类型的表单布局:
- 垂直表单(默认)
- 内联表单
- 水平表单
吹着表单或基本表单
- 向父 <form> 元素添加 role="form"。
- 把标签和控件放在一个带有 class .form-group 的 <div> 中。这是获取最佳间距所必需的。
- 向所有的文本元素 <input>、<textarea> 和 <select> 添加 class .form-control。
例子:
<!DOCTYPE html>
<html>
<head>
<title>Bootstrap 实例 - 内联表单</title>
<link href="http://libs.baidu.com/bootstrap/3.0.3/css/bootstrap.min.css" rel="stylesheet">
<script src="http://libs.baidu.com/jquery/2.0.0/jquery.min.js"></script>
<script src="http://libs.baidu.com/bootstrap/3.0.3/js/bootstrap.min.js"></script>
</head>
<body>
<form class="form-inline" role="form">

   <div class="form-group">

      <label class="sr-only" for="name">名称</label>

      <input type="text" class="form-control" id="name"

         placeholder="请输入名称">

   </div>

   <div class="form-group">

      <label class="sr-only" for="inputfile">文件输入</label>

      <input type="file" id="inputfile">

   </div>

   <div class="checkbox">

      <label>

      <input type="checkbox"> 请打勾

      </label>

   </div>

   <button type="submit" class="btn btn-default">提交</button>

</form>
</body>
</html>
效果图:

内联表单
如果需要创建一个表单,它的所有元素是内联的,向左对齐的,标签是并排的,请向 <form> 标签添加 class .form-inline。
<form class="form-inline" role="form">
<div class="form-group">
<label class="sr-only" for="name">名称</label>
<input type="text" class="form-control" id="name"
placeholder="请输入名称">
</div>
<div class="form-group">
<label class="sr-only" for="inputfile">文件输入</label>
<input type="file" id="inputfile">
</div>
<div class="checkbox">
<label>
<input type="checkbox"> 请打勾
</label>
</div>
<button type="submit" class="btn btn-default">提交</button>
</form>
- 默认情况下,Bootstrap 中的 input、select 和 textarea 有 100% 宽度。在使用内联表单时,您需要在表单控件上设置一个宽度。
- 使用 class .sr-only,您可以隐藏内联表单的标签。
效果图:
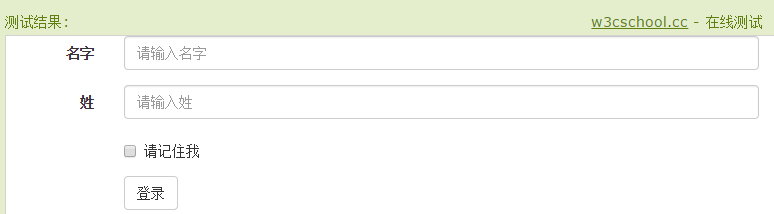
水平表单
水平表单与其他表单不仅标记的数量上不同,而且表单的呈现形式也不同。如需创建一个水平布局的表单,请按下面的几个步骤进行:
- 向父 <form> 元素添加 class .form-horizontal。
- 把标签和控件放在一个带有 class .form-group 的 <div> 中。
- 向标签添加 class .control-label。
<form class="form-horizontal" role="form">

   <div class="form-group">

      <label for="firstname" class="col-sm-2 control-label">名字</label>

      <div class="col-sm-10">

         <input type="text" class="form-control" id="firstname"

            placeholder="请输入名字">

      </div>

   </div>

   <div class="form-group">

      <label for="lastname" class="col-sm-2 control-label">姓</label>

      <div class="col-sm-10">

         <input type="text" class="form-control" id="lastname"

            placeholder="请输入姓">

      </div>

   </div>

   <div class="form-group">

      <div class="col-sm-offset-2 col-sm-10">

         <div class="checkbox">

            <label>

               <input type="checkbox"> 请记住我

            </label>

         </div>

      </div>

   </div>

   <div class="form-group">

      <div class="col-sm-offset-2 col-sm-10">

         <button type="submit" class="btn btn-default">登录</button>

      </div>

   </div>

</form>

效果图:
输入框(Input)
<form role="form">

  <div class="form-group">

    <label for="name">标签</label>

    <input type="text" class="form-control" placeholder="文本输入">

  </div>

 </form>

文本框(Textarea)
<form role="form">

  <div class="form-group">

    <label for="name">文本框</label>

    <textarea class="form-control" rows="3"></textarea>

  </div>

</form>
复选框((Checkbox)和单选框(Radio)
<label for="name">默认的复选框和单选按钮的实例</label>

<div class="checkbox">

   <label><input type="checkbox" value="">选项 1</label>

</div>

<div class="checkbox">

   <label><input type="checkbox" value="">选项 2</label>

</div>

<div class="radio">

   <label>

      <input type="radio" name="optionsRadios" id="optionsRadios1"

         value="option1" checked> 选项 1

   </label>

</div>

<div class="radio">

   <label>

      <input type="radio" name="optionsRadios" id="optionsRadios2"

         value="option2">

         选项 2 - 选择它将会取消选择选项 1

   </label>

</div>

<label for="name">内联的复选框和单选按钮的实例</label>

<div>

   <label class="checkbox-inline">

      <input type="checkbox" id="inlineCheckbox1" value="option1"> 选项 1

   </label>

   <label class="checkbox-inline">

      <input type="checkbox" id="inlineCheckbox2" value="option2"> 选项 2

   </label>

   <label class="checkbox-inline">

      <input type="checkbox" id="inlineCheckbox3" value="option3"> 选项 3

   </label>

   <label class="checkbox-inline">

      <input type="radio" name="optionsRadiosinline" id="optionsRadios3"

         value="option1" checked> 选项 1

   </label>

   <label class="checkbox-inline">

      <input type="radio" name="optionsRadiosinline" id="optionsRadios4"

         value="option2"> 选项 2

   </label>

</div>
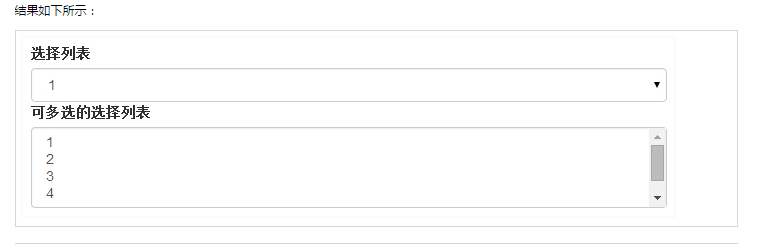
选择框(Select)
- 使用 multiple="multiple" 允许用户选择多个选项。
<form role="form">

   <div class="form-group">

      <label for="name">选择列表</label>

      <select class="form-control">

         <option>1</option>

         <option>2</option>

         <option>3</option>

         <option>4</option>

         <option>5</option>

      </select>

      <label for="name">可多选的选择列表</label>

      <select multiple class="form-control">

         <option>1</option>

         <option>2</option>

         <option>3</option>

         <option>4</option>

         <option>5</option>

      </select>

   </div>

</form>
静态控件
当您需要在一个水平表单内的表单标签后放置纯文本时,请在 <p> 上使用 class .form-control-static。
<form class="form-horizontal" role="form">

  <div class="form-group">

    <label class="col-sm-2 control-label">Email</label>

    <div class="col-sm-10">

      <p class="form-control-static">email@example.com</p>

    </div>

  </div>

  <div class="form-group">

    <label for="inputPassword" class="col-sm-2 control-label">密码</label>

    <div class="col-sm-10">

      <input type="password" class="form-control" id="inputPassword"

         placeholder="请输入密码">

    </div>

  </div>

</form>

表单控件状态
除了 :focus 状态(即,用户点击 input 或使用 tab 键聚焦到 input 上),Bootstrap 还为禁用的输入框定义了样式,并提供了表单验证的 class。
输入框焦点
当输入框 input 接收到 :focus 时,输入框的轮廓会被移除,同时应用 box-shadow。
禁用的输入框 input
如果您想要禁用一个输入框 input,只需要简单地添加 disabled 属性,这不仅会禁用输入框,还会改变输入框的样式以及当鼠标的指针悬停在元素上时鼠标指针的样式。
禁用的字段集 fieldset
对 <fieldset> 添加 disabled 属性来禁用 <fieldset> 内的所有控件。
验证状态
Bootstrap 包含了错误、警告和成功消息的验证样式。只需要对父元素简单地添加适当的 class(.has-warning、 .has-error 或 .has-success)即可使用验证状态。
<form class="form-horizontal" role="form">
<div class="form-group">
<label class="col-sm-2 control-label">聚焦</label>
<div class="col-sm-9">
<input class="form-control" id="focusedInput" type="text"
value="该输入框获得焦点...">
</div>
</div>
<div class="form-group">
<label for="inputPassword" class="col-sm-2 control-label">
禁用
</label>
<div class="col-sm-9">
<input class="form-control" id="disabledInput" type="text"
placeholder="该输入框禁止输入..." disabled>
</div>
</div>
<fieldset disabled>
<div class="form-group">
<label for="disabledTextInput" class="col-sm-2 control-label">
禁用输入(Fieldset disabled)
</label>
<div class="col-sm-10">
<input type="text" id="disabledTextInput" class="form-control"
placeholder="禁止输入">
</div>
</div>
<div class="form-group">
<label for="disabledSelect" class="col-sm-2 control-label">
禁用选择菜单(Fieldset disabled)
</label>
<div class="col-sm-10">
<select id="disabledSelect" class="form-control">
<option>禁止选择</option>
</select>
</div>
</div>
</fieldset>
<div class="form-group has-success">
<label class="col-sm-2 control-label" for="inputSuccess">
输入成功
</label>
<div class="col-sm-10">
<input type="text" class="form-control" id="inputSuccess">
</div>
</div>
<div class="form-group has-warning">
<label class="col-sm-2 control-label" for="inputWarning">
输入警告
</label>
<div class="col-sm-10">
<input type="text" class="form-control" id="inputWarning">
</div>
</div>
<div class="form-group has-error">
<label class="col-sm-2 control-label" for="inputError">
输入错误
</label>
<div class="col-sm-10">
<input type="text" class="form-control" id="inputError">
</div>
</div>
</form>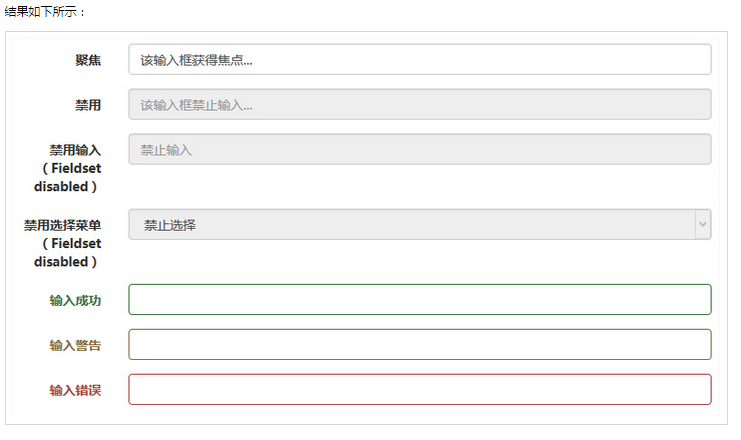
表单控件大小
您可以分别使用 class .input-lg 和 .col-lg-* 来设置表单的高度和宽度。
<form role="form">
<div class="form-group">
<input class="form-control input-lg" type="text"
placeholder=".input-lg">
</div>
<div class="form-group">
<input class="form-control" type="text" placeholder="默认输入">
</div>
<div class="form-group">
<input class="form-control input-sm" type="text"
placeholder=".input-sm">
</div>
<div class="form-group">
</div>
<div class="form-group">
<select class="form-control input-lg">
<option value="">.input-lg</option>
</select>
</div>
<div class="form-group">
<select class="form-control">
<option value="">默认选择</option>
</select>
</div>
<div class="form-group">
<select class="form-control input-sm">
<option value="">.input-sm</option>
</select>
</div>
<div class="row">
<div class="col-lg-5">
<input type="text" class="form-control" placeholder=".col-lg-2">
</div>
<div class="col-lg-3">
<input type="text" class="form-control" placeholder=".col-lg-3">
</div>
<div class="col-lg-4">
<input type="text" class="form-control" placeholder=".col-lg-4">
</div>
</div>
</form>
【原创】bootstrap框架的学习 第八课 -[bootstrap表单]的更多相关文章
- 【原创】bootstrap框架的学习 第七课 -[bootstrap表格]
Bootstrap 表格 标签 描述 <table> 为表格添加基础样式. <thead> 表格标题行的容器元素(<tr>),用来标识表格列. <tbody& ...
- 【原创】bootstrap框架的学习 第六课[bootstrap代码]
Bootstrap 允许您以两种方式显示代码: 第一种是 <code> 标签.如果您想要内联显示代码,那么您应该使用 <code> 标签. 第二种是 <pre> 标 ...
- Asp.net MVC4高级编程学习笔记-模型学习第五课MVC表单和HTML辅助方法20171101
MVC表单和HTML辅助方法 一.表单的使用. 表单中的action与method特性.Action表示表单要提交往那里,因此这里就有一个URL.这个URL可以是相对或绝对地址.表单默认的method ...
- 【原创】bootstrap框架的学习 第五课
一.Bootstrap 中定义了所有的 HTML 标题(h1 到 h6)的样式. <!DOCTYPE html> <html> <head> <title&g ...
- Elasticsearch7.X 入门学习第八课笔记-----索引模板和动态模板
原文:Elasticsearch7.X 入门学习第八课笔记-----索引模板和动态模板 版权声明:本文为博主原创文章,遵循CC 4.0 BY-SA版权协议,转载请附上原文出处链接和本声明. 本文链接: ...
- go微服务框架kratos学习笔记八 (kratos的依赖注入)
目录 go微服务框架kratos学习笔记八(kratos的依赖注入) 什么是依赖注入 google wire kratos中的wire Providers injector(注入器) Binding ...
- ng2 学习笔记(二)表单及表单验证
在上一篇文章中提到了表单,只说了表单的数据绑定,这一篇文章主要讲一下表单验证,为什么把表单单独拿出来学习,主要是因为,表单是商业应用的支柱,我们用它来执行登录.求助.下单.预订机票.安排会议,以及不计 ...
- Django学习笔记(五)—— 表单
疯狂的暑假学习之 Django学习笔记(五)-- 表单 參考:<The Django Book> 第7章 1. HttpRequest对象的信息 request.path ...
- Bootstrap历练实例:响应式导航(带有表单)
<!DOCTYPE html><html><head><meta http-equiv="Content-Type" content=&q ...
随机推荐
- 1774: [Usaco2009 Dec]Toll 过路费
1774: [Usaco2009 Dec]Toll 过路费 Time Limit: 10 Sec Memory Limit: 64 MBSubmit: 263 Solved: 154[Submit ...
- Weexpack 使用教程
简介 weexpack 是 weex 新一代的工程开发套件,是基于weex快速搭建应用原型的利器.它能够帮助开发者通过命令行创建weex工程,添加相应平台的weex app模版,并基于模版从本地.Gi ...
- golang http server分析(一)
http:http请求过程实质上是一个tcp连接通信,具体通过socket接口编码实现 在go中是通过listenAndServer()方法对外提供了一个http服务,在该方法中完成了socket的通 ...
- Linux系统启动过程详解
启动第一步--加载BIOS当你打开计算机电源,计算机会首先加载BIOS信息,BIOS信息是如此的重要,以至于计算机必须在最开始就找到它.这是因为BIOS中包含了CPU的相关信息.设备启动顺序信息.硬盘 ...
- Mobiscroll日期插件使用
相关资源 官方帮助文档:https://docs.mobiscroll.com/3-0-1 导入资源文件 <link href="${webRoot}/template/green/w ...
- HTML学习笔记汇总
笔记几乎涵盖了日常开发中全部的知识点以及相关注意事项 想要学习网页制作的初学者可以通过本篇笔记初步掌握HTML的使用,也可以将该笔记作为查阅资料查看 HTML简单结构 <html> < ...
- 2017-3-22 HTML 表单 、框架
表单:<form action="" method="get/post" ></form> 表单元素:12个 1.文本类 文本框:< ...
- SqlCommandBuilder类是如何构建T-Sql语句
本篇博客默认你看了[DataTable中AcceptChanges()方法的DataRowRowState属性]这篇博客. 在使用SqlCommandBuilder很简单,就是创建一个SqlComma ...
- Java单例模式再加强——按组多单例
最近要使用alibaba的rocket mq(我们公司对其进行了封装,使其运行在dotNet平台上,Java还是和原生的差不多,涉及公司的内容本文不会提及),其中 在生产者组这一块,建议是用单例模式的 ...
- 简学Python第七章__class面向对象高级用法与反射
Python第七章__class面向对象高级用法与反射 欢迎加入Linux_Python学习群 群号:478616847 目录: Python中关于oop的常用术语 类的特殊方法 元类 反射 一.P ...