html canvas-nest.js 源码
// canvas_width || r.x canvas_height || r.y = e.max / 2 && (r.x -= 0.03 * x_dist, r.y -= 0.03 * y_dist), //靠近的时候加速
d = (e.max - dist) / e.max,
context.beginPath(),
context.lineWidth = d / 2,
context.strokeStyle = "rgba(" + config.c + "," + (d + 0.2) + ")",
context.moveTo(r.x, r.y),
context.lineTo(e.x, e.y),
context.stroke());
}
}
}), frame_func(draw_canvas);
}
//创建画布,并添加到body中
var the_canvas = document.createElement("canvas"), //画布
config = get_config_option(), //配置
canvas_id = "c_n" + config.l, //canvas id
context = the_canvas.getContext("2d"), canvas_width, canvas_height,
frame_func = window.requestAnimationFrame || window.webkitRequestAnimationFrame || window.mozRequestAnimationFrame || window.oRequestAnimationFrame || window.msRequestAnimationFrame || function(func) {
window.setTimeout(func, 1000 / 45);
}, random = Math.random,
current_point = {
x: null, //当前鼠标x
y: null, //当前鼠标y
max: 20000 // 圈半径的平方
},
all_array;
the_canvas.id = canvas_id;
the_canvas.style.cssText = "position:fixed;top:0;left:0;z-index:" + config.z + ";opacity:" + config.o;
get_by_tagname("body")[0].appendChild(the_canvas);
//初始化画布大小
set_canvas_size();
window.onresize = set_canvas_size;
//当时鼠标位置存储,离开的时候,释放当前位置信息
window.onmousemove = function(e) {
e = e || window.event;
current_point.x = e.clientX;
current_point.y = e.clientY;
}, window.onmouseout = function() {
current_point.x = null;
current_point.y = null;
};
//随机生成config.n条线位置信息
for (var random_points = [], i = 0; config.n > i; i++) {
var x = random() * canvas_width, //随机位置
y = random() * canvas_height,
xa = 2 * random() - 1, //随机运动方向
ya = 2 * random() - 1;
// 随机点
random_points.push({
x: x,
y: y,
xa: xa,
ya: ya,
max: 6000 //沾附距离
});
}
all_array = random_points.concat([current_point]);
//0.1秒后绘制
setTimeout(function() {
draw_canvas();
}, 100);
}();
// ]]>
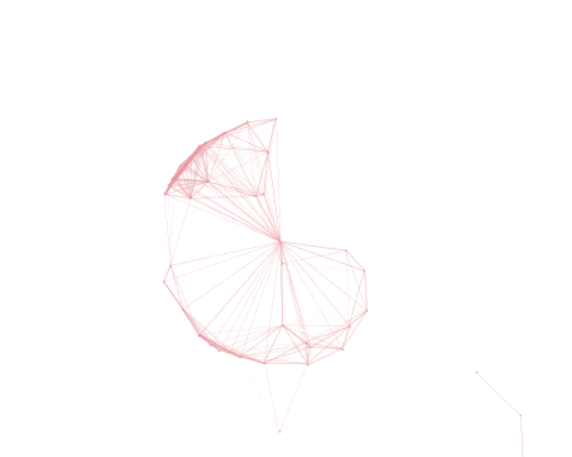
canvas-nest.js 这个js文件可以用来实现炫酷的线条与鼠标进行交互的功能,具体效果如图所示
js具体源码如下:
/**
     * Copyright (c) 2016 hustcc
     * License: MIT
     * Version: %%GULP_INJECT_VERSION%%
     * GitHub: https://github.com/hustcc/canvas-nest.js
    **/
    ! function() {
      //封装方法,压缩之后减少文件大小
      function get_attribute(node, attr, default_value) {
        return node.getAttribute(attr) || default_value;
      }
      //封装方法,压缩之后减少文件大小
      function get_by_tagname(name) {
        return document.getElementsByTagName(name);
      }
      //获取配置参数
      function get_config_option() {
        var scripts = get_by_tagname("script"),
          script_len = scripts.length,
          script = scripts[script_len - 1]; //当前加载的script
        return {
          l: script_len, //长度,用于生成id用
          z: get_attribute(script, "zIndex", -1), //z-index
          o: get_attribute(script, "opacity", 0.5), //opacity
          c: get_attribute(script, "color", "0,0,0"), //color
          n: get_attribute(script, "count", 99) //count
        };
      }
      //设置canvas的高宽
      function set_canvas_size() {
        canvas_width = the_canvas.width = window.innerWidth || document.documentElement.clientWidth || document.body.clientWidth,
        canvas_height = the_canvas.height = window.innerHeight || document.documentElement.clientHeight || document.body.clientHeight;
      }

      //绘制过程
      function draw_canvas() {
        context.clearRect(0, 0, canvas_width, canvas_height);
        //随机的线条和当前位置联合数组
        var e, i, d, x_dist, y_dist, dist; //临时节点
        //遍历处理每一个点
        random_points.forEach(function(r, idx) {
          r.x += r.xa,
          r.y += r.ya, //移动
          r.xa *= r.x > canvas_width || r.x < 0 ? -1 : 1,
          r.ya *= r.y > canvas_height || r.y < 0 ? -1 : 1, //碰到边界,反向反弹
          context.fillRect(r.x - 0.5, r.y - 0.5, 1, 1); //绘制一个宽高为1的点
          //从下一个点开始
          for (i = idx + 1; i < all_array.length; i++) {
            e = all_array[i];
            // 当前点存在
            if (null !== e.x && null !== e.y) {
              x_dist = r.x - e.x; //x轴距离 l
              y_dist = r.y - e.y; //y轴距离 n
              dist = x_dist * x_dist + y_dist * y_dist; //总距离, m

              dist < e.max && (e === current_point && dist >= e.max / 2 && (r.x -= 0.03 * x_dist, r.y -= 0.03 * y_dist), //靠近的时候加速
                d = (e.max - dist) / e.max,
                context.beginPath(),
                context.lineWidth = d / 2,
                context.strokeStyle = "rgba(" + config.c + "," + (d + 0.2) + ")",
                context.moveTo(r.x, r.y),
                context.lineTo(e.x, e.y),
                context.stroke());
            }
          }
        }), frame_func(draw_canvas);
      }
      //创建画布,并添加到body中
      var the_canvas = document.createElement("canvas"), //画布
        config = get_config_option(), //配置
        canvas_id = "c_n" + config.l, //canvas id
        context = the_canvas.getContext("2d"), canvas_width, canvas_height,
        frame_func = window.requestAnimationFrame || window.webkitRequestAnimationFrame || window.mozRequestAnimationFrame || window.oRequestAnimationFrame || window.msRequestAnimationFrame || function(func) {
          window.setTimeout(func, 1000 / 45);
        }, random = Math.random,
        current_point = {
          x: null, //当前鼠标x
          y: null, //当前鼠标y
          max: 20000 // 圈半径的平方
        },
        all_array;
      the_canvas.id = canvas_id;
      the_canvas.style.cssText = "position:fixed;top:0;left:0;z-index:" + config.z + ";opacity:" + config.o;
      get_by_tagname("body")[0].appendChild(the_canvas);

      //初始化画布大小
      set_canvas_size();
      window.onresize = set_canvas_size;
      //当时鼠标位置存储,离开的时候,释放当前位置信息
      window.onmousemove = function(e) {
        e = e || window.event;
        current_point.x = e.clientX;
        current_point.y = e.clientY;
      }, window.onmouseout = function() {
        current_point.x = null;
        current_point.y = null;
      };
      //随机生成config.n条线位置信息
      for (var random_points = [], i = 0; config.n > i; i++) {
        var x = random() * canvas_width, //随机位置
          y = random() * canvas_height,
          xa = 2 * random() - 1, //随机运动方向
          ya = 2 * random() - 1;
        // 随机点
        random_points.push({
          x: x,
          y: y,
          xa: xa,
          ya: ya,
          max: 6000 //沾附距离
        });
      }
      all_array = random_points.concat([current_point]);
      //0.1秒后绘制
      setTimeout(function() {
        draw_canvas();
      }, 100);
    }();
在html网页中body的标签中添加script标签,如下所示
<script type="text/javascript" color="208,55,66" opacity="0.5"count="99"src="test.js"></script>
color 颜色自定义,opactity 是透明度,一般来说0.5-1就可以了,count的是数量,不要太大,太大可能会使得用户的浏览器卡顿,src后为该js文件的所在路径。
PS:
我直接用test命令了那个js文件
html canvas-nest.js 源码的更多相关文章
- Swing实现canvas-nest.js 源码
#### 说明 canvas-nest.js 源码 http://www.bubuko.com/infodetail-2237716.html 地址:https://gitee.com/dgwcode ...
- underscore.js 源码
underscore.js 源码 underscore]JavaScript 中如何判断两个元素是否 "相同" Why underscore 最近开始看 underscore.js ...
- MVVM大比拼之avalon.js源码精析
简介 avalon是国内 司徒正美 写的MVVM框架,相比同类框架它的特点是: 使用 observe 模式,性能高. 将原始对象用object.defineProperty重写,不需要用户像用knoc ...
- 深入理解unslider.js源码
最近用到了一个挺好用的幻灯片插件,叫做unslider.js,就想看看怎么实现幻灯片功能,就看看源码,顺便自己也学习学习.看完之后收获很多,这里和大家分享一下. unslider.js 源码和使用教程 ...
- Jquery.cookie.js 源码和使用方法
jquery.cookie.js源码和使用方法 jQuery操作cookie的插件,大概的使用方法如下 $.cookie(‘the_cookie’); //读取Cookie值$.cookie(’the ...
- MVVM架构~knockoutjs系列之从Knockout.Validation.js源码中学习它的用法
返回目录 说在前 有时,我们在使用一个插件时,在网上即找不到它的相关API,这时,我们会很抓狂的,与其抓狂,还不如踏下心来,分析一下它的源码,事实上,对于JS这种开发语言来说,它开发的插件的使用方法都 ...
- basket.js 源码分析
basket.js 源码分析 一.前言 basket.js 可以用来加载js脚本并且保存到 LocalStorage 上,使我们可以更加精准地控制缓存,即使是在 http 缓存过期之后也可以使用.因此 ...
- 国籍控件(js源码)
国籍控件(js源码) 一直苦于没有好的国籍控件可以用,于是抽空写了一个国籍控件,现分享给大家. 主要功能和界面介绍 国籍控件主要支持中文.英文过滤以及键盘上下事件. 源码介绍 国籍控件核心是两个文件, ...
- vue.js源码精析
MVVM大比拼之vue.js源码精析 VUE 源码分析 简介 Vue 是 MVVM 框架中的新贵,如果我没记错的话作者应该毕业不久,现在在google.vue 如作者自己所说,在api设计上受到了很多 ...
- 从template到DOM(Vue.js源码角度看内部运行机制)
写在前面 这篇文章算是对最近写的一系列Vue.js源码的文章(https://github.com/answershuto/learnVue)的总结吧,在阅读源码的过程中也确实受益匪浅,希望自己的这些 ...
随机推荐
- Windows10中“SQL Server 配置管理器”哪去了?
SQL Server 配置管理器是一种工具,用于管理与 SQL Server 相关联的服务.配置 SQL Server 使用的网络协议以及从 SQL Server 客户端计算机管理网络连接配置.SQL ...
- 虚拟机配置静态IP地址
使用VMware配置虚拟机静态IP地址 一.安装好虚拟后在菜单栏选择编辑→ 虚拟网络编辑器,打开虚拟网络编辑器对话框,选择Vmnet8 Net网络连接方式,随意设置子网IP,点击NAT设置页面,查看子 ...
- 面向对象15.1String类特点
String 特点: 字符串对象一旦被初始化就不会被改变. public class Ssstring {public static void main(String[] args) { //这个是2 ...
- 从源码的角度看Service是如何启动的
欢迎访问我的个人博客 ,原文链接:http://wensibo.top/2017/07/16/service/ ,未经允许不得转载! 七月中旬了,大家的实习有着落了吗?秋招又准备的怎么样了呢?我依旧在 ...
- C# 调用.exe文件
process da = new process(); da.startinfo.filename = @""D:\BM0002\BM0002.exe"; //要调用的 ...
- kali ssh服务连接问题,无法远程管理
1.修改sshd_config文件,命令为:vi /etc/ssh/sshd_config 2.将#PasswordAuthentication no的注释去掉,并且将NO修改为YES 3.将#Per ...
- js数组拍平
js数组拍平 var arr=[1,[[[7,2],8,9],3]]; function f(arr) { if (Object.prototype.toString.call(arr) != &qu ...
- HDU - 4995 - Revenge of kNN
题目链接 : https://vjudge.net/problem/HDU-4995 题目大意 : 读入n个点的坐标与该点所拥有的值val,进行m次查询,对于每一次查询,读入该点的坐标,计算离该 ...
- Spring源码情操陶冶-AbstractApplicationContext#finishBeanFactoryInitialization
承接前文Spring源码情操陶冶-AbstractApplicationContext#registerListeners 约定web.xml配置的contextClass为默认值XmlWebAppl ...
- iOS TextView输入长度限制 设置placeholder
textView在使用中通常会有2个功能是最常用的 设置placeholder 限制输入长度 TYLimitedTextView刚好是为了解决这个2个问题而诞生的,下面讲解TYLimitedTextV ...