Install Greenplum OSS on Ubuntu
About Greenplum Database
Greenplum Database is an MPP SQL Database based on PostgreSQL. Its used in production in hundreds of large corporations and government agencies around the world and including the open source has over thousands of deployments globally.
Greenplum Database scales to multi-petabyte data sizes with ease and allows a cluster of powerful servers to work together to provide a single SQL interface to the data.
In addition to using SQL for analyzing structured data, Greenplum provides modules and extensions on top of the PostgreSQL abstractions for in database machine learning and AI, Geospatial analytics, Text Search (with Apache Solr) and Text Analytics with Python and Java, and the ability to create user-defined functions with Python, R, Java, Perl, C or C++.
Greenplum Database Ubuntu Distribution
Greenplum Database is the only open source product in its category that has a large install base, and now with the release of Greenplum Database 5.3, Ready to Install binaries are hosted for the Ubuntu Operating System to make installation and deployment easy.
Ubuntu is a popular operating system in cloud-native environments and is based on the very well respected Debian Linux distribution.
In this article, I will demonstrate how to install the Open Source Greenplum Database binaries on the Ubuntu Operating System.
Greenplum Database binaries for Ubuntu are hosted on the Personal Package Archive system, which allows the community to contribute readily to install packages that can be installed from any internet connected system.
So let’s get right to it!
Greenplum OSS on Ubuntu Installation Instructions
First, ensure you have a supported Ubuntu OS version. At the time of this writing, Ubuntu builds of Greenplum are built for the 16.04 LTS (long-term support) release version of Ubuntu. Check the PPA page, for current information about which OS version is available.
Add the Greenplum PPA repository to your Ubuntu System, like this:
sudo add-apt-repository ppa:greenplum/db
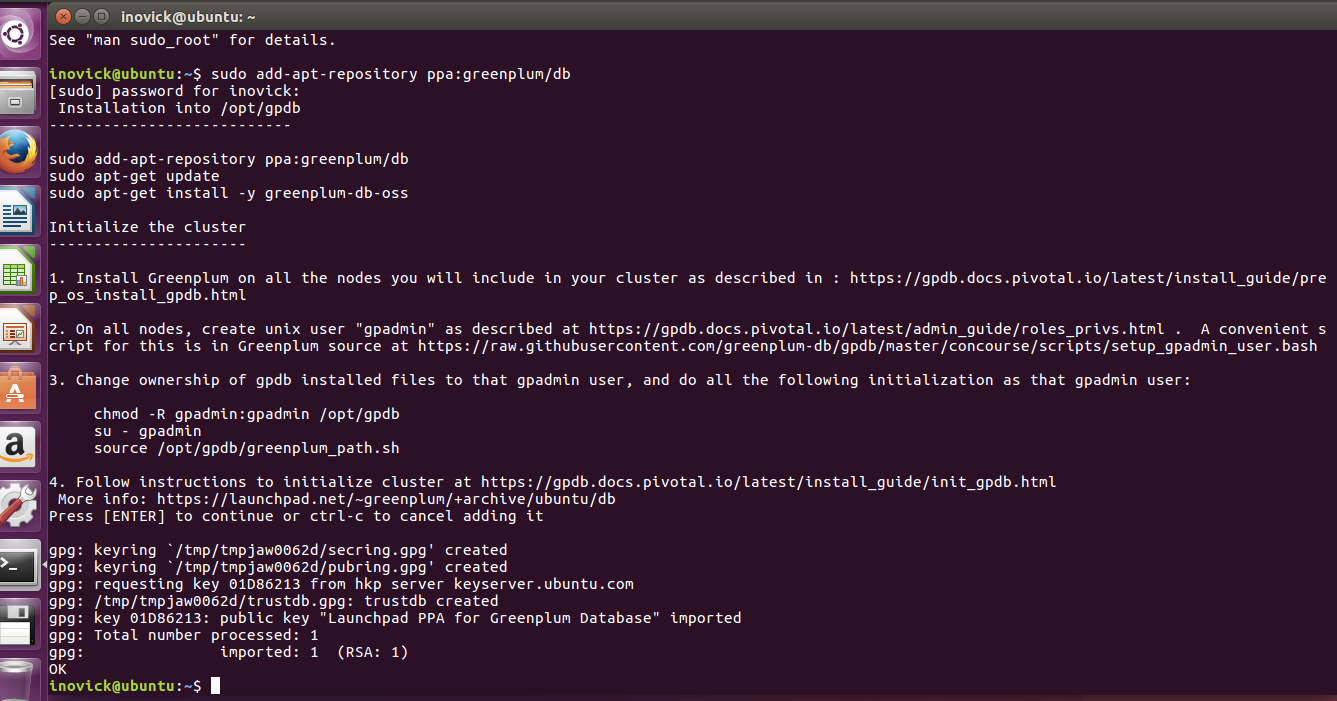
Update your Ubuntu system to retrieve information from the recently added repository, like this:
sudo apt-get update
Install the Greenplum Database software, like this:
sudo apt-get install greenplum-db-oss
The above command will install the Greenplum Database software and any required dependencies on the system automatically and put the resulting software in /opt/gpdb.
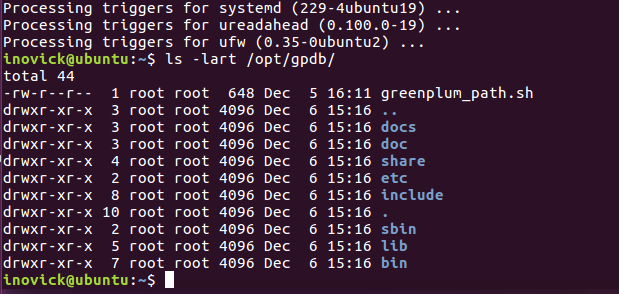
Load Greenplum Database software into your environment with the following command:
$ . /opt/gpdb/greenplum_path.sh

$ which gpssh

/opt/gpdb/bin/gpssh
You can see the software is on the path by testing using the which command as above. Now you can copy a Greenplum cluster configuration file template into your local directory for editing like this:
cp $GPHOME/docs/cli_help/gpconfigs/gpinitsystem_singlenode .
Edit gpinitsystem Configuration File
The following edits can be made for the most simple cluster configuration running locally.
Create this file and put only your hostname into the file:
MACHINE_LIST_FILE=./hostlist_singlenode
Update this line to have a directory you want to use for primaries for example:
declare -a DATA_DIRECTORY=(/gpdata1 /gpdata2)
declare -a DATA_DIRECTORY=(/home/inovick/primary /home/inovick/primary)
And make sure the directory mentioned above exists.
Update this line to have the hostname of your machine, in my case, the hostname is ‘ubuntu’:
MASTER_HOSTNAME=hostname_of_machine
MASTER_HOSTNAME=ubuntu
Update the master data directory entry in the file and ensure it exists by making the directory:
MASTER_DIRECTORY=/home/inovick/master
That’s enough to get the database initialized and up running, so close the file and let’s initialize the cluster. We will have a master segment instance and two primary segment instances with this configuration. In more advanced setups you would configure a standby master and segment mirrors on additional hosts, and the data would be automatically both sharded (distributed) between the primary segments and mirrored from primaries to mirrors.
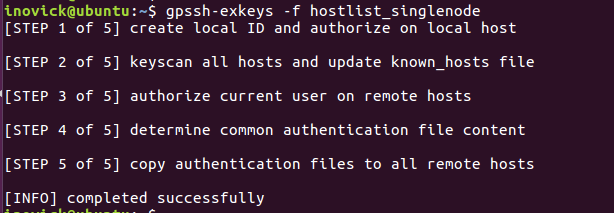
Run gpinitsystem
First, let’s make sure ssh keys are exchanged by running the following command. Screenshot from my system is shown below:
gpssh-exchkeys -f hostlist_singlenode
Ok, we need to start the cluster, let’s get started. Run the following command:
gpinitsystem -c gpinitsystem_singlenode
The utility will print out what its going to do and then ask you to confirm before proceeding. Here is an example below:

Once it finishes you are good to go, you can create a database, login and start doing queries and inserting data as shown below:

To really get the full benefit, you will want to do some of the following things:
- Allocate enough hardware to process large amounts of data in your cluster
- Check the official Greenplum Database documentation
- Watch some of the Greenplum Videos on YouTube
- Load a lot of data using the high speed parallel load of gpload or external tables with gpfdist, PXF, or S3
That’s it for this tutorial, enjoy Greenplum OSS on Ubuntu.
PPA description
Installation into /opt/gpdb
---------------------------
sudo apt-get install -y software-properties-common
sudo add-apt-repository ppa:greenplum/db

sudo apt-get update
sudo apt-get install -y greenplum-db-oss
Initialize the cluster
----------------------
1. Install Greenplum on all the nodes you will include in your cluster as described in : https://gpdb.docs.pivotal.io/latest/install_guide/prep_os_install_gpdb.html
2. On all nodes, create unix user "gpadmin" as described at https://gpdb.docs.pivotal.io/latest/admin_guide/roles_privs.html . A convenient script for this is in Greenplum source at https://raw.githubusercontent.com/greenplum-db/gpdb/master/concourse/scripts/setup_gpadmin_user.bash
3. Change ownership of gpdb installed files to the gpadmin user, and do all the following initialization as that gpadmin user:
chown -R gpadmin:gpadmin /opt/gpdb
su - gpadmin
source /opt/gpdb/greenplum_path.sh
4. Follow instructions to initialize cluster at https://gpdb.docs.pivotal.io/latest/install_guide/init_gpdb.html
Adding this PPA to your system
You can update your system with unsupported packages from this untrusted PPA by adding ppa:greenplum/db to your system's Software Sources. (Read about installing)
sudo add-apt-repository ppa:greenplum/db
sudo apt-get update
Install Greenplum OSS on Ubuntu的更多相关文章
- Install Google Pinyin on Ubuntu 14.04
Install Google Pinyin on Ubuntu 14.04 I've been spending more and more time on Ubuntu and I'm not us ...
- HOWTO install Oracle 11g on Ubuntu Linux 12.04 (Precise Pangolin) 64bits
安装了Ubuntu 12.04 64bit, 想在上面安装Oracle 11gr2,网上找了好多文档都没成功,最后完全参考了MordicusEtCubitus的文章. 成功安装的关键点:install ...
- Install a Redmine on Ubuntu system
# How to install a Redmine on Ubuntu system Ref to: https://www.linode.com/docs/applications/project ...
- Install LAMP Stack On Ubuntu 16.04
原文:http://www.unixmen.com/how-to-install-lamp-stack-on-ubuntu-16-04/ LAMP is a combination of operat ...
- How do you install Google Chrome on Ubuntu?
https://askubuntu.com/questions/510056/how-to-install-google-chrome sudo apt-get install chromium-br ...
- Install eclipse ns3 in ubuntu 14.04
1. NS3 install 参考NS3 tutorial即可. 2.eclipse 2.1下载 下载地址:http://www.eclipse.org/downloads/ ...
- install dns server on ubuntu
参考 CSDN/Ubuntu环境下安装和配置DNS服务器 在 Ubuntu 上安裝 DNS server Install BIND 9 on Ubuntu and Configure It for U ...
- [译]How to Install Node.js on Ubuntu 14.04 如何在ubuntu14.04上安装node.js
原文链接为 http://www.hostingadvice.com/how-to/install-nodejs-ubuntu-14-04/ 由作者Jacob Nicholson 发表于October ...
- Install latest R for ubuntu
### delete old version rm -rf /usr/local/lib/R /usr/lib/R ~/**/R sudo apt-get autoremove rstudio sud ...
随机推荐
- HDU1370(中国剩余定理)
昨天我细致一想,发现自己之前的分类(用OJ来划分,毫无意义啊.)太失败了,所以我又一次划分了一下大分类,在分到数论的时候,我就想起了中国剩余定理了.于是乎今天就刷了一题中国剩余定理的题目了.话说太久没 ...
- 填充整个区间(fill,fill_n,generate和generate_n)
fill 将value值填充整个区间,不能为OutputIterator,因为fill会用到first和last,outputIterator无法做相等的测试 template <class F ...
- More C++ Idioms
Table of Contents Note: synonyms for each idiom are listed in parentheses. Adapter Template TODO Add ...
- php 面向对象:this 关键字
PHP5中为解决变量的命名冲突和不确定性问题,引入关键字“$this”代表其所在当前对象. $this在构造函数中指该构造函数所创建的新对象. 在类中使用当前对象的属性和方法,必须使用$this-&g ...
- Centos维护命令
1.查看系统版本 cat /etc/issue cat /etc/redhat-release 3. cat /proc/version 4.uname -a 显示如下 5 uname -r (二)查 ...
- Spring4相关jar包介绍(转)
Spring4相关jar包介绍 spring-core.jar(必须):这个jar 文件包含Spring 框架基本的核心工具类.Spring 其它组件要都要使用到这个包里的类,是其它组件的基本核心,当 ...
- C# 打印、输入和for循环的使用
using System; using System.Collections.Generic; using System.Linq; using System.Text; using System.T ...
- itertools.groupby()/itertools.compress() 笔记
关于itertools.groupby() itertools.groupby()就是将相邻的并且相同的键值划分为同一组,相似功能可以看https://docs.python.org/3/librar ...
- [转]Aroon Indicator
Aroon Indicator Trend Oscillator Description The Aroon indicator, developed by Tushar Chande, indica ...
- CENTOS 7 64BIT,MYSQL5.7安装与配置
配置MYSQL YUM源 wget -P ./ http://dev.mysql.com/get/mysql57-community-release-el7-8.noarch.rpm ######## ...