使用TensorFlow给花朵🌺分类

第一步:准备好需要的库
- tensorflow-gpu 1.8.0
- opencv-python 3.3.1
- numpy
- skimage
- os
- pillow
第二步:准备数据集:
链接:https://pan.baidu.com/s/1Kbz_UaRhAfhlweFY28R8Sw 密码:iym3
本次使用了花朵分类的数据集,总共有5类

每类里面有不同形态的同一类花朵

在下载完数据集之后,我们对数据集进行预处理:
from skimage import io, transform

import os

import numpy as np

# 将所有的图片resize成100*100

w = 100

h = 100

c = 3

# 读取图片

def read_img(path):

    imgs = []

    labels = []

    classs = os.listdir(path)

    for idx, folder in enumerate(classs):

        cate = os.path.join(path, folder)

        for im in os.listdir(cate):

            img_path =os.path.join(cate, im)

            # print('reading the images:%s' % (img_path))

            img = io.imread(img_path)

            img = transform.resize(img, (w, h))

            # with open('tests.txt', 'a') as f:

            #     f.write(img_path+'_'+str(idx)+'\n')

            imgs.append(img)

            labels.append(idx)

    return np.asarray(imgs, np.float32), np.asarray(labels, np.int32)

def suffer(data, label):

    # 打乱顺序

    num_example = data.shape[0]

    arr = np.arange(num_example)

    np.random.shuffle(arr)

    data = data[arr]

    label = label[arr]

    # 将所有数据分为训练集和验证集

    ratio = 0.8

    s = np.int(num_example * ratio)

    x_train = data[:s]

    y_train = label[:s]

    x_val = data[s:]

    y_val = label[s:]

    return x_train,y_train,x_val,y_val

def minibatches(inputs=None, targets=None, batch_size=None, shuffle=False):

    assert len(inputs) == len(targets)

    if shuffle:

        indices = np.arange(len(inputs))

        np.random.shuffle(indices)

    for start_idx in range(0, len(inputs) - batch_size + 1, batch_size):

        if shuffle:

            excerpt = indices[start_idx:start_idx + batch_size]

        else:

            excerpt = slice(start_idx, start_idx + batch_size)

        yield inputs[excerpt], targets[excerpt]
我们将图片统一设为100×100的大小,然后对每一个文件夹标号,作为标签。为了检验我们是否将标签与图片对齐,我预留了一个写文件路径+标签的一个文件。
写出来是这样的
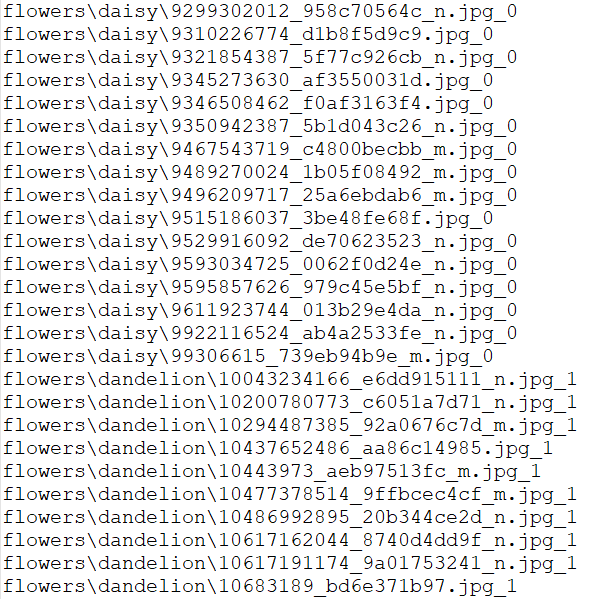
在做处理好标签和图片之后我们将其设定为 np.asarray(imgs, np.float32)的格式。
然后将这些图片随机打乱顺序。以8:2的比例划分训练集和验证集。
接着我们来生成minibatch:将数据切分成batch_size的大小送入网络。
在预处理完数据之后,我们开始进行网络的构建
import tensorflow as tf

def batch_norm(x, momentum=0.9, epsilon=1e-5, train=True, name='bn'):

    return tf.layers.batch_normalization(x,

                      momentum=momentum,

                      epsilon=epsilon,

                      scale=True,

                      training=train,

                      name=name)

def simple_cnn(x):

    # 第一个卷积层(100——>50)

    conv1 = tf.layers.conv2d(

        inputs=x,

        filters=32,

        kernel_size=[3, 3],

        padding="same",

        activation=tf.nn.relu,

        kernel_initializer=tf.truncated_normal_initializer(stddev=0.01))

    conv1 = batch_norm(conv1, name='pw_bn1')

    pool1 = tf.layers.max_pooling2d(inputs=conv1, pool_size=[2, 2], strides=2)

    # 第二个卷积层(50->25)

    conv2 = tf.layers.conv2d(

        inputs=pool1,

        filters=64,

        kernel_size=[3, 3],

        padding="same",

        activation=tf.nn.relu,

        kernel_initializer=tf.truncated_normal_initializer(stddev=0.01))

    conv2 = batch_norm(conv2, name='pw_bn2')

    pool2 = tf.layers.max_pooling2d(inputs=conv2, pool_size=[2, 2], strides=2)

    # 第三个卷积层(25->12)

    conv3 = tf.layers.conv2d(

        inputs=pool2,

        filters=128,

        kernel_size=[3, 3],

        padding="same",

        activation=tf.nn.relu,

        kernel_initializer=tf.truncated_normal_initializer(stddev=0.01))

    conv3 = batch_norm(conv3, name='pw_bn3')

    pool3 = tf.layers.max_pooling2d(inputs=conv3, pool_size=[2, 2], strides=2)

    # 第四个卷积层(12->6)

    conv4 = tf.layers.conv2d(

        inputs=pool3,

        filters=128,

        kernel_size=[3, 3],

        padding="same",

        activation=tf.nn.relu,

        kernel_initializer=tf.truncated_normal_initializer(stddev=0.01))

    conv4 = batch_norm(conv4, name='pw_bn4')

    pool4 = tf.layers.max_pooling2d(inputs=conv4, pool_size=[2, 2], strides=2)

    re1 = tf.reshape(pool4, [-1, 6 * 6 * 128])

    # 全连接层

    dense1 = tf.layers.dense(inputs=re1,

                             units=1024,

                             activation=tf.nn.relu,

                             kernel_initializer=tf.truncated_normal_initializer(stddev=0.01),

                             kernel_regularizer=tf.contrib.layers.l2_regularizer(0.003))

    dense2 = tf.layers.dense(inputs=dense1,

                             units=512,

                             activation=tf.nn.relu,

                             kernel_initializer=tf.truncated_normal_initializer(stddev=0.01),

                             kernel_regularizer=tf.contrib.layers.l2_regularizer(0.003))

    logits = tf.layers.dense(inputs=dense2,

                             units=5,

                             activation=None,

                             kernel_initializer=tf.truncated_normal_initializer(stddev=0.01),

                             kernel_regularizer=tf.contrib.layers.l2_regularizer(0.003))

    pred = tf.nn.softmax(logits, name='prob')

    return logits, pred
我们的网络由4个卷积层,两个全连接层,一个softmax层组成。在每一层的卷积后面加入了batch_normalization,relu和池化。
batch_normalization层很好用,加上它之后,有效的预防了梯度消逝和爆炸,还加速了收敛。
在搭建好网络之后,我们开始编写训练模块
import tensorflow as tf

import cnn

import dataset

# 将所有的图片resize成100*100

w = 100

h = 100

c = 3

path = 'flowers'

x = tf.placeholder(tf.float32, shape=[None, w, h, c], name='x')

y_ = tf.placeholder(tf.int32, shape=[None, ], name='y_')

logits,pred = cnn.simple_cnn(x)

loss = tf.losses.sparse_softmax_cross_entropy(labels=y_, logits=logits)

train_op = tf.train.AdamOptimizer(learning_rate=0.001).minimize(loss)

correct_prediction = tf.equal(tf.cast(tf.argmax(logits, 1), tf.int32), y_)

acc = tf.reduce_mean(tf.cast(correct_prediction, tf.float32))

data, label = dataset.read_img(path)

x_train, y_train,x_val, y_val = dataset.suffer(data, label)

# 训练和测试数据,可将n_epoch设置更大一些

n_epoch = 11

batch_size = 16

def train():

    sess = tf.InteractiveSession()

    sess.run(tf.global_variables_initializer())

    saver = tf.train.Saver()

    for epoch in range(n_epoch):

        train_loss, train_acc, n_batch = 0, 0, 0

        for x_train_a, y_train_a in dataset.minibatches(x_train, y_train, batch_size, shuffle=True):

            _, err, ac = sess.run([train_op, loss, acc], feed_dict={x: x_train_a, y_: y_train_a})

            train_loss += err

            train_acc += ac

            n_batch += 1

        print('Epoch %d - train loss: %f'%(epoch, (train_loss / n_batch)))

        print('Epoch %d - train acc: %f'%(epoch,train_acc / n_batch))

        # validation

        val_loss, val_acc, n_batch = 0, 0, 0

        for x_val_a, y_val_a in dataset.minibatches(x_val, y_val, batch_size, shuffle=False):

            err, ac = sess.run([loss, acc], feed_dict={x: x_val_a, y_: y_val_a})

            val_loss += err

            val_acc += ac

            n_batch += 1

        print('Epoch %d - Validation loss: %f' %(epoch, val_loss / n_batch))

        print('Epoch %d - Validation Accuracy: %f'%( epoch,(val_acc / n_batch)))

        if epoch % 5 == 0:

            saver.save(sess,  "./model/save_net.ckpt",epoch)

            print('Trained Model Saved.')

train()
训练时我们首先要定义X,Y作为索引
x = tf.placeholder(tf.float32, shape=[None, w, h, c], name='x')

y_ = tf.placeholder(tf.int32, shape=[None, ], name='y_')

然后对于刚才构建的网络进行损失的计算,精确度计算以及优化器的选择。
接着我们将session初始化
    sess = tf.InteractiveSession()

    sess.run(tf.global_variables_initializer())

    saver = tf.train.Saver()
然后将定义的X,Y索引与你的真实数据,标签对齐。
使用
_, err, ac = sess.run([train_op, loss, acc], feed_dict={x: x_train_a, y_: y_train_a})

开始运行就可以了。
测试同理,不过测试的时候不需要优化器,所以只需要加入参数loss,acc就可以了。
我们每隔5次保存一次模型。
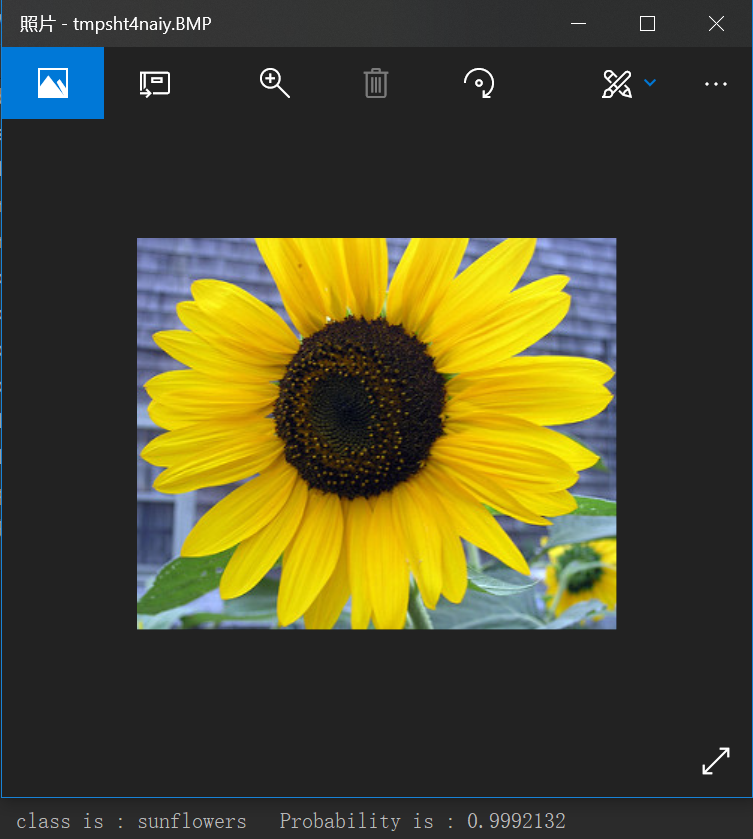
在训练结束后,我们对使用之前训练好的模型进行预测:
import numpy as np

import tensorflow as tf

from PIL import Image, ImageDraw, ImageFont

from cnn import simple_cnn

# 将所有的图片resize成100*100

w = 100

h = 100

c = 3

classes = ['daisy','dandelion','roses','sunflowers','tulips']

image_test = Image.open('44079668_34dfee3da1_n.jpg')

resized_image = image_test.resize((w, h), Image.BICUBIC)

image_data = np.array(resized_image, dtype='float32')

imgs_holder = tf.placeholder(tf.float32, shape=[1, w, h, c])

logits,pred  = simple_cnn(imgs_holder)

saver = tf.train.Saver()

ckpt_dir = './model/'

with tf.Session() as sess:

    ckpt = tf.train.get_checkpoint_state(ckpt_dir)

    saver.restore(sess, ckpt.model_checkpoint_path)

    classes_ = sess.run(pred,feed_dict={ imgs_holder: np.reshape(image_data , [1, w, h, c])})

num = np.argmax(classes_)

print('class is :',classes[int(num)],'  Probability is :',classes_[0][int(num)])
在预测时,因为子还需要输入一张图片就可以了,所以我们只制作图片的索引
imgs_holder = tf.placeholder(tf.float32, shape=[1, w, h, c])

然后读取刚才保存的参数,只需要输入目录,即可自动读取最后训练的模型。
然后运行:
classes_ = sess.run(pred,feed_dict={ imgs_holder: np.reshape(image_data , [1, w, h, c])})

输出每个类的概率值。
我们将这个概率最大的值的标号读取出来,对应之前文件夹的标号。
classes = ['daisy','dandelion','roses','sunflowers','tulips']
然后将这个标号对应的概率数标出来。
本次使用了tf.layer进行了简单CNN的构建,并且使用了tensorflow传统的sess.run
的方法来运行图,没有使用之前提到的高级API。
在这种方法上进行了简单的尝试,接下来会尝试使用slim框架构建网络。
使用TensorFlow给花朵🌺分类的更多相关文章
- SVM原理以及Tensorflow 实现SVM分类(附代码)
1.1. SVM介绍 1.2. 工作原理 1.2.1. 几何间隔和函数间隔 1.2.2. 最大化间隔 - 1.2.2.0.0.1. \(L( {x}^*)\)对$ {x}^*$求导为0 - 1.2.2 ...
- 芝麻HTTP:TensorFlow LSTM MNIST分类
本节来介绍一下使用 RNN 的 LSTM 来做 MNIST 分类的方法,RNN 相比 CNN 来说,速度可能会慢,但可以节省更多的内存空间. 初始化 首先我们可以先初始化一些变量,如学习率.节点单元数 ...
- tensorflow实现二分类
读万卷书,不如行万里路.之前看了不少机器学习方面的书籍,但是实战很少.这次因为项目接触到tensorflow,用一个最简单的深层神经网络实现分类和回归任务. 首先说分类任务,分类任务的两个思路: 如果 ...
- tensorflow学习笔记————分类MNIST数据集
在使用tensorflow分类MNIST数据集中,最容易遇到的问题是下载MNIST样本的问题. 一般是通过使用tensorflow内置的函数进行下载和加载, from tensorflow.examp ...
- Tensorflow实现手写体分类(含dropout)
一.手写体分类 1. 数据集 import tensorflow as tf from tensorflow.examples.tutorials.mnist import input_data im ...
- 用 TensorFlow 实现 SVM 分类问题
这篇文章解释了底部链接的代码. 问题描述  如上图所示,有一些点位于单位正方形内,并做好了标记.要求找到一条线,作为分类的标准.这些点的数据在 inearly_separable_data.csv ...
- TF Boys (TensorFlow Boys ) 养成记(四):TensorFlow 简易 CIFAR10 分类网络
前面基本上把 TensorFlow 的在图像处理上的基础知识介绍完了,下面我们就用 TensorFlow 来搭建一个分类 cifar10 的神经网络. 首先准备数据: cifar10 的数据集共有 6 ...
- tensorflow 教程 文本分类 IMDB电影评论
昨天配置了tensorflow的gpu版本,今天开始简单的使用一下 主要是看了一下tensorflow的tutorial 里面的 IMDB 电影评论二分类这个教程 教程里面主要包括了一下几个内容:下载 ...
- 基于tensorflow的文本分类总结(数据集是复旦中文语料)
代码已上传到github:https://github.com/taishan1994/tensorflow-text-classification 往期精彩: 利用TfidfVectorizer进行 ...
随机推荐
- [微软]The latest version of Windows is Windows Sandbox
The latest version of Windows is Windows Sandbox by Surur @mspoweruser Dec 19, 2018 at 1:40 GMT As h ...
- [转帖] 学习 Linux 大页的内存知识
一.在解释什么情况下需要开启大页和为啥需要开启大页前先了解下Linux下页的相关的知识:以下的内容是基于32位的系统,4K的内存页大小做出的计算1)目录表,用来存放页表的位置,共包含1024个目录en ...
- shell 命令 if [ -d filename] 判断文件
作者:曹毅涵 [ -a FILE ] 如果 FILE 存在则为真. [ -b FILE ] 如果 FILE 存在且是一个块特殊文件则为真. [ -c FILE ] 如果 FILE 存在且是一个字特殊 ...
- Kivy 中文教程 实例入门 简易画板 (Simple Paint App):2. 实现绘图功能
1. 理解 kivy 坐标系统 上一节中,咪博士带大家实现了画板程序的基础框架,以及一个基本的自定义窗口部件(widget).在上一节的末尾,咪博士留了一道关于 kivy 坐标系统的思考题给大家.通过 ...
- Treasure Exploration POJ - 2594(最小边覆盖)
因为是路 所以 如果 1——3 2——3 3——4 3——5 则 1——4 1——5 2——4 2——5 都是是合法的 又因为机器人是可以相遇的 所以 我们把所有的点 分别放在 ...
- 洛谷 P2376 [USACO09OCT]津贴Allowance 解题报告
P2376 [USACO09OCT]津贴Allowance 题目描述 作为创造产奶纪录的回报,\(Farmer\) \(John\)决定开始每个星期给\(Bessie\)一点零花钱. \(FJ\)有一 ...
- Luogu 1613 跑路(最短路径,倍增)
Luogu 1613 跑路(最短路径,倍增) Description 小A的工作不仅繁琐,更有苛刻的规定,要求小A每天早上在6:00之前到达公司,否则这个月工资清零.可是小A偏偏又有赖床的坏毛病.于是 ...
- gtest简介及简单使用
本文摘自 gtest简介及简单使用 ,在此感谢作者的分享. 具体使用教程 _______________________________________________________________ ...
- python操作txt文件中数据教程[2]-python提取txt文件
python操作txt文件中数据教程[2]-python提取txt文件中的行列元素 觉得有用的话,欢迎一起讨论相互学习~Follow Me 原始txt文件 程序实现后结果-将txt中元素提取并保存在c ...
- Java 在匿名内部函数中为外部函数变量赋值的解决方案
Java匿名内部函数本人不怎么主动使用,但是经常会调用一些API,其中会调用一些接口,而这些接口是需要使用匿名内部类来实现的,于是就遇到了一些问题. 就比如okHttp3 的接口调用 OkHttpCl ...