day15 CSS JS DOM初探
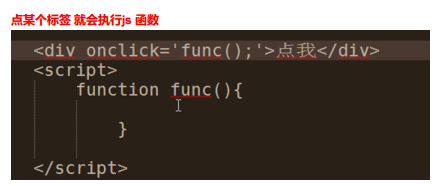
2 写动作JS
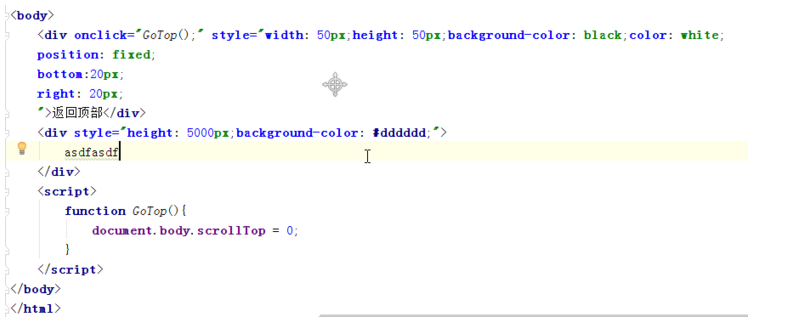
写一个悬浮菜单:
<!DOCTYPE html>

<html lang="en">

<head>

    <meta charset="UTF-8">

    <title>Title</title>

    <style>

        .pg-header{

            margin: 0 auto;

            height: 48px;

            width:980px;

            background-color: aquamarine;

            color: coral;

            position: fixed;

            top: 0;

            left: 20px;

            right: 20px;

            line-height: 48px;

            text-align: center;

        }

        .pg-body{

            margin: 0 auto;

            background-color: #dddddd;

            width:980px;

            height: 5000px;

            margin-top: 50px;

        }

    </style>

</head>

<body>

    <div class="pg-header">此处为菜单</div>

    <div class="pg-body">此处为内容</div>

</body>

</html>
效果:
上下滚动菜单始终固定在顶部
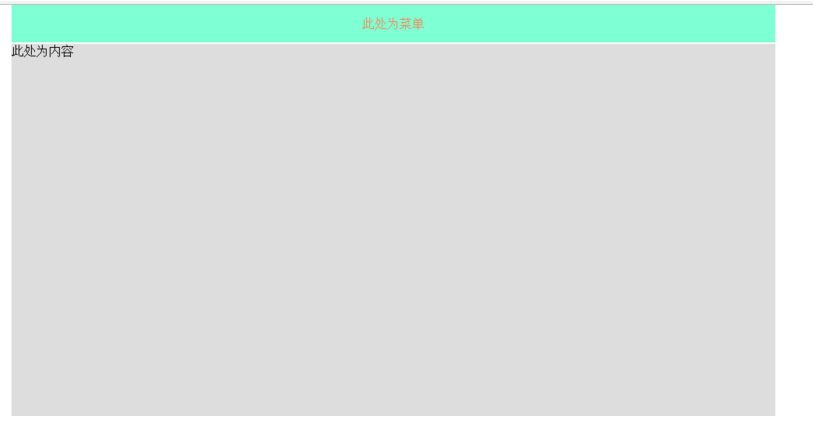
实现一个点赞按钮的效果:
<!DOCTYPE html>

<html lang="en">

<head>

    <meta charset="UTF-8">

    <title>Title</title>

</head>

<body>

    <div style="position: relative;width: 500px;height: 200px;border: 1px solid red; margin: 0 auto;">

        <div style="position: absolute;left: 0;bottom: 0;width: 50px;height: 50px;background-color: aquamarine"></div>

    </div>

    <div style="position: relative;width: 500px;height: 200px;border: 1px solid red; margin: 0 auto;">

        <div style="position: absolute;right: 0;top: 0;width: 50px;height: 50px;background-color: aquamarine"></div>

    </div>

</body>

</html>
效果:
实现一个遮罩层,就是平时的弹出选择框,即模态框:
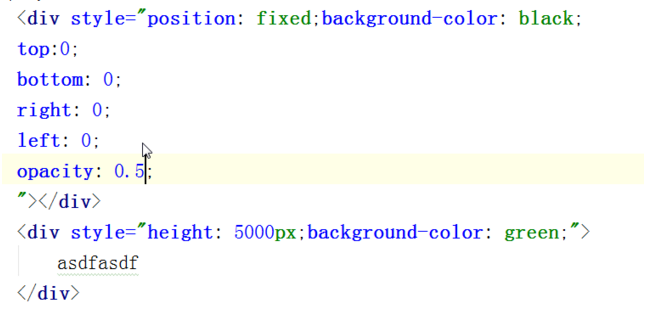
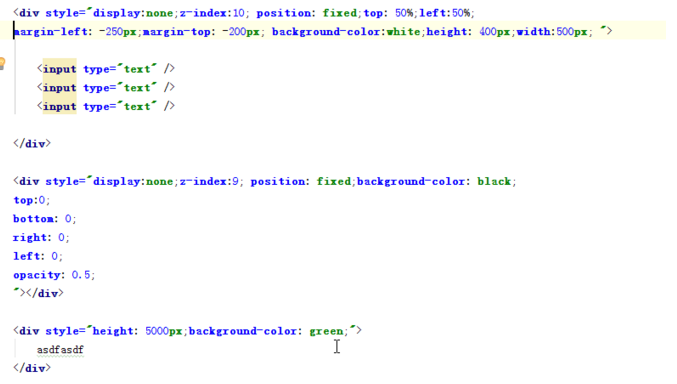
实践:
<!DOCTYPE html>

<html lang="en">

<head>

    <meta charset="UTF-8">

    <title>Title</title>

</head>

<body>

    <div style="background-color: white;

    /*display: none;*/

    z-index: 10;

    position: fixed;

    height: 400px;

    width: 500px;

    top: 50%;

    left: 50%;

    margin-left: -250px;

    margin-top: -200px;

    border: 1px brown;

    ">

        <div style="display: inline">姓名</div><input type="text"/>

        <div style="display: inline">密码</div><input type="text"/>

    </div>

    <div style="background-color: blue;

    /*display: none;*/

    position: fixed;

    z-index: 9;

    top:0;

    bottom: 0;

    left: 0;

    right: 0;

    opacity: 0.5;"></div>

    <div style="height: 5000px;background-color: coral;"> hehhehhehe</div>

</body>

</html>
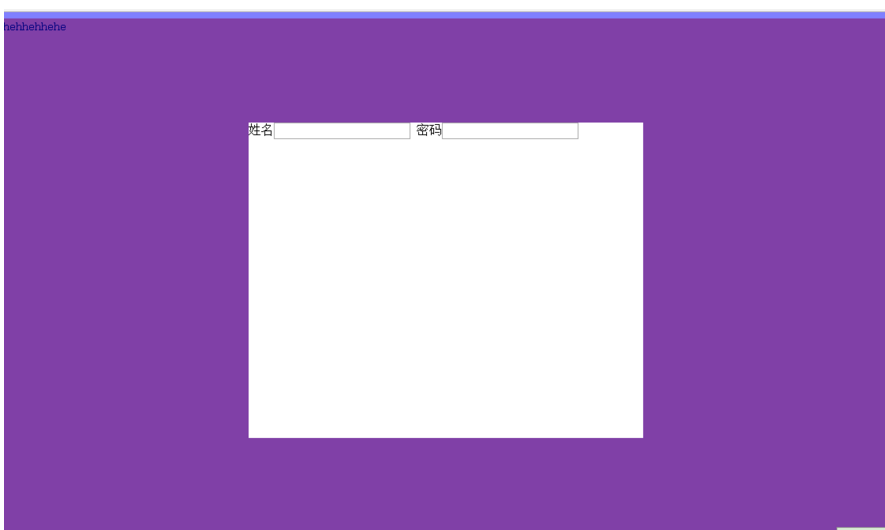
效果:
设置上右下左的间隔:
伪类:
实践:
<!DOCTYPE html>
<html lang="en">
<head>
<meta charset="UTF-8">
<title>Title</title>
<style>
.pg-header{
position: fixed; /* 设置为固定位置*/
right: 0; /*距离右边0*/
left: 0; /*距离左边0*/
top: 0; /*距离上边0*/
height: 48px; /*高度为48像素*/
background-color: #2459a2; /*背景颜色*/
line-height: 48px; /*设置上下居中,和高度一样才能居中*/
}
.pg-body{
margin-top: 50px; /*设置距离顶部50像素,避免menu挡住body*/
}
.w{
width: 980px; /*全局宽度 980像素*/
margin: 0 auto; /*自动居中*/
}
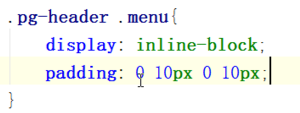
.pg-header .menu{
display: inline-block; /*设置标签为行内块级混合标签,可以设置高度和宽度*/
padding: 0 10px 0 10px; /*设置标签上下左右的距离*/
color: white; /*字体颜色*/
}
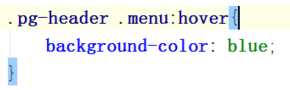
.pg-header .menu:hover{ /*此属性是当鼠标移动到此时应用*/
background-color: dodgerblue; /*背景颜色*/
}
</style>
</head>
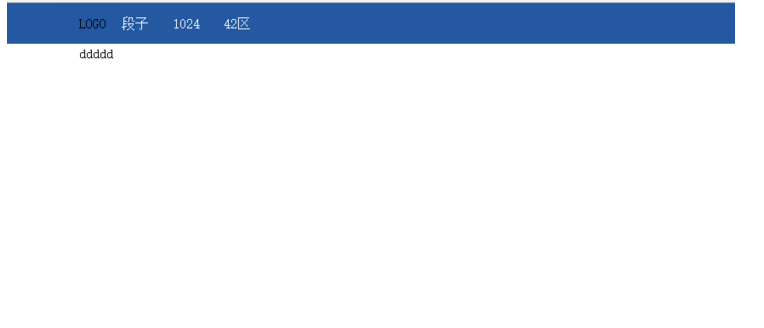
<body>
<div class="pg-header">
<div class="w">
<a class="logo">LOGO</a>
<a class="menu">段子</a>
<a class="menu">1024</a>
<a class="menu">42区</a>
</div>
</div>
<div class="pg-body">
<div class="w">ddddd</div>
</div>
</body>
</html>

渐变色 就是一个非常细的图片一直自动堆叠

其实图标都是只用一个图,然后通过调整
就能显示一个图片不同的位置
实践:
<body>

    <div style="height: 100px;"></div>

    <div style="height: 20px;width:20px;background-image: url(icon_18_118.png);border: 1px solid red"></div>

</body>
显示不同位置:
<body>

    <div style="height: 100px;"></div>

    <div style="height: 20px;

    width:20px;

    background-image: url(icon_18_118.png);

    background-position-x: 0px;

    background-position-y: -58px;

    border: 1px solid red"></div>

</body>

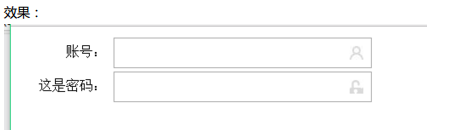
相对的位置,如点赞的图案:
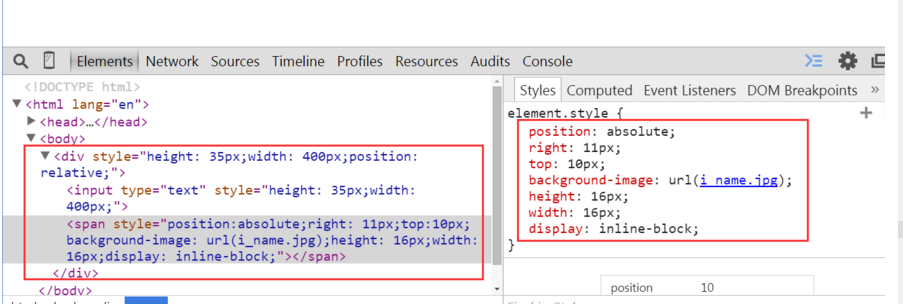
有个问题,图片会挡住输入,修改后就好了

实践:
<!DOCTYPE html>

<html lang="en">

<head>

    <meta charset="UTF-8">

    <title>Title</title>

</head>

<body>

    <div class="user-input" style="padding: 5px;">

        <div style="display: inline-block;width: 100px;text-align: right;">账号:</div>

        <div style="display: inline-block;width: 300px;height:30px;position: relative;">

            <input type="text" style="height: 30px;

            width: 270px;

            padding-right: 30px"></input>

            <span style="position:absolute;

            right: 6px;

            top:10px;

            background-image: url(user.jpg);

            height: 16px;

            width: 16px;

            display: inline-block"></span>

        </div>

    </div>

    <div class="passwd-input" style="padding: 5px;">

        <div style="display: inline-block;width: 100px;text-align: right;">这是密码:</div>

        <div style="display: inline-block;width: 300px;height:30px;position: relative;">

            <input type="text" style="height: 30px;

            width: 270px;

            padding-right: 30px"></input>

            <span style="position:absolute;

            right: 6px;

            top:10px;

            background-image: url(i_pwd.jpg);

            height: 16px;

            width: 16px;

            display: inline-block"></span>

        </div>

    </div>

</body>

</html>
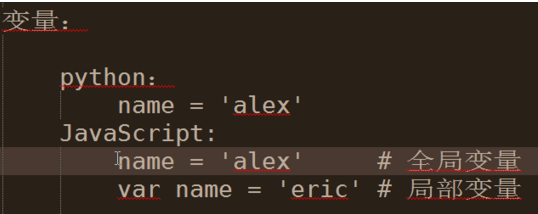
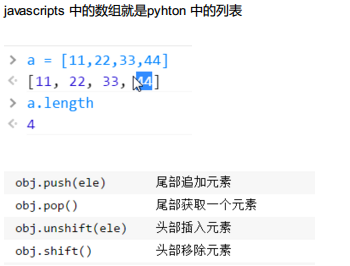
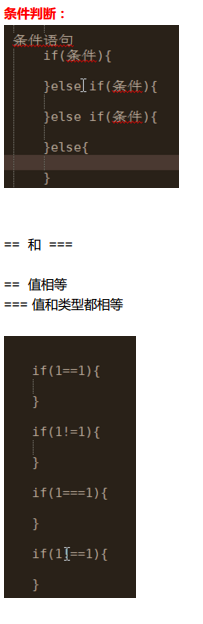
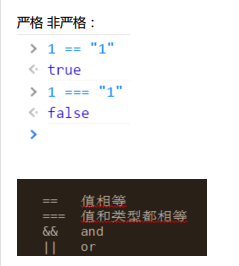
开始 javascript
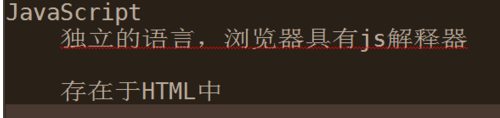
helloworld
写代码的位置,两种形式:
1在html 文件中:
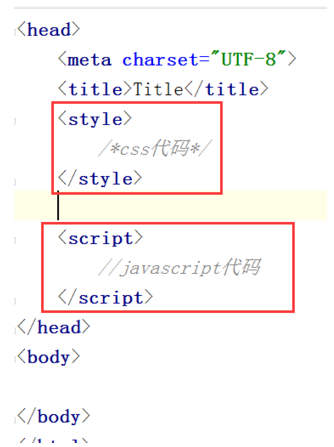
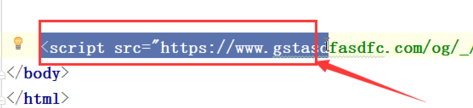
2 单独文件,引入到html文件中:


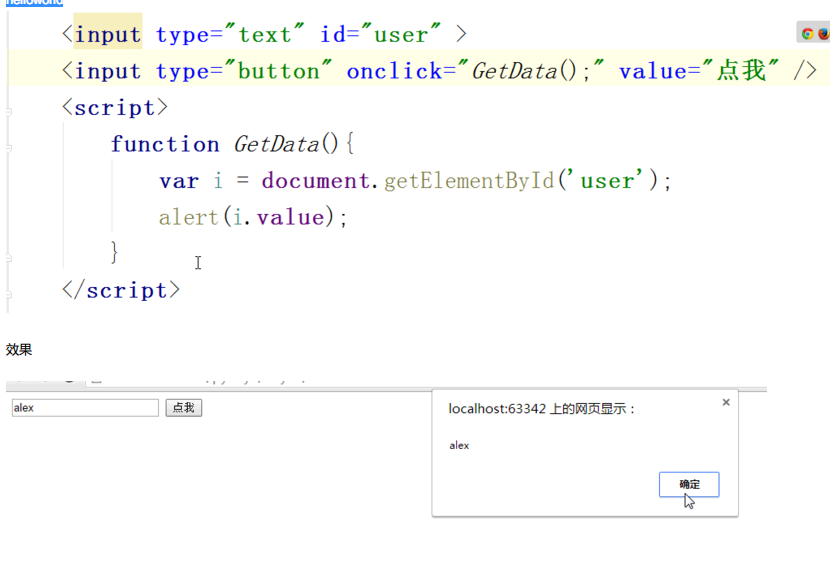
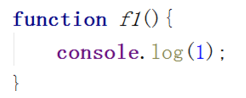
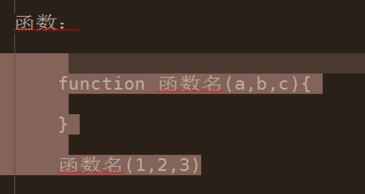
定义函数:
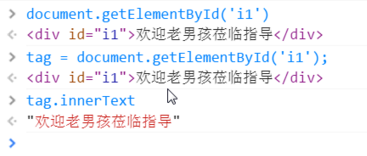
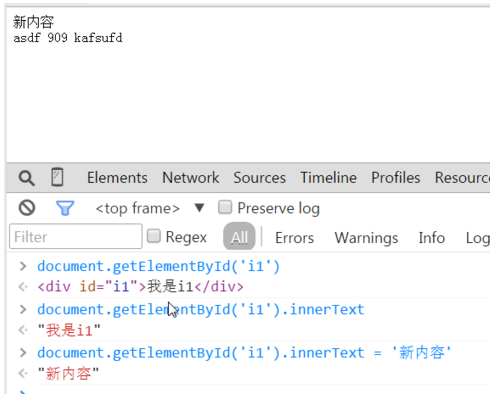
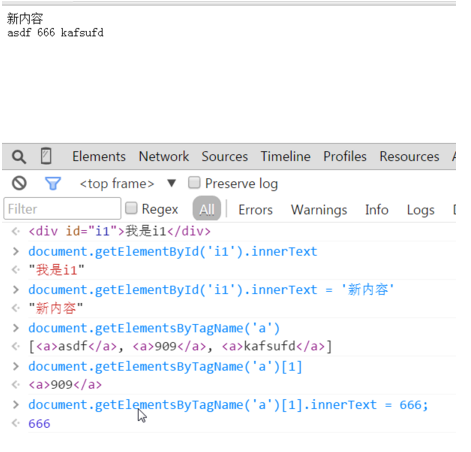
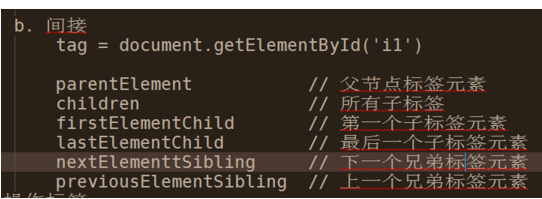
根据id找到内容:
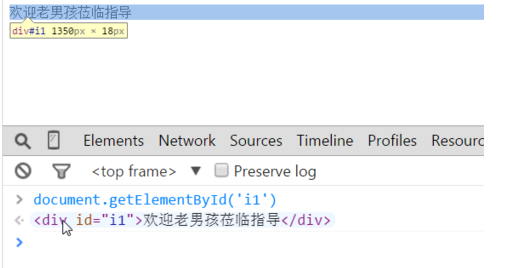
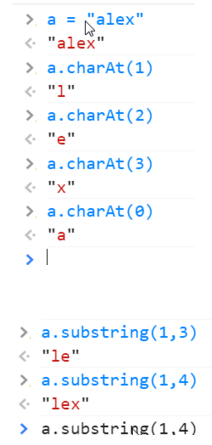
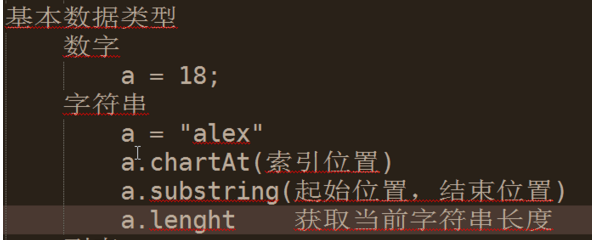
获取内容:
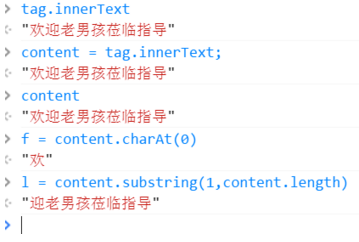
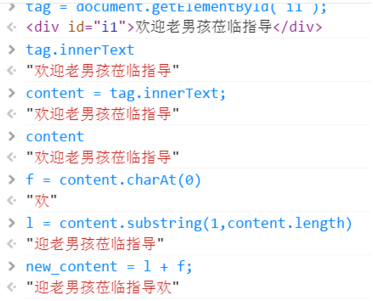
拼接字符串:
做一个滚动条效果:

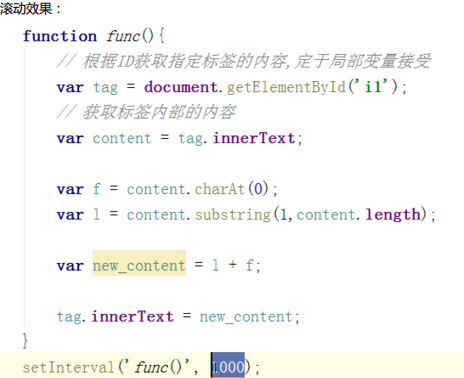
实践:
<!DOCTYPE html>
<html lang="en">
<head>
<meta charset="UTF-8">
<title>Title</title>
<script>
function func() {
var tag = document.getElementById('i1');
var content = tag.innerText;
var f = content.charAt(0);
var l = content.substring(1,content.length)
var new_content = l + f;
tag.innerText = new_content;
}
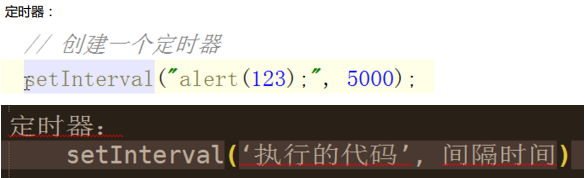
setInterval('func()',500);
</script>
</head>
<body>
<div id="i1">欢迎老男孩莅临指导 </div>
</body>
</html>
效果:


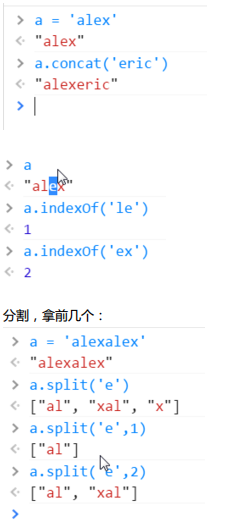
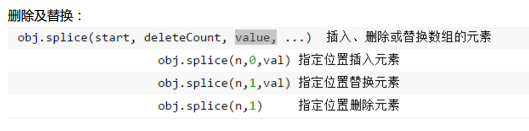
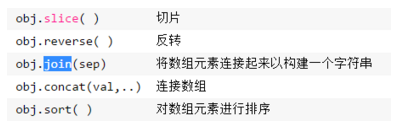
join 添加分隔符
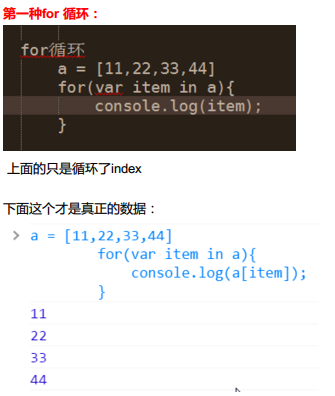
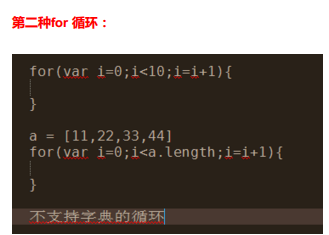
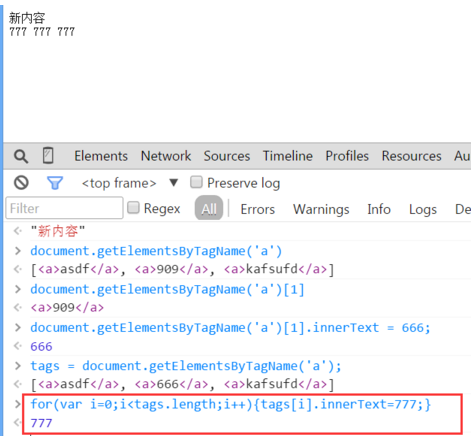
循环:


实现模态框:
<!DOCTYPE html>
<html lang="en">
<head>
<meta charset="UTF-8">
<title>Title</title>
<style>
.hide{
display: none;
}
.c1{
position: fixed;
left: 0;
right: 0;
top: 0;
bottom: 0;
background-color: black;
opacity: 0.6;
z-index: 9;
}
.c2{
width: 500px;
height: 400px;
background-color: white;
position: fixed;
left: 50%;
right: 50%;
top: 50%;
margin-left: -250px;
margin-top: -100px;
z-index: 10;
}
</style>
</head>
<body>
<div>
<input type="button" value="添加" onclick="ShowModel();"/>
</div>
<!--遮罩层 -->
<div id="i1" class="c1 hide"></div>
<!-- 弹出窗-->
<div id="i2" class="c2 hide">
<p>
<input type="text"/>
<input type="text"/>
</p>
<p>
<input type="button" value="取消" onclick="HideModel();"/>
<input type="button" value="确定" onclick="HideModel();"/>
</p>
</div>
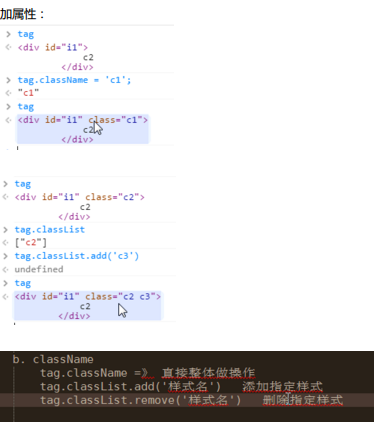
<script>
function ShowModel() {
document.getElementById('i1').classList.remove('hide')
document.getElementById('i2').classList.remove('hide')
}
function HideModel() {
document.getElementById('i1').classList.add('hide')
document.getElementById('i2').classList.add('hide')
}
</script>
</body>
</html>
效果:

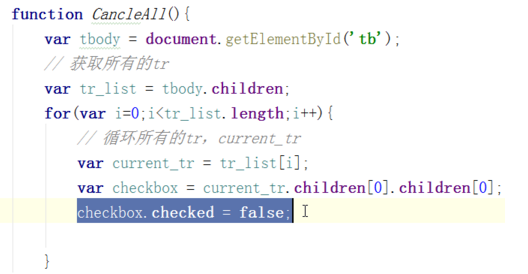
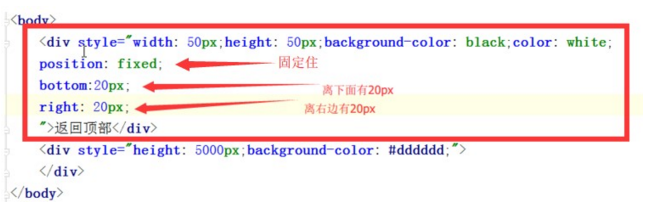
实现一个后台管理的简单页面,需要点击菜单显示菜单,可以全选,反选,可以点击有模态框效果:
<!DOCTYPE html>

<html lang="en">

<head>

    <meta charset="UTF-8">

    <title>管理</title>

    <style>

        .pg-header{

            margin: 0 auto;

            height: 48px;

            /*width:980px;*/

            background-color: #2459a2;

            color: coral;

            position: fixed;

            top: 0;

            left: 0;

            right: 0;

            line-height: 48px;

            z-index: 10;

        }

        .pg-header .logo{

            display: inline-block;

            margin-left: 50px;

        }

        .pg-body{

            margin-top: 50px;

            width:1080px;

            height: 2000px;

        }

        .pg-body .menu{

            text-align: center;

            width:200px;

            border: 1px solid red;

            padding: 10px;

            background-color: aquamarine;

            float: left;

            margin: 5px;

        }

        .pg-body .menu .every-menu{

            text-align: center;

            display: inline-block;

            border: 1px solid red;

            width: 180px;

            height: 50px;

            margin: 5px;

            padding: 2px;

            line-height: 50px;

        }

        .pg-body .info{

            float: left;

            margin: 5px;

            border: 1px solid red;

            width: 800px;

            height: 500px;

        }

        .pg-body .info .info-menu{

            margin: 10px;

        }

        .pg-body .info-body{

            margin: 5px;

            /*width: 650px;*/

            height: 400px;

            border: 1px solid red;

            text-align: center;

        }

        .go-header{

            position: fixed;

            bottom:20px;

            right:20px;

            width: 80px;

            height: 80px;

            background-color: coral;

            color: white;

            z-index: 11;

            cursor: pointer;

        }

        .hide{

            display: none;

        }

        .c1{

            position: fixed;

            left: 0;

            right: 0;

            top: 0;

            bottom: 0;

            background-color: black;

            opacity: 0.6;

            z-index: 9;

        }

        .c2{

            width: 500px;

            height: 400px;

            background-color: white;

            position: fixed;

            left: 50%;

            right: 50%;

            top: 50%;

            margin-left: -250px;

            margin-top: -100px;

            z-index: 10;

        }

        .hide-menu{

            display: none;

        }

        .item .header{

            height: 35px;

            background-color: #2459a2;

            color: white;

            line-height: 35px;

        }

    </style>

</head>

<body>

    <div class="pg-header">

        <a class="logo">LOGO</a>

    </div>

    <div class="go-header" onclick="GoTop();">

        <img src="back_top.png" alt="美女" title="返回顶部">

    </div>

    <!--遮罩层 -->

    <div id="i1" class="c1 hide"></div>

    <!-- 弹出窗-->

    <div id="i2" class="c2 hide">

        <p>

            <div style="margin: 5px;">

                <div style="display: inline-block;width: 60px;text-align: right">IP:</div>

                <input type="text"/>

            </div>

            <div style="margin: 5px;">

                <div style="display: inline-block;width: 60px;text-align: right">主机:</div>

                <input type="text"/>

            </div>

        </p>

        <p>

            <div style="display: inline-block;width: 200px;text-align: center">

                <input type="button" value="取消" onclick="HideModel();"/>

                <input type="button" value="确定" onclick="HideModel();"/>

            </div>

        </p>

    </div>

    <div class="pg-body">

        <div class="menu">

            <div class="item">

                <div id='m1' class="header" onclick="ChangeMenu('m1');">菜单1</div>

                <div class="content hide-menu">

                    <div>内容1</div>

                    <div>内容1</div>

                    <div>内容1</div>

                </div>

            </div>

            <div class="item">

                <div id='m2' class="header" onclick="ChangeMenu('m2');">菜单2</div>

                <div class="content hide-menu">

                    <div>内容2</div>

                    <div>内容2</div>

                    <div>内容2</div>

                </div>

            </div>

            <div class="item">

                <div id='m3' class="header" onclick="ChangeMenu('m3');">菜单3</div>

                <div class="content hide-menu">

                    <div>内容3</div>

                    <div>内容3</div>

                    <div>内容3</div>

                </div>

            </div>

            <div class="item">

                <div id='m4' class="header" onclick="ChangeMenu('m4');">菜单4</div>

                <div class="content hide-menu">

                    <div>内容4</div>

                    <div>内容4</div>

                    <div>内容4</div>

                </div>

            </div>

        </div>

        <div class="info">

            <div class="info-menu">

                <input type="button" value="全选" onclick="CheckAll();"> </input>

                <input type="button" value="取消" onclick="CancleAll();"> </input>

                <input type="button" value="反选" onclick="ReCheckAll();"> </input>

                <input type="button" value="添加" onclick="ShowModel();"> </input>

            </div>

            <div class="info-body">

                <div>

                    <table>

                        <thead>

                            <tr>

                                <td>选择</td>

                                <td>主机</td>

                                <td>IP</td>

                                <td>备注</td>

                            </tr>

                        </thead>

                        <tbody  id="tb">

                            <tr>

                                <td><input type="checkbox"/></td>

                                <td>web101</td>

                                <td>192.168.8.5</td>

                                <td></td>

                            </tr>

                            <tr>

                                <td><input type="checkbox"/></td>

                                <td>web102</td>

                                <td>192.168.8.6</td>

                                <td></td>

                            </tr>

                            <tr>

                                <td><input type="checkbox"/></td>

                                <td>web103</td>

                                <td>192.168.8.7</td>

                                <td></td>

                            </tr>

                            <tr>

                                <td><input type="checkbox"/></td>

                                <td>web104</td>

                                <td>192.168.8.8</td>

                                <td></td>

                            </tr>

                            <tr>

                                <td><input type="checkbox"/></td>

                                <td>web105</td>

                                <td>192.168.8.9</td>

                                <td></td>

                            </tr>

                        </tbody>

                    </table>

                </div>

            </div>

        </div>

        <div style="clear: both;"></div>

    </div>

<script>

    function CheckAll() {

        var tbody = document.getElementById('tb');

        var tr_list = tbody.children;

        for (var i = 0; i < tr_list.length; i++) {

            var curren_tr = tr_list[i];

            var checkbox = curren_tr.children[0].children[0];

            checkbox.checked = true;

        }

    }

    function CancleAll() {

        var tbody = document.getElementById('tb');

        var tr_list = tbody.children;

        for (var i = 0; i < tr_list.length; i++) {

            var curren_tr = tr_list[i];

            var checkbox = curren_tr.children[0].children[0];

            checkbox.checked = false;

        }

    }

    function ReCheckAll() {

        var tbody = document.getElementById('tb');

        var tr_list = tbody.children;

        for (var i = 0; i < tr_list.length; i++) {

            var curren_tr = tr_list[i];

            var checkbox = curren_tr.children[0].children[0];

            if (checkbox.checked) {

                checkbox.checked = false;

            }else{

                checkbox.checked = true;

            }

        }

    }

    function GoTop() {

        document.body.scrollTop = 0;

    }

    function ShowModel() {

        document.getElementById('i1').classList.remove('hide')

        document.getElementById('i2').classList.remove('hide')

    }

    function HideModel() {

        document.getElementById('i1').classList.add('hide')

        document.getElementById('i2').classList.add('hide')

    }

    function ChangeMenu(nid){

            var current_header = document.getElementById(nid);

            var item_list = current_header.parentElement.parentElement.children;

            for(var i=0;i<item_list.length;i++){

                var current_item = item_list[i];

                current_item.children[1].classList.add('hide-menu');

            }

            current_header.nextElementSibling.classList.remove('hide-menu');

    }

</script>

</body>

</html>
效果:
day15 CSS JS DOM初探的更多相关文章
- HTML,CSS,JS,DOM,jQuery
HTML 超链接访问顺序 a:link-->a:visited-->a:hover-->a:active.(有顺序) link:表示从未访问过的链接的样式 visited:表示已经访 ...
- 转战JS(1) 初探与变量类型、运算符、常用函数与转换
转战JS(1)初探与变量类型.运算符.常用函数与转换 做为一名.NET后台开发人员,正考滤向Web前端开发转型,之前也写过一代前端代码,可是当再回头看JS,并有转向它的意愿的时候,突然发现:原来JS不 ...
- 1. web前端开发分享-css,js入门篇
关注前端这么多年,没有大的成就,就入门期间积累了不少技巧与心得,跟大家分享一下,不一定都适合每个人,毕竟人与人的教育背景与成长环境心理活动都有差别,但就别人的心得再结合自己的特点,然后探索适合自己的学 ...
- css+js+html基础知识总结
css+js+html基础知识总结 一.CSS相关 1.css的盒子模型:IE盒子模型.标准W3C盒子模型: 2.CSS优先级机制: 选择器的优先权:!important>style(内联样式) ...
- web前端开发分享-css,js入门篇(转)
转自:http://www.cnblogs.com/jikey/p/3600308.html 关注前端这么多年,没有大的成就,就入门期间积累了不少技巧与心得,跟大家分享一下,不一定都适合每个人,毕竟人 ...
- jQuery中的ready方法及实现按需加载css,js
模拟jQuery中的ready方法及实现按需加载css,js 一.ready函数的实现 经常用jQuery类库或其他类库中的ready方法,有时候想想它们到底是怎么实现的,但是看了一下jQuery中的 ...
- Js DOM 详解
DOM事件类 基本概念 DOM事件的级别 1.DOM0 element.onclick = function(){} 2.DOM2 element.addEventListener("cli ...
- 用html+css+js实现选项卡切换效果
文章转载自:http://tongling.github.io/JSCards/ 用html+css+js实现选项卡切换效果 使用之前学过的综合知识,实现一个新闻门户网站上的常见选项卡效果: 文字素材 ...
- web前端开发分享-css,js入门篇
学习没有捷径,但学习是有技巧与方法. 一,css入门篇: 推荐书籍:css哪些事儿,精通css. 理由:css那些事儿,他是一本介绍css基础类的书,是入门的经典读物. 系统的介绍了css的选 ...
随机推荐
- python语法之一
Python 标识符 在 Python 里,标识符由字母.数字.下划线组成. 在 Python 中,所有标识符可以包括英文.数字以及下划线(_),但不能以数字开头. Python 中的标识符是区分大小 ...
- 关于dependencies和devDependencies的理解
npm install 会下载dependencies和devDependencies中的模块,当使用npm install --production或者注明NODE_ENV变量值为productio ...
- 将表格table作为execl导出
有时候的需求是从后台获取数据,然后将数据变成execl,进行导出,下载成execl 解决的方法是 一,比较方便的是 这有个插件 可以直接用 https://www.npmjs.com/package/ ...
- vue系列(一)子组件和父组件
父组件传递数据到子组件props 父组件 <template> <div class="main"> <div class="top&quo ...
- pat甲级1139
1139 First Contact(30 分) Unlike in nowadays, the way that boys and girls expressing their feelings o ...
- 提升Web性能的8个技巧总结
提升Web性能的8个技巧总结 在互联网盛行的今天,越来越多的在线用户希望得到安全可靠并且快速的访问体验.针对Web网页过于膨胀以及第三脚本蚕食流量等问题,Radware向网站运营人员提出以下改进建议, ...
- python_28_dictionary补充
#update:合并两个字典,如果有交叉就覆盖更新,没有交叉的就创建 info={ 'stu1101':'Liu Guannan', 'stu1102':'Wang Ruipu', 'stu1103' ...
- flush caches
- javaweb基础(28)_jstl的核心标签
一.JSTL标签库介绍 JSTL标签库的使用是为弥补html标签的不足,规范自定义标签的使用而诞生的.使用JSLT标签的目的就是不希望在jsp页面中出现java逻辑代码 二.JSTL标签库的分类 核心 ...
- Bootstrap 弹出框(Popover)插件
Bootstrap 弹出框(Popover)插件与Bootstrap 提示工具(Tooltip)插件类似,提供了一个扩展的视图,用户只需要把鼠标指针悬停到元素上面即可.弹出框的内容完全由Bootstr ...