[RN] React Native 好用的时间线 组件
React Native 好用的时间线 组件
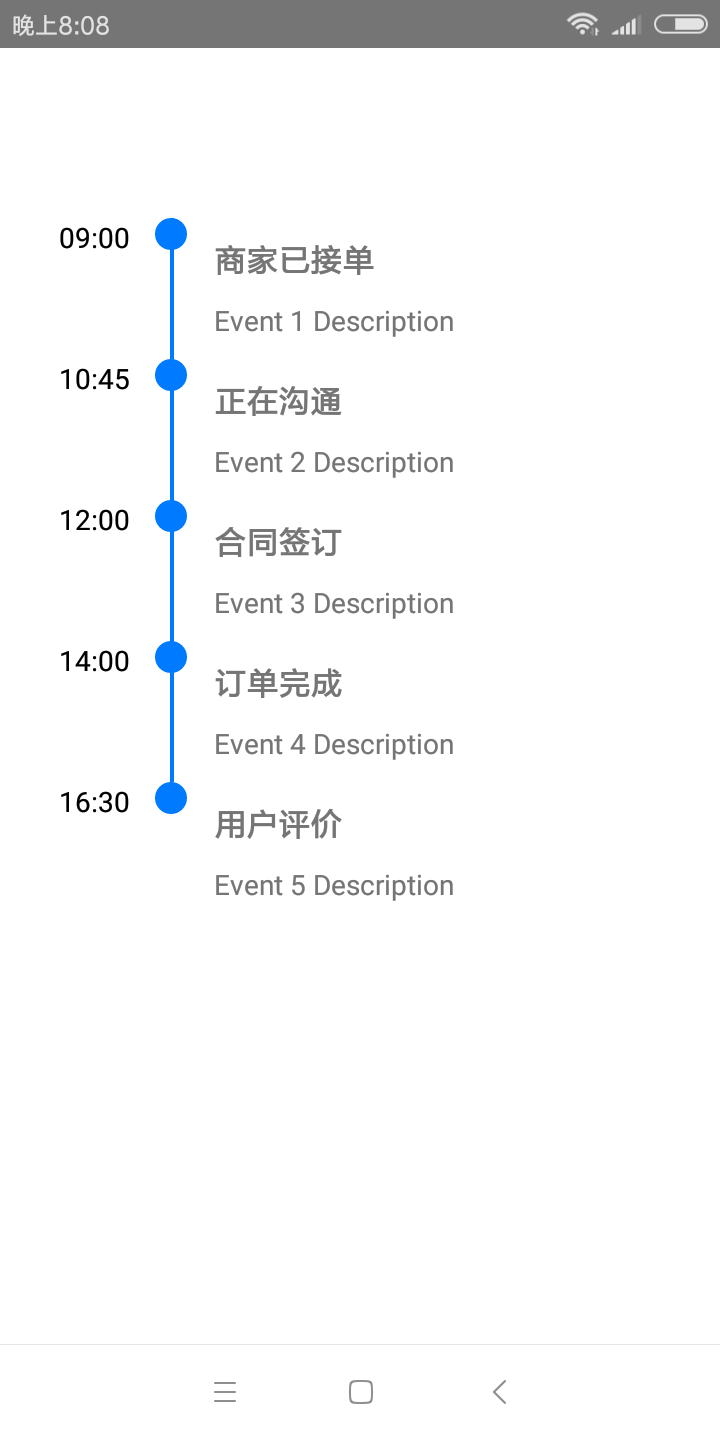
效果如下:
实现方法:
一、组件封装
CustomTimeLine.js
"use strict";
import React, {Component} from "react";
import {
StyleSheet,
ListView,
Image,
View,
Text,
TouchableOpacity
} from "react-native";
const ds = new ListView.DataSource({
rowHasChanged: (r1, r2) => r1 !== r2,
sectionHeaderHasChanged: (s1, s2) => s1 !== s2
});
const defaultCircleSize = ;
const defaultCircleColor = "#007AFF";
const defaultLineWidth = ;
const defaultLineColor = "#007AFF";
const defaultTimeTextColor = "black";
const defaultDotColor = "white";
const defaultInnerCircle = "none";
export default class CustomTimeLine extends Component {
static defaultProps = {
circleSize: defaultCircleSize,
circleColor: defaultCircleColor,
lineWidth: defaultLineWidth,
lineColor: defaultLineColor,
innerCircle: defaultInnerCircle,
columnFormat: "single-column-left",
separator: false,
showTime: true
};
constructor(props, context) {
super(props, context);
this._renderRow = this._renderRow.bind(this);
this.renderTime = (this.props.renderTime
? this.props.renderTime
: this._renderTime
).bind(this);
this.renderDetail = (this.props.renderDetail
? this.props.renderDetail
: this._renderDetail
).bind(this);
this.renderCircle = (this.props.renderCircle
? this.props.renderCircle
: this._renderCircle
).bind(this);
this.renderEvent = this._renderEvent.bind(this);
this.state = {
data: this.props.data,
dataSource: ds.cloneWithRows(this.props.data),
x: ,
width:
};
}
componentWillReceiveProps(nextProps) {
this.setState({
data: nextProps.data,
dataSource: ds.cloneWithRows(nextProps.data)
});
}
render() {
return (
<View style={[styles.container, this.props.style]}>
<ListView
ref="listView"
style={[styles.listview, this.props.listViewStyle]}
dataSource={this.state.dataSource}
renderRow={this._renderRow}
automaticallyAdjustContentInsets={false}
{...this.props.options}
/>
</View>
);
}
_renderRow(rowData, sectionID, rowID) {
let content = null;
switch (this.props.columnFormat) {
case "single-column-left":
content = (
<View style={[styles.rowContainer, this.props.rowContainerStyle]}>
{this.renderTime(rowData, sectionID, rowID)}
{this.renderEvent(rowData, sectionID, rowID)}
{this.renderCircle(rowData, sectionID, rowID)}
</View>
);
break;
case "single-column-right":
content = (
<View style={[styles.rowContainer, this.props.rowContainerStyle]}>
{this.renderEvent(rowData, sectionID, rowID)}
{this.renderTime(rowData, sectionID, rowID)}
{this.renderCircle(rowData, sectionID, rowID)}
</View>
);
break;
case "two-column":
content =
rowID % === ? (
<View style={[styles.rowContainer, this.props.rowContainerStyle]}>
{this.renderTime(rowData, sectionID, rowID)}
{this.renderEvent(rowData, sectionID, rowID)}
{this.renderCircle(rowData, sectionID, rowID)}
</View>
) : (
<View style={[styles.rowContainer, this.props.rowContainerStyle]}>
{this.renderEvent(rowData, sectionID, rowID)}
{this.renderTime(rowData, sectionID, rowID)}
{this.renderCircle(rowData, sectionID, rowID)}
</View>
);
break;
}
return <View key={rowID}>{content}</View>;
}
_renderTime(rowData, sectionID, rowID) {
if (!this.props.showTime) {
return null;
}
var timeWrapper = null;
switch (this.props.columnFormat) {
case "single-column-left":
timeWrapper = {
alignItems: "flex-end"
};
break;
case "single-column-right":
timeWrapper = {
alignItems: "flex-start"
};
break;
case "two-column":
timeWrapper = {
flex: ,
alignItems: rowID % === ? "flex-end" : "flex-start"
};
break;
}
return (
<View style={timeWrapper}>
<View style={[styles.timeContainer, this.props.timeContainerStyle]}>
<Text style={[styles.time, this.props.timeStyle]}>
{rowData.time}
</Text>
</View>
</View>
);
}
_renderEvent(rowData, sectionID, rowID) {
const lineWidth = rowData.lineWidth
? rowData.lineWidth
: this.props.lineWidth;
const isLast = this.props.renderFullLine
? !this.props.renderFullLine
: this.state.data.slice(-)[] === rowData;
const lineColor = isLast
? "rgba(0,0,0,0)"
: rowData.lineColor ? rowData.lineColor : this.props.lineColor;
let opStyle = null;
switch (this.props.columnFormat) {
case "single-column-left":
opStyle = {
borderColor: lineColor,
borderLeftWidth: lineWidth,
borderRightWidth: ,
marginLeft: ,
paddingLeft:
};
break;
case "single-column-right":
opStyle = {
borderColor: lineColor,
borderLeftWidth: ,
borderRightWidth: lineWidth,
marginRight: ,
paddingRight:
};
break;
case "two-column":
opStyle =
rowID % ==
? {
borderColor: lineColor,
borderLeftWidth: lineWidth,
borderRightWidth: ,
marginLeft: ,
paddingLeft:
}
: {
borderColor: lineColor,
borderLeftWidth: ,
borderRightWidth: lineWidth,
marginRight: ,
paddingRight:
};
break;
}
return (
<View
style={[styles.details, opStyle]}
onLayout={evt => {
if (!this.state.x && !this.state.width) {
const {x, width} = evt.nativeEvent.layout;
this.setState({x, width});
}
}}
>
<TouchableOpacity
disabled={this.props.onEventPress == null}
style={[this.props.detailContainerStyle]}
onPress={() =>
this.props.onEventPress ? this.props.onEventPress(rowData) : null
}
>
<View style={styles.detail}>
{this.renderDetail(rowData, sectionID, rowID)}
</View>
{this._renderSeparator()}
</TouchableOpacity>
</View>
);
}
_renderDetail(rowData, sectionID, rowID) {
let title = rowData.description ? (
<View>
<Text style={[styles.title, this.props.titleStyle]}>
{rowData.title}
</Text>
<Text style={[styles.description, this.props.descriptionStyle]}>
{rowData.description}
</Text>
</View>
) : (
<Text style={[styles.title, this.props.titleStyle]}>{rowData.title}</Text>
);
return <View style={styles.container}>{title}</View>;
}
_renderCircle(rowData, sectionID, rowID) {
var circleSize = rowData.circleSize
? rowData.circleSize
: this.props.circleSize ? this.props.circleSize : defaultCircleSize;
var circleColor = rowData.circleColor
? rowData.circleColor
: this.props.circleColor ? this.props.circleColor : defaultCircleColor;
var lineWidth = rowData.lineWidth
? rowData.lineWidth
: this.props.lineWidth ? this.props.lineWidth : defaultLineWidth;
var circleStyle = null;
switch (this.props.columnFormat) {
case "single-column-left":
circleStyle = {
width: this.state.x ? circleSize : ,
height: this.state.x ? circleSize : ,
borderRadius: circleSize / ,
backgroundColor: circleColor,
left: this.state.x - circleSize / + (lineWidth - ) /
};
break;
case "single-column-right":
circleStyle = {
width: this.state.width ? circleSize : ,
height: this.state.width ? circleSize : ,
borderRadius: circleSize / ,
backgroundColor: circleColor,
left: this.state.width - circleSize / - (lineWidth - ) /
};
break;
case "two-column":
circleStyle = {
width: this.state.width ? circleSize : ,
height: this.state.width ? circleSize : ,
borderRadius: circleSize / ,
backgroundColor: circleColor,
left: this.state.width - circleSize / - (lineWidth - ) /
};
break;
}
var innerCircle = null;
switch (this.props.innerCircle) {
case "icon":
let iconSource = rowData.icon ? rowData.icon : this.props.icon;
let iconStyle = {
height: circleSize,
width: circleSize
};
innerCircle = (
<Image
source={iconSource}
style={[iconStyle, this.props.iconStyle]}
/>
);
break;
case "dot":
let dotStyle = {
height: circleSize / ,
width: circleSize / ,
borderRadius: circleSize / ,
backgroundColor: rowData.dotColor
? rowData.dotColor
: this.props.dotColor ? this.props.dotColor : defaultDotColor
};
innerCircle = <View style={[styles.dot, dotStyle]}/>;
break;
}
return (
<View style={[styles.circle, circleStyle, this.props.circleStyle]}>
{innerCircle}
</View>
);
}
_renderSeparator() {
if (!this.props.separator) {
return null;
}
return <View style={[styles.separator, this.props.separatorStyle]}/>;
}
}
const styles = StyleSheet.create({
container: {
flex:
},
listview: {
flex:
},
sectionHeader: {
marginBottom: ,
backgroundColor: "#007AFF",
height: ,
justifyContent: "center"
},
sectionHeaderText: {
color: "#FFF",
fontSize: ,
alignSelf: "center"
},
rowContainer: {
flexDirection: "row",
flex: ,
//alignItems: 'stretch',
justifyContent: "center"
},
timeContainer: {
minWidth:
},
time: {
textAlign: "right",
color: defaultTimeTextColor
},
circle: {
width: ,
height: ,
borderRadius: ,
position: "absolute",
left: -,
alignItems: "center",
justifyContent: "center"
},
dot: {
width: ,
height: ,
borderRadius: ,
backgroundColor: defaultDotColor
},
title: {
fontSize: ,
fontWeight: "bold"
},
details: {
borderLeftWidth: defaultLineWidth,
flexDirection: "column",
flex:
},
detail: {paddingTop: , paddingBottom: },
description: {
marginTop:
},
separator: {
height: ,
backgroundColor: "#aaa",
marginTop: ,
marginBottom:
}
});
代码调用:
import React, {Component} from 'react';

import {StyleSheet, View} from 'react-native';

import Timeline from './CustomTimeLine';

export default class TestTimeLine extends Component {

    constructor() {

        super()

        this.data = [

            {time: '09:00', title: '商家已接单', description: 'Event 1 Description'},

            {time: '10:45', title: '正在沟通', description: 'Event 2 Description'},

            {time: '12:00', title: '合同签订', description: 'Event 3 Description'},

            {time: '14:00', title: '订单完成', description: 'Event 4 Description'},

            {time: '16:30', title: '用户评价', description: 'Event 5 Description'}

        ]

    }

    render() {

        return (

            <View style={styles.container}>

                <Timeline

                    style={styles.list}

                    data={this.data}

                    showTime={true}

                />

            </View>

        );

    }

}

const styles = StyleSheet.create({

    container: {

        flex: ,

        padding: ,

        paddingTop: ,

        backgroundColor: 'white'

    },

    list: {

        flex: ,

        marginTop: ,

    },

});
更多使用方法,参考:
https://github.com/thegamenicorus/react-native-timeline-listview
本博客地址: wukong1688
本文原文地址:https://www.cnblogs.com/wukong1688/p/11049014.html
转载请著名出处!谢谢~~
[RN] React Native 好用的时间线 组件的更多相关文章
- [RN] React Native 幻灯片效果 Banner
[RN] React Native 幻灯片效果 Banner 1.定义Banner import React, {Component} from 'react'; import {Image, Scr ...
- [RN] React Native 实现图片预览
[RN] React Native 实现图片预览 效果预览: 代码如下: 'use strict'; import React, {Component} from 'react'; import {I ...
- [RN] React Native 常见基本问题归纳总结
[RN] React Native 常见基本问题归纳总结 本问题总结涉及到版本为: "react": "16.8.3","react-native& ...
- [RN] React Native 关闭所有黄色警告
[RN] React Native 关闭所有黄色警告 console.ignoredYellowBox = ['Warning: BackAndroid is deprecated. Please u ...
- [RN] React Native 下实现底部标签(支持滑动切换)
上一篇文章 [RN] React Native 下实现底部标签(不支持滑动切换) 总结了不支持滑动切换的方法,此篇文章总结出 支持滑动 的方法 准备工作之类的,跟上文类似,大家可点击上文查看相关内容. ...
- [RN] React Native 常用命令行
[RN] React Native 常用命令行 1.查看当前版本 react-native --version 或 react-native -v 2.创建指定版本的React Native项目 1) ...
- [RN] React Native 实现 类似QQ 登陆页面
[RN] React Native 实现 类似QQ 登陆页面 一.主页index.js 项目目录下index.js /** * @format */ import {AppRegistry} from ...
- 基于React Native的Material Design风格的组件库 MRN
基于React Native的Material Design风格的组件库.(为了平台统一体验,目前只打算支持安卓) 官方网站 http://mrn.js.org/ Github https://git ...
- [RN] React Native 打包时 减少 Apk 的大小
React Native 打包时 减少 Apk 的大小 主要有两个方法: 在打包前设置 android\app\build.gradle 文件中 1) def enableProguardInRele ...
随机推荐
- sublime text3安装ConvertToUTF8
1.安装 Package Control 方式1:命令行安装 按ctrl+~快捷键,调出一个小文本款,然后粘贴以下代码: import urllib.request,os,hashlib; h = ' ...
- centos7.x下环境搭建(四)—redis安装
redis介绍 redis是用C语言开发的一个开源的高性能键值对(key-value)数据库.它通过提供多种键值数据类型来适应不同场景下的存储需求,目前为止redis支持的键值数据类型如下字符串.列表 ...
- Centos7利用rsync实现文件同步
0x01 测试环境 CentOS 7.4 Rsync服务端:192.168.204.130 CentOS 7.4 Rsync客户端:192.168.204.168 0x02 rsync同步方式 第一种 ...
- MP3文件信息修改
MP3文件信息 参考链接:https://www.jianshu.com/p/e368517ec7b9 总结: ID3V1在MP3文件后面;ID3V2在MP3文件前面;现在有些文件是V1的,有些文件是 ...
- 13、VUE单文件工程
1.为什么要使用单文件工程? 1.Vue.js路由组件的不方便 不支持引用HTML页面,以至于template里面定义的标签会编辑器当字符串,这让编辑变的困难. 2.Vue.js于Node.js语言结 ...
- VS2008激活找不到密匙输入框
VS2008试用版到期后会无法使用,网上一搜就能找到很多激活码: Visual Studio 2008 Professional Edition: XMQ2Y-4T3V6-XJ48Y-D3K2V-6C ...
- 用jquery写自己的form表单验证
这几天看了锋利的jquery,感觉很不错.特别是jquery强大的选择器.今天就利用jquery写了一个自己的form表单验证的小案例.当巩固下jquery.首先贴下代码,当然只是一个小案例. 思路: ...
- 用友 U9 常用的东西
系统资源 数据字典 UI组件 UI参照组件 BE组件 BP组件 SV组件
- Mac下Homebrew将程序文件存在什么位置
一般情况是这么操作的: 1.通过brew install安装应用最先是放在/usr/local/Cellar/目录下. 2.有些应用会自动创建软链接放在/usr/bin或者/usr/sbin,同时也会 ...
- css的尺寸、display的属性、以及浮动和清除浮动的方法
css的尺寸width heightline-height 行高是由三部分构成,上间距 文本高度 下间距,且上下间距相等.所以文字居中.行高:一旦设置了行高,元素内部必须有内容.line-height ...