SpringBoot+Vue前后端分离项目,maven package自动打包整合
起因:看过Dubbo管控台的都知道,人家是个前后端分离的项目,可是一条打包命令能让两个项目整合在一起,我早想这样玩玩了。
1. 建立个maven父项目
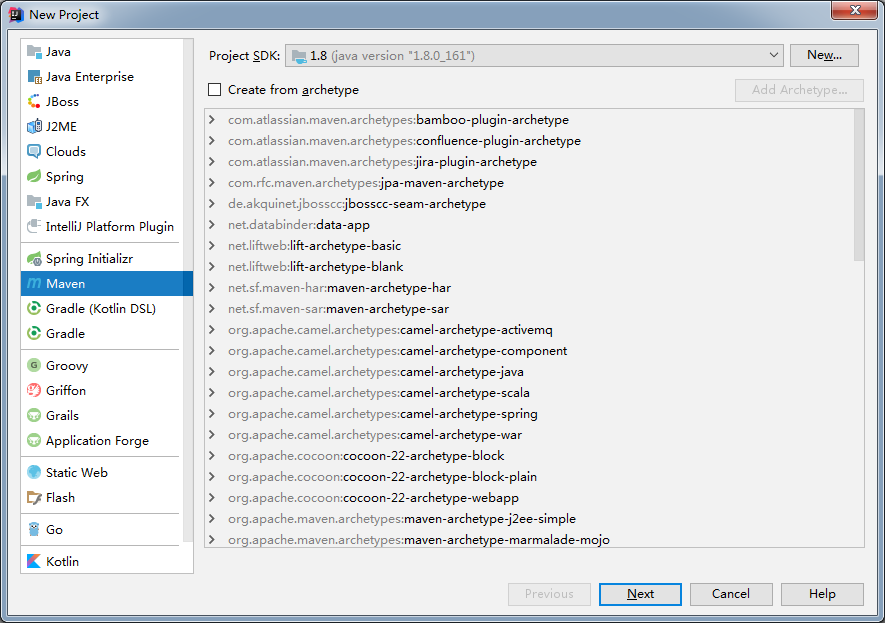
next
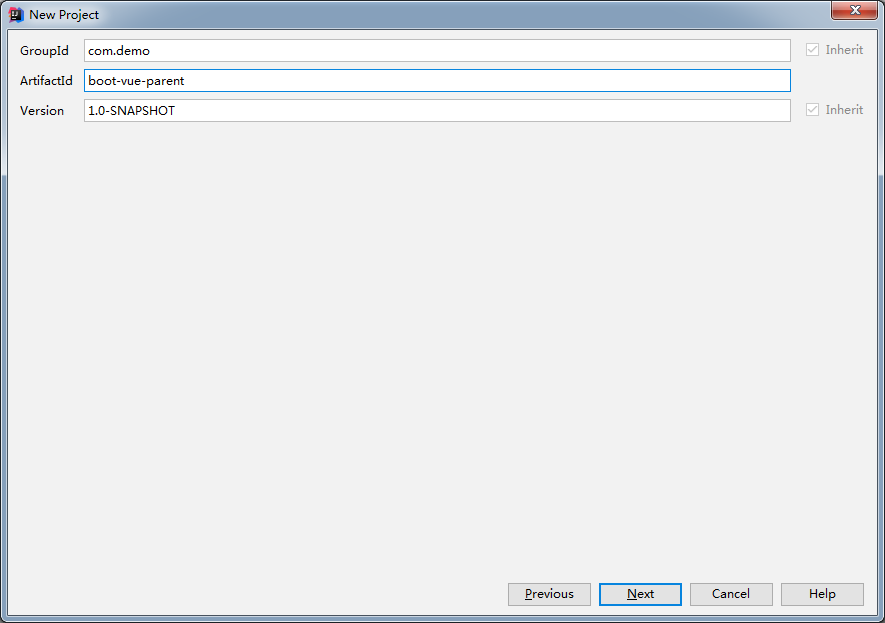
这个作为父工程,next

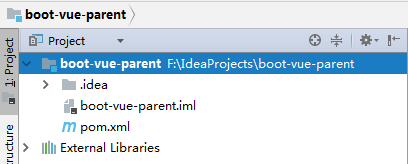
Finish,然后把项目目录的src删除
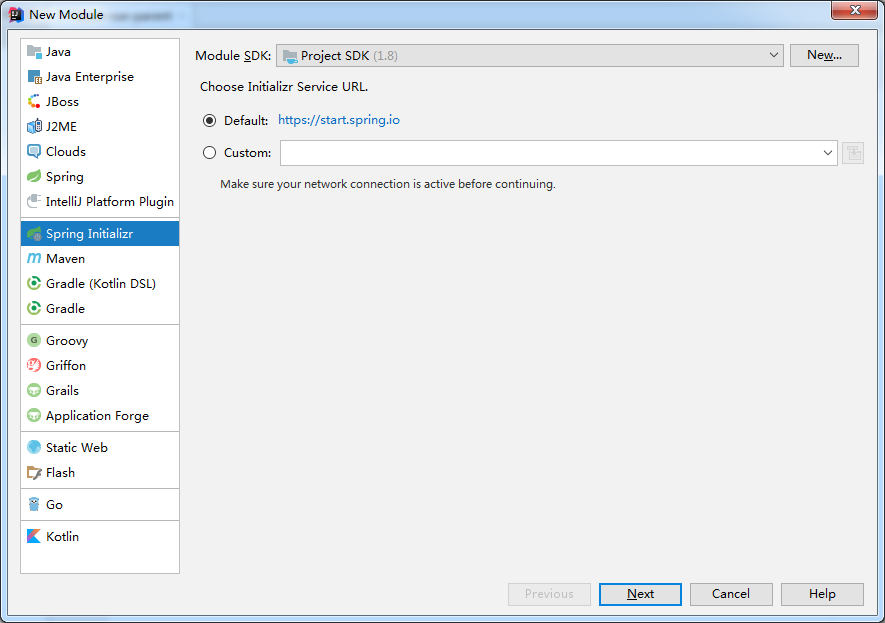
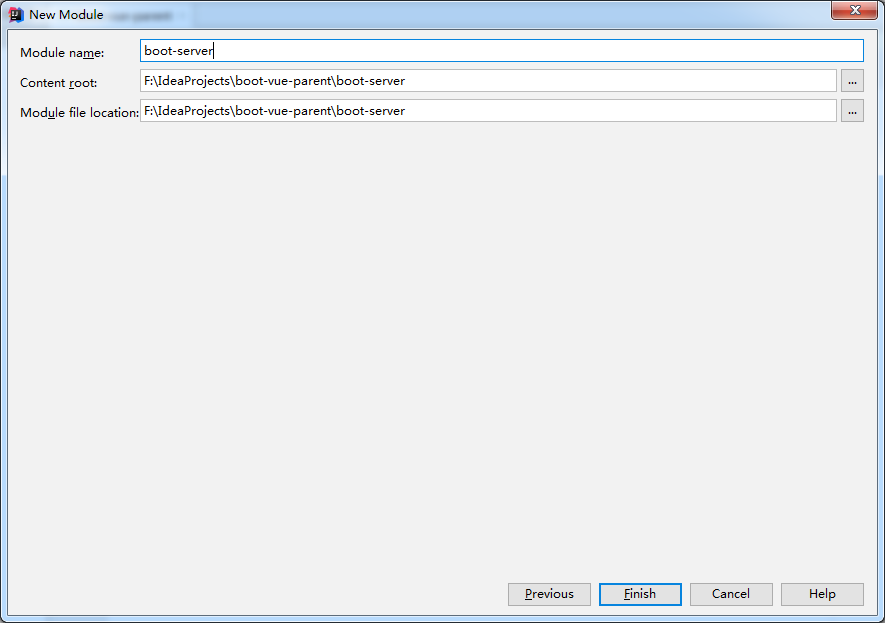
2. 建立springboot子项目(Module)
next
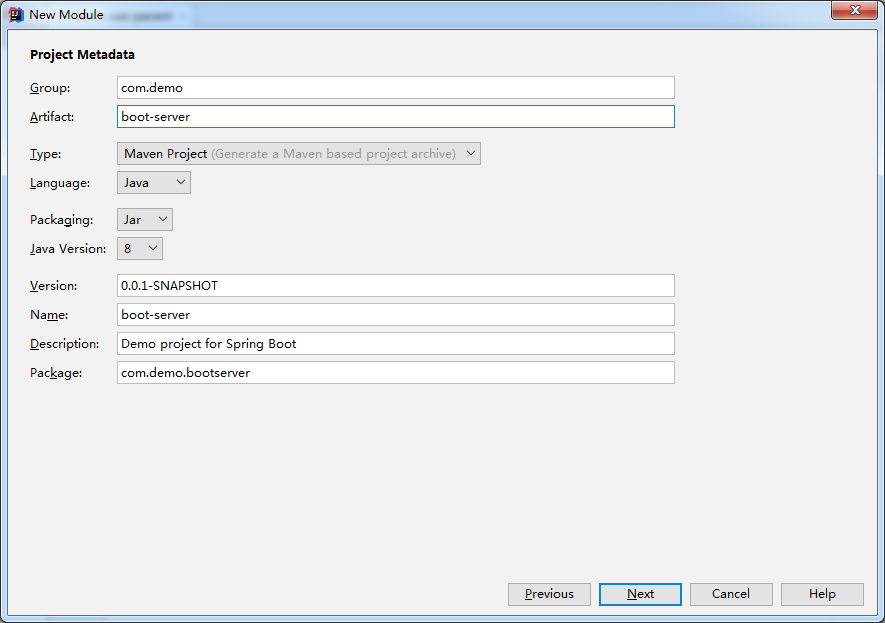
next
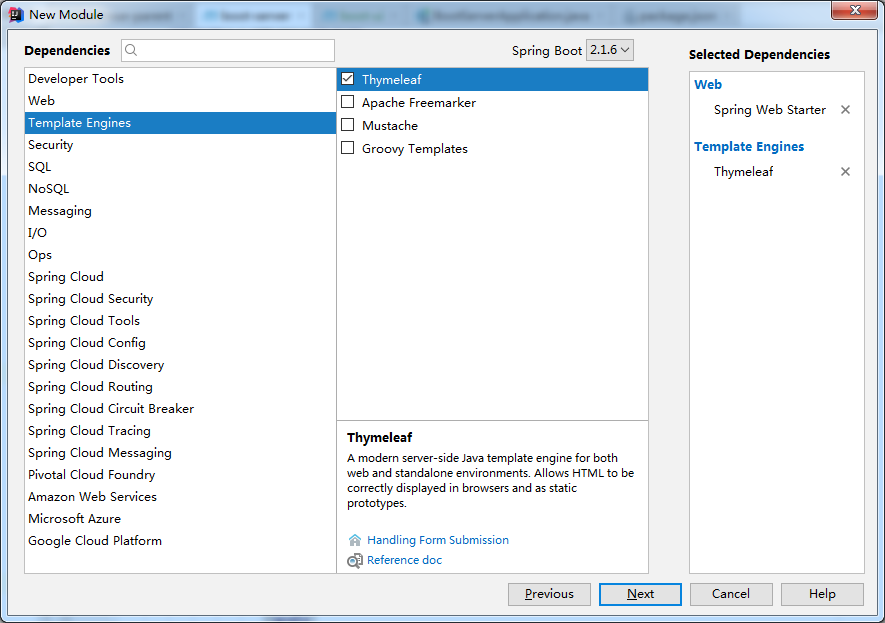
这里引入模板引擎,是为了能运行前端项目,next
3. 建立前端子项目
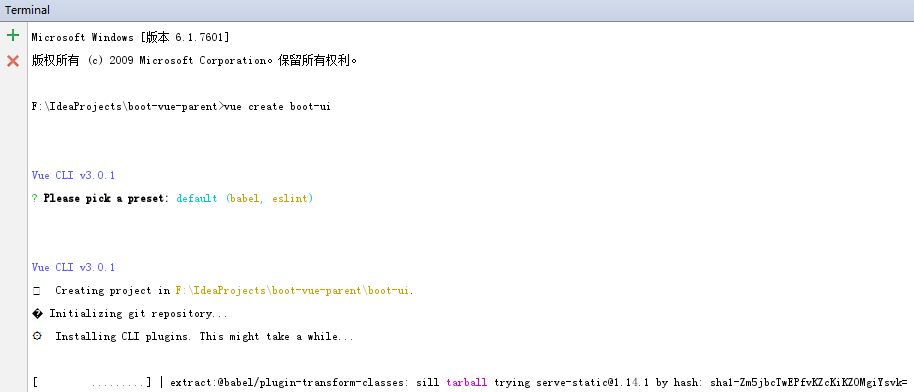
这里就不是new Module了,而是直接在父项目根目录,用vue-cli3.0工具直接创建。
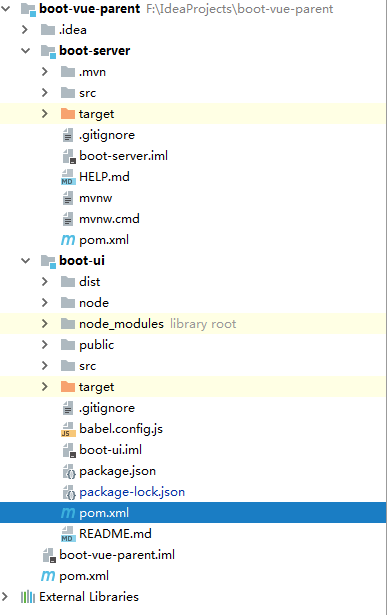
4. 先提前看一下最终项目目录(这个目录是我最后打包测试没问题的目录,所以会出现一些打包之后才会有的文件~)
5. 要实现打包整合只需要修改三个文件,即:三个pom.xml文件。

第一个,parent的pom.xml
<?xml version="1.0" encoding="UTF-8"?>

<project xmlns="http://maven.apache.org/POM/4.0.0"

         xmlns:xsi="http://www.w3.org/2001/XMLSchema-instance"

         xsi:schemaLocation="http://maven.apache.org/POM/4.0.0 http://maven.apache.org/xsd/maven-4.0.0.xsd">

    <modelVersion>4.0.0</modelVersion>

    <groupId>com.demo</groupId>

    <artifactId>boot-vue-parent</artifactId>

    <version>1.0-SNAPSHOT</version>

    <packaging>pom</packaging>

    <modules>

        <module>boot-ui</module>

        <module>boot-server</module>

    </modules>

    <properties>

        <spring.boot.version>2.1.6.RELEASE</spring.boot.version>

        <maven.resource.version>3.1.0</maven.resource.version>

        <maven.clean.version>3.1.0</maven.clean.version>

        <maven.compiler.version>3.8.1</maven.compiler.version>

        <java.source.version>1.8</java.source.version>

        <java.target.version>1.8</java.target.version>

        <file.encoding>UTF-8</file.encoding>

        <checkstyle.skip>true</checkstyle.skip>

        <maven-checkstyle-plugin-version>3.0.0</maven-checkstyle-plugin-version>

        <jacoco-version>0.8.2</jacoco-version>

    </properties>

    <dependencyManagement>

        <dependencies>

            <dependency>

                <groupId>org.springframework.boot</groupId>

                <artifactId>spring-boot-starter-parent</artifactId>

                <version>${spring.boot.version}</version>

                <scope>import</scope>

                <type>pom</type>

            </dependency>

        </dependencies>

    </dependencyManagement>

    <profiles>

        <profile>

            <id>checkstyle</id>

            <activation>

                <jdk>[1.8,)</jdk>

            </activation>

            <build>

                <plugins>

                    <!--辅助判断代码格式是否满足规范(非必须)-->

                    <plugin>

                        <groupId>org.apache.maven.plugins</groupId>

                        <artifactId>maven-checkstyle-plugin</artifactId>

                        <version>${maven-checkstyle-plugin-version}</version>

                        <dependencies>

                            <dependency>

                                <groupId>com.puppycrawl.tools</groupId>

                                <artifactId>checkstyle</artifactId>

                                <version>8.9</version>

                            </dependency>

                        </dependencies>

                        <executions>

                            <execution>

                                <id>checkstyle-validation</id>

                                <phase>validate</phase>

                                <configuration>

                                    <configLocation>codestyle/checkstyle.xml</configLocation>

                                    <encoding>UTF-8</encoding>

                                    <consoleOutput>true</consoleOutput>

                                    <failOnViolation>true</failOnViolation>

                                </configuration>

                                <goals>

                                    <goal>check</goal>

                                </goals>

                            </execution>

                        </executions>

                    </plugin>

                    <!--Apache RAT (Release Audit Tool) 是一个用来检查软件许可证发行的准确性和高效性的工具。它的本质是:对可能出现的问题作出预测(非必须)-->

                    <plugin>

                        <groupId>org.apache.rat</groupId>

                        <artifactId>apache-rat-plugin</artifactId>

                        <version>0.12</version>

                        <executions>

                            <execution>

                                <id>verify.rat</id>

                                <phase>verify</phase>

                                <goals>

                                    <goal>check</goal>

                                </goals>

                                <configuration>

                                    <excludes>

                                        <exclude>**/*.versionsBackup</exclude>

                                        <exclude>**/.idea/</exclude>

                                        <exclude>**/*.iml</exclude>

                                        <exclude>**/*.txt</exclude>

                                        <exclude>**/*.sh</exclude>

                                        <exclude>**/*.bat</exclude>

                                        <exclude>**/*.md</exclude>

                                        <exclude>.git/</exclude>

                                        <exclude>**/*.git*</exclude>

                                        <exclude>.gitignore</exclude>

                                        <exclude>**/.settings/*</exclude>

                                        <exclude>**/.classpath</exclude>

                                        <exclude>**/*.properties</exclude>

                                        <exclude>**/.project</exclude>

                                        <exclude>**/target/**</exclude>

                                        <exclude>**/*.log</exclude>

                                        <exclude>CODE_OF_CONDUCT.md</exclude>

                                        <exclude>.codecov.yml</exclude>

                                        <exclude>.travis.yml</exclude>

                                        <exclude>PULL_REQUEST_TEMPLATE.md</exclude>

                                        <exclude>CONTRIBUTING.md</exclude>

                                        <exclude>**/codestyle/*</exclude>

                                        <exclude>**/node_modules/**</exclude>

                                        <exclude>**/.babelrc</exclude>

                                        <exclude>**/.editorconfig</exclude>

                                        <exclude>**/package-lock.json</exclude>

                                        <exclude>**/package.json</exclude>

                                        <exclude>**/OpenSans.css</exclude>

                                        <exclude>**/.eslintignore</exclude>

                                        <exclude>**/resources/META-INF/**</exclude>

                                        <exclude>**/src/main/resources/public/**</exclude>

                                        <exclude>**/src/licenses/**</exclude>

                                    </excludes>

                                </configuration>

                            </execution>

                        </executions>

                    </plugin>

                </plugins>

            </build>

        </profile>

    </profiles>

    <build>

        <plugins>

            <!--JAVA代码覆盖率工具(非必须)-->

            <plugin>

                <groupId>org.jacoco</groupId>

                <artifactId>jacoco-maven-plugin</artifactId>

                <version>${jacoco-version}</version>

                <executions>

                    <execution>

                        <goals>

                            <goal>prepare-agent</goal>

                        </goals>

                    </execution>

                    <execution>

                        <id>report</id>

                        <phase>test</phase>

                        <goals>

                            <goal>report</goal>

                        </goals>

                    </execution>

                </executions>

            </plugin>

            <!--编译插件-->

            <plugin>

                <groupId>org.apache.maven.plugins</groupId>

                <artifactId>maven-compiler-plugin</artifactId>

                <version>${maven.compiler.version}</version>

                <configuration>

                    <source>${java.source.version}</source>

                    <target>${java.target.version}</target>

                    <encoding>${file.encoding}</encoding>

                </configuration>

            </plugin>

        </plugins>

    </build>

</project>
第二个,springboot项目的pom.xml文件
<?xml version="1.0" encoding="UTF-8"?>

<project xmlns="http://maven.apache.org/POM/4.0.0" xmlns:xsi="http://www.w3.org/2001/XMLSchema-instance"

    xsi:schemaLocation="http://maven.apache.org/POM/4.0.0 http://maven.apache.org/xsd/maven-4.0.0.xsd">

    <modelVersion>4.0.0</modelVersion>

    <parent>

        <groupId>com.demo</groupId>

        <artifactId>boot-vue-parent</artifactId>

        <version>1.0-SNAPSHOT</version>

    </parent>

    <artifactId>boot-server</artifactId>

    <properties>

        <java.version>1.8</java.version>

    </properties>

    <dependencies>

        <dependency>

            <groupId>org.springframework.boot</groupId>

            <artifactId>spring-boot-starter-web</artifactId>

        </dependency>

        <dependency>

            <groupId>org.springframework.boot</groupId>

            <artifactId>spring-boot-starter-thymeleaf</artifactId>

        </dependency>

        <dependency>

            <groupId>org.springframework.boot</groupId>

            <artifactId>spring-boot-starter-test</artifactId>

            <scope>test</scope>

        </dependency>

    </dependencies>

    <build>

        <plugins>

            <plugin>

                <groupId>org.springframework.boot</groupId>

                <artifactId>spring-boot-maven-plugin</artifactId>

                <version>${spring.boot.version}</version>

                <!--解决打包后,执行java -jar 命令,找不到主清单属性-->

                <executions>

                    <execution>

                        <phase>package</phase>

                        <goals>

                            <goal>repackage</goal>

                        </goals>

                    </execution>

                </executions>

            </plugin>

            <!--clean插件-->

            <plugin>

                <groupId>org.apache.maven.plugins</groupId>

                <artifactId>maven-clean-plugin</artifactId>

                <version>${maven.clean.version}</version>

                <configuration>

                    <filesets>

                        <fileset>

                            <directory>src/main/resources/static</directory>

                        </fileset>

                        <fileset>

                            <directory>src/main/resources/templates</directory>

                        </fileset>

                    </filesets>

                </configuration>

            </plugin>

            <!--资源插件,主要为了从前端项目里复制打包好的文件到springboot项目-->

            <plugin>

                <groupId>org.apache.maven.plugins</groupId>

                <artifactId>maven-resources-plugin</artifactId>

                <version>${maven.resource.version}</version>

                <executions>

                    <execution>

                        <id>copy static</id>

                        <phase>generate-resources</phase>

                        <goals>

                            <goal>copy-resources</goal>

                        </goals>

                        <configuration>

                            <outputDirectory>src/main/resources/static</outputDirectory>

                            <overwrite>true</overwrite>

                            <resources>

                                <resource>

                                    <!--因为vue-cli打包的目录在项目的根目录,所以从这里复制-->

                                    <directory>${project.parent.basedir}/boot-ui/dist</directory>

                                    <includes>

                                        <include>css/</include>

                                        <include>img/</include>

                                        <include>js/</include>

                                        <include>favicon.ico</include>

                                    </includes>

                                </resource>

                            </resources>

                        </configuration>

                    </execution>

                    <execution>

                        <id>copy template</id>

                        <phase>generate-resources</phase>

                        <goals>

                            <goal>copy-resources</goal>

                        </goals>

                        <configuration>

                            <outputDirectory>src/main/resources/templates</outputDirectory>

                            <overwrite>true</overwrite>

                            <resources>

                                <resource>

                                    <!--因为vue-cli打包的目录在项目的根目录,所以从这里复制-->

                                    <directory>${project.parent.basedir}/boot-ui/dist</directory>

                                    <includes>

                                        <include>index.html</include>

                                    </includes>

                                </resource>

                            </resources>

                        </configuration>

                    </execution>

                </executions>

            </plugin>

        </plugins>

    </build>

</project>
最后一个,vue项目里新添加的pom.xml文件
<?xml version="1.0" encoding="UTF-8"?>

<project xmlns="http://maven.apache.org/POM/4.0.0"

         xmlns:xsi="http://www.w3.org/2001/XMLSchema-instance"

         xsi:schemaLocation="http://maven.apache.org/POM/4.0.0 http://maven.apache.org/xsd/maven-4.0.0.xsd">

    <parent>

        <groupId>com.demo</groupId>

        <artifactId>boot-vue-parent</artifactId>

        <version>1.0-SNAPSHOT</version>

    </parent>

    <modelVersion>4.0.0</modelVersion>

    <artifactId>boot-ui</artifactId>

    <properties>

        <project.build.sourceEncoding>UTF-8</project.build.sourceEncoding>

        <project.reporting.outputEncoding>UTF-8</project.reporting.outputEncoding>

        <java.version>1.8</java.version>

        <frontend-maven-plugin.version>1.6</frontend-maven-plugin.version>

    </properties>

    <build>

        <plugins>

            <!--frontend-maven-plugin为项目本地下载/安装Node和NPM,运行npm install命令-->

            <plugin>

                <groupId>com.github.eirslett</groupId>

                <artifactId>frontend-maven-plugin</artifactId>

                <version>${frontend-maven-plugin.version}</version>

                <executions>

                    <execution>

                        <id>install node and npm</id>

                        <goals>

                            <goal>install-node-and-npm</goal>

                        </goals>

                        <configuration>

                            <nodeVersion>v10.16.0</nodeVersion>

                            <npmVersion>6.9.0</npmVersion>

                        </configuration>

                    </execution>

                    <!-- Install all project dependencies -->

                    <execution>

                        <id>npm install</id>

                        <goals>

                            <goal>npm</goal>

                        </goals>

                        <!-- optional: default phase is "generate-resources" -->

                        <phase>generate-resources</phase>

                        <!-- Optional configuration which provides for running any npm command -->

                        <configuration>

                            <arguments>install</arguments>

                        </configuration>

                    </execution>

                    <!-- Build and minify static files -->

                    <execution>

                        <id>npm run build</id>

                        <goals>

                            <goal>npm</goal>

                        </goals>

                        <configuration>

                            <arguments>run build</arguments>

                        </configuration>

                    </execution>

                </executions>

            </plugin>

        </plugins>

    </build>

</project>
6. 解释一下
最重要的插件就两个,一个是springboot项目里的maven-resources-plugin,另一个是vue项目里的frontend-maven-plugin。
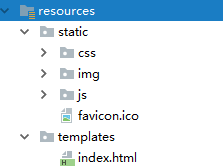
资源插件的复制路径很好理解,vue-cli3.0打包的目录如图所示
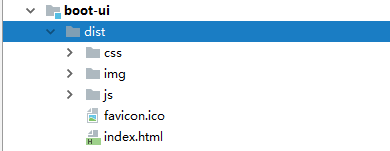
而我们要在springboot项目里运行,就要把index.html文件复制到templates目录,其他文件复制到static目录。
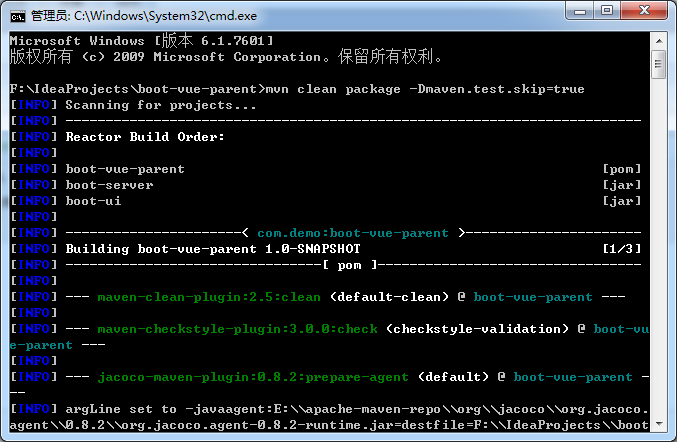
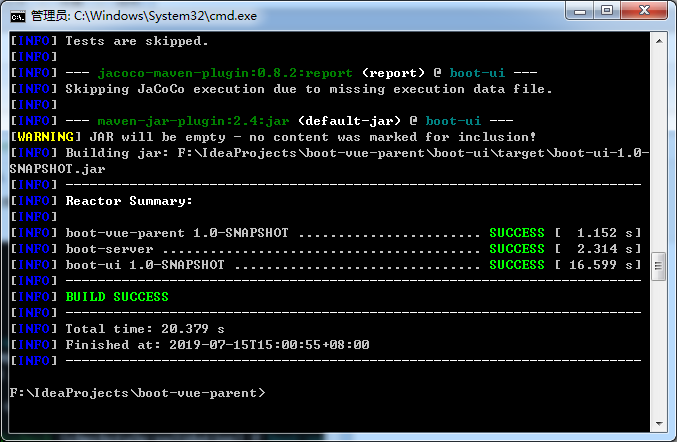
7. 打包运行。
mvn clean package -Dmaven.test.skip=true
进入根目录,执行打包命令
..
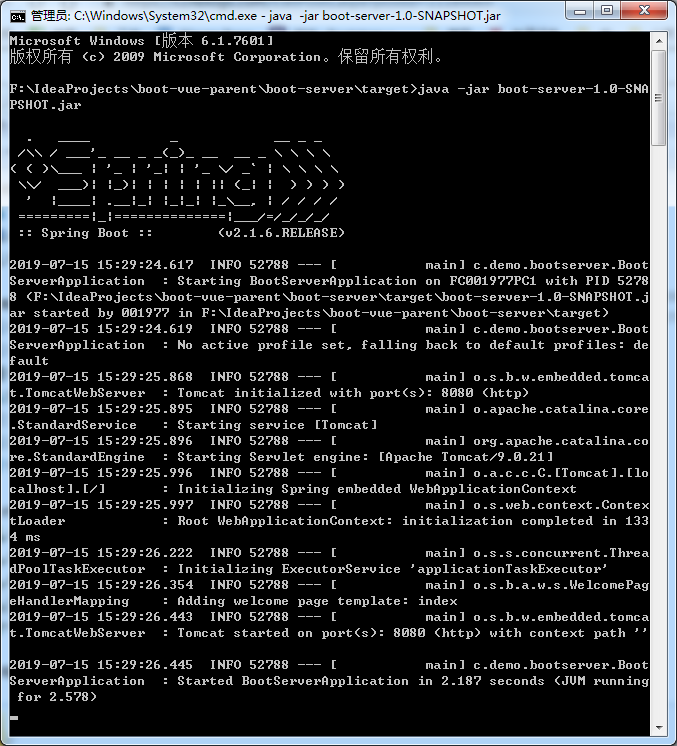
进入server的target目录,执行java -jar命令
访问:
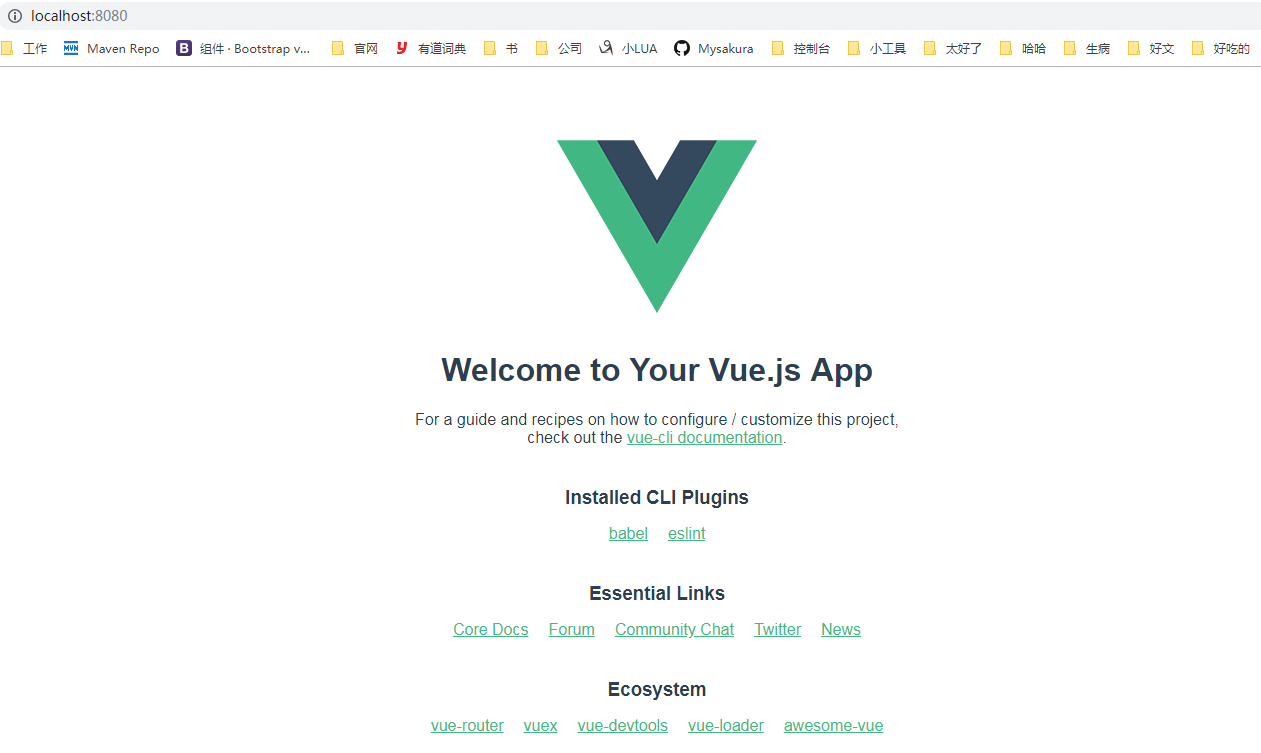
完成 https://github.com/Mysakura/boot-vue-parent
8. 引申 frontend-maven-plugin
这个插件不仅仅支持node+npm,还支持node+yarn。这里我也写了个例子 https://github.com/Mysakura/frontend-maven-plugin-demo
boot-ui项目的pom.xml文件
<?xml version="1.0" encoding="UTF-8"?>

<project xmlns="http://maven.apache.org/POM/4.0.0"

         xmlns:xsi="http://www.w3.org/2001/XMLSchema-instance"

         xsi:schemaLocation="http://maven.apache.org/POM/4.0.0 http://maven.apache.org/xsd/maven-4.0.0.xsd">

    <parent>

        <groupId>com.example</groupId>

        <artifactId>boot-vue-parent</artifactId>

        <version>1.0-SNAPSHOT</version>

    </parent>

    <modelVersion>4.0.0</modelVersion>

    <artifactId>boot-ui</artifactId>

    <properties>

        <project.build.sourceEncoding>UTF-8</project.build.sourceEncoding>

        <project.reporting.outputEncoding>UTF-8</project.reporting.outputEncoding>

        <java.version>1.8</java.version>

        <frontend-maven-plugin.version>1.7.6</frontend-maven-plugin.version>

    </properties>

    <build>

        <plugins>

            <!--安装node和npm的情况-->

            <!--<plugin>-->

                <!--<groupId>com.github.eirslett</groupId>-->

                <!--<artifactId>frontend-maven-plugin</artifactId>-->

                <!--<version>${frontend-maven-plugin.version}</version>-->

                <!--<executions>-->

                    <!--<execution>-->

                        <!--<id>install node and npm</id>-->

                        <!--<goals>-->

                            <!--<goal>install-node-and-npm</goal>-->

                        <!--</goals>-->

                        <!--<configuration>-->

                            <!--<nodeVersion>v10.16.0</nodeVersion>-->

                            <!--<npmVersion>6.9.0</npmVersion>-->

                        <!--</configuration>-->

                    <!--</execution>-->

                    <!--<!– Install all project dependencies –>-->

                    <!--<execution>-->

                        <!--<id>npm install</id>-->

                        <!--<goals>-->

                            <!--<goal>npm</goal>-->

                        <!--</goals>-->

                        <!--<phase>generate-resources</phase>-->

                        <!--<configuration>-->

                            <!--<arguments>install</arguments>-->

                        <!--</configuration>-->

                    <!--</execution>-->

                    <!--<!– Build and minify static files –>-->

                    <!--<execution>-->

                        <!--<id>npm run build</id>-->

                        <!--<goals>-->

                            <!--<goal>npm</goal>-->

                        <!--</goals>-->

                        <!--<configuration>-->

                            <!--<arguments>run build</arguments>-->

                        <!--</configuration>-->

                    <!--</execution>-->

                <!--</executions>-->

            <!--</plugin>-->

            <!--安装node和yarn的情况-->

            <plugin>

                <groupId>com.github.eirslett</groupId>

                <artifactId>frontend-maven-plugin</artifactId>

                <version>${frontend-maven-plugin.version}</version>

                <executions>

                    <execution>

                        <id>install node and yarn</id>

                        <goals>

                            <goal>install-node-and-yarn</goal>

                        </goals>

                        <phase>generate-resources</phase>

                        <configuration>

                            <nodeVersion>v10.16.0</nodeVersion>

                            <yarnVersion>v1.13.0</yarnVersion>

                        </configuration>

                    </execution>

                    <!-- Install all project dependencies -->

                    <execution>

                        <id>yarn install</id>

                        <goals>

                            <goal>yarn</goal>

                        </goals>

                        <configuration>

                            <arguments>install</arguments>

                        </configuration>

                    </execution>

                    <!-- Build and minify static files -->

                    <execution>

                        <id>yarn run build</id>

                        <goals>

                            <goal>yarn</goal>

                        </goals>

                        <configuration>

                            <arguments>run build</arguments>

                        </configuration>

                    </execution>

                </executions>

            </plugin>

        </plugins>

    </build>

</project>
SpringBoot+Vue前后端分离项目,maven package自动打包整合的更多相关文章
- Springboot+vue前后端分离项目,poi导出excel提供用户下载的解决方案
因为我们做的是前后端分离项目 无法采用response.write直接将文件流写出 我们采用阿里云oss 进行保存 再返回的结果对象里面保存我们的文件地址 废话不多说,上代码 Springboot 第 ...
- SpringBoot+Vue前后端分离,使用SpringSecurity完美处理权限问题
原文链接:https://segmentfault.com/a/1190000012879279 当前后端分离时,权限问题的处理也和我们传统的处理方式有一点差异.笔者前几天刚好在负责一个项目的权限管理 ...
- 喜大普奔,两个开源的 Spring Boot + Vue 前后端分离项目可以在线体验了
折腾了一周的域名备案昨天终于搞定了. 松哥第一时间想到赶紧把微人事和 V 部落部署上去,我知道很多小伙伴已经等不及了. 1. 也曾经上过线 其实这两个项目当时刚做好的时候,我就把它们部署到服务器上了, ...
- 两个开源的 Spring Boot + Vue 前后端分离项目
折腾了一周的域名备案昨天终于搞定了. 松哥第一时间想到赶紧把微人事和 V 部落部署上去,我知道很多小伙伴已经等不及了. 1. 也曾经上过线 其实这两个项目当时刚做好的时候,我就把它们部署到服务器上了, ...
- Jeecg-Boot 2.0 版本发布,基于Springboot+Vue 前后端分离快速开发平台
目录 Jeecg-Boot项目简介 源码下载 升级日志 Issues解决 v1.1升级到v2.0不兼容地方 系统截图 Jeecg-Boot项目简介 Jeecg-boot 是一款基于代码生成器的智能开发 ...
- SpringBoot +Vue 前后端分离实例
今天下了Vue,想试一试前后端分离的实现,没想到坑还不少,这里就记录一下我遇到的坑和我的代码: 一.Vue的下载安装:从网上找就好了,没什么问题,除了下载以后,要把镜像库改成淘宝的,要不然太慢了. 二 ...
- springboot + mybatis 前后端分离项目的搭建 适合在学习中的大学生
人生如戏,戏子多半掉泪! 我是一名大四学生,刚进入一家软件件公司实习,虽说在大学中做过好多个实训项目,都是自己完成,没有组员的配合.但是在这一个月的实习中,我从以前别人教走到了现在的自学,成长很多. ...
- SpringBoot,Vue前后端分离开发首秀
需求:读取数据库的数据展现到前端页面 技术栈:后端有主要有SpringBoot,lombok,SpringData JPA,Swagger,跨域,前端有Vue和axios 不了解这些技术的可以去入门一 ...
- SpringBoot+Vue前后端分离,使用SpringSecurity完美处理权限问题(一)
当前后端分离时,权限问题的处理也和我们传统的处理方式有一点差异. 笔者前几天刚好在负责一个项目的权限管理模块,现在权限管理模块已经做完了,我想通过5-6篇文章,来介绍一下项目中遇到的问题以及我的解决方 ...
随机推荐
- day001-在Windows下python环境的搭建
一.Python下载 1.Python最新源码,二进制文档,新闻资讯等可以在Python的官网查看到: 2.Python官网:https://www.python.org/ 3.你可以在以下链接中下载 ...
- 华三NAT总结
1.保证网络之间的连通性,可以用动态路由协议使网络连通. 2.配置一条默认路由到外网. ip route-static 0.0.0.0 0 210.33.44.2 3.进入连接外网的端口,把这个端口设 ...
- 利用python画小猪佩奇
import turtle as t t.pensize(4) t.hideturtle() t.colormode(255) t.color((255,155,192),"pink&quo ...
- isopod dsl 框架管理kubernetes 配置
isopod 是一个包含了丰富能力的dsl 框架我们可以不用编写yaml 文件来进行k8s 管理 说明 语法类似python,目前移植内置了一些不错的功能kube 方法 vault 集成,helm 集 ...
- VUE 基础配置
原文:https://www.cnblogs.com/LearningOnline/p/9368838.html 1.安装Node.js等软件 报错: 解决: 原文:https://pdf-lib.o ...
- 细说PHP-fpm
在理解php-fpm之前,我们要先搞清楚几个关键词以及他们之间的关系:CGI FastCGI:(Fast Common Gateway Interface),即快速通用网关接口,是一种让交互程序与We ...
- select函数及fd_set介绍
1. select函数 1. 用途 在编程的过程中,经常会遇到许多阻塞的函数,好像read和网络编程时使用的recv, recvfrom函数都是阻塞的函数,当函数不能成功执行的时候,程序就会一直阻塞在 ...
- 【JZOJ6246】【20190627】B
题目 求逆续对个数为\(k\)的\(n\)阶排列个数\(mod \ 1e9+7\) $1 \le n , k \le 10^5 $ 题解 $f_{i,j} = \sum_{k=0}^{i-1} f ...
- December Challenge 2019 Division 1 题解
传送门 当我打开比赛界面的时候所有题目都已经被一血了-- BINXOR 直接把异或之后二进制最多和最少能有多少个\(1\)算出来,在这个范围内枚举,组合数算一下就行了.注意\(1\)的个数是\(2\) ...
- ZROI 2020WC集训训练赛 Day4
最后一场,幸好没有掉分,假装功德圆满吧. T1有各种数据结构做法,主要难点在优化空间. T2直接DP就完事了,然而记搜的复杂度是对的-- T3神仙最小割. 没错这篇文章就是咕了. pkuwc rp++ ...