day11-实现Spring底层机制-01
实现Spring底层机制-01
主要实现:初始化IOC容器+依赖注入+BeanPostProcessor机制+AOP
前面我们实际上已经使用代码简单实现了:
- Spring XML 注入 bean (Spring基本介绍02)
- Spring 注解方式注入 bean (Spring管理Bean-IOC-04)
- Spring AOP 动态代理实现 (AOP-01)
1.引出问题
1.1原生Spring如何实现依赖注入、singleton和prototype
例子
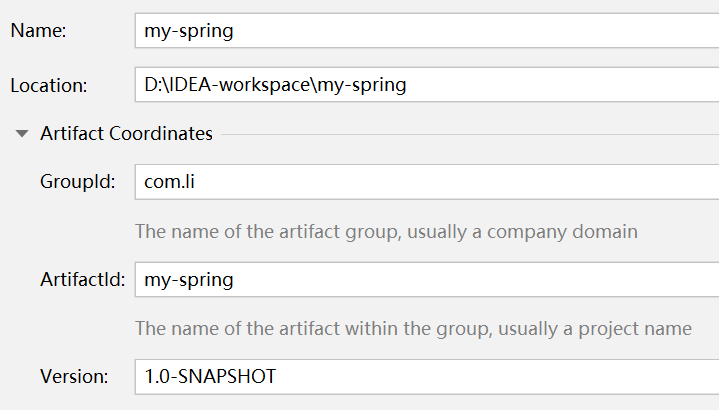
1.创建新的Maven项目:
2.在pom.xml文件中添加 spring 开发的基本包:
<dependencies>

    <!--加入 spring 开发的基本包-->

    <dependency>

        <groupId>org.springframework</groupId>

        <artifactId>spring-context</artifactId>

        <version>5.3.8</version>

    </dependency>

    <!--加入spring开发切面编程需要的包-->

    <dependency>

        <groupId>org.springframework</groupId>

        <artifactId>spring-aspects</artifactId>

        <version>5.3.8</version>

    </dependency>

</dependencies>
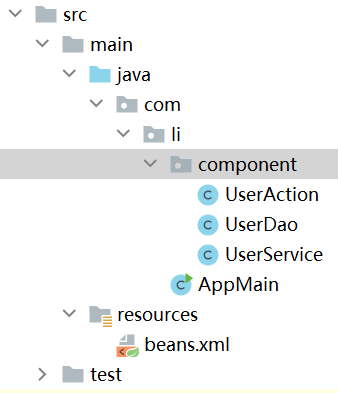
3.src/main/java/ 目录下创建包 com/li/component,在该包下分别创建UserDao.java、UserService.java、UserAction.java
UserDao:
package com.li.component;

import org.springframework.stereotype.Component;

/**

 * @author 李

 * @version 1.0

 */

//也可以使用 @Repository

@Component

public class UserDao {

    public void hi() {

        System.out.println("UserDao-hi()---");

    }

}
UserService:
package com.li.component;

import org.springframework.beans.factory.annotation.Autowired;

import org.springframework.stereotype.Component;

/**

 * @author 李

 * @version 1.0

 */

//也可以使用 @Service

@Component

public class UserService {

    //定义属性

    //也可以使用 @Resource

    @Autowired

    private UserDao userDao;

    public void m1() {

        userDao.hi();

    }

}
UserAction:
package com.li.component;

import org.springframework.stereotype.Component;

/**

 * @author 李

 * @version 1.0

 * 一个 Controller

 */

//也可以使用 @Controller

@Component

public class UserAction {

}
4.在 src/main/resources 目录下创建 spring 的容器文件 beans.xml
<?xml version="1.0" encoding="UTF-8"?>

<beans xmlns="http://www.springframework.org/schema/beans"

       xmlns:xsi="http://www.w3.org/2001/XMLSchema-instance"

       xmlns:context="http://www.springframework.org/schema/context"

       xsi:schemaLocation="http://www.springframework.org/schema/beans

       http://www.springframework.org/schema/beans/spring-beans.xsd

       http://www.springframework.org/schema/context

       https://www.springframework.org/schema/context/spring-context.xsd">

    <!--配置自动扫描的包,同时引入对应的名称空间-->

    <!--说明:

        1.如果是普通的java项目,beans.xml 放在src 目录下即可

        2.如果是maven项目,beans.xml文件就要放在 src/main/resources 目录下-->

    <context:component-scan base-package="com.li.component"/>

</beans>
5.测试类中获取配置的bean,并输出对象的地址值
package com.li;

import com.li.component.UserAction;

import com.li.component.UserDao;

import com.li.component.UserService;

import org.springframework.context.ApplicationContext;

import org.springframework.context.support.ClassPathXmlApplicationContext;

/**

 * @author 李

 * @version 1.0

 */

public class AppMain {

    public static void main(String[] args) {

        //测试是否可以得到spring容器中的bean

        ApplicationContext ioc = new ClassPathXmlApplicationContext("beans.xml");

        UserAction userAction = (UserAction) ioc.getBean("userAction");

        UserAction userAction2 = (UserAction) ioc.getBean("userAction");

        System.out.println("userAction=" + userAction);

        System.out.println("userAction2=" + userAction2);

    }

}
可以看到通过“userAction”名称获取的对象的地址值相同,这说明它们实际上是同一个对象
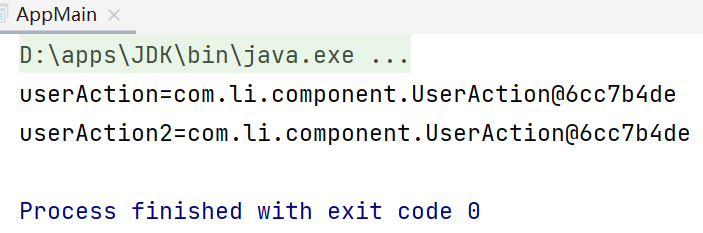
在默认情况下,我们配置的@Component,@Controller,@Service,@Repository 是单例的,即spring的ioc容器只会创建一个bean实例
6.如果我们希望将一个类配置为多例的,怎么办呢?
只需要在对应的类头部添加 @Scope(value = "prototype"),表示以多实例的形式返回该类的bean对象
package com.li.component;

import org.springframework.context.annotation.Scope;

import org.springframework.stereotype.Component;

@Component

@Scope(value = "prototype")

public class UserAction {

}
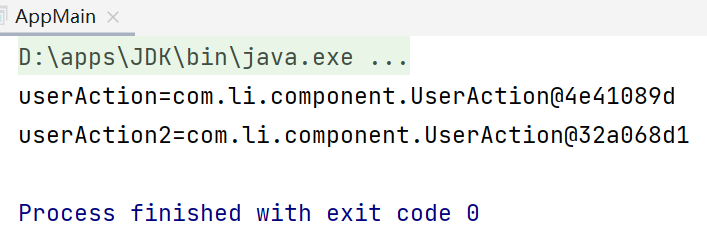
现在我们重新运行测试类,可以看到通过“userAction”名称获取的对象的地址值不相同,这说明它们是不同的对象。
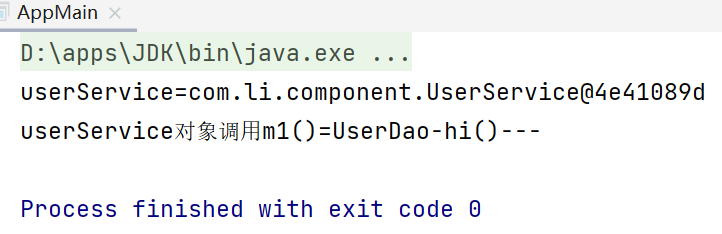
7.我们在测试类中获取userService对象,并调用m1方法
package com.li;

import com.li.component.UserAction;

import com.li.component.UserDao;

import com.li.component.UserService;

import org.springframework.context.ApplicationContext;

import org.springframework.context.support.ClassPathXmlApplicationContext;

/**

 * @author 李

 * @version 1.0

 */

public class AppMain {

    public static void main(String[] args) {

        ApplicationContext ioc = new ClassPathXmlApplicationContext("beans.xml");

        UserService userService = (UserService) ioc.getBean("userService");

        System.out.println("userService=" + userService);

        //测试依赖注入

        System.out.print("userService对象调用m1()=");

        userService.m1();

    }

}
输出如下,成功获取到userService对象,并且调用m1方法成功。这说明UserService类中的userDao属性成功通过@AutoWired 注解装配。
问题一:spring底层是如何通过注解来完成多例或者单例对象的创建的?
问题二:Spring容器如何实现依赖注入?
1.2原生Spring如何实现BeanPostProcessor
BeanPosecessor详见Spring管理Bean-IOC-03-2.16后置处理器
- 后置处理器会在 bean 初始化方法调用前 和 初始化方法调用后 被调用
- 后置处理器对象会作用在容器配置文件的所有bean对象中(即使bean对象没有初始化方法)
例子
1.创建一个后置处理器:
package com.li.process;

import org.springframework.beans.BeansException;

import org.springframework.beans.factory.config.BeanPostProcessor;

import org.springframework.stereotype.Component;

/**

 * @author 李

 * @version 1.0

 * 一个后置处理器

 */

@Component

public class MyBeanPostProcessor implements BeanPostProcessor {

    //在 Bean的 init初始化方法前被调用

    @Override

    public Object postProcessBeforeInitialization(Object bean, String beanName) throws BeansException {

        System.out.println("postProcessBeforeInitialization 被调用 " + beanName + " bean= " + bean.getClass());

        return bean;

    }

    //在 Bean的 init初始化方法后被调用

    @Override

    public Object postProcessAfterInitialization(Object bean, String beanName) throws BeansException {

        System.out.println("postProcessAfterInitialization 被调用 " + beanName + " bean= " + bean.getClass());

        return bean;

    }

}
要使用后置处理器,需要进行配置,配置的方式有两种:(1)在xml容器文件中进行配置(2)添加注解
使用注解时,还要保证扫描的范围要覆盖到该类
2.在UserService类中添加初始化方法:
package com.li.component;

import org.springframework.beans.factory.annotation.Autowired;

import org.springframework.stereotype.Component;

import javax.annotation.PostConstruct;

/**

 * @author 李

 * @version 1.0

 */

//也可以使用 @Service

@Component

public class UserService {

    //定义属性

    //也可以使用 @Resource

    @Autowired

    private UserDao userDao;

    public void m1() {

        userDao.hi();

    }

    //初始化方法-名称随意,需要@PostConstruct指定init为初始化方法

    @PostConstruct

    public void init(){

        System.out.println("UserService-init()");

    }

}
3.在测试类中进行测试:
package com.li;

import com.li.component.UserAction;

import com.li.component.UserDao;

import com.li.component.UserService;

import org.springframework.context.ApplicationContext;

import org.springframework.context.support.ClassPathXmlApplicationContext;

/**

 * @author 李

 * @version 1.0

 */

public class AppMain {

    public static void main(String[] args) {

        ApplicationContext ioc = new ClassPathXmlApplicationContext("beans.xml");

        UserAction userAction = (UserAction) ioc.getBean("userAction");

        UserAction userAction2 = (UserAction) ioc.getBean("userAction");

        System.out.println("userAction=" + userAction);

        System.out.println("userAction2=" + userAction2);

        UserDao userDao = (UserDao) ioc.getBean("userDao");

        System.out.println("userDao=" + userDao);

        UserService userService = (UserService) ioc.getBean("userService");

        System.out.println("userService=" + userService);

        System.out.print("userService对象调用m1()=");

        userService.m1();

    }

}
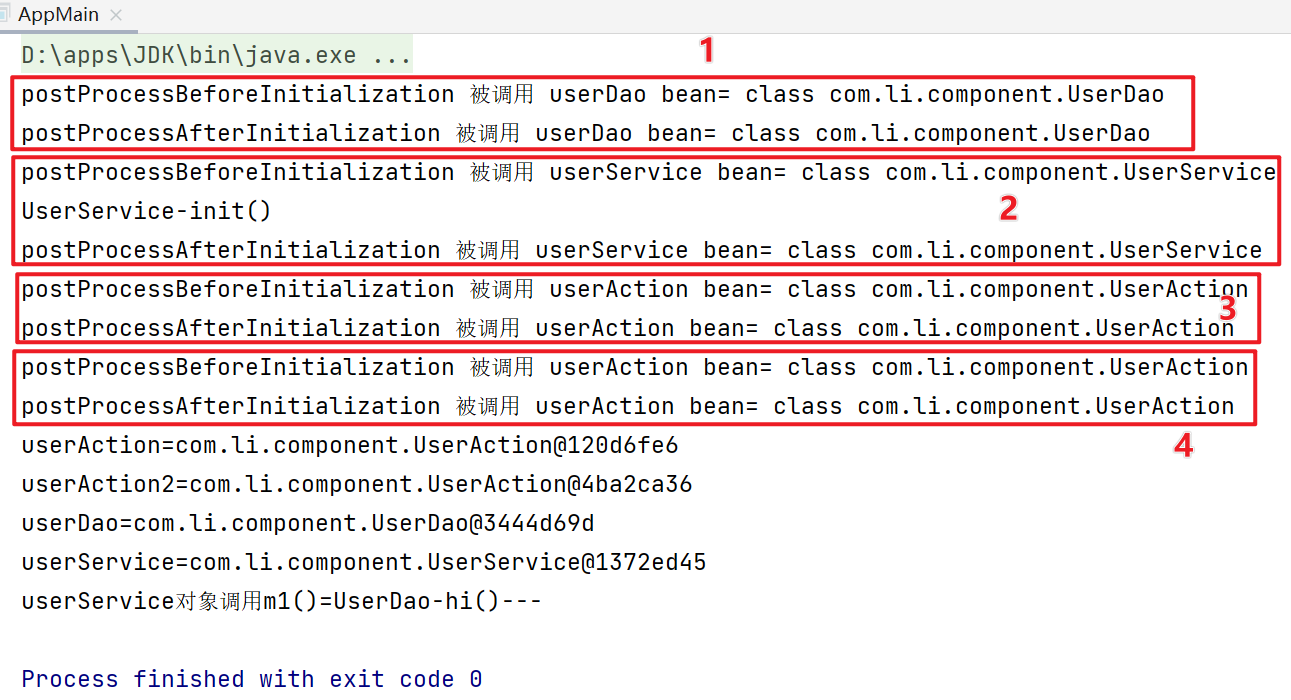
如下,后置处理器对象会作用在容器配置文件的所有bean对象中(即使bean对象没有初始化方法),根据之前的配置,容器中一共有四个对象(UserAction为多例),因此一共调用了八次。
这里userAction对象因为是多例的,强制为懒加载,因此在被获取时(getBean())才创建,因此排在最后。
问题三:原生Spring如何实现BeanPostProcessor?
1.3原生spring如何实现AOP
例子-在上述代码的基础上添加如下内容
1.SmartAnimal 接口:
package com.li.aop;

/**

 * @author 李

 * @version 1.0

 */

public interface SmartAnimal {

    public float getSum(float i, float j);

    public float getSub(float i, float j);

}
2.SmartDog 实现类:
package com.li.aop;

import org.springframework.stereotype.Component;

/**

 * @author 李

 * @version 1.0

 */

@Component

public class SmartDog implements SmartAnimal {

    @Override

    public float getSum(float i, float j) {

        float res = i + j;

        System.out.println("SmartDog-getSum()-res=" + res);

        return res;

    }

    @Override

    public float getSub(float i, float j) {

        float res = i - j;

        System.out.println("SmartDog-getSub()-res=" + res);

        return res;

    }

}
3.SmartAnimalAspect 切面类:
package com.li.aop;

import org.aspectj.lang.JoinPoint;

import org.aspectj.lang.Signature;

import org.aspectj.lang.annotation.*;

import org.springframework.stereotype.Component;

import java.util.Arrays;

/**

 * @author 李

 * @version 1.0

 * 切面类

 */

@Component

@Aspect

public class SmartAnimalAspect {

    @Pointcut(value = "execution(public float com.li.aop.SmartAnimal.*(float,float))")

    public void myPointCut() {

    }

    //前置通知

    @Before(value = "myPointCut()")

    public void before(JoinPoint joinpoint) {

        Signature signature = joinpoint.getSignature();

        System.out.println("SmartAnimalAspect切面类-before()-" + signature.getName()

                + "-参数-" + Arrays.toString(joinpoint.getArgs()));

    }

    //返回通知

    @AfterReturning(value = "myPointCut()", returning = "res")

    public void afterReturning(JoinPoint joinpoint, Object res) {

        Signature signature = joinpoint.getSignature();

        System.out.println("SmartAnimalAspect切面类-afterReturning()-" + signature.getName() + "-res-" + res);

    }

    //异常通知

    @AfterThrowing(value = "myPointCut()", throwing = "res")

    public void afterThrowing(JoinPoint joinpoint, Throwable res) {

        Signature signature = joinpoint.getSignature();

        System.out.println("SmartAnimalAspect切面类-afterThrowing()-" + signature.getName() + "-res-" + res);

    }

    //最终通知

    @After(value = "myPointCut()")

    public void after(JoinPoint joinpoint) {

        Signature signature = joinpoint.getSignature();

        System.out.println("SmartAnimalAspect切面类-after()-" + signature.getName());

    }

}
4.在容器文件中开启基于注解的aop功能:
<!--配置自动扫描的包,同时引入对应的名称空间-->

<context:component-scan base-package="com.li.aop"/>

<!--开启基于注解的 aop 功能-->

<aop:aspectj-autoproxy/>
5.进行测试:
package com.li;

import com.li.aop.SmartAnimal;

import org.springframework.context.ApplicationContext;

import org.springframework.context.support.ClassPathXmlApplicationContext;

/**

 * @author 李

 * @version 1.0

 */

public class AppMain {

    public static void main(String[] args) {

        ApplicationContext ioc = new ClassPathXmlApplicationContext("beans.xml");

        SmartAnimal smartDogProxy = ioc.getBean(SmartAnimal.class);

        smartDogProxy.getSum(101, 99);

    }

}
测试结果:

前面的输出是因为之前配置了后置处理器,它在创建ioc容器时会被调用,对所有bean对象生效。
红框处,后置处理器的 postProcessBeforeInitialization() 方法调用时,bean对象的还是原生的类型,但是到了 postProcessAfterInitialization() 方法调用时,已经变成了代理对象 $Proxy。这说明后置处理器和aop切面编程有着密切的关系。
简单分析AOP和BeanPostProcessor的关系:
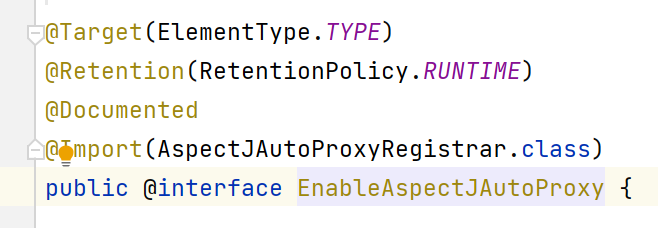
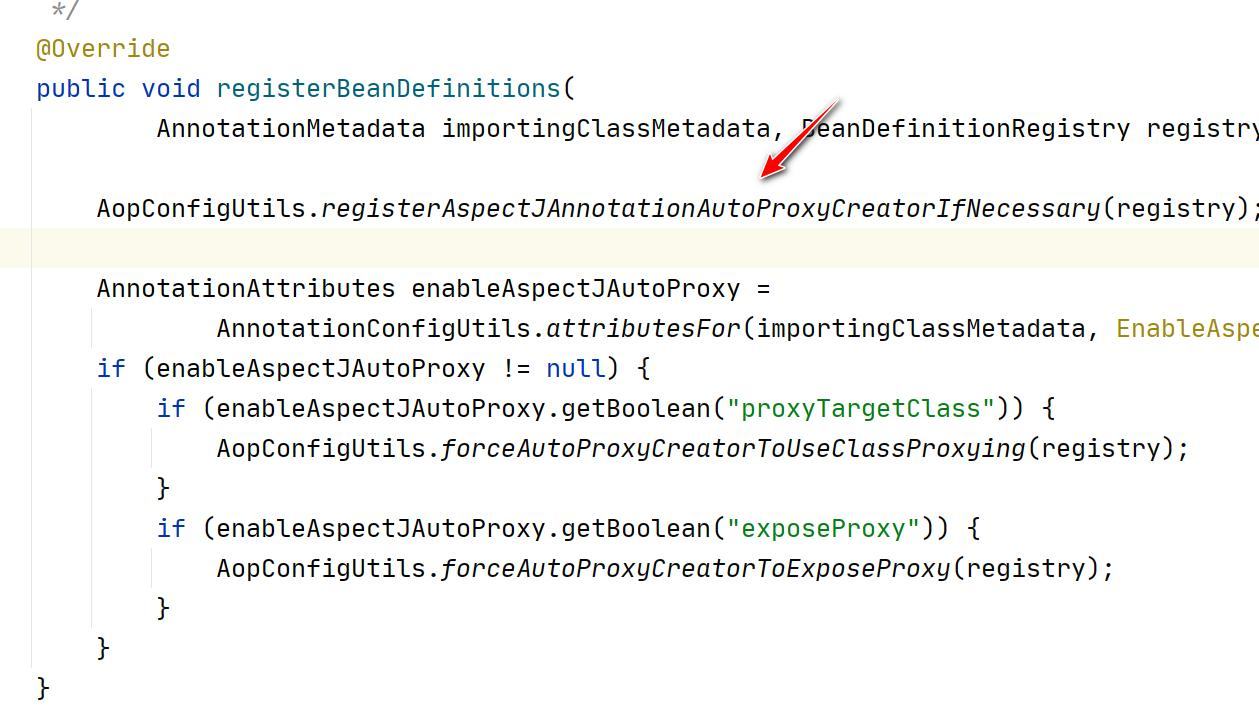
1.AOP实现Spring可以通过一个类加入注解@EnableAspectJAutoProxy来执行
2.我们来追一下@EnableAspectJAutoProxy
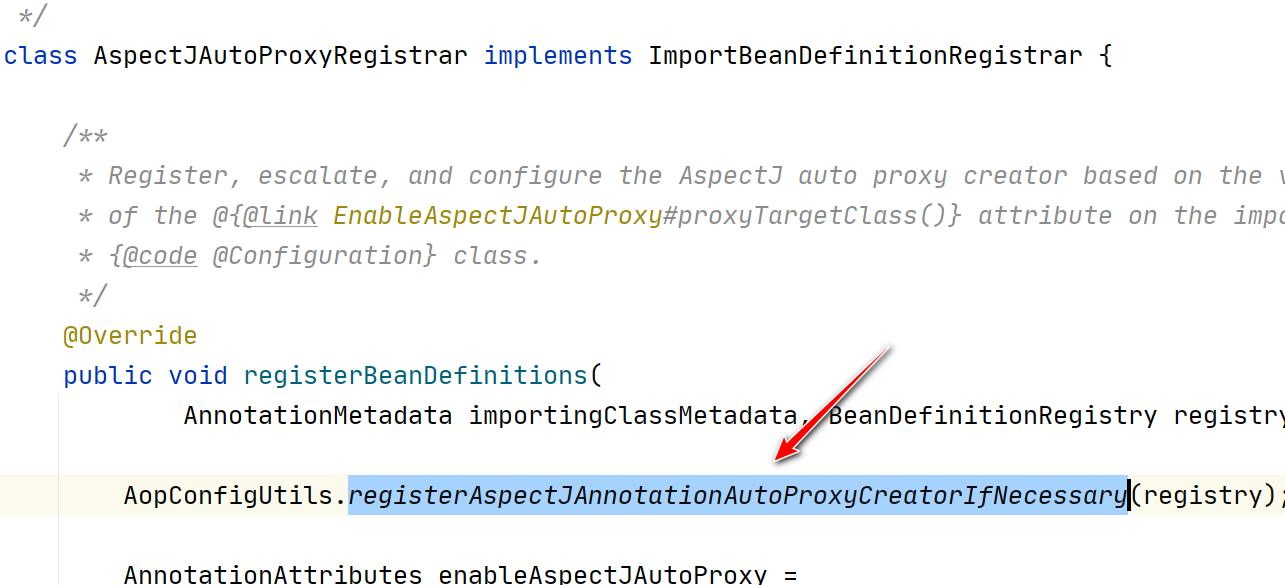


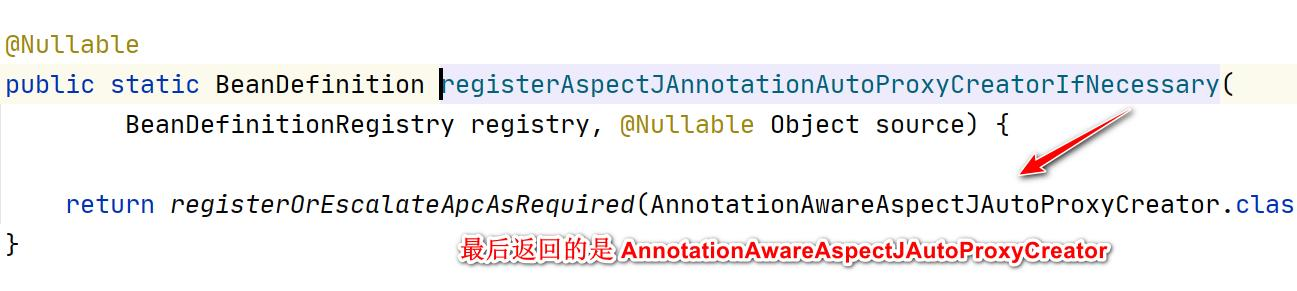
3.看一下 AnnotationAwareAspectJAutoProxyCreator 的类图
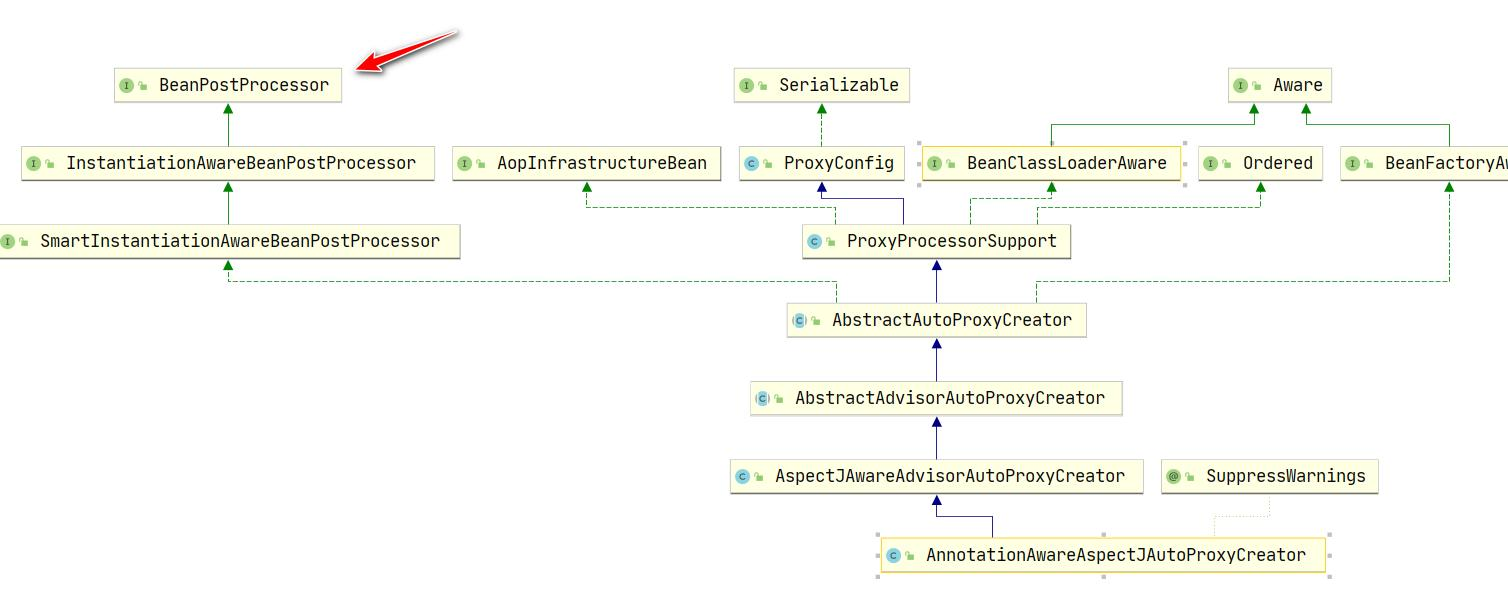
4.解读:
(1)AOP底层是基于BeanPostProcessor机制的
(2)即在Bean对象创建好后,根据是否需要AOP处理,决定返回代理对象还是原生的Bean对象
(3)在返回代理对象时,就可以根据要代理的类和方法来返回
(4)这个机制并不难,本质就是BeanPostProcessor 机制+动态代理技术
2.Spring整体架构分析

day11-实现Spring底层机制-01的更多相关文章
- day12-实现Spring底层机制-02
实现Spring底层机制-02 3.实现任务阶段1 3.1知识拓展-类加载器 Java的类加载器有三种: Bootstrap类加载器 ----- 对应路径 jre/lib Ext类加载器 ----- ...
- day13-实现Spring底层机制-03
实现Spring底层机制-03 7.实现任务阶段5 7.1分析 阶段5目标:bean后置处理器的实现 7.2代码实现 新增: 1.创建 InitializingBean 接口,实现该接口的 Bean ...
- day05-SpringMVC底层机制简单实现-01
SpringMVC底层机制简单实现-01 主要完成:核心分发控制器+Controller和Service注入容器+对象自动装配+控制器方法获取参数+视图解析+返回JSON格式数据 1.搭建开发环境 创 ...
- Hibernate工作原理及为什么要用?. Struts工作机制?为什么要使用Struts? spring工作机制及为什么要用?
三大框架是用来开发web应用程序中使用的.Struts:基于MVC的充当了其中的试图层和控制器Hibernate:做持久化的,对JDBC轻量级的封装,使得我们能过面向对象的操作数据库Spring: 采 ...
- Spring事件机制详解
一.前言 说来惭愧,对应Spring事件机制之前只知道实现 ApplicationListener 接口,就可以基于Spring自带的事件做一些事情(如ContextRefreshedEvent),但 ...
- spring工作机制及为什么要用?
spring工作机制及为什么要用?1.spring mvc请所有的请求都提交给DispatcherServlet,它会委托应用系统的其他模块负责对请求进行真正的处理工作.2.DispatcherSer ...
- 如何妙用Spring 数据绑定机制?
前言 在剖析完 「Spring Boot 统一数据格式是怎么实现的? 」文章之后,一直觉得有必要说明一下 Spring's Data Binding Mechanism 「Spring 数据绑定机制」 ...
- day08-SpringMVC底层机制简单实现-04
SpringMVC底层机制简单实现-04 https://github.com/liyuelian/springmvc-demo.git 8.任务7-完成简单视图解析 功能说明:通过目标方法返回的 S ...
- Spring 事务机制详解
原文出处: 陶邦仁 Spring事务机制主要包括声明式事务和编程式事务,此处侧重讲解声明式事务,编程式事务在实际开发中得不到广泛使用,仅供学习参考. Spring声明式事务让我们从复杂的事务处理中得到 ...
- java 反射机制01
// */ // ]]> java反射机制01 Table of Contents 1 反射机制 2 反射成员 2.1 java.lang.Class 2.2 Constructor 2.3 ...
随机推荐
- AI自动生成视频保姆级教程,还能赚包辣条哦~
友友们,小卷今天给大家分享下如何通过AI自动生成视频,只需要3分钟就能做出一个视频,把视频发到B站.抖音.西瓜上,还能赚包辣条哦~ 文末给大家准备了AI变现的案例及AIGC知识库,记得领取哦! 1.收 ...
- Word-批量导出Word中的图片
当我们需要把Word文件中的图片保存起来,你是如何导出Word图片呢?右键一张张保存图片吗?这效率太低了.如果文档中有大量的图片,这个方法会浪费很多时间. 下面给大家分享word如何批量导出图片的技巧 ...
- NC15172 情人节的电灯泡
题目链接 题目 题目描述 情人节到了,小芳和小明手牵手,打算过一个完美的情人节,但是小刚偏偏也来了,当了一个明晃晃的电灯泡,小明很尴尬,就和小刚说,我交给你个任务,你完成了我俩就带你玩,否则你就回家吧 ...
- 一文总结 C++ 常量表达式、constexpr 和 const
TLDR 修饰变量的时候,可以把 constexpr 对象当作加强版的 const 对象:const 对象表明值不会改变,但不一定能够在编译期取得结果:constexpr 对象不仅值不会改变,而且保证 ...
- Apache log4j2远程代码执行漏洞
漏洞描述 Apache Log4j2是一个基于Java的日志记录工具.该工具重写了Log4j框架,并且引入了大量丰富的特性.该日志框架被大量用于业务系统开发,用来记录日志信息.大多数情况下,开发者可能 ...
- sensitive-word-admin v1.3.0 发布 如何支持敏感词控台分布式部署?
拓展阅读 sensitive-word-admin v1.3.0 发布 如何支持分布式部署? sensitive-word-admin 敏感词控台 v1.2.0 版本开源 sensitive-word ...
- 【Unity3D】人体模型及动画
1 前言 2D动画 中初步了解了 Animation 和 Animator,本文将进一步学习 3D 动画,并介绍 人体模型相关内容. 模型制作软件主要有:3DMax.Maya,模型存储格式主要 ...
- Apipost参数描述的填写和参数描述库的使用
请求参数的描述填写 对于header.query以及form-data和urlencode的body参数,我们在如下地方填写参数描述: 如图中所示,对于一个填写过的参数,我们可以在新建接口可以通过点击 ...
- FFmpeg开发笔记(七):ffmpeg解码音频保存为PCM并使用软件播放
若该文为原创文章,未经允许不得转载原博主博客地址:https://blog.csdn.net/qq21497936原博主博客导航:https://blog.csdn.net/qq21497936/ar ...
- Kotlin 函数 与 lambda 表达式
一.函数 代码块函数体: fun sum(x: Int, y: Int): Int { return x + y } 表达式函数体: fun sum(x: Int, y: Int) = x + y 使 ...