
How to use USB 3G dongle/stick Huawei E169/E620/E800 ( Chip used Qualcomm e1750) in Linux (China and world)
Using this 3G module in Linux is so great. I want it. So I made it.
The 3G dongle of Huawei E169/E620/E800 is made from chip Qualcomm e1750. Yes, yet an American company. Huawei understands business.
 +
+ 
I am using KDE based on ubuntu 14.04 AMD64.
After you pluging the dongle into computer, you would see this:

The Huawei Modem is recognized by Linux kernel and its modules.
Here are several ways of doing so.
1. Using system GUI -- networkmanager
Add a mobile boardband connection.
Choose Qualcomm E1750 if your system can detect it.

Then


Go on

Go on

Go on

Leave the username and password blank. If you are in China, then make sure the number is *99#
APN: 3gnet
Click ok.
Then go to connect it from your network manager.

2. Using KDE kppp (GUI)
You should install these packages before doing so.
sudo apt-get install ppp kppp wvdial -y
kppp has its GUI.
wvdial is the backend tool which kppp uses. Or you can use wvdial later in console only.
This would come out if it is sucessfully connected to the internet.

Leave the Login ID and password empty.
In tab Accounts, "New" a profile. And make it look like this.
Click configure and create a profile for connection.
Make sure number to be *99# if you are in China.
And authentication to be Terminal-based.

Then click ok to save it.
Then go to tab Modems. "New" a profile named "huawei3g".
And edit it.
Make sure it looks like this.
device: /dev/ttyUSB0
(it depends on how many devices you have sometimes. Everytime you plug in the 3G dongle, there would be 3 devices came out. They would be /dev/ttyUSB0 ,/dev/ttyUSB1, /dev/ttyUSB2 . ( ttyUSB0 is used for controlling the 3G dongle. And it supports AT commands. Others are some other stuff about voice call and so on)
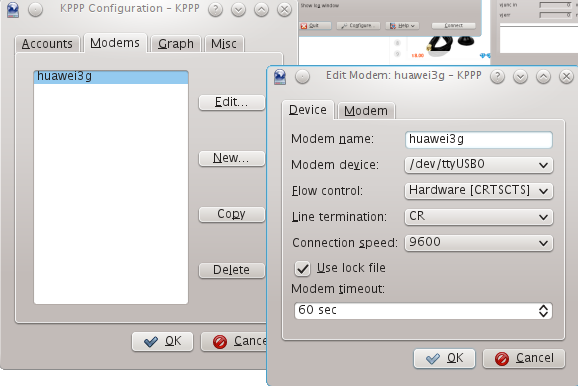
Click OK to save it.
Then go back, and hit connect in kppp.
This is what you gonna see.

3. Using wvdial in command lines
sudo apt-get install ppp wvdial -y
then go to configure the wvdial
Make the file look like this:
[Dialer Defaults]

Init1 = ATZ

Init2 = ATQ0 V1 E1 S0= &C1 &D2 +FCLASS=

Modem Type = Analog Modem

Baud =

New PPPD = yes

Modem = /dev/ttyUSB0

ISDN =

; Phone = <Target Phone Number>

; Password = <Your Password>

; Username = <Your Login Name>

Phone = *#
; Phone = *99***1#           ; If you are in America or somewhere

Password = 3gnet

Username = 3gnet
And connect to internet in console:
Now you would see successfully we are connected to internet.
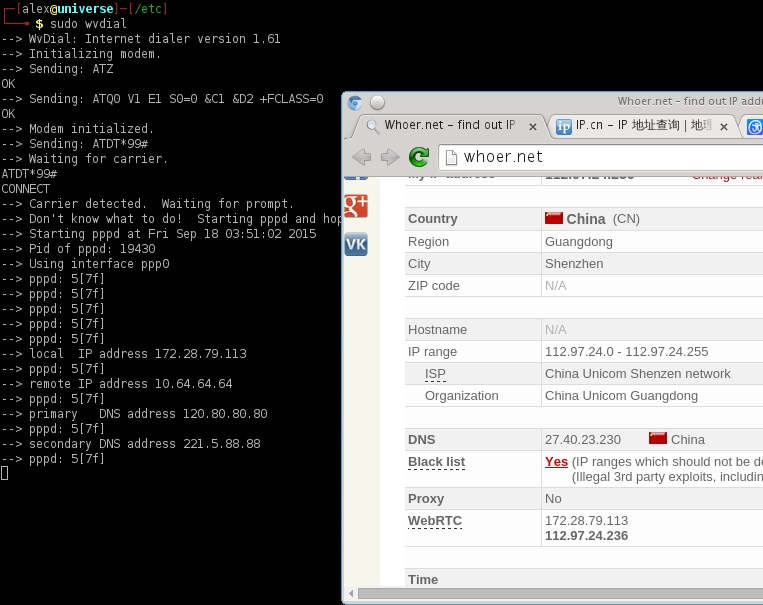
There is another interface called ppp0 here.

Hit Ctrl + C in console to disconnect.
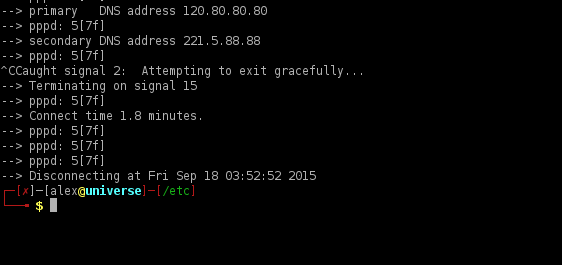
4. Using Sakis3G GUI / commands scripts
Here are something from http://www.sakis3g.com/
First check that you have ppp installed
sudo apt-get install pppNow download the Sakis3g package
sudo wget "http://www.sakis3g.com/downloads/sakis3g.tar.gz" -O sakis3g.tar.gzThen unzip the file
sudo tar -xzvf sakis3g.tar.gzMake the file executable
sudo chmod +x sakis3gAnd finally launch it
sudo ./sakis3g --interactive

more options:

then you are gonna see

Then
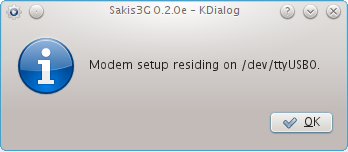
then

But I see this:
This really does not work. :(
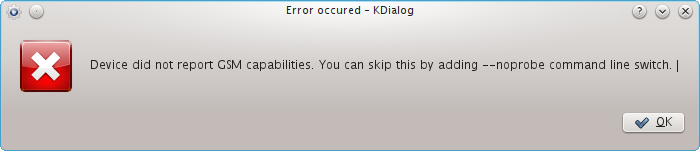
So I go to commands.
sudo ./sakis3g "--sudo" OTHER="USBMODEM" USBMODEM="12d1:1001" "FORCE_APN=internet.public" \

USBINTERFACE="" APN_USER="user" APN_PASS="user" "connect" "info"
Remember this:
12d1 is the vendor ID, 1001 is the product ID.
And then try these in console.
It failed again... If you see:

Here are some knowledge from
Network Manager and Sakis3G don't really work well together. Sometimes you need to run Sakis3g twice or remove and plug the device back in to get it to work. This is because ModemManager can be quite forceful by locking device ports. Alternatively, you can switch the device using Sakis3G (at which point Network Manager should pick it up) and then connecting using Network Manager.
As for the pin - either remove the required pin from the sim card by putting it in a normal mobile phone or provide your pin for switching in /etc/sakis3g.conf using the SIM_PIN="" variable.
To be continued.
Chip live debugging
If you want to check out what this module is shipped with. You could get into it's heart using CuteCom via Serial ports.

Happy hacking!
How to use USB 3G dongle/stick Huawei E169/E620/E800 ( Chip used Qualcomm e1750) in Linux (China and world)的更多相关文章
- Raspberry Pi - Huawei HiLink E3256 3G modem to ethernet adapter
Raspberry Pi - Huawei HiLink E3256 3G modem to ethernet adapter This page documents how to configure ...
- Yocto开发笔记之《驱动调试-华为3G模块》(QQ交流群:519230208)
QQ群:519230208,为避免广告骚扰,申请时请注明 “开发者” 字样 ======================================================== 参考:ht ...
- openwrt固件支持3G和4G上网卡
http://wiki.openwrt.org/doc/howtobuild/wireless-router-with-a-3g-dongle Building image with support ...
- Android——4.2 - 3G移植之路之 reference-ril .pppd 拨号上网 (三)
Android的RIL机制中的 reference-ril.c 即为厂商提供的驱动接口.这个驱动源代码各个厂商都是有提供的,网上也有下载.我如今用的就是huawei wcdma的.最后编译成libre ...
- openwrt使用3G上网卡
尊敬的大大.感谢你抽空指导我 我的设备是db120 mu350 和广东无限卡 版本是OpenWrt Backfire 10.03.336 DIY full 一. 没有安装到kmod-us ...
- 2 WAN 和1 Evo/3g Routeros PCC 方法负载平衡
陕西中际现代包装科技:Routeros 2 WAN 和1 Evo/3g PCC 方法负载平衡 (Routeros多线负载平衡) 我们将要讨论2Wan和1个Evo/3G 的负载平衡.负载平衡就是在不同 ...
- linux下的usb抓包方法【转】
转自:http://blog.chinaunix.net/uid-11848011-id-4508834.html 1.配置内核使能usb monitor: make menuconfig ...
- Linux下的硬件驱动——USB设备(转载)
usb_bulk_msg函数 当对usb设备进行一次读或者写时,usb_bulk_msg 函数是非常有用的; 然而, 当你需要连续地对设备进行读/写时,建议你建立一个自己的urbs,同时将urbs 提 ...
- 【转载】linux下的usb抓包方法
1 linux下的usb抓包方法 1.配置内核使能usb monitor: make menuconfig Device Drivers --> ...
随机推荐
- 深入理解C指针之六:指针和结构体
原文:深入理解C指针之六:指针和结构体 C的结构体可以用来表示数据结构的元素,比如链表的节点,指针是把这些元素连接到一起的纽带. 结构体增强了数组等集合的实用性,每个结构体可以包含多个字段.如果不用结 ...
- JS 数组array方法push, pop, unshift, shift, slice,splice,contact, join, sort
Array:数组对象用来在单独的变量名中存储一系列的值 定义数组: 1. var arrayObj = new Array(); 2. var arrayObj = ...
- Hadoop-2.4.1完全分布式环境搭建
Hadoop-2.4.1完全分布式环境搭建 Hadoop-2.4.1完全分布式环境搭建 一.配置步骤如下: 主机环境搭建,这里是使用了5台虚拟机,在ubuntu 13系统上进行搭建hadoop ...
- white-space的值
white-space的值:normal 默认.空白会被浏览器忽略.pre 空白会被浏览器保留.其行为方式类似 HTML 中的 标签.nowrap 文本不会换行,文本会在在同一行上继续,直到遇到 标签 ...
- 权限设计实现(MVC4+Bootstrap+ PetaPoco+Spring.Net)
权限设计实现(MVC4+Bootstrap+ PetaPoco+Spring.Net) 一.前言 至毕业后一直在做企业Web开发,做过的项目也有不少,每个项目的框架设计都不是一样,但是每个项目的权限模 ...
- OpenSUSE 13.2使用VPN(PPTP)
新年开始,有时查询个资料或是下个软件包并不是那么愉快,决定使用付费VPN,他们使用的是用户名及密码的验证方式 在网上找到了一个教程,挺详尽的,如果想按照步骤能使用即可的原则,跟着我一起设置,想了解更多 ...
- Repository 仓储
Repository 仓储 写在前面 首先,本篇博文主要包含两个主题: 领域服务中使用仓储 SELECT 某某某(有点晕?请看下面.) 上一篇:Repository 仓储,你的归宿究竟在哪?(二)-这 ...
- git 简单教程更新
0.初始化 $ git config --global user.name "xxx" $ git config --global user.email "xxx@gma ...
- DataUml Design 课程6-DataUML Design 1.1版本号正式宣布(支持PD数据模型)
从DataUML Design正式宣布到现在两个月,因为最近忙,出版到现在为止1.1版本号.稍后我们将始终坚持以良好DataUML Design软件,我希望程序员有很多支持. 一.1.1新的和改进的版 ...
- ibatis提示Unable to load embedded resource from assembly "Entity.Ce_SQL.xml,Entity".
原本以为是xml文件配置错误,尝试无果,最终原因未将xml文件的生成操作选择为嵌入的资源.很无语!