
IdentityServer4-前后端分离的授权验证(六)
上两节介绍完Hybrid模式在MVC下的使用,包括验证从数据获取的User和Claim对MVC的身份授权。本节将介绍Implicit模式在JavaScript应用程序中的使用,使用Node.js+Express构建JavaScript客户端,实现前后端分离。本节授权服务和资源服务器基于第四和第五节。
一、使用Node.js+Express搭建JavaScript客户端
(1)首先需要Node.js环境
下载并安装Node.js,官网下载地址:https://nodejs.org/en/
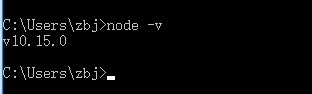
输入指令:node –v 检测是否已安装Node.js,已安装会显示安装的Node.js版本
(2)安装Express
打开cmd,输入指令:npm install express-generator –g
输入指令:express –h 已安装express会显示帮助文档

(3)新建文件,创建JavaScript_Client应用程序
新建文件夹(在D盘新建Express文件夹),cmd进入该文件夹。
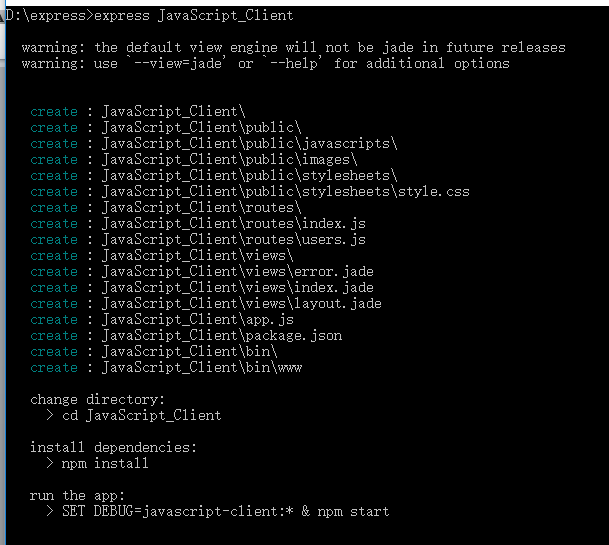
输入:express JavaScript_Client 在当前目录下创建一个名为JavaScript_Client的应用。目录结构如下:
(4)安装依赖包
输入:cd JavaScript_Client 进入JavaScript_Client目录
输入:npm install 安装依赖包

(5)启动并测试项目
输入:npm start

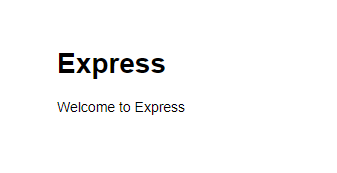
浏览器打开:http://localhost:3000
看到以下页面证明成功了。
二、添加JavaScript客户端测试代码
(1)安装oidc-client库
输入:npm install oidc-client –save
我们会发现在D:\express\JavaScript_Client\node_modules\oidc-client\dist 有两个js文件
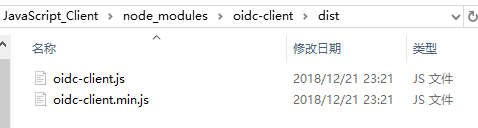
我们只需使用这两个文件。把这两个文件复制到D:\express\JavaScript_Client\public\ javascripts 目录下
(2)添加测试用的HTML文件
使用VSCode打开JavaScript_Client文件夹,在public(D:\express\JavaScript_Client\public)下新建index.html文件。添加几个测试用的按钮。
<!DOCTYPE html>

<html>

<head>

    <meta charset="utf-8" />

    <title></title>

</head>

<body>

    <button id="login">Login</button>

    <button id="api">Call API</button>

    <button id="logout">Logout</button>

    <pre id="results"></pre>

    <script src=" javascripts/oidc-client.js"></script>

    <script src="app.js"></script>

</body>

</html>
(3)添加测试的js文件
在public下新建app.js文件。
黏贴以下代码
/// <reference path=" javascripts/oidc-client.js" />

function log() {

    document.getElementById('results').innerText = '';

    Array.prototype.forEach.call(arguments, function (msg) {

        if (msg instanceof Error) {

            msg = "Error: " + msg.message;

        }

        else if (typeof msg !== 'string') {

            msg = JSON.stringify(msg, null, 2);

        }

        document.getElementById('results').innerHTML += msg + '\r\n';

    });

}

document.getElementById("login").addEventListener("click", login, false);

document.getElementById("api").addEventListener("click", api, false);

document.getElementById("logout").addEventListener("click", logout, false);

var config = {

    authority: "http://localhost:5000",

    client_id: "js",

    redirect_uri: "http://localhost:5003/callback.html",

    response_type: "id_token token",

    scope:"openid profile api1",

    post_logout_redirect_uri : "http://localhost:5003/index.html",

};

var mgr = new Oidc.UserManager(config);

mgr.getUser().then(function (user) {

    if (user) {

        log("User logged in", user.profile);

    }

    else {

        log("User not logged in");

    }

});

function login() {

    mgr.signinRedirect();

}

function api() {

    mgr.getUser().then(function (user) {

        var url = "http://localhost:5001/identity";

        var xhr = new XMLHttpRequest();

        xhr.open("GET", url);

        xhr.onload = function () {

            log(xhr.status, JSON.parse(xhr.responseText));

        }

        xhr.setRequestHeader("Authorization", "Bearer " + user.access_token);

        xhr.send();

    });

}

function logout() {

    mgr.signoutRedirect();

}
以下对app.js代码进行分析
App.js中log函数用来记录消息
function log() {

    document.getElementById('results').innerText = '';

    Array.prototype.forEach.call(arguments, function (msg) {

        if (msg instanceof Error) {

            msg = "Error: " + msg.message;

        }

        else if (typeof msg !== 'string') {

            msg = JSON.stringify(msg, null, 2);

        }

        document.getElementById('results').innerHTML += msg + '\r\n';

    });

}
使用oidc-client库中的UserManager类来管理OpenID连接协议。添加此代码以配置和实例化UserManager:
var config = {

    authority: "http://localhost:5000",

    client_id: "js",

    redirect_uri: "http://localhost:5003/callback.html",

    response_type: "id_token token",

    scope:"openid profile api1",

    post_logout_redirect_uri : "http://localhost:5003/index.html",

};

var mgr = new Oidc.UserManager(config);
接下来,UserManager提供一个getUser API来获取用户是否登录到JavaScript应用程序。返回的User对象有一个profile属性,其中包含用户的声明。添加此代码以检测用户是否登录到JavaScript应用程序:
mgr.getUser().then(function (user) {

    if (user) {

        log("User logged in", user.profile);

    }

    else {

        log("User not logged in");

    }

});
接下来,我们要实现登录、api和注销功能。UserManager提供登录用户的signinRedirect和用户登出的signoutRedirect。我们在上述代码中获得的用户对象还有一个access_token属性,可以使用该属性对web API进行身份验证。access_token将通过Bearer模式传递给Web API。添加以下代码在我们的应用程序中实现这三个功能:
function login() {

    mgr.signinRedirect();

}

function api() {

    mgr.getUser().then(function (user) {

        var url = "http://localhost:5001/identity";

        var xhr = new XMLHttpRequest();

        xhr.open("GET", url);

        xhr.onload = function () {

            log(xhr.status, JSON.parse(xhr.responseText));

        }

        xhr.setRequestHeader("Authorization", "Bearer " + user.access_token);

        xhr.send();

    });

}

function logout() {

    mgr.signoutRedirect();

}
(4)再新建一个callback.html。一旦用户登录到IdentityServer,这个HTML文件就是指定的redirect_uri页面。它将完成OpenID Connect协议与IdentityServer的登录握手。这里的代码都由我们前面使用的UserManager类提供。登录完成后,我们可以将用户重定向回index.html页面。添加此代码完成登录过程:
<!DOCTYPE html>

<html>

<head>

    <meta charset="utf-8" />

    <title></title>

</head>

<body>

    <script src=" javascripts/oidc-client.js"></script>

    <script>

        new Oidc.UserManager().signinRedirectCallback().then(function () {

            window.location = "index.html";

        }).catch(function (e) {

            console.error(e);

        });

    </script>

</body>

</html>
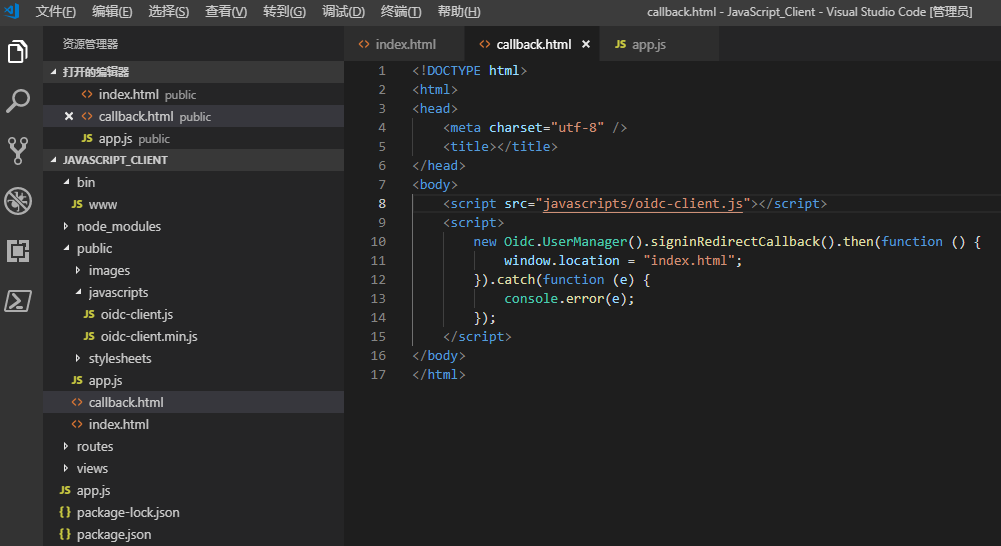
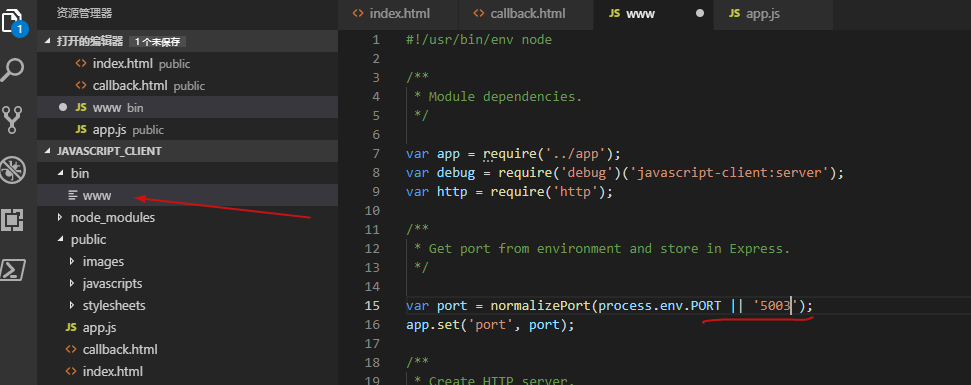
(8)修改服务端口为5003
三、修改授权服务配置,资源服务器允许跨域调用API
(1)修改授权服务配置
在AuthServer项目,打开Config.cs文件,在GetClients中添加JavaScript客户端配置
                // JavaScript Client

                new Client

                {

                    ClientId = "js",

                    ClientName = "JavaScript Client",

                    AllowedGrantTypes = GrantTypes.Implicit,

                    AllowAccessTokensViaBrowser = true,

                    RedirectUris = { "http://localhost:5003/callback.html" },

                    PostLogoutRedirectUris = { "http://localhost:5003/index.html" },

                    AllowedCorsOrigins = { "http://localhost:5003" },

                    AllowedScopes =

                    {

                        IdentityServerConstants.StandardScopes.OpenId,

                        IdentityServerConstants.StandardScopes.Profile,

                        "api1"

                    },

                }
(2)在资源服务配置允许跨域调用api
在ResourceAPI项目,打开Startup.cs文件中的ConfigureServices方法,配置CORS,允许Ajax调用从http://localhost:5003调用http://localhost:5001的Web API。
 //JS-allow Ajax calls to be made from http://localhost:5003 to http://localhost:5001.

            services.AddCors(options =>

            {

                //this defines a CORS policy called "default"

                options.AddPolicy("default", policy =>

                {

                    policy.WithOrigins("http://localhost:5003")

                        .AllowAnyHeader()

                        .AllowAnyMethod();

                });

            });
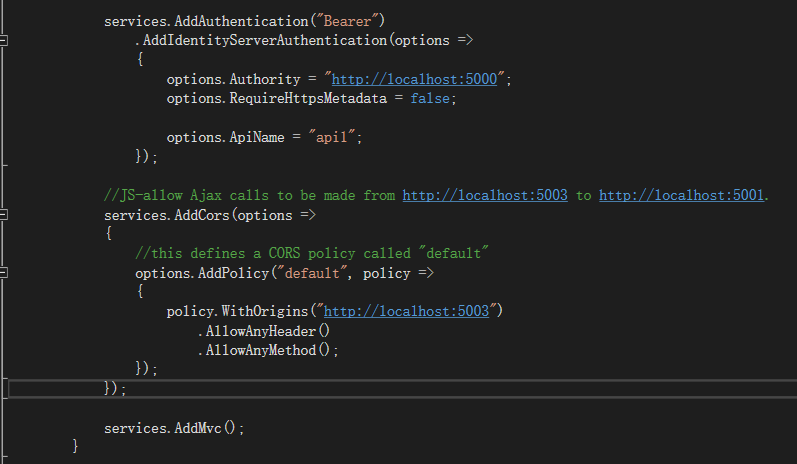
在Configure方法中将CORS中间件添加到管道中
 //JS-Add the CORS middleware to the pipeline in Configure:

            app.UseCors("default");
(3)添加测试用的api接口
添加IdentityController控制器
[Route("[controller]")]

    public class IdentityController : ControllerBase

    {

        [Authorize(Roles ="admin")]

        [HttpGet]

        public IActionResult Get()

        {

            return new JsonResult(from c in User.Claims select new { c.Type, c.Value });

        }

    }
(4)测试
运行AuthServer项目,运行ResourceAPI项目。
在VSCode终端输入:npm start

打开浏览器:http://localhost:5003/
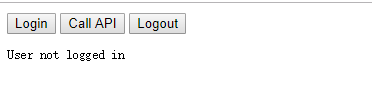
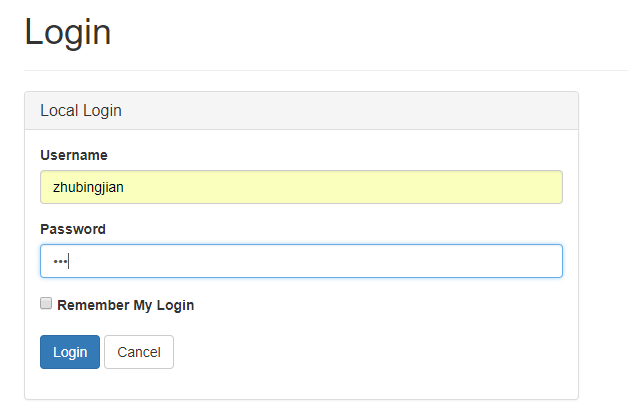
点击Login,使用账号:zhubingjian 密码:123 登录
登录返回用户的Claims信息

点击Call API,调用资源服务器的API接口

成功获取接口返回的信息。
通过这六节的内容,大概地介绍了IdentityServer4中Client的应用场景,包括MVC、前后端分离和服务端。
此外还介绍了如何动态配置Client、如何验证从数据库中获取的User以及自定义Claims的方法。
这个系列对IdentityServer4的介绍也是我博客的起点,写博客虽然很花时间,但是可以帮助我加深对知识点的理解。然而文中也体现到我对某些知识点的理解还是不到位的,望大家见谅。
参考官网地址:https://identityserver4.readthedocs.io/en/release/quickstarts/7_javascript_client.html
授权服务和资源服务源码地址:https://github.com/Bingjian-Zhu/Mvc-HybridFlow.git
JavaScript客户端源码地址:https://github.com/Bingjian-Zhu/Identity-JavaScript_Client.git
IdentityServer4-前后端分离的授权验证(六)的更多相关文章
- SpringBoot2.0.3 + SpringSecurity5.0.6 + vue 前后端分离认证授权
新项目引入安全控制 项目中新近添加了Spring Security安全组件,前期没怎么用过,加之新版本少有参考,踩坑四天,终完成初步解决方案.其实很简单,Spring Security5相比之前版本少 ...
- SpringBoot20 集成SpringSecurity02 -> 利用SpringSecurity进行前后端分离的登录验证
1 SpirngBoot环境搭建 创建一个SpringBoot项目即可,详情参见三少的相关博文 参考博文 -> 点击前往 SpirngBoot项目脚手架 -> 点击前往 2 引入Spirn ...
- Django 利用JWT实现前后端分离的Token验证
一.什么是Token? Token是服务端生成的一串字符串,以作客户端进行请求的一个令牌,当第一次登录后,服务器会生成一个Token并将此Token返回给客户端,以后客户端只需带上这个Token前来请 ...
- Spring Security OAuth2.0认证授权六:前后端分离下的登录授权
历史文章 Spring Security OAuth2.0认证授权一:框架搭建和认证测试 Spring Security OAuth2.0认证授权二:搭建资源服务 Spring Security OA ...
- 从壹开始前后端分离 [ Vue2.0+.NET Core2.1] 十六 ║Vue基础:ES6初体验 & 模块化编程
缘起 昨天说到了<从壹开始前后端分离 [ Vue2.0+.NET Core2.1] 十五 ║ Vue前篇:JS对象&字面量&this>,通过总体来看,好像大家对这一块不是很 ...
- 从壹开始前后端分离[.netCore 不定期 ] 36 ║解决JWT自定义中间件授权过期问题
缘起 哈喽,老张的不定期更新的日常又开始了,在咱们的前后端分离的.net core 框架中,虽然已经实现了权限验证<框架之五 || Swagger的使用 3.3 JWT权限验证[修改]>, ...
- 解决Django+Vue前后端分离的跨域问题及关闭csrf验证
前后端分离难免要接触到跨域问题,跨域的相关知识请参:跨域问题,解决之道 在Django和Vue前后端分离的时候也会遇到跨域的问题,因为刚刚接触Django还不太了解,今天花了好长的时间,查阅了 ...
- IdentityServer4之Implicit(隐式许可) —— oidc-client-js前后端分离
IdentityServer4之Implicit(隐式许可) —— oidc-client-js前后端分离 参考 官方文档:oidc-client-js:oidc-client是一个JavaScrip ...
- SpringSecurity04 利用JPA和SpringSecurity实现前后端分离的认证和授权
1 环境搭建 1.1 环境说明 JDK:1.8 MAVEN:3.5 SpringBoot:2.0.4 SpringSecurity:5.0.7 IDEA:2017.02旗舰版 1.2 环境搭建 创建一 ...
随机推荐
- python中的%s%是什么意思
它是一个字符串格式化语法(它从C借用). 请参阅 “格式化字符串”: Python支持将值格式化为字符串.虽然这可以包括非常复杂的表达式,但最基本的用法是将值插入到%s 占位符的字符串中 . 编辑 ...
- SpringBoot集成Dubbo
(1).新建一个普通Maven项目,用于存放一些公共服务接口及公共的Bean等. 项目: 公共Bean: package cn.coreqi.entities; import java.io.Seri ...
- Mysql被攻击
日志: show global variables like '%general%'; set global general_log=on; 默认Path:/var/run/mysqld/mysqld ...
- 调用链系列二、Zipkin 和 Brave 实现(springmvc、RestTemplate)服务调用跟踪
Brave介绍 1.Brave简介 Brave 是用来装备 Java 程序的类库,提供了面向标准Servlet.Spring MVC.Http Client.JAX RS.Jersey.Resteas ...
- Visual Studio 2017 + Python3.6安装scipy库
Windows10下安装scipy很麻烦,直接在命令行下使用pip install scipy无法安装,但可以借助VS2017的集成环境来安装. (1)首先在Visual Studio Install ...
- Python单元测试unittest - 单元测试框架
一.unittest简介 unitest单元测试框架最初是有JUnit的启发,它支持测试自动化,共享测试的设置和关闭代码,将测试聚合到集合中,以及测试与报告框架的独立性. 二.unittest相关概念 ...
- 转载:第2章 Nginx的配置 概述《深入理解Nginx》(陶辉)
原文:https://book.2cto.com/201304/19623.html Nginx拥有大量官方发布的模块和第三方模块,这些已有的模块可以帮助我们实现Web服务器上很多的功能.使用这些模块 ...
- Solution of Publishing failed with multiple errors Error copying file static\
1.前言 由于系统被IT打了防病毒补丁,然后启动web项目一直出现Publishing failed with multiple errors Error copying file static... ...
- java开发之——[接口回调]
一.回调的含义和用途 1. 什么是回调? 一般来说,模块之间都存在一定的调用关系,从调用方式上看,可以分为三类:同步调用.异步调用和回调.同步调用是一种阻塞式调用,即在函数A的函数体里通过书写函数B的 ...
- vue系列之flex经典案例
案例分析: 1.中间文字居中 2.文字俩边有横线 横线无法固定宽度,因为在大屏手机上,容易出现Bug,宽度不够,俩边会出现大量空隙 解决办法,使用flex布局(网站链接) 代码: <div cl ...