[Android Studio] Using API of OpenCV DNN
前言
一、故事背景
- NDK方法人脸识别
OpenCV4Android系列:
1. OpenCV4Android开发实录(1):移植OpenCV3.3.0库到Android Studio
2.OpenCV4Android开发实录(2): 使用OpenCV3.3.0库实现人脸检测
- 轻量化卷积模型
纵览轻量化卷积神经网络:SqueezeNet、MobileNet、ShuffleNet、Xception
- 移动设备集成OpenCV DNN
Official tutorials, which looks good: https://docs.opencv.org/3.4.1/d0/d6c/tutorial_dnn_android.html
- tensorboard监控训练过程
深度学习入门篇--手把手教你用 TensorFlow 训练模型
二、从训练到部署
- 目的
训练一个OpenCV DNN可以集成并部署在移动端的模型。
- 训练
Ref: 深度学习入门篇--手把手教你用 TensorFlow 训练模型
Ref: [Tensorflow] Object Detection API - build your training environment
这里,重点补充下 tensorboard 的相关内容。
可能的位置: ./object_detection/eval_util.py
可视化:
tensorboard --logdir= D:/training-sets/data-translate/training
- 部署
From: https://github.com/opencv/opencv/tree/master/samples/android
Ref: https://github.com/floe/opencv-tutorial-1-camerapreview
Ref: https://github.com/floe/opencv-tutorial-2-mixedprocessing
三、部署到手机
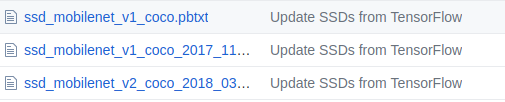
- TensorFlow 提供的版本
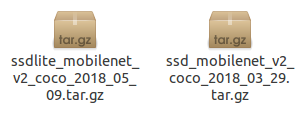
- OpenCV 支持的版本
参见:opencv_extra/testdata/dnn/
Jeff: 对应的v2比较大,估计是为了性能考虑,敬请期待ssdlite版本。
- 手机测试代码
结合tutorial-3和objdetect就好,代码示范如下:
package org.opencv.samples.tutorial1;

import org.opencv.android.BaseLoaderCallback;

import org.opencv.android.CameraBridgeViewBase.CvCameraViewFrame;

import org.opencv.android.LoaderCallbackInterface;

import org.opencv.android.OpenCVLoader;

import org.opencv.core.Mat;

import org.opencv.android.CameraBridgeViewBase;

import org.opencv.android.CameraBridgeViewBase.CvCameraViewListener2;

import org.opencv.dnn.Dnn;  // Jeffrey

import android.app.Activity;

import android.os.Bundle;

import android.util.Log;

import android.view.Menu;

import android.view.MenuItem;

import android.view.SurfaceView;

import android.view.WindowManager;

import android.widget.Toast;

//-------------------------------------------------------------------

import android.content.Context;

import android.content.res.AssetManager;

//import android.os.Bundle;

//import android.support.v7.app.AppCompatActivity;  # Jeff: ignore.

//import android.util.Log;

//import org.opencv.android.BaseLoaderCallback;

//import org.opencv.android.CameraBridgeViewBase;

//import org.opencv.android.CameraBridgeViewBase.CvCameraViewFrame;

//import org.opencv.android.CameraBridgeViewBase.CvCameraViewListener2;

//import org.opencv.android.LoaderCallbackInterface;

//import org.opencv.android.OpenCVLoader;

import org.opencv.core.Core;

//import org.opencv.core.Mat;

import org.opencv.core.Point;

import org.opencv.core.Scalar;

import org.opencv.core.Size;

import org.opencv.dnn.Net;

//import org.opencv.dnn.Dnn;

import org.opencv.imgproc.Imgproc;

import java.io.BufferedInputStream;

import java.io.File;

import java.io.FileOutputStream;

import java.io.IOException;

//-------------------------------------------------------------------

public class Tutorial1Activity extends Activity implements CvCameraViewListener2 {

    private static final String TAG = "OCVSample::Activity";

    private CameraBridgeViewBase mOpenCvCameraView;

    private boolean              mIsJavaCamera     = true;

    private MenuItem             mItemSwitchCamera = null;

    private static final String[] classNames = {"background", "laava"};

    private Net net;

    private BaseLoaderCallback mLoaderCallback = new BaseLoaderCallback(this) {

        @Override

        public void onManagerConnected(int status) {

            switch (status) {

                case LoaderCallbackInterface.SUCCESS:

                {

                    Log.i(TAG, "OpenCV loaded successfully");

                    mOpenCvCameraView.enableView();

                } break;

                default:

                {

                    super.onManagerConnected(status);

                } break;

            }

        }

    };

    public Tutorial1Activity() {

        Log.i(TAG, "Instantiated new " + this.getClass());

    }

    /** Called when the activity is first created. */

    @Override

    public void onCreate(Bundle savedInstanceState) {

        Log.i(TAG, "called onCreate");

        super.onCreate(savedInstanceState);

        getWindow().addFlags(WindowManager.LayoutParams.FLAG_KEEP_SCREEN_ON);

        setContentView(R.layout.tutorial1_surface_view);

        mOpenCvCameraView = (CameraBridgeViewBase) findViewById(R.id.tutorial1_activity_java_surface_view);

        mOpenCvCameraView.setVisibility(SurfaceView.VISIBLE);

        mOpenCvCameraView.setCvCameraViewListener(this);

    }

//-------------------------------------------------------------------

    @Override

    public void onPause() {

        super.onPause();

        if (mOpenCvCameraView != null)

            mOpenCvCameraView.disableView();

    }

    @Override

    public void onResume() {

        super.onResume();

        if (!OpenCVLoader.initDebug()) {

            Log.d(TAG, "Internal OpenCV library not found. Using OpenCV Manager for initialization");

            OpenCVLoader.initAsync(OpenCVLoader.OPENCV_VERSION_3_0_0, this, mLoaderCallback);

        } else {

            Log.d(TAG, "OpenCV library found inside package. Using it!");

            mLoaderCallback.onManagerConnected(LoaderCallbackInterface.SUCCESS);

        }

    }

    public void onDestroy() {

        super.onDestroy();

        if (mOpenCvCameraView != null)

            mOpenCvCameraView.disableView();

    }

//-------------------------------------------------------------------

    // Upload file to storage and return a path.

    private static String getPath(String file, Context context) {

        AssetManager assetManager = context.getAssets();

        BufferedInputStream inputStream = null;

        try {

            // Read data from assets.

            inputStream = new BufferedInputStream(assetManager.open(file));

            byte[] data = new byte[inputStream.available()];

            inputStream.read(data);

            inputStream.close();

            // Create copy file in storage.

            File outFile = new File(context.getFilesDir(), file);

            FileOutputStream os = new FileOutputStream(outFile);

            os.write(data);

            os.close();

            // Return a path to file which may be read in common way.

            return outFile.getAbsolutePath();

        } catch (IOException ex) {

            Log.i(TAG, "Failed to upload a file");

        }

        return "";

    }

    // Load a network.

    public void onCameraViewStarted(int width, int height) {

        String proto   = getPath("MobileNetSSD_deploy.prototxt", this);

        String weights = getPath("MobileNetSSD_deploy.caffemodel", this);

        String config  = getPath("ssd_mobilenet_v1_coco.pbtxt", this);

        String model   = getPath("frozen_inference_graph.pb", this);

//        net = Dnn.readNetFromCaffe(proto, weights);

        net = Dnn.readNetFromTensorflow(model, config);

        Log.i(TAG, "Network loaded successfully");

    }

//-------------------------------------------------------------------

    /**

     *

     *

     *

     * @param inputFrame

     * @return

     */

    public Mat onCameraFrame(CvCameraViewFrame inputFrame) {

        final int    IN_WIDTH        = 300;

        final int    IN_HEIGHT       = 300;

        final float  WH_RATIO        = (float)IN_WIDTH / IN_HEIGHT;

        final double IN_SCALE_FACTOR = 0.007843;

        final double MEAN_VAL        = 127.5;

        final double THRESHOLD       = 0.2;

        // Get a new frame

        Mat frame = inputFrame.rgba();

        Imgproc.cvtColor(frame, frame, Imgproc.COLOR_RGBA2RGB);

        // Forward image through network.

        Mat blob = Dnn.blobFromImage(frame, IN_SCALE_FACTOR,

                new Size(IN_WIDTH, IN_HEIGHT),

                new Scalar(MEAN_VAL, MEAN_VAL, MEAN_VAL), false, false);

        net.setInput(blob);

        Mat detections = net.forward();

        int cols = frame.cols();

        int rows = frame.rows();

        Size cropSize;

        if ((float)cols / rows > WH_RATIO) {

            cropSize = new Size(rows * WH_RATIO, rows);

        } else {

            cropSize = new Size(cols, cols / WH_RATIO);

        }

        int y1 = (int)(rows - cropSize.height) / 2;

        int y2 = (int)(y1 + cropSize.height);

        int x1 = (int)(cols - cropSize.width) / 2;

        int x2 = (int)(x1 + cropSize.width);

        Mat subFrame = frame.submat(y1, y2, x1, x2);

        cols = subFrame.cols();

        rows = subFrame.rows();

        detections = detections.reshape(1, (int)detections.total() / 7);

        for (int i = 0; i < detections.rows(); ++i) {

            double confidence = detections.get(i, 2)[0];

            if (confidence > THRESHOLD) {

                int classId = (int)detections.get(i, 1)[0];

                int xLeftBottom = (int)(detections.get(i, 3)[0] * cols);

                int yLeftBottom = (int)(detections.get(i, 4)[0] * rows);

                int xRightTop   = (int)(detections.get(i, 5)[0] * cols);

                int yRightTop   = (int)(detections.get(i, 6)[0] * rows);

                // Draw rectangle around detected object.

                Imgproc.rectangle(subFrame, new Point(xLeftBottom, yLeftBottom),

                        new Point(xRightTop, yRightTop),

                        new Scalar(0, 255, 0));

                String label = classNames[classId] + ": " + confidence;

                int[] baseLine = new int[1];

                Size labelSize = Imgproc.getTextSize(label, Core.FONT_HERSHEY_SIMPLEX, 0.5, 1, baseLine);

                // Draw background for label.

                Imgproc.rectangle(subFrame, new Point(xLeftBottom, yLeftBottom - labelSize.height),

                        new Point(xLeftBottom + labelSize.width, yLeftBottom + baseLine[0]),

                        new Scalar(255, 255, 255), Core.FILLED);

                // Write class name and confidence.

                Imgproc.putText(subFrame, label, new Point(xLeftBottom, yLeftBottom),

                        Core.FONT_HERSHEY_SIMPLEX, 0.5, new Scalar(0, 0, 0));

            }

        }

        return frame;

    }

//-------------------------------------------------------------------

    public void onCameraViewStopped() {

    }

//-------------------------------------------------------------------

}
End.
[Android Studio] Using API of OpenCV DNN的更多相关文章
- android studio 使用 jni 编译 opencv 完整实例 之 图像边缘检测!从此在andrid中自由使用 图像匹配、识别、检测
目录: 1,过程感慨: 2,运行环境: 3,准备工作: 4,编译 .so 5,遇到的关键问题及其解决方法 6,实现效果截图. (原创:转载声明出处:http://www.cnblogs.com/lin ...
- android studio 使用 jni 编译 opencv 完整实例 之 图像边缘检测!
目录: 1,过程感慨: 2,运行环境: 3,准备工作: 4,编译 .so 5,遇到的关键问题及其解决方法 6,实现效果截图. ------------------------------------- ...
- Android Studio配置及使用OpenCV
1.下载及目录介绍 进入官网(http://opencv.org/)下载OpenCV4Android并解压(这里是OpenCV-3.2.0-android-sdk).下面是目录的结构图: sdk ...
- 使用Android Studio查看API文档
在使用Android Studio编码时,若要查看某个类或函数的释义, 只需将光标移动至要查看释义的代码处,然后按下Ctrl+Q,便会弹出文档描述. 然而,有时候会出现如下状况: 因为默认查看的是在线 ...
- android studio compile api implementation 区别
compile与api 二者等同,无区别 implementation与compile或implementation与api implementation编译的依赖只作用于当前的module.即APP ...
- Android Studio中配置及使用OpenCV示例
Android Studio配置及使用OpenCV 前言:最近在做项目移植,项目较大,在Eclipse中配置的Jni及OpenCV环境没任何问题,但是迁移到Studio中就问题一大堆,网上也找了一些资 ...
- [Android Studio] Using Java to call OpenCV
Environment: Android studio 2.2.3, OpenCV 2.4.9 For Android, Android 6 with api 23 for X86 一.File: b ...
- opencv-android笔记1:android studio 2.3 + opencv-android-sdk 实现 camera预览
Android studio环境配置不再赘述,可以参照我的其他博客. Android应用程序开发环境搭建:http://blog.csdn.net/ja33son/article/details/61 ...
- 【OpenCV for Android】Android Studio JNI和NDK配置及采坑记录
在配置好Android studio的OpenCV环境后,我们就可以通过Java代码调用OpenCV的API了,但是在通常情况下,用Java代码编写图像处理算法的运行效率是没有C++代码高的,在应用层 ...
随机推荐
- js实现截取或查找字符串中的子字符串
获取 答案: var string0="sss.sscdyfasdfdgfg";//sscdy获取 ,); 答案是采用substr方法. 定义和用法:substr方法用于返回一个从 ...
- PID控制器(比例-积分-微分控制器)- V
Linear Actuator - PID Control Introduction This application guide is designed to explain the basics ...
- Android NDK 使用自己的共享库(Import Module)
LOCAL_PATH := $(call my-dir)//标准mk语句,指编译路径,所有mk文件第一句都是这个 /**这个模块表示引用了一个本地的静态库include $(CLEAR_VARS) / ...
- JVM Debugger Memory View for IntelliJ IDEA
Posted on August 19, 2016 by Andrey Cheptsov Every day we try to find new ways to improve developer ...
- .Net Core DES加密解密
一.DES说明 1.加密的密钥必须是16位,因为是通过AES处理的Create,AES内置的位数为16位. 2.加密结果返回Base64字符格式 二.加密方法整理 //默认密钥向量 private s ...
- vs2013修改书签(vs书签文件位置)
visual studio 2013 的书签功能很好用,可以记录一些代码的位置:方便查阅: 不过当项目被他人修改过后,svn update 更新过后,书签的文件行号不变,但是已经不再是原来记录的哪一行 ...
- iOS开发-UIView扩展CGRect
关于UIView的位置都会遇到,一般需要改变UIView的位置,需要先获取原有的frame位置,然后在frame上面修改,有的时候如果只是改变了一下垂直方向的位置,宽度和高度的一种,这种写法很麻烦.下 ...
- 【Storm】一张图搞定Storm的运行架构
- Oracle NID工具修改数据库DBID、数据库名称、数据库实例名
DBID是数据库的唯一标识符,在一些特殊场合会涉及到DBID的相关内容,本篇文章的目的是演示将DB_NAME的值从ORCL修改为ORCL1. 一.查看当前的环境 [oracle@oracledb ad ...
- 视觉SLAM中的数学基础 第二篇 四元数
视觉SLAM中的数学基础 第二篇 四元数 什么是四元数 相比欧拉角,四元数(Quaternion)则是一种紧凑.易于迭代.又不会出现奇异值的表示方法.它在程序中广为使用,例如ROS和几个著名的SLAM ...