
手撸一个springsecurity,了解一下security原理
手撸一个springsecurity,了解一下security原理
转载自:www.javaman.cn 手撸一个springsecurity,了解一下security原理
今天手撸一个简易版本的springsecurity,带大家理解下springsecurity的原理:
安全框架的两个特点就是认证和授权,让我们来通过代码了解下认证和授权的处理方式:
1、认证
认证就是指需要登录才能进行系统操作,如:登录qq、微信或者是web系统的登录都是认证的过程
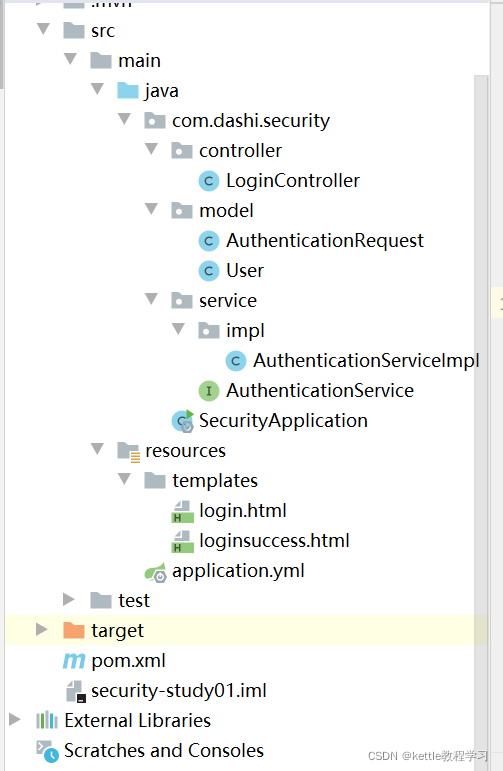
1.1 工程目录
1.2 maven配置pom.xml
<?xml version="1.0" encoding="UTF-8"?>

<project xmlns="http://maven.apache.org/POM/4.0.0" xmlns:xsi="http://www.w3.org/2001/XMLSchema-instance"

         xsi:schemaLocation="http://maven.apache.org/POM/4.0.0 https://maven.apache.org/xsd/maven-4.0.0.xsd">

    <modelVersion>4.0.0</modelVersion>

    <parent>

        <groupId>org.springframework.boot</groupId>

        <artifactId>spring-boot-starter-parent</artifactId>

        <version>2.6.3</version>

        <relativePath/> <!-- lookup parent from repository -->

    </parent>

    <groupId>com.dashi</groupId>

    <artifactId>security</artifactId>

    <version>0.0.1-SNAPSHOT</version>

    <name>security</name>

    <description>Demo project for Spring Boot</description>

    <properties>

        <java.version>1.8</java.version>

    </properties>

    <dependencies>

        <dependency>

            <groupId>org.springframework.boot</groupId>

            <artifactId>spring-boot-starter</artifactId>

        </dependency>

        <dependency>

            <groupId>org.springframework.boot</groupId>

            <artifactId>spring-boot-starter-web</artifactId>

        </dependency>

        <dependency>

            <groupId>org.springframework.boot</groupId>

            <artifactId>spring-boot-starter-thymeleaf</artifactId>

        </dependency>

        <dependency>

            <groupId>org.projectlombok</groupId>

            <artifactId>lombok</artifactId>

            <optional>true</optional>

        </dependency>

        <dependency>

            <groupId>org.springframework.boot</groupId>

            <artifactId>spring-boot-starter-test</artifactId>

            <scope>test</scope>

        </dependency>

    </dependencies>

    <build>

        <plugins>

            <plugin>

                <groupId>org.springframework.boot</groupId>

                <artifactId>spring-boot-maven-plugin</artifactId>

                <configuration>

                    <excludes>

                        <exclude>

                            <groupId>org.projectlombok</groupId>

                            <artifactId>lombok</artifactId>

                        </exclude>

                    </excludes>

                </configuration>

            </plugin>

        </plugins>

    </build>

</project>
1.3 application.yml
spring:

  mvc:

    view:

      prefix: /

      suffix: .html
1.4 创建User,模拟springsecurity的用户信息的核心接口UserDetails
import lombok.AllArgsConstructor;

import lombok.Data;

@Data

@AllArgsConstructor

public class User {

    private Integer id;

    private String username;

    private String password;

}
1.5 创建AuthenticationService,模拟springsecurity的UserDetailsService核心接口
public interface AuthenticationService {

    public User authentication(AuthenticationRequest authenticationRequest);

}
1.6 实现AuthenticationService,模拟实现UserDetailsService的过程
@Service

public class AuthenticationServiceImpl implements AuthenticationService {

    private Map<String,User> users =  new HashMap<String,User>();

    @Override

    public User authentication(AuthenticationRequest authenticationRequest) {

        if(authenticationRequest == null||"".equals(authenticationRequest.getUsername())||"".equals(authenticationRequest.getPassword())){

            throw new RuntimeException("用户名或密码为空");

        }

        User user = users.get(authenticationRequest.getUsername());

        if(user == null){

            throw new RuntimeException("用户不存在");

        }

        if(!user.getPassword().equals(authenticationRequest.getPassword())){

            throw new RuntimeException("密码不正确");

        }

        return user;  //模拟实现UserDetailS的User

    }

    public User getUser(String username){

        return users.get(username);

    }

	//创建两个账户,模拟管理员和普通的来宾用户

    {

        users.put("admin",new User(1,"admin","123"));  //管理员

        users.put("guest",new User(2,"guest","111"));  //来宾账户

    }

}
1.7 接收请求参数封装对象
@Data

public class AuthenticationRequest {

    private String username;

    private String password;

}
1.8 登录Controller,对/login请求处理,它调用AuthenticationService完成认证并返回登录结果提示信息
@Controller

public class LoginController {

    @Autowired

    private AuthenticationService authenticationService;

    @GetMapping("/login")

    public String login(){

        return "login";

    }

    @PostMapping(value = "/login",produces = {"text/plain;charset=UTF-8"})

    public String login(AuthenticationRequest authenticationRequest, Model model){

        System.out.println("111"+authenticationRequest);

        User user = authenticationService.authentication(authenticationRequest);

        String loginMsg = user.getUsername()+"登录成功";

        System.out.println(loginMsg);

        model.addAttribute("loginMsg",loginMsg);

        return "loginsuccess";

    }

}
1.9 认证页面
<!DOCTYPE HTML PUBLIC "-//W3C//DTD HTML 4.01 Transitional//EN"

        "http://www.w3.org/TR/html4/loose.dtd">

<html>

<head>

    <title>登录</title>

</head>

<body>

<form action="/login" method="post">

    用户名:<input type="text" name="username"><br>

    密码:<input type="password" name="password"><br>

    <input type="submit" value="登录1">

</form>

</body>

</html>
<!DOCTYPE HTML PUBLIC "-//W3C//DTD HTML 4.01 Transitional//EN"

        "http://www.w3.org/TR/html4/loose.dtd">

<html lang="en" xmlns:th="http://www.thymeleaf.org">

<head>

    <title>Title</title>

</head>

<body>

    <h1 th:text="${loginMsg}"></h1>

</body>

</html>
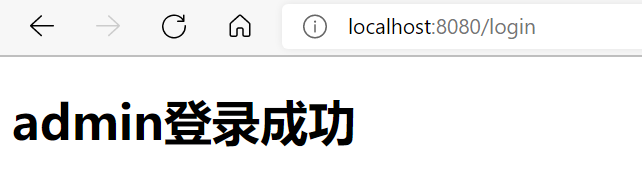
1.10 认证成功后打印登录成功
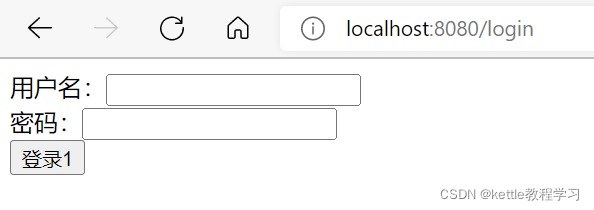
1)登录界面如下
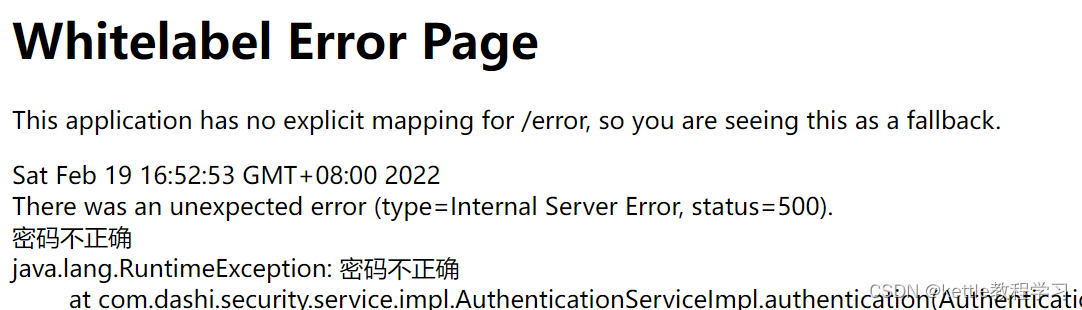
2)密码错误界面
3)登录成功界面
2、授权
授权就是控制什么样的用户或者角色访问什么功能,例如:管理员可以访问全部功能,guest普通用户只能访问某一个菜单或者功能
2.1 User增加权限authorities和session
package com.dashi.security.model;

import lombok.AllArgsConstructor;

import lombok.Data;

import java.util.Set;

@Data

@AllArgsConstructor

public class User {

    private Integer id;

    private String username;

    private String password;

    //登录用户,增加登录用户session

    public static final String LOGIN_USER = "user";

    /**

     * 用户权限

     */

    private Set<String> authorities;

}
2.2 用户增加角色authorities
import com.dashi.security.model.AuthenticationRequest;

import com.dashi.security.model.User;

import com.dashi.security.service.AuthenticationService;

import org.springframework.stereotype.Service;

import org.springframework.util.StringUtils;

import java.util.HashMap;

import java.util.HashSet;

import java.util.Map;

import java.util.Set;

@Service

public class AuthenticationServiceImpl implements AuthenticationService {

    private Map<String,User> users =  new HashMap<String,User>();

    @Override

    public User authentication(AuthenticationRequest authenticationRequest) {

        if(authenticationRequest == null||"".equals(authenticationRequest.getUsername())||"".equals(authenticationRequest.getPassword())){

            throw new RuntimeException("用户名或密码为空");

        }

        User user = users.get(authenticationRequest.getUsername());

        if(user == null){

            throw new RuntimeException("用户不存在");

        }

        if(!user.getPassword().equals(authenticationRequest.getPassword())){

            throw new RuntimeException("密码不正确");

        }

        return user;

    }

    public User getUser(String username){

        return users.get(username);

    }

    {

        //增加管理员权限

        Set<String> authorities1 = new HashSet<>();

        authorities1.add("admin");

        //增加来宾权限

        Set<String> authorities2 = new HashSet<>();

        authorities2.add("guest");

        users.put("admin",new User(1,"admin","123",authorities1));

        users.put("guest",new User(2,"guest","111",authorities2));

    }

}
2.3登录成功后,将用户放到session中
import com.dashi.security.model.AuthenticationRequest;

import com.dashi.security.model.User;

import com.dashi.security.service.AuthenticationService;

import org.springframework.beans.factory.annotation.Autowired;

import org.springframework.stereotype.Controller;

import org.springframework.ui.Model;

import org.springframework.web.bind.annotation.GetMapping;

import org.springframework.web.bind.annotation.ModelAttribute;

import org.springframework.web.bind.annotation.PostMapping;

import org.springframework.web.servlet.ModelAndView;

import javax.servlet.http.HttpSession;

@Controller

public class LoginController {

    @Autowired

    private AuthenticationService authenticationService;

    @GetMapping("/login")

    public String login(){

        return "login";

    }

    @PostMapping(value = "/login",produces = {"text/plain;charset=UTF-8"})

    public String login(AuthenticationRequest authenticationRequest, Model model, HttpSession session){

        System.out.println("111"+authenticationRequest);

        User user = authenticationService.authentication(authenticationRequest);

        session.setAttribute(User.LOGIN_USER,user);

        String loginMsg = user.getUsername()+"登录成功";

        System.out.println(loginMsg);

        model.addAttribute("loginMsg",loginMsg);

        return "loginsuccess";

    }

}
2.4 增加Springboot拦截器配置,判断是admin用户,可以访问所有资源resource1和resource2,如果是guest用户只允许访问resource2资源
import com.dashi.security.model.User;

import org.springframework.stereotype.Component;

import org.springframework.web.servlet.HandlerInterceptor;

import javax.servlet.http.HttpServletRequest;

import javax.servlet.http.HttpServletResponse;

import java.io.IOException;

import java.io.PrintWriter;

@Component

public class MyAuthenInterceptor implements HandlerInterceptor {

    @Override

    public boolean preHandle(HttpServletRequest request, HttpServletResponse response, Object handler) throws Exception {

        Object object = request.getSession().getAttribute(User.LOGIN_USER);

        System.out.println("object = " + object);

        if(object == null){

            writeContent(response,"请登录");

        }

        //获取请求的url

        String requestURI = request.getRequestURI();

        User user = (User)object;

        if(user.getAuthorities().contains("admin") && requestURI.contains("/resource1") || requestURI.contains("/resource2")){

            writeContent(response,user.getUsername()+"访问:"+requestURI+"访问成功!");

            return true;

        }

        if(user.getAuthorities().contains("guest") && requestURI.contains("/resource2")){

            writeContent(response,user.getUsername()+"访问:"+requestURI+"访问成功!");

            return true;

        }

        writeContent(response,"权限不足!");

        return false;

    }

    private void writeContent(HttpServletResponse response,String msg) throws IOException {

        response.setContentType("text/html;charset=utf-8");

        PrintWriter printWriter = response.getWriter();

        printWriter.write(msg);

        printWriter.close();

        response.resetBuffer();

    }

}
2.5 拦截器进行请求拦截,拦截/resource/**请求
import org.springframework.beans.factory.annotation.Autowired;

import org.springframework.context.annotation.Configuration;

import org.springframework.web.servlet.config.annotation.InterceptorRegistry;

import org.springframework.web.servlet.config.annotation.WebMvcConfigurer;

@Configuration

public class LoginConfig implements WebMvcConfigurer {

    @Autowired

    private MyAuthenInterceptor myAuthenInterceptor;

    public void addInterceptors(InterceptorRegistry registry){

        registry.addInterceptor(myAuthenInterceptor).addPathPatterns("/resource/**");

    }

}
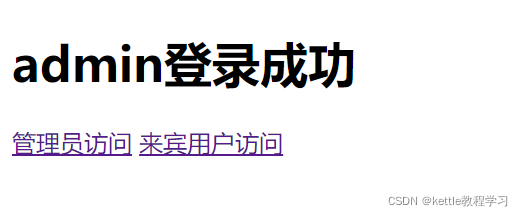
2.6 授权测试界面如下:
1)登录成功后设置resource1和resource2访问功能
2)admin用户访问资源1和资源2
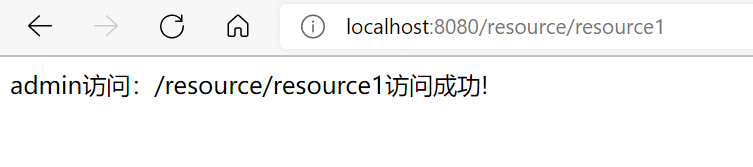

3)guest用户只能访问资源2,不能访问资源1


2.7 实现了springsecurity的认证和授权
1、 认证功能:
loginPage("/login.html")即为认证
2、 授权功能:
.antMatchers("/resource/resource1").hasAuthority(“admin”)
.antMatchers("/resource/resource2").hasAuthority(“admin”)
.antMatchers("/resource/resource2").hasAuthority(“guest”)
  @Override

    protected void configure(HttpSecurity http) throws Exception {

            //以下五步是表单登录进行身份认证最简单的登录环境

            http.formLogin() //表单登陆

                .loginPage("/login.html") //指定登陆页面

                .loginProcessingUrl("/authentication/form")//登陆页面提交的页面 开始使用UsernamePasswordAuthenticationFilter过滤器处理请求

                .and() //

                .authorizeRequests() //下面的都是授权的配置

				.antMatchers("/resource/resource1").hasAuthority("admin")

				.antMatchers("/resource/resource2").hasAuthority("admin") .antMatchers("/resource/resource2").hasAuthority("guest")

                .and()

                .csrf().disable();//关闭跨站请求伪造攻击拦截
手撸一个springsecurity,了解一下security原理的更多相关文章
- 手撸一个SpringBoot-Starter
1. 简介 通过了解SpringBoot的原理后,我们可以手撸一个spring-boot-starter来加深理解. 1.1 什么是starter spring官网解释 starters是一组方便的依 ...
- 通过 Netty、ZooKeeper 手撸一个 RPC 服务
说明 项目链接 微服务框架都包括什么? 如何实现 RPC 远程调用? 开源 RPC 框架 限定语言 跨语言 RPC 框架 本地 Docker 搭建 ZooKeeper 下载镜像 启动容器 查看容器日志 ...
- 使用Java Socket手撸一个http服务器
原文连接:使用Java Socket手撸一个http服务器 作为一个java后端,提供http服务可以说是基本技能之一了,但是你真的了解http协议么?你知道知道如何手撸一个http服务器么?tomc ...
- 【手撸一个ORM】MyOrm的使用说明
[手撸一个ORM]第一步.约定和实体描述 [手撸一个ORM]第二步.封装实体描述和实体属性描述 [手撸一个ORM]第三步.SQL语句构造器和SqlParameter封装 [手撸一个ORM]第四步.Ex ...
- 第二篇-用Flutter手撸一个抖音国内版,看看有多炫
前言 继上一篇使用Flutter开发的抖音国际版 后再次撸一个国内版抖音,大部分功能已完成,主要是Flutter开发APP速度很爽, 先看下图 项目主要结构介绍 这次主要的改动在api.dart 及 ...
- C#基于Mongo的官方驱动手撸一个Super简易版MongoDB-ORM框架
C#基于Mongo的官方驱动手撸一个简易版MongoDB-ORM框架 如题,在GitHub上找了一圈想找一个MongoDB的的ORM框架,未偿所愿,就去翻了翻官网(https://docs.mongo ...
- 五分钟,手撸一个Spring容器!
大家好,我是老三,Spring是我们最常用的开源框架,经过多年发展,Spring已经发展成枝繁叶茂的大树,让我们难以窥其全貌. 这节,我们回归Spring的本质,五分钟手撸一个Spring容器,揭开S ...
- Golang:手撸一个支持六种级别的日志库
Golang标准日志库提供的日志输出方法有Print.Fatal.Panic等,没有常见的Debug.Info.Error等日志级别,用起来不太顺手.这篇文章就来手撸一个自己的日志库,可以记录不同级别 ...
- 以鶸ice为例,手撸一个解释器(一)明确目标
代码地址 # HelloWorld.ice print("hello, world") 前言(废话) 其实从开始学习编译原理到现在已经有快半年的时间了,但是其间常常不能坚持看下去龙 ...
随机推荐
- Scala语言介绍一
为什么学习scala语言 Scala是基于JVM的语言,与java语言类似,java语言是基于JVM的面向对象的语言,Scala也是基于JVM,同时支持面向对象和面向函数的编程语言.Spark底层的源 ...
- RocketMQ架构原理解析(一):整体架构
RocketMQ架构原理解析(一):整体架构 RocketMQ架构原理解析(二):消息存储(CommitLog) RocketMQ架构原理解析(三):消息索引(ConsumeQueue & I ...
- leetcode 986. 区间列表的交集
问题描述 给定两个由一些 闭区间 组成的列表,每个区间列表都是成对不相交的,并且已经排序. 返回这两个区间列表的交集. (形式上,闭区间 [a, b](其中 a <= b)表示实数 x 的集合, ...
- Android Sensor.TYPE_STEP_COUNTER 计步器传感器 步数统计
注意:使用 计步器传感器 Sensor.TYPE_STEP_COUNTER 获取步数前需要手机支持该传感器 1.学习资料 1.1 SENSOR.TYPE_STEP_COUNTER 地址:开发者文档 翻 ...
- 【pwn】学pwn日记——栈学习(持续更新)
[pwn]学pwn日记--栈学习(持续更新) 前言 从8.2开始系统性学习pwn,在此之前,学习了部分汇编指令以及32位c语言程序的堆栈图及函数调用. 学习视频链接:XMCVE 2020 CTF Pw ...
- vue项目再HBuilder打包成app后,有ui模块未添加的弹窗
直接在打包后的mainifst.json的文件夹中加入标注部分,我是这样解决了的
- SSM项目使用拦截器实现登录验证功能
SSM项目使用拦截器实现登录验证功能 登录接口实现 public User queryUser(String UserName, String Password,HttpServletRequest ...
- 网络分层和TCP三次握手
它们就是 OSI 的七层模型,和 TCP/IP 的四层 / 五层模型.这两种模型的最大区别,就是前者在传输层和应用层之间,还有会话层和表示层,而后者没有. TCP三次握手: 位码即tcp标志位,有6种 ...
- cobbler最小化安装centos8
centos8 已经发布了GA版本,迫不及待的想尝鲜了,然后现实总是那么残酷,一直安装失败,具体安装步骤如下: 假设cobbler已配置完成. 1.下载centos8 iso镜像 wget http: ...
- 合宙AIR105使用Keil MDK + DAP-Link 烧录和调试
关于AIR105 AIR105是合宙LuatOS生态下的一款芯片, 1月初上市, 开发板与摄像头一起搭售(赠送). 从配置信息看, 芯片性能相当不错: Cortex-M4F内核, 最高频率204Mhz ...