Springboot+CAS单点登录
一:安装CAS
下载cas:https://github.com/apereo/cas
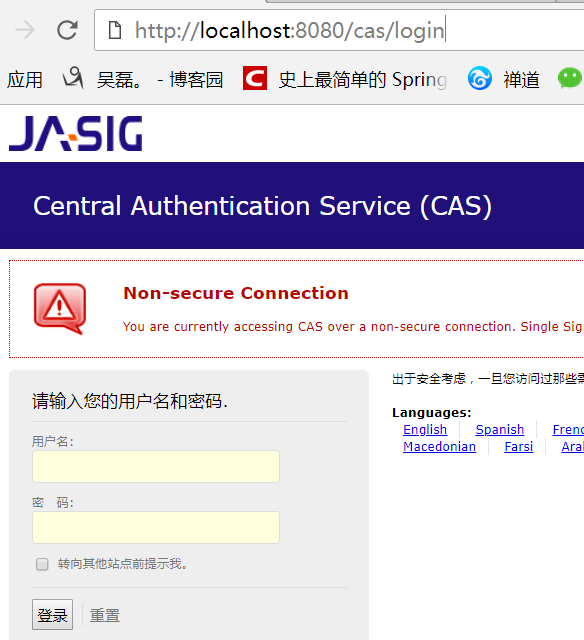
1.1 将cas并打成war包。放入一个干净的tomcat中,启动tomcat测试: http://localhost:8080/cas/login
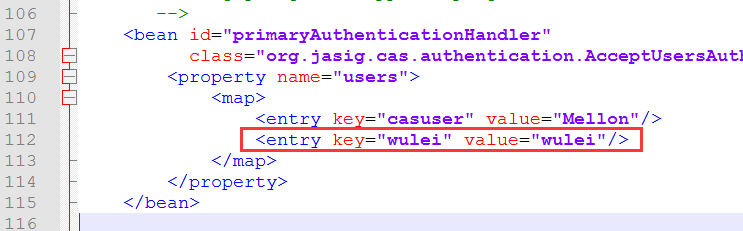
1.2 默认账号密码:casuser Mellon 我们可以在tomcat\webapps\cas\WEB-INF\deployerConfigContext.xml文件添加一个账号密码
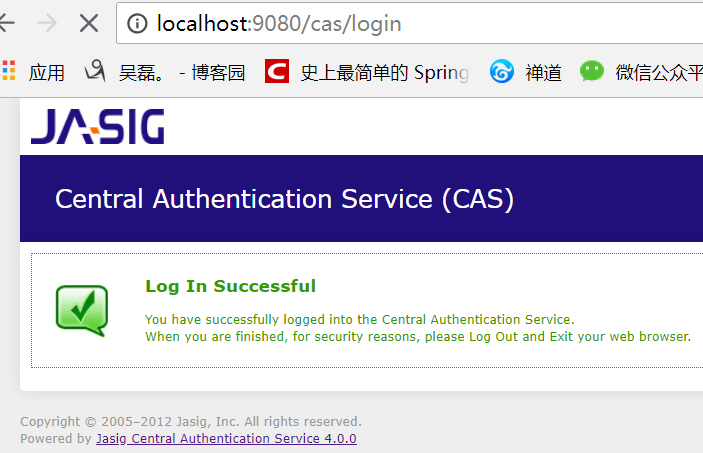
1.3 修改tomcat端口为9080, 并将tomcat\webapps\cas\WEB-INF\cas.properties的server.name改为http://localhost:9080
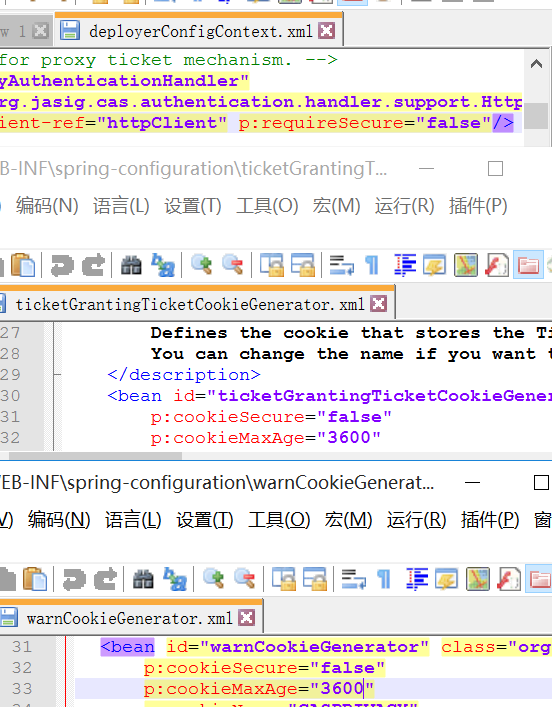
1.4 去除https认证:
1.4.1 在tomcat\webapps\cas\WEB-INF\deployerConfigContext.xml文件

      的p:httpClient-ref="httpClient"后面添加p:requireSecure="false"

1.4.2 把tomcat\webapps\cas\WEB-INF\spring-configuration的

      ticketGrantingTicketCookieGenerator.xml文件里面把p:cookieSecure="true"改为false;

      p:cookieMaxAge="-1"改为3600(-1是不保存cookie,3600秒是一个小时,保存登录信息)

1.4.3 把tomcat\webapps\cas\WEB-INF\spring-configuration的

      warnCookieGenerator.xml的p:cookieSecure="true"改为false

      p:cookieMaxAge="-1"改为3600
1.5 配置单点登出: 将tomcat\webapps\cas\WEB-INF\cas-servlet.xml中${cas.logout.followServiceRedirects:false}括号里的值改为true
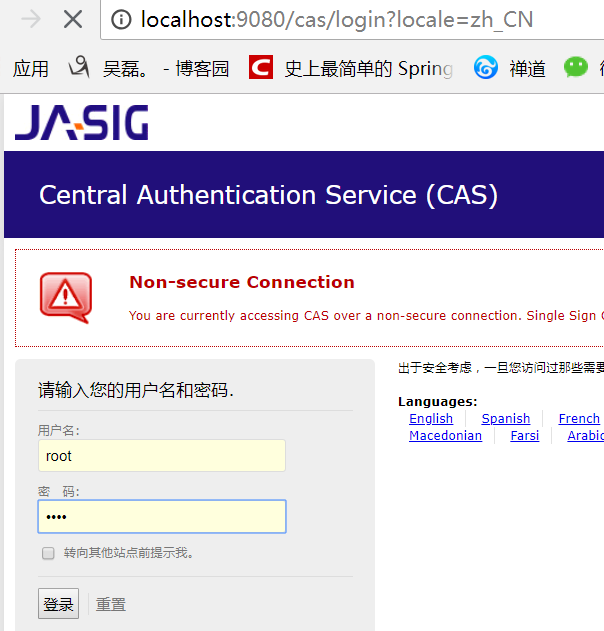
1.6 启动测试: 输入刚才配置的账号密码 wulei / wulei
二:配置数据源(CAS对接数据库)
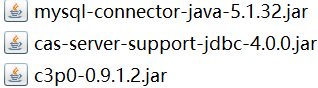
2.1 在tomcat\webapps\cas\WEB-INF\lib里添加 c3p0连接池 mysql驱动 cas的jdbc支持包
2.2 修改tomcat\webapps\cas\WEB-INF\deployerConfigContext.xml文件
2.2.1 注释掉<entry key-ref="primaryAuthenticationHandler" value-ref="primaryPrincipalResolver" />;添加<entry key-ref="dbAuthHandler" value-ref="primaryPrincipalResolver"/>

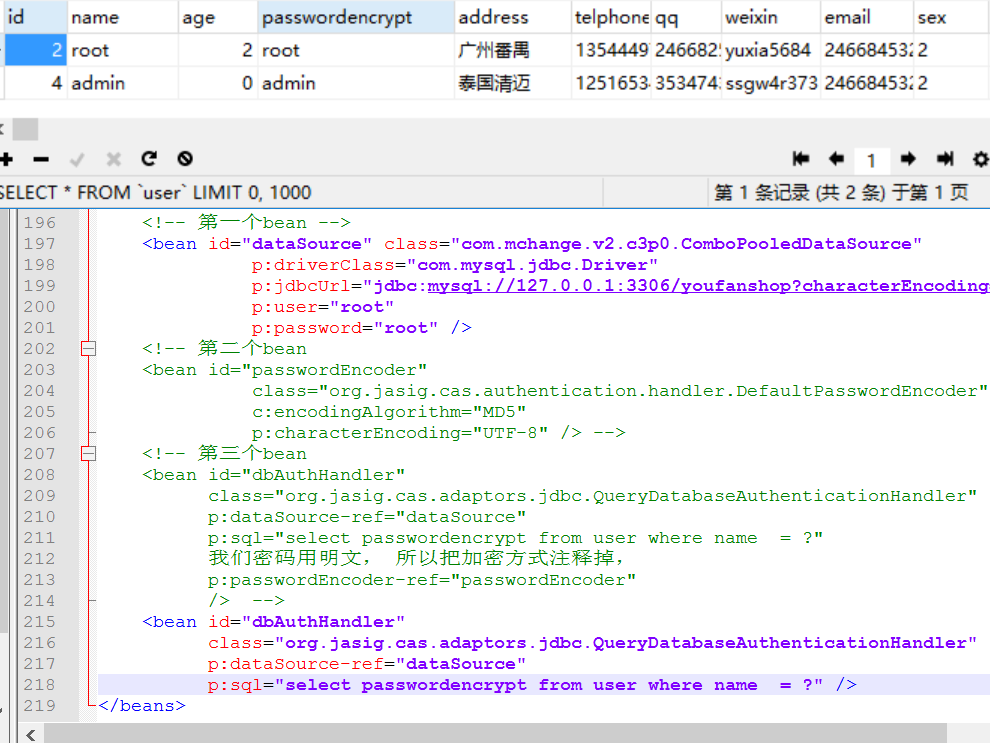
2.2.2 添加数据源 <bean id="dataSource" 添加加密方式 <bean id="passwordEncoder" 添加sql语句 <bean id="dbAuthHandler"
    <!-- 第一个bean -->

    <bean id="dataSource" class="com.mchange.v2.c3p0.ComboPooledDataSource"

              p:driverClass="com.mysql.jdbc.Driver"

              p:jdbcUrl="jdbc:mysql://127.0.0.1:3306/youfanshop?characterEncoding=utf8"

              p:user="root"

              p:password="root" />

    <!-- 第二个bean

    <bean id="passwordEncoder"

              class="org.jasig.cas.authentication.handler.DefaultPasswordEncoder"

              c:encodingAlgorithm="MD5"

              p:characterEncoding="UTF-8" /> -->

    <!-- 第三个bean

    <bean id="dbAuthHandler"

          class="org.jasig.cas.adaptors.jdbc.QueryDatabaseAuthenticationHandler"

          p:dataSource-ref="dataSource"

          p:sql="select passwordencrypt from user where name  = ?"

          我们密码用明文, 所以把加密方式注释掉,

          p:passwordEncoder-ref="passwordEncoder"

          />  -->

    <bean id="dbAuthHandler"

          class="org.jasig.cas.adaptors.jdbc.QueryDatabaseAuthenticationHandler"

          p:dataSource-ref="dataSource"

          p:sql="select passwordencrypt from user where name  = ?" />
2.3 重启测试(此时就能用数据库的账号密码登录了)
三:springBoot客户端
3.1 导包
    <parent>

        <groupId>org.springframework.boot</groupId>

        <artifactId>spring-boot-starter-parent</artifactId>

        <version>1.5.13.RELEASE</version>

        <relativePath/> <!-- lookup parent from repository -->

    </parent>

    <properties>

        <project.build.sourceEncoding>UTF-8</project.build.sourceEncoding>

        <project.reporting.outputEncoding>UTF-8</project.reporting.outputEncoding>

        <java.version>1.8</java.version>

    </properties>

    <dependencies>

        <!--web场景启动器,包含 Tomcat 和 spring-mvc restful  aop jackjson支持。 -->

        <dependency>

            <groupId>org.springframework.boot</groupId>

            <artifactId>spring-boot-starter-web</artifactId>

        </dependency>

        <!-- CAS依赖包 -->

        <dependency>

            <groupId>net.unicon.cas</groupId>

            <artifactId>cas-client-autoconfig-support</artifactId>

            <version>1.5.0-GA</version>

        </dependency>

    </dependencies>
3.2 application.properties
server.port=8081

cas.server-url-prefix=http\://127.0.0.1\:9080/cas

cas.server-login-url=http\://127.0.0.1\:9080/cas/login

cas.client-host-url=http\://127.0.0.1\:8081

cas.validation-type=CAS
3.3 配置类
import net.unicon.cas.client.configuration.CasClientConfigurerAdapter;

import net.unicon.cas.client.configuration.EnableCasClient;

import org.springframework.boot.web.servlet.FilterRegistrationBean;

import org.springframework.context.annotation.Configuration;

@Configuration

@EnableCasClient

public class CasConfigure extends CasClientConfigurerAdapter {

@Override

public void configureAuthenticationFilter(FilterRegistrationBean authenticationFilter) {

    super.configureAuthenticationFilter(authenticationFilter);

        authenticationFilter.getInitParameters().put("authenticationRedirectStrategyClass","com.patterncat.CustomAuthRedirectStrategy");

    }

}
3.4 控制器
@RestController

public class IndexController {

    @RequestMapping("/login")

    public String auth() {

        return "login success";

    }

}
3.5 主函数
@SpringBootApplication

public class Application {

     private static Logger log = Logger.getLogger(Application.class);

     public static void main(String[] args) {

            SpringApplication.run(Application.class, args);

            log.info("SpringBoot Start Success");

        }

}
测试: 浏览器输入 127.0.0.1:8081/login之前会先跳转到CAS的登陆页面,登录成功之后才会进入Controller。
Springboot+CAS单点登录的更多相关文章
- CAS单点登录原理简单介绍
1. SSO简介 1.1 单点登录定义 单点登录(Single sign on),英文名称缩写SSO,SSO的意思就是在多系统的环境中,登录单方系统,就可以在不用再次登录的情况下访问相关受信任的系统. ...
- Spring boot security权限管理集成cas单点登录
挣扎了两周,Spring security的cas终于搞出来了,废话不多说,开篇! Spring boot集成Spring security本篇是使用spring security集成cas,因此,先 ...
- CAS单点登录系列之极速入门于实战教程(4.2.7)
@ 目录 一. SSO简介 1.1 单点登录定义 1.2 单点登录角色 1.3 单点登录分类 二. CAS简介 2.1 CAS简单定义 2.2 CAS体系结构 2.3 CAS原理 三.CAS服务端搭建 ...
- SSO之CAS单点登录实例演示
本文目录: 一.概述 二.演示环境 三.JDK安装配置 四.安全证书配置 五.部署CAS-Server相关的Tomcat 六.部署CAS-Client相关的Tomcat 七. 测试验证SSO 一.概述 ...
- cas 单点登录出现org.jasig.cas.client.util.CommonUtils.getResponseFromServer - 拒绝连接 Connection refused
cas 单点登录出现org.jasig.cas.client.util.CommonUtils.getResponseFromServer - 拒绝连接 Connection refused 环境: ...
- CAS单点登录中文用户名乱码问题
CAS单点登录中文用户名乱码问题,有两种情况 1. CAS server乱码 即在向server端提交用户名和密码时,发生了乱码,解决方法是: 打开WEB-INF/web.xml,在其它的Filter ...
- CAS单点登录系统整合——注册的问题
最近一段时间在搞CAS单点登录系统,涉及到几个子系统的整合问题.对于注册,这里遇到了一个选择: 在子系统内完成注册,然后把信息同步到CAS系统: 在CAS系统中完成基本信息的注册,比如:用户名.邮箱. ...
- Asp.net Mvc4 使用Cas单点登录
因项目需要,使用了耶鲁大学的Cas单点登录方案,在java中使用一直正常,但是在.Net中碰到了循环重定向的问题,反复测试后,总算解决了,最终的配置如下: <?xml version=" ...
- CAS单点登录之mysql数据库用户验证及常见问题
前面已经介绍了CAS服务器的搭建,详情见:搭建CAS单点登录服务器.然而前面只是简单地介绍了服务器的搭建,其验证方式是原始的配置文件的方式,这显然不能满足日常的需求.下面介绍下通过mysql数据库认证 ...
随机推荐
- 介绍HTML5几种存储方式
总体情况 h5之前,存储主要是用cookies.cookies缺点有在请求头上带着数据,大小是4k之内.主Domain污染. 主要应用:购物车.客户登录 对于IE浏览器有UserData,大小是64k ...
- sh_06_break
sh_06_break i = 0 while i < 10: # break 某一条件满足时,退出循环,不再执行后续重复的代码 # i == 3 if i == 3: break print( ...
- 技术干货:Python解析CSV
1. 什么是CSV CSV(Commma-Separated Value)是都好分隔符,其文件以纯文本形式存储表格数据(数字和文本). 案例: 2. 为什么要使用CSV 与专有的二进制文件格式截然不同 ...
- Oracle JET 单页面应用程序Router 使用(上)
单页面应用程序:使用一个进加载一次的网页,如果页面由于用户的交互而改变,则仅绘制更改的页面部分. 要创建单页面应用程序需要使用 oj.Router 的虚拟导航来支持,ojModule 用来响应页面的重 ...
- java基础--单例模式的7种实现【转载】
转载:http://www.blogjava.net/kenzhh/archive/2013/03/15/357824.html 第一种,线程不安全(懒汉模式) 1 public class Sing ...
- leetcode 12题 数字转罗马数字
leetcode 12题 数字转罗马数字 答案一:我的代码 代码本地运行完全正确,在线运行出错 class Solution { public: string intToRoman(int num) ...
- String对象的常见方法
String 对象方法 方法 描述 anchor() 创建 HTML 锚. big() 用大号字体显示字符串. blink() 显示闪动字符串. bold() 使用粗体显示字符串. charAt() ...
- java数字加密算法
数字加密在项目中时常会遇到,如手机号,身份证号信息等,下面小白将自己手写的数字加密算法分享给大家,可在项目中直接运用.加密规则,入参时传递一个字段时间戳 time:* 1.以字母代替数字,0-9分别为 ...
- 使用 Dom4j 对XML操作!!!
转自:http://blog.csdn.net/redarmy_chen/article/details/12969219 dom4j是一个Java的XML API,类似于jdom,用来读写XML文件 ...
- java网络通信:伪异步I/O编程(PIO)
缺点:避免了线程资源耗尽的问题,但是根本上来说,serversocket的accept方法和inputstream的输入流方法都是阻塞型方法. 服务端:加了一个线程池,实现线程复用.客户端不变 pub ...