
flutter 访问网页+http请求
一、目录
1、访问网页
2、http请求
-----------------------------这是分割线-----------------------------
1、访问网页
基于url_launcher库实现,最新版本号 5.0.2,没有的话需要添加到pubspec.yaml中
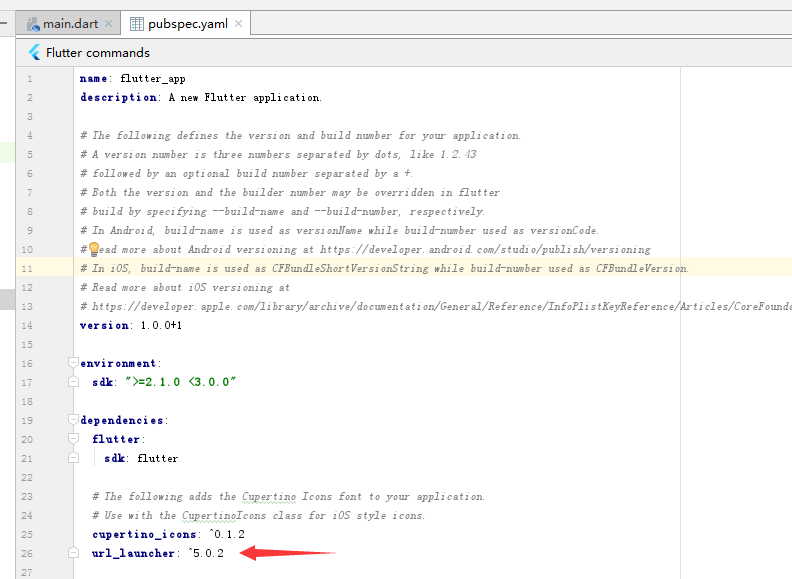
然后get 该package
只要引入不报错就ok了。
ex.dart
/*

  time: 2019-4-3

 */

// 引入资源包

import 'package:flutter/material.dart';

import 'package:url_launcher/url_launcher.dart';

// main fun

void main() => runApp(new MyApp());

class MyApp extends StatelessWidget {

  @override

  Widget build(BuildContext context) {

    // TODO: implement build

    return new MaterialApp(

        title: 'url请求',

        home: new Scaffold(

          appBar: new AppBar(

            title: new Text('Example of packages'),

          ),

          body: new Center(

            child: new RaisedButton(

              onPressed: () {

                print();

                // url

                const url = "https://www.baidu.com";

                launch(url); // 打开浏览器跳转至百度网页

              },

              child: new Text('baidu'),

            ),

          ),

        ));

  }

}
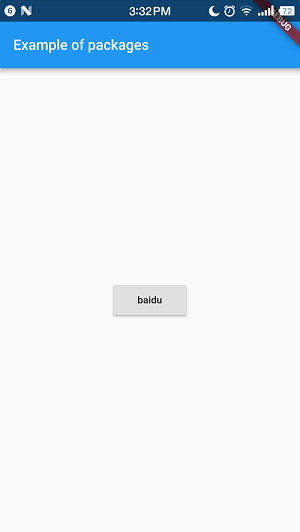
运行效果如下
点击baidu按钮,打开网页


2、http请求
2.1、Http请求
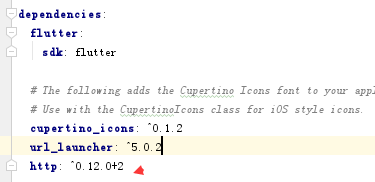
下载Http库 版本号 0.12.0+2
ex.dart
/*

  time: 2019-4-3

  title: htttp请求

 */

// 引入资源包

import 'package:flutter/material.dart';

//import 'package:url_launcher/url_launcher.dart';

import 'package:http/http.dart' as http;

// main fun

void main () => runApp(new MyApp());

class MyApp extends StatelessWidget {

  @override

  Widget build(BuildContext context) {

    // TODO: implement build

    return new MaterialApp(

        title: 'Http 请求示例',

        home: new Scaffold(

          appBar: new AppBar(

            title:  new Text('Http 请求示例'),

          ),

          body: new Center(

            child: new RaisedButton(

              onPressed: () {

                print();

                var url = 'http://www.cnblogs.com/';

                // get

                http.get(url).then((response) {

                  print("Response status: ${response.statusCode}");

                  print("Response body: ${response.body[10]}");

                });

                // post

                http.post(url,body: {"key": "value"}).then((response) {

                  print('this is post');

                  print("Response status: ${response.statusCode}");

                  print("Response body: ${response.body}");

                });

              },

              child: new Text('发送请求'),

            ),

          ),

        )

    );

  }

}
运行效果
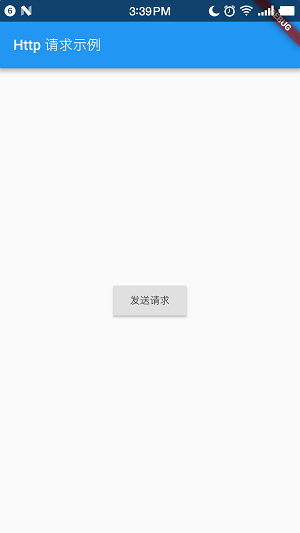
我点击发送请求之后,控制台输出
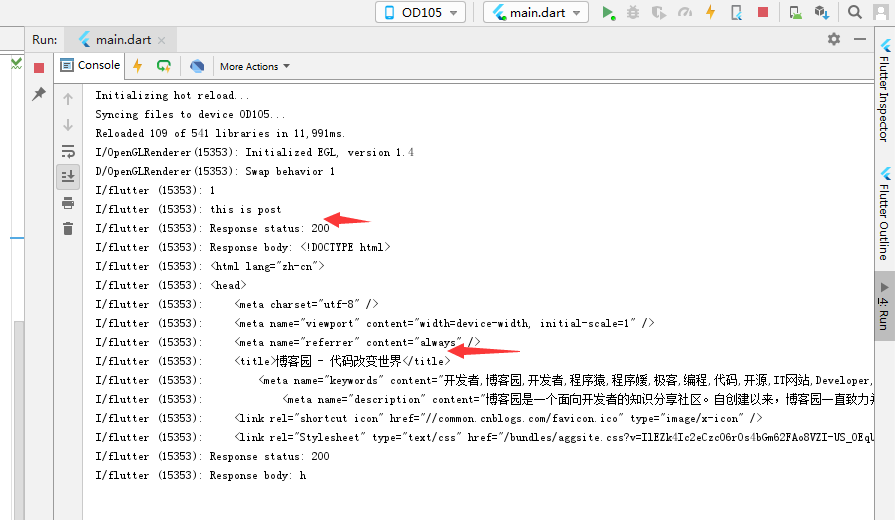
请求成功,并返回了内容。
2.1、HttpClient请求
ex.dart
/*

  time: 2019-4-3

  title: htttpClient请求

 */

// 引入资源包

import 'package:flutter/material.dart';

import 'dart:convert';

import 'dart:io';

// main fun

void main () => runApp(new MyApp());

class MyApp extends StatelessWidget {

  // 获取天气数据

  void getWeatherData() async {

    try {

      // 实例化一个HttpCLient对象

      HttpClient  httpClient = new HttpClient();

      // 发起请求

      HttpClientRequest request = await httpClient.getUrl(

          Uri.parse("http://wthrcdn.etouch.cn/weather_mini?city=重庆市")

      );

      // 等待服务器返回数据

      HttpClientResponse response = await request.close();

      // 使用utf-8.decoder从response解析数据

      var result = await response.transform(utf8.decoder).join();

      // 输出

      print(result);

      // 关闭

      httpClient.close();

    } catch (e) {

      print("请求失败:$e");

    }

  }

  @override

  Widget build(BuildContext context) {

    // TODO: implement build

    return new MaterialApp(

      title: 'HttpClient 请求示例',

      home: new Scaffold(

        appBar: new AppBar(

          title:  new Text('HttpClient 请求示例'),

        ),

        body: new Center(

          child: new RaisedButton(

              onPressed: getWeatherData,

              child: new Text('获取天气数据'),

          ),

        ),

      )

    );

  }

}
运行效果如下:

点击按钮之后,控制台输出:
I/flutter (15353): {"data":{"yesterday":{"date":"6日星期六","high":"高温 30℃","fx":"无持续风向","low":"低温 14℃","fl":"<![CDATA[<3级]]>","type":"晴"},"city":"重庆","forecast":[{"date":"7日星期天","high":"高温 32℃","fengli":"<![CDATA[<3级]]>","low":"低温 15℃","fengxiang":"无持续风向","type":"晴"},{"date":"8日星期一","high":"高温 32℃","fengli":"<![CDATA[<3级]]>","low":"低温 18℃","fengxiang":"无持续风向","type":"多云"},{"date":"9日星期二","high":"高温 29℃","fengli":"<![CDATA[<3级]]>","low":"低温 19℃","fengxiang":"无持续风向","type":"多云"},{"date":"10日星期三","high":"高温 24℃","fengli":"<![CDATA[<3级]]>","low":"低温 18℃","fengxiang":"无持续风向","type":"阴"},{"date":"11日星期四","high":"高温 25℃","fengli":"<![CDATA[<3级]]>","low":"低温 18℃","fengxiang":"无持续风向","type":"多云"}],"ganmao":"各项气象条件适宜,发生感冒机率较低。但请避免长期处于空调房间中,以防感冒。","wendu":"3}
flutter 访问网页+http请求的更多相关文章
- 浅谈 php 采用curl 函数库获取网页 cookie 和 带着cookie去访问 网页的方法!!!!
由于近段时间帮朋友开发一个能够查询正方教务系统的微信公众平台号.有所收获.这里总结下个人经验. 开讲前,先吐槽一下新浪云服务器,一个程序里的 同一个函数 在PC测试可以正常运行,在它那里就会挂的 ...
- 访问网页时提示的503错误信息在IIS中怎么设置
访问网页时提示的503错误信息在IIS中怎么设置 503是一种常见的HTTP状态码,出现此提示信息的原因是由于临时的服务器维护或者过载,服务器当前无法处理请求则导致了访问网页时出现了503错误.那么当 ...
- Android网络:HTTP之利用HttpURLConnection访问网页、获取网络图片实例 (附源码)
http://blog.csdn.net/yanzi1225627/article/details/22222735 如前文所示的TCP局域网传送东西,除了对传输层的TCP/UDP支持良好外,Andr ...
- WiFi-ESP8266入门http(3-4)网页一键配网(1若为普通wifi直连 2若为西电网页认证自动网页post请求连接)+网页按钮灯控+MQTT通信
网页一键配网(1若为普通wifi直连 2若为西电网页认证自动网页post请求连接)+网页按钮灯控+MQTT通信 工程连接:https://github.com/Dongvdong/ESP8266_H ...
- Python3 定时访问网页
本系列文章由 @YhL_Leo 出品,转载请注明出处. 文章链接: http://blog.csdn.net/yhl_leo/article/details/50358695 如果我有一组网站,想要定 ...
- Python爬虫笔记【一】模拟用户访问之设置请求头 (1)
学习的课本为<python网络数据采集>,大部分代码来此此书. 网络爬虫爬取数据首先就是要有爬取的权限,没有爬取的权限再好的代码也不能运行.所以首先要伪装自己的爬虫,让爬虫不像爬虫而是像人 ...
- apache启动但是无法访问网页
apache启动但是访问不了的问题排除??? 端口没有被占用,则需要考虑防火墙问题. 首先我们需要确保远程的Linux系统已经安装好,我们使用xshell远程SSH登录到Linux系统里,同时我们也要 ...
- 第14.6节 使用Python urllib.request模拟浏览器访问网页的实现代码
Python要访问一个网页并读取网页内容非常简单,在利用<第14.5节 利用浏览器获取的http信息构造Python网页访问的http请求头>的方法构建了请求http报文的请求头情况下,使 ...
- Flutter学习(7)——网络请求框架Dio简单使用
原文地址: Flutter学习(7)--网络请求框架Dio简单使用 | Stars-One的杂货小窝 Flutter系列学习之前都是在个人博客发布,感兴趣可以过去看看 网络请求一般APP都是需要的,在 ...
随机推荐
- Ubuntu如何百度云盘下载
我使用Firefox浏览器下载. (1)先为浏览器下载一个插件:网盘助手 (2)通过终端安装aria2: sudo apt-get install python-apt sudo apt-get in ...
- 三、后门的编写和 ShellCode 的提取
第三章.后门的编写和 ShellCode 的提取 (一)IP 和 Socket 编程初步 NOTES: 1.Windows 下网络通信编程的几种方式 第一种是基于 NetBIOS 的网络编程,这种方法 ...
- vue配置 请求本地json数据
第一步:在build文件夹下找到webpack.dev.conf.js文件,在const portfinder = require('portfinder')后添加 //第一步const expres ...
- (转)用JS获取地址栏参数的方法(超级简单)
转自http://www.cnblogs.com/fishtreeyu/archive/2011/02/27/1966178.html 用JS获取地址栏参数的方法(超级简单) 方法一:采用正则表达式获 ...
- 51Nod - 1433 0和5 找规律
小K手中有n张牌,每张牌上有一个一位数的数,这个字数不是0就是5.小K从这些牌在抽出任意张(不能抽0张),排成一行这样就组成了一个数.使得这个数尽可能大,而且可以被90整除. 注意: 1.这个数没有前 ...
- SpringBoot使用Druid数据库加密链接完整方案
网上的坑 springboot 使用 Druid 数据库加密链接方案,不建议采用网上的一篇文章<springboot 结合 Druid 加密数据库密码遇到的坑!>介绍的方式来进行加密链接实 ...
- 阿里云ECS Centos7 系统安装图形化桌面
阿里云官网默认的Linux Centos7系统镜像,都是没有安装桌面环境的,用户如果要使用桌面,需要自己在服务器上进行安装. 本教程以MATE桌面安装为例 1.登录服务器,执行命令安装桌面环境. 先安 ...
- idea打开dashboard
1.编辑workspace.xml文件,搜索 “RunDashboard” 节点 2.在component节点下增加option <option name="configuration ...
- Javascript 4.3 事件处理函数
鼠标指针悬停在某个元素上时触发一个动作:onmouseover事件处理函数 鼠标指针离开某个元素时触发一个动作:onmouseout事件处理函数 点击某个链接时触发一个动作:onclick事件处理函数 ...
- Mac os x 系统的发展史
·Mac OS 9:发布时间:1999年 于1999年发布的Mac OS 9操作系统(图片来自互联网) 在OS X之前,1999年发布的Mac OS 9看起来就是一个普通的桌面操作系统.并且现在已经被 ...