spring属性注入
1,set方法注入
(1)对于值类型的属性:
在对象中一定要有set方法
package com.songyan.demo1; import com.songyan.injection.Car; /**
* 要创建的对象类
* @author sy
*
*/
public class User {
private String name;
private int age ;/**
* 重写toString方法在输出对象时将属性值输出
*/
@Override
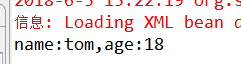
public String toString() { return "name:"+this.name+",age:"+this.age;
}
public String getName() {
return name;
}
public void setName(String name) {
this.name = name;
}
public int getAge() {
return age;
}
public void setAge(int age) {
this.age = age;
} }
在配置文件中进行配置
<!--在user对象中为属性名为name的属性赋值为“tom”  -->

<property name="name" value="tom"></property>

<property name="age" value="18"></property>

</bean>
测试
ApplicationContext applicationContext=new ClassPathXmlApplicationContext("com/songyan/injection/beans5.xml");

    User user=(User)applicationContext.getBean("user");

    System.out.println(user);
(2)对于引用类型的属性
package com.songyan.injection;

public class Car {

    private String name;

    private String color;

    @Override

    public String toString() {

        return "【carname:"+this.name+",carcolor:"+this.color+"】";

    }

    public String getName() {

        return name;

    }

    public void setName(String name) {

        this.name = name;

    }

    public String getColor() {

        return color;

    }

    public void setColor(String color) {

        this.color = color;

    }

}
package com.songyan.demo1;

import com.songyan.injection.Car;

/**

 * 要创建的对象类

 * @author sy

 *

 */

public class User {

private String name;

private int age ;

private Car car;

public Car getCar() {

    return car;

}

public void setCar(Car car) {

    this.car = car;

}

/**

 * 重写toString方法在输出对象时将属性值输出

 */

@Override

    public String toString() {

        return "name:"+this.name+",age:"+this.age+",car:"+this.car;

    }

public String getName() {

    return name;

}

public void setName(String name) {

    this.name = name;

}

public int getAge() {

    return age;

}

public void setAge(int age) {

    this.age = age;

}

}
package com.songyan.injection;

import org.springframework.context.ApplicationContext;

import org.springframework.context.support.ClassPathXmlApplicationContext;

import com.songyan.demo1.User;

public class Client {

public static void main(String[] args) {

    ApplicationContext applicationContext=new ClassPathXmlApplicationContext("com/songyan/injection/beans5.xml");

    User user=(User)applicationContext.getBean("user");

    System.out.println(user);

}

}
<?xml version="1.0" encoding="UTF-8"?>

<beans xmlns:xsi="http://www.w3.org/2001/XMLSchema-instance"

    xmlns="http://www.springframework.org/schema/beans"

    xsi:schemaLocation="http://www.springframework.org/schema/beans http://www.springframework.org/schema/beans/spring-beans-4.2.xsd ">

    <!-- 引用类型的属性注入需要先将属性配置 -->

    <bean name="car" class="com.songyan.injection.Car">

        <property name="name" value="宝马"></property>

        <property name="color" value="red"></property>

    </bean>

    <!--set 方法注入值类型 -->

    <bean name="user" class="com.songyan.demo1.User">

        <!--在user对象中为属性名为name的属性赋值为“tom” -->

        <property name="name" value="tom"></property>

        <property name="age" value="18"></property>

        <!--引用类型的赋值使用ref属性 -->

        <property name="car" ref="car"></property>

    </bean>

</beans>
2,构造方法注入
package com.songyan.injection;

public class Car {

    private String name;

    private String color;

    // 通过构造函数对属性赋值

    public Car(String name, String color) {

        super();

        this.name = name;

        this.color = color;

    }

    public Car() {

    }

    @Override

    public String toString() {

        return "【carname:" + this.name + ",carcolor:" + this.color + "】";

    }

}
package com.songyan.demo1;

import com.songyan.injection.Car;

/**

 * 要创建的对象类

 * @author sy

 *

 */

public class User {

private String name;

private int age ;

private Car car;

/**

 * 通过构造函数对属性赋值

 * @param name

 * @param age

 * @param car

 */

public User(String name, int age, Car car) {

    super();

    this.name = name;

    this.age = age;

    this.car = car;

}

public User()

{

}

/**

 * 重写toString方法在输出对象时将属性值输出

 */

@Override

    public String toString() {

        return "name:"+this.name+",age:"+this.age+",car:"+this.car;

    }

}
<?xml version="1.0" encoding="UTF-8"?>

<beans xmlns:xsi="http://www.w3.org/2001/XMLSchema-instance"

    xmlns="http://www.springframework.org/schema/beans"

    xsi:schemaLocation="http://www.springframework.org/schema/beans http://www.springframework.org/schema/beans/spring-beans-4.2.xsd ">

    <!-- 引用类型的属性注入需要先将属性配置 -->

    <bean name="car" class="com.songyan.injection.Car">

        <constructor-arg name="name" value="baoma"></constructor-arg>

        <constructor-arg name="color" value="red"></constructor-arg>

    </bean>

    <!--构造方法注入值类型 -->

    <bean name="user" class="com.songyan.demo1.User">

        <!--在user对象中为属性名为name的属性赋值为“tom” -->

        <constructor-arg name="name" value="tom"></constructor-arg>

        <constructor-arg name="age" value="18"></constructor-arg>

        <constructor-arg name="car" ref="car"></constructor-arg>

    </bean>

</beans>
package com.songyan.injection;

import org.springframework.context.ApplicationContext;

import org.springframework.context.support.ClassPathXmlApplicationContext;

import com.songyan.demo1.User;

public class Client {

public static void main(String[] args) {

    ApplicationContext applicationContext=new ClassPathXmlApplicationContext("com/songyan/injection/beans5.xml");

    User user=(User)applicationContext.getBean("user");

    System.out.println(user);

}

}
3,p名称空间注入
4,spel注入
5,复杂类型注入
package com.songyan.injection;

public class Car {

    private String name;

    private String color;

    // 通过构造函数对属性赋值

    public Car(String name, String color) {

        super();

        this.name = name;

        this.color = color;

    }

    public Car() {

    }

    @Override

    public String toString() {

        return "【carname:" + this.name + ",carcolor:" + this.color + "】";

    }

}
package com.songyan.complex;

import java.util.Arrays;

import java.util.List;

import java.util.Map;

import java.util.Properties;

public class Complex {

    private Object[] obj;//数组类型注入

    private List list;//list类型注入

    private Map map;//map类型注入

    private Properties properties;//文件类型注入

    @Override

    public String toString() {

        return "array:"+Arrays.toString(obj)+"    \nlist:"+this.list+"  \nproperties:"+this.properties+"\nmap:"+this.map;

    }

    public Object[] getObj() {

        return obj;

    }

    public void setObj(Object[] obj) {

        this.obj = obj;

    }

    public List getList() {

        return list;

    }

    public void setList(List list) {

        this.list = list;

    }

    public Map getMap() {

        return map;

    }

    public void setMap(Map map) {

        this.map = map;

    }

    public Properties getProperties() {

        return properties;

    }

    public void setProperties(Properties properties) {

        this.properties = properties;

    }

}
<?xml version="1.0" encoding="UTF-8"?>

<beans xmlns:xsi="http://www.w3.org/2001/XMLSchema-instance"

    xmlns="http://www.springframework.org/schema/beans"

    xsi:schemaLocation="http://www.springframework.org/schema/beans http://www.springframework.org/schema/beans/spring-beans-4.2.xsd ">

    <!-- 引用类型的属性注入需要先将属性配置 -->

    <bean name="car" class="com.songyan.injection.Car">

        <constructor-arg name="name" value="baoma"></constructor-arg>

        <constructor-arg name="color" value="red"></constructor-arg>

    </bean>

    <bean name="complex" class="com.songyan.complex.Complex">

    <!--数组类型-->

        <!--数组中只有一个值类型  -->

        <!-- <property name="obj" value="tom"></property> -->

        <!--数组中只有一个引用类型  -->

        <!-- <property name="obj" ref="car"></property> -->

        <!--数组中有多个值  -->

         <property name="obj" >

             <array>

                 <value>tom</value>

                 <value>jack</value>

                 <ref bean="car" />

             </array>

         </property>

    <!--map类型  -->

    <property name="map">

        <map>

            <entry key="name" value="zhangsan"></entry>

            <entry key="car" value-ref="car"></entry>

        </map>

    </property>

    <!--list类型  -->

        <!--一个值  -->

        <!-- <property name="list" value="jack"></property> -->

        <!--多个值  -->

        <property name="list">

            <list>

                <value>jack1</value>

                <value>jack2</value>

                <ref bean="car"/>

            </list>

        </property>

    <!--properties  -->

    <property name="properties">

        <props>

            <prop key="name">user</prop>

            <prop key="pass">123</prop>

            <prop key="id">192.168.1.1</prop>

        </props>

    </property>

    </bean>

</beans>
package com.songyan.complex;

import org.springframework.context.ApplicationContext;

import org.springframework.context.support.ClassPathXmlApplicationContext;

import com.songyan.demo1.User;

public class Cliect {

public static void main(String[] args) {

    ApplicationContext applicationContext=new ClassPathXmlApplicationContext("com/songyan/complex/beans.xml");

    Complex complex=(Complex)applicationContext.getBean("complex");

    System.out.println(complex);

}

}
spring属性注入的更多相关文章
- Spring 属性注入(一)JavaBean 内省机制在 BeanWrapper 中的应用
Spring 属性注入(一)JavaBean 内省机制在 BeanWrapper 中的应用 Spring 系列目录(https://www.cnblogs.com/binarylei/p/101174 ...
- Spring 属性注入(二)BeanWrapper 结构
Spring 属性注入(二)BeanWrapper 结构 Spring 系列目录(https://www.cnblogs.com/binarylei/p/10117436.html) BeanWrap ...
- Spring 属性注入(三)AbstractNestablePropertyAccessor
Spring 属性注入(三)AbstractNestablePropertyAccessor Spring 系列目录(https://www.cnblogs.com/binarylei/p/10117 ...
- Spring 属性注入(四)属性键值对 - PropertyValue
Spring 属性注入(四)属性键值对 - PropertyValue Spring 系列目录(https://www.cnblogs.com/binarylei/p/10117436.html) P ...
- spring 属性注入
Spring的核心技术室依赖注入,下面是依赖注入之属性注入的实现过程,牛刀小试,请看效果. 1.首先添加Spring.Web引用.本例中是使用分层思想来演示的,下面是项目的结构和UserModel类的 ...
- Spring属性注入、构造方法注入、工厂注入以及注入参数(转)
Spring 是一个开源框架. Spring 为简化企业级应用开发而生(对比EJB2.0来说). 使用 Spring 可以使简单的 JavaBean 实现以前只有 EJB 才能实现的功能.Spring ...
- 六 Spring属性注入的四种方式:set方法、构造方法、P名称空间、SPEL表达式
Spring的属性注入: 构造方法的属性注入 set方法的属性注入
- java spring属性注入
一.创建对象时候,向类里面属性设置值:一般有三个方式 1) .有参构造, 2). set**** 3).接口注入 二. 在spring框架里面,支持前面两种方式: 1).有参构造方法 用constr ...
- spring属性注入DI
spring setter方式注入: 注入对象属性: 前提: 在bean对应实体中有对应的setter方法. 基础代码: 在bean中有另一个bean属性的setter方法. package cn.i ...
随机推荐
- (整)Unreal渲染模块 框总览
@author: 黑袍小道 随缘查看 说明 由于搬山的渲染这部分担心自己理解错误,故而搬移官方下,后面整个完成再反过来更新 (这当且仅当做Unreal的帮助文档). 图形编程 模块 渲 ...
- (转\整)UE4游戏优化 多人大地型游戏的优化(三)GPU的优化
施主分享随缘,评论随心,@author:白袍小道 小道暗语: 1.因为小道这里博客目录没自己整,暂时就用随笔目录结构,所以二级目录那啥就忽略了.标题格式大致都是(原or转) 二级目录 (标题) 2.因 ...
- Python编码报错
Python默认编码错误SyntaxError: Non-ASCII character '\xe5'之解决方法在编写Python时,当使用中文输出或注释时运行脚本,会提示错误信息:SyntaxErr ...
- WinDbg分析dump文件排查bug
文章:WinDbg-如何抓取dump文件 命令: cd C:\Windows\System32\inetsrv appcmd list wp 可以查看各个站点的pid
- 29个android开发常用的类、方法及接口
在安卓开发中,我们常常都需要借助各种各样的方法.类和接口来实现相关功能.提升开发效率,但对于初学者而言,什么时候该用什么类.方法和接口呢?下面小编整理了29个,日常开发中比较常用的类.方法.接口及其应 ...
- ORACLE 向BLOB字段中出入图片等二进制文件,使用Oracle SQl Developer工具
使用PL/SQL也可以 create directory "image" as 'e:\'; --"image" 要带双引号,网上很多不带的,我测试时出错,并且 ...
- 快速激活最新JetBrains公司系列产品包括最新的phpstorm10
快速激活最新JetBrains公司系列产品包括最新的phpstorm10 IntelliJ IDEA开源社区 提供了如下通用激活方法: 注册时选择License server 然后输入框填写:http ...
- Html5学习进阶三 Input 类型
HTML5 新的 Input 类型 HTML5 拥有多个新的表单输入类型.这些新特性提供了更好的输入控制和验证. 本章全面介绍这些新的输入类型: email url number range Date ...
- 创建型设计模式之建造者模式(Builder)
结构 意图 将一个复杂对象的构建与它的表示分离,使得同样的构建过程可以创建不同的表示. 适用性 当创建复杂对象的算法应该独立于该对象的组成部分以及它们的装配方式时. 当构造过程必须允许被构造的对象有不 ...
- 【Git】Git SSH Key 生成步骤
Git是分布式的代码管理工具,远程的代码管理是基于SSH的,所以要使用远程的Git则需要SSH的配置. github的SSH配置如下: 一 . 设置Git的user name和email: $ git ...