vue+mockjs 模拟数据,实现前后端分离开发
在项目中尝试了mockjs,mock数据,实现前后端分离开发。
关于mockjs,官网描述的是
1.前后端分离
2.不需要修改既有代码,就可以拦截 Ajax 请求,返回模拟的响应数据。
3.数据类型丰富
4.通过随机数据,模拟各种场景。
等等优点。
总结起来就是在后端接口没有开发完成之前,前端可以用已有的接口文档,在真实的请求上拦截ajax,并根据mockjs的mock数据的规则,模拟真实接口返回的数据,并将随机的模拟数据返回参与相应的数据交互处理,这样真正实现了前后台的分离开发。
与以往的自己模拟的假数据不同,mockjs可以带给我们的是:在后台接口未开发完成之前模拟数据,并返回,完成前台的交互;在后台数据完成之后,你所做的只是去掉mockjs:停止拦截真实的ajax,仅此而已。
下面一步步的来实现vue-cli创建项目并添加一条新闻类的数据模拟接口:
1.安装vue-cli全局脚手架
npm install --global vue-cli
2.创建vue项目
vue init webpack mockjs
cd mockjs
npm install axios --save
3.安装mockjs
npm install mockjs --save-dev
4.项目目录

axios/api 用来封装axios
Hello.vue 页面首页
NeswCell.vue 新闻组件
router/index.js 路由
main.js 入口js
mock.js mockjs文件
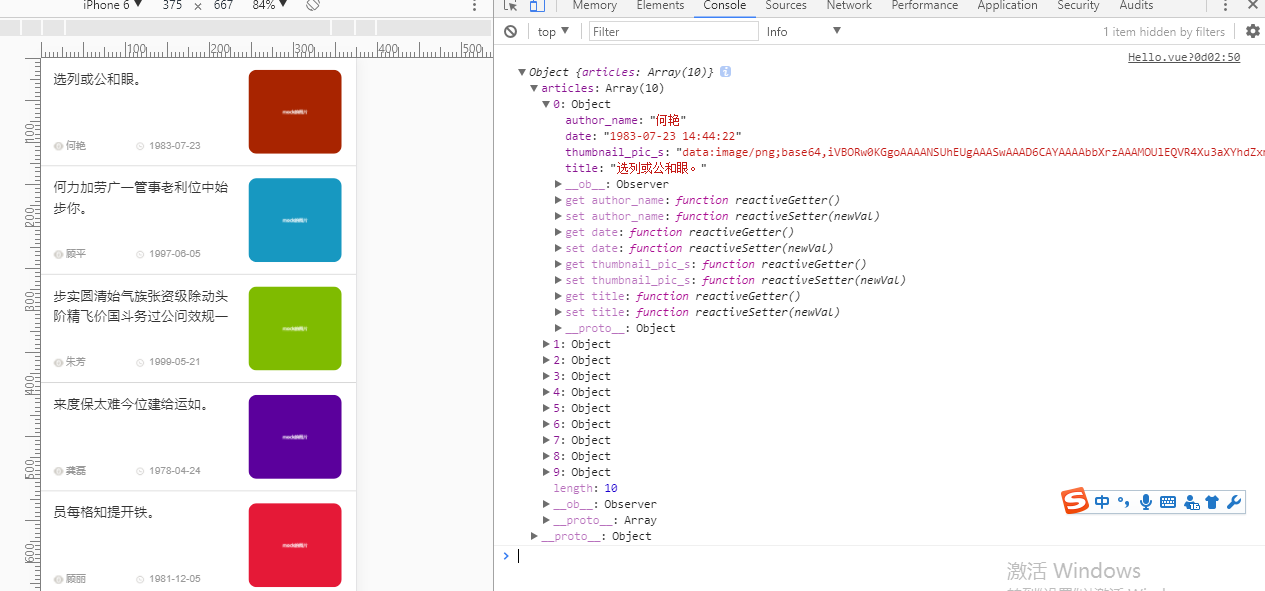
在来看下完成后的效果
5.在入口js(main.js)里引入mockjs
// The Vue build version to load with the `import` command

// (runtime-only or standalone) has been set in webpack.base.conf with an alias.

import Vue from 'vue'

import App from './App'

import router from './router'

Vue.config.productionTip = false

// 引入mockjs

require('./mock.js')

/* eslint-disable no-new */

new Vue({

	el: '#app',

	router,

	template: '<App/>',

	components: {

		App

	}

})

Vue.filter('getYMD', function(input) {

	return input.split(' ')[0];

})
这里我添加了额一个常用的时间整理过滤器 getYMD
6. 添加一个mock规则(mock.js)
// 引入mockjs

const Mock = require('mockjs');

// 获取 mock.Random 对象

const Random = Mock.Random;

// mock一组数据

const produceNewsData = function() {

	let articles = [];

	for (let i = 0; i < 100; i++) {

		let newArticleObject = {

			title: Random.csentence(5, 30), //  Random.csentence( min, max )

			thumbnail_pic_s: Random.dataImage('300x250', 'mock的图片'), // Random.dataImage( size, text ) 生成一段随机的 Base64 图片编码

			author_name: Random.cname(), // Random.cname() 随机生成一个常见的中文姓名

			date: Random.date() + ' ' + Random.time() // Random.date()指示生成的日期字符串的格式,默认为yyyy-MM-dd;Random.time() 返回一个随机的时间字符串

		}

		articles.push(newArticleObject)

	}

	return {

		articles: articles

	}

}

// Mock.mock( url, post/get , 返回的数据);

Mock.mock('/news/index', 'post', produceNewsData);
7.在Hello.vue 中请求文档接口,并接收mock数据
<template>

  <div class="index">

    <div v-for="(item, key) in newsListShow">

      <news-cell

      :newsDate="item"

      :key="key"

      ></news-cell>

    </div>

  </div>

</template>

<script>

import api from './../axios/api.js'

import NewsCell from './NewsCell.vue'

export default {

  name: 'index',

  data () {

    return {

      newsListShow: [],

    }

  },

  components: {

    NewsCell

  },

  created() {

    this.setNewsApi();

  },

  methods:{

    setNewsApi: function() {

      api.JH_news('/news/index', 'type=top&key=123456')

      .then(res => {

        console.log(res);

        this.newsListShow = res.articles;

      });

    },

  }

}

</script>

<!-- Add "scoped" attribute to limit CSS to this component only -->

<style scoped>

.topNav{

  width: 100%;

  background: #ED4040;

  position: fixed;

  top:0rem;

  left: 0;

  z-index: 10;

}

.simpleNav{

  width: 100%;

  line-height: 1rem;

  overflow: hidden;

  overflow-x: auto;

  text-align: center;

  font-size: 0;

  font-family: '微软雅黑';

  white-space: nowrap;

}

.simpleNav::-webkit-scrollbar{height:0px}

.simpleNavBar{

  display: inline-block;

  width: 1.2rem;

  color:#fff;

  font-size:0.3rem;

}

.navActive{

  color: #000;

  border-bottom: 0.05rem solid #000;

}

.placeholder{

  width:100%;

  height: 1rem;

}

</style>
注意:api.JH_news是我封装的axios函数
axios/api.js如下
import axios from 'axios'

import vue from 'vue'

axios.defaults.headers.post['Content-Type'] = 'application/x-www-form-urlencoded'

// 请求拦截器

axios.interceptors.request.use(function(config) {

    return config;

  }, function(error) {

    return Promise.reject(error);

  })

  // 响应拦截器

axios.interceptors.response.use(function(response) {

  return response;

}, function(error) {

  return Promise.reject(error);

})

// 封装axios的post请求

export function fetch(url, params) {

  return new Promise((resolve, reject) => {

    axios.post(url, params)

      .then(response => {

        resolve(response.data);

      })

      .catch((error) => {

        reject(error);

      })

  })

}

export default {

  JH_news(url, params) {

    return fetch(url, params);

  }

}
8.在NewsCell.vue展示数据
<template>

  <section class="financial-list">

    <section class="collect" @click="jumpPage">

      <aside>

        <h2>{{newsDate.title}}</h2>

        <section class="Cleft clearfix">

          <img class="fl" src="./../assets/icon/eyes.png" style="width:0.24rem;height:0.2rem;">

          <span class="fl">{{newsDate.author_name}}</span>

        </section>

        <section class="Cright">

          <img src="./../assets/icon/clock.png" style="width:0.2rem;height:0.2rem;">

          <span>{{newsDate.date | getYMD}}</span>

        </section>

        <div style="clear: both"></div>

      </aside>

      <aside>

        <img :src="newsDate.thumbnail_pic_s" style="border-radius: 0.2rem;">

      </aside>

      <div style="clear: both"></div>

    </section>

  </section>

</template>

<script>

export default {

  name: 'NewsCell',

  props: {

    newsDate: Object

  },

  data () {

    return {

    }

  },

  computed: {

  },

  methods: {

    jumpPage: function () {

      window.location.href = this.newsDate.url

    }

  }

}

</script>

<style scoped>

.financial-list {

  width: 100%;

  height: 100%;

  background-color: white;

  padding: 0.28rem 0;

  border-bottom: 1px solid #ccc;

}

.financial-list .collect {

  width: 92%;

  margin: 0 auto;

}

.financial-list .collect aside:nth-of-type(1) {

  width: 63%;

  float: left;

}

.financial-list .collect aside:nth-of-type(2) {

  width: 32%;

  height: 2rem;

  float: left;

  margin-left: 0.3rem;

}

.financial-list .collect h2 {

  width: 100%;

  height: 0.96rem;

  font-size: 0.32rem;

  color: #333333;

  line-height: 0.48rem;

  text-overflow: ellipsis;

  -o-text-overflow: ellipsis;

  overflow: hidden;

}

.financial-list .collect aside:nth-of-type(2) img {

  width: 100%;

  height: 100%;

}

.financial-list .collect aside .Cleft {

  width: 45%;

  float: left;

  margin-top: 0.66rem;

}

.financial-list .collect aside .Cleft span{

  display: block;

  width: 1.4rem;

  margin-left: 0.05rem;

  white-space: nowrap;

  text-overflow: ellipsis;

  -o-text-overflow: ellipsis;

  overflow: hidden;

}

.financial-list .collect aside .Cright {

  width: 55%;

  float: right;

  margin-top: 0.66rem;

}

.financial-list .collect aside .Cright span{

  display: inline-block;

  margin: 0.04rem 0 0 0.05rem;

}

.financial-list .collect aside span {

  font-size: 0.2rem;

  color: #999999;

}

.financial-list .collect aside .Cleft img,

.financial-list .collect aside .Cright img {

  width: 0.18rem;

  height: 0.24rem;

  margin-top: 0.09rem;

}

</style>
完成
9.所有代码可以查看我的github: https://github.com/Jasonwang911/vue_mockjs
vue+mockjs 模拟数据,实现前后端分离开发的更多相关文章
- axios + mock.js模拟数据实现前后端分离开发的实例代码
首先就是必须安装axios和mock.js npm install axios npm install mockjs 1. 然后在文档src中新建一个mock.js文件,如图 2. 在main.js中 ...
- Mock模拟数据,前后端分离
安装 使用npm安装: npm install mockjs; 或直接<script src="http://mockjs.com/dist/mock.js">< ...
- SpringBoot,Vue前后端分离开发首秀
需求:读取数据库的数据展现到前端页面 技术栈:后端有主要有SpringBoot,lombok,SpringData JPA,Swagger,跨域,前端有Vue和axios 不了解这些技术的可以去入门一 ...
- 如何利用vue和php做前后端分离开发?
新手上路,前端工程师,刚毕业参加工作两个月,上面让我用vue搭建环境和php工程师一起开发,做前后端分离,然而我只用过简单的vue做一些小组件的经验,完全不知道怎样和php工程师配合,ps: php那 ...
- beego-vue URL重定向(beego和vue前后端分离开发,beego承载vue前端分离页面部署)
具体过程就不说,是搞这个的自然会动,只把关键代码贴出来. beego和vue前后端分离开发,beego承载vue前端分离页面部署 // landv.cnblogs.com //没有授权转载我的内容,再 ...
- 基于RAP(Mock)实现前后端分离开发
看看RAP的官方定义: 什么是RAP? (Rigel API Platform) 在前后端分离的开发模式下,我们通常需要定义一份接口文档来规范接口的具体信息.如一个请求的地址.有几个参数.参数名称及类 ...
- Web前后端分离开发(CRUD)及其演变概括
今天学习了前后端分离开发模式又从网上查了一些资料就写了一篇博客分享: 一.为什么分离前后端 1.1早期开发 1.2后段为主mvc模式 1.2.1Structs框架介绍 1.2.2Spring mcv开 ...
- Post方式 前后端分离开发postman工具首次使用心得及注意事项
使用前:2009年以前,一直用asp(非asp.net)语言开发网站,网页调用数据等操作,是通过asp标签<%%>嵌入到HTML标签语言中.相隔八年后,听说最近都是MVC后又什么前后端分离 ...
- laravel5.7 前后端分离开发 实现基于API请求的token认证
最近在学习前后端分离开发,发现 在laravel中实现前后台分离是无法无法使用 CSRF Token 认证的.因为 web 请求的用户认证是通过Session和客户端Cookie的实现的,而前后端分离 ...
随机推荐
- windows端口占用处理工具
一.描述 笔者在最近使用tomcat时,老是会遇到这种端口占用的问题,便写了这个小的exe,用于解决windows下的端口占用问题. 好吧,其实是我实在记不住CMD下的那几行命令.这玩意的实现比较简单 ...
- Python之数据加密与解密及相关操作(hashlib模块、hmac模块、random模块、base64模块、pycrypto模块)
本文内容 数据加密概述 Python中实现数据加密的模块简介 hashlib与hmac模块介绍 random与secrets模块介绍 base64模块介绍 pycrypto模块介绍 总结 参考文档 提 ...
- javaScript高级程序设计笔记 1
核心 ECMAScript 文档对象模型 DOM 浏览器对象模型 BOM 延迟脚本 defer typeof操作符 判断字符类型 返回 undefined boolean s ...
- jquery $.each 和for 怎么跳出循环
jquery $.each 和for 怎么跳出循环 1.for循环中我们使用continue:终止本次循环计入下一个循环,使用break终止整个循环.2.而在jquery中 $.each则对应的使用r ...
- 在React中使用Redux
这是Webpack+React系列配置过程记录的第六篇.其他内容请参考: 第一篇:使用webpack.babel.react.antdesign配置单页面应用开发环境 第二篇:使用react-rout ...
- javascript封装的函数
/*获取一个指定长度随机数*/ csdn.random = function (len) { if (!len) len = 5; var r = Math.random().toString(); ...
- Swift大写和小写字符串
您可以通过字符串的 uppercaseString 和 lowercaseString 属性来访问一个字符串的大写/小写版本. 复制纯文本新窗口 let normal = "Could yo ...
- 【LeetCode】110. Balanced Binary Tree
题目: Given a binary tree, determine if it is height-balanced. For this problem, a height-balanced bin ...
- 【Android Developers Training】 29. 从Activity获得结果
注:本文翻译自Google官方的Android Developers Training文档,译者技术一般,由于喜爱安卓而产生了翻译的念头,纯属个人兴趣爱好. 原文链接:http://developer ...
- CSS 从入门到忘记
CSS是Cascading Style Sheets的简称,中文称为层叠样式表,用来控制网页数据的表现,可以使网页的表现与数据内容分离. 一. css的三种引入方式 二. css的选择器(Select ...