
Ubuntu18.04换源
引用:https://blog.csdn.net/u012308586/article/details/102953882
第一步、sudo cp /etc/apt/sources.list /etc/apt/sources.list.bak 备份
文件里内容大概是这样:
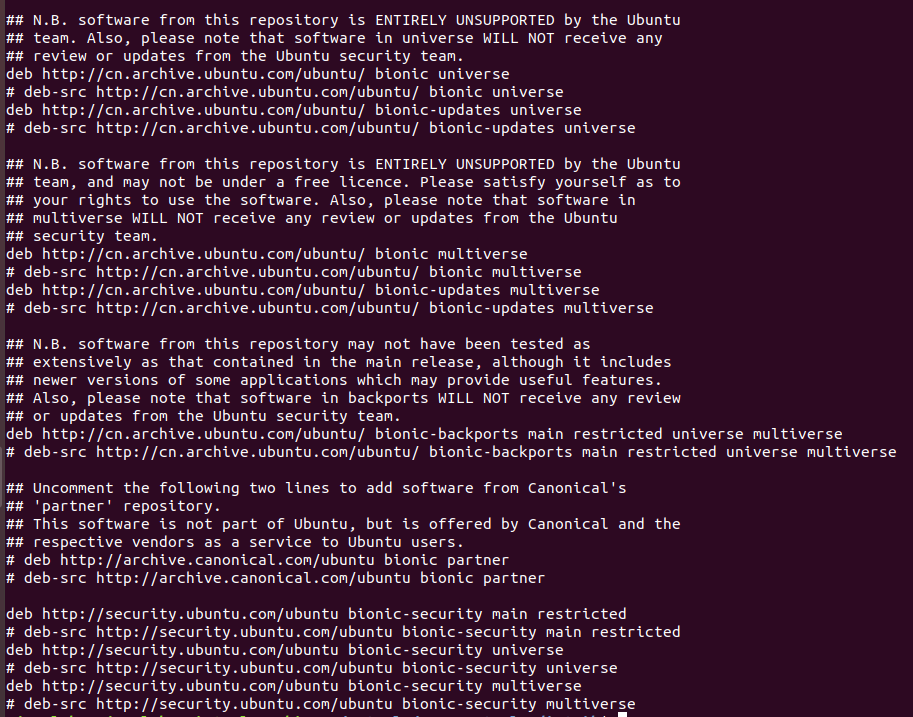
第二步、修改源文件source.list
- 终端执行命令:sudo chmod 777 /etc/apt/sources.list更改文件权限使其可编辑;
- 执行命令:sudo gedit /etc/apt/sources.list打开文件进行编辑;
- 删除原来的文件内容,复制下面的任意一个到其中并保存(常用的是阿里源和清华源,推荐阿里源);
阿里源:
 1 deb http://mirrors.aliyun.com/ubuntu/ bionic main restricted universe multiverse

 2

 3 deb http://mirrors.aliyun.com/ubuntu/ bionic-security main restricted universe multiverse

 4

 5 deb http://mirrors.aliyun.com/ubuntu/ bionic-updates main restricted universe multiverse

 6

 7 deb http://mirrors.aliyun.com/ubuntu/ bionic-proposed main restricted universe multiverse

 8

 9 deb http://mirrors.aliyun.com/ubuntu/ bionic-backports main restricted universe multiverse

10

11 deb-src http://mirrors.aliyun.com/ubuntu/ bionic main restricted universe multiverse

12

13 deb-src http://mirrors.aliyun.com/ubuntu/ bionic-security main restricted universe multiverse

14

15 deb-src http://mirrors.aliyun.com/ubuntu/ bionic-updates main restricted universe multiverse

16

17 deb-src http://mirrors.aliyun.com/ubuntu/ bionic-proposed main restricted universe multiverse

18

19 deb-src http://mirrors.aliyun.com/ubuntu/ bionic-backports main restricted universe multiverse
清华源:
 1 deb https://mirrors.tuna.tsinghua.edu.cn/ubuntu/ bionic main restricted universe multiverse

 2

 3 deb-src https://mirrors.tuna.tsinghua.edu.cn/ubuntu/ bionic main restricted universe multiverse

 4

 5 deb https://mirrors.tuna.tsinghua.edu.cn/ubuntu/ bionic-updates main restricted universe multiverse

 6

 7 deb-src https://mirrors.tuna.tsinghua.edu.cn/ubuntu/ bionic-updates main restricted universe multiverse

 8

 9 deb https://mirrors.tuna.tsinghua.edu.cn/ubuntu/ bionic-backports main restricted universe multiverse

10

11 deb-src https://mirrors.tuna.tsinghua.edu.cn/ubuntu/ bionic-backports main restricted universe multiverse

12

13 deb https://mirrors.tuna.tsinghua.edu.cn/ubuntu/ bionic-security main restricted universe multiverse

14

15 deb-src https://mirrors.tuna.tsinghua.edu.cn/ubuntu/ bionic-security main restricted universe multiverse

16

17 deb https://mirrors.tuna.tsinghua.edu.cn/ubuntu/ bionic-proposed main restricted universe multiverse

18

19 deb-src https://mirrors.tuna.tsinghua.edu.cn/ubuntu/ bionic-proposed main restricted universe multiverse
163源:
 1 deb http://mirrors.163.com/ubuntu/ bionic main restricted universe multiverse

 2

 3 deb http://mirrors.163.com/ubuntu/ bionic-security main restricted universe multiverse

 4

 5 deb http://mirrors.163.com/ubuntu/ bionic-updates main restricted universe multiverse

 6

 7 deb http://mirrors.163.com/ubuntu/ bionic-proposed main restricted universe multiverse

 8

 9 deb http://mirrors.163.com/ubuntu/ bionic-backports main restricted universe multiverse

10

11 deb-src http://mirrors.163.com/ubuntu/ bionic main restricted universe multiverse

12

13 deb-src http://mirrors.163.com/ubuntu/ bionic-security main restricted universe multiverse

14

15 deb-src http://mirrors.163.com/ubuntu/ bionic-updates main restricted universe multiverse

16

17 deb-src http://mirrors.163.com/ubuntu/ bionic-proposed main restricted universe multiverse

18

19 deb-src http://mirrors.163.com/ubuntu/ bionic-backports main restricted universe multiverse
第三步、更新源
终端执行命令:sudo apt update更新软件列表,换源完成。
Ubuntu18.04换源的更多相关文章
- Ubuntu18.04 更换源
在虚拟机新建一个Ubuntu18.04.1-live-server-amd64当做服务器 在安装软件时报错: slave@slave:~$ sudo -s[sudo] password for sla ...
- Ubuntu16.04换源(转)
乌班图换源(ubuntu 16.04换阿里云源为例) 换成国内最快的阿里云源 第一步:备份原来的源文件 cd /etc/apt/ 1 2 然后会显示下面的源文件sources.list 输入命令 su ...
- Linux18.04换源等等等配置
root用户 sudo passwd root 安装Tools 文件→其他位置→Vmware Tools→打开终端. 管理员权限→copy→tar -zxvf 文件名解压→打开vmware-tools ...
- Ubuntu16.04换源
换成国内最快的阿里云源 第一步:备份原来的源文件 cd /etc/apt/ 然后会显示下面的源文件sources.list 输入命令 sudo cp sources.list sources.list ...
- Ubuntu16.04 换源(或者404 Not Found问题)
当执行sudo apt-get update或者sudo apt-get install命令时,出现以下两个问题: “apt-get 404 Not Found Package Repository ...
- ubuntu 16.04换源 网易、搜狐、阿里云
如何更改源可以在软件更新中选择源 使用如下命令更改(修改前先备份): [html] view plain copy print?sudo cp /etc/apt/source.list /etc/ap ...
- ubuntu 16.04 换源
第一步:备份原来的源文件 cd /etc/apt/ 命令 cp sources.list sources.list.bak 将sources.list备份到sources.list.bak 第二步:替 ...
- Ubuntu18.04更新源
一.备份/etc/apt/sources.list文件 cd /etc/apt sudo cp sources.list sources.list.old 二.选择国内常用的源 #阿里源 deb ht ...
- Ubuntu14.04 换源 阿里云
sudo cp /etc/apt/sources.list /etc/apt/sources.list_backup sudo vim /etc/apt/sources.list sudo apt-g ...
随机推荐
- 老猿学5G随笔:5G核心网中与用户数据相关的NF功能体UDM、AUSF、PCF、UDR
在业务支撑工作中,与核心网主要的交互包括用户数据管理(含签约关系.策略数据),5G核心网中与用户数据相关的NF功能体包括UDM.AUSF和PCR以及UDR,在此只简单介绍这些NF的功能: UDM:统一 ...
- 问题:PyCharm调试方法Force run to cursor与run to cursor的区别
Force run to cursor与run to cursor的差别是,后者在执行到光标的代码行前,如果有代码中设置了断点,会在该断点处暂停,等待进一步调试指令,而Force run to cur ...
- Error.name 六种值对应的信息
1 EvalErroe:eval() 的使用与定义不一致 2 RangrError: 数值越界 3 ReferenceError:非法或不能识别的引用数值 4 SyntaxError:发生语法解析错 ...
- 使用OpenSSL自建一个HTTPS服务
1. 理论知识 1.1 什么是https 传统的 HTTP 协议以明文方式进行通信,不提供任何方式的数据加密,很容易被中间攻击者破解通信内容或者伪装成服务器与客户端通信,在安全性上存在很大问题. HT ...
- 【面试专栏】JAVA锁机制
1. 悲观锁 / 乐观锁 在Java和数据库中都存在悲观锁和乐观锁的应用.Mysql锁机制中的悲观锁和乐观锁请查看: Mysql锁机制--悲观锁和乐观锁 悲观锁:在获得数据时先加锁,只到数 ...
- 【面试专栏】Java并发编程:volatile关键字
1. 内存模型 若一个变量在多线程环境下同时操作,则可能出现结果不一致的情况.这就是常说的缓存不一致性问题. 解决缓存不一致问题,通常有两个解决方案: 通过在总线加LOCK#锁的方式 因为CPU和其 ...
- JavaSE12-内部类&API
1. 参数传递 1.1 类名作为形参和返回值 1.类名作为方法的形参 方法的形参是类名,其实需要的是该类的对象 实际传递的是该对象的[地址值] 2.类名作为方法的返回值 方法的返回值是类名,其实返回的 ...
- ssh 免密码登陆设置不成功
记一次centos6设置免密码登陆设置不成功的解决.自己挖的坑自己填. ssh 免密码登陆设置( 正常情况下是这样的,设置成功后登陆主机是不需要密码的) [root@master .ssh]# ssh ...
- Linux命令-2.文件属性
在Linux系统中文件的属性有:文件类型.属主属性.属组属性.其他属性,使用10个字符表示,如下图: 其中第0位表示文件类型: 当为[ d ]则是目录 当为[ - ]则是文件: 若是[ l ]则表示为 ...
- 记badusb制作
很早之前就听说过这个很牛批的小神器,配合社会工程学渗透简直无敌.. 参考的文章是 GCOW团队 j0 师傅的,文章写的非常详细 ,一步步来就行 https://blog.csdn.net/qq_260 ...