Gitlab_ansible_jenkins三剑客③Ansible的安装及使用
一台服务器可能会安装不同的python应用,不同的应用可能使用的模块版本不同,如果都安装在同样的环境下容易冲突,为了避免冲突,引入virtualenv 这个包管理工具进行环境的隔离
使用pip安装之前需要配置代理(没有使用代理的不用配置)
# 因为有代理,需要设置
export http_proxy=http://10.11.0.148:808
export https_proxy=http://10.11.0.148:808
export ftp_proxy=http://10.11.0.148:808
ansible的环境安装
# root用户下安装依赖
[root@node1 ~]# yum install -y git nss curl
下载安装包:
[root@node1 ~]# wget http://www.python.org/ftp/python/3.6.5/Python-3.6.5.tar.xz
[root@node1 ~]# tar xf Python-3.6.5.tar.xz
[root@node1 ~]# cd Python-3.6.5
[root@node1 Python-3.6.5]# ./configure --prefix=/usr/local/ --with-ensurepip=install --enable-shared LDFLAGS="-Wl,-rpath /usr/local/lib"
[root@node1 Python-3.6.5]# make && make altinstal
将默认的pip替换为pip3.6
[root@node1 Python-3.6.5]# which pip3.6
/usr/local/bin/pip3.6
[root@node1 Python-3.6.5]# ln -s /usr/local/bin/pip3.6 /usr/local/bin/pip
# 安装 virtualenv
[root@node1 Python-3.6.5]# /usr/local/bin/pip3.6 install virtualenv
# 创建运行ansible的用户并进入该用户
[root@node1 Python-3.6.5]# useradd deploy
[root@node1 Python-3.6.5]# su - deploy
[deploy@node1 ~]$
# 创建 python3.6环境下的env环境
[deploy@node1 ~]$ virtualenv -p /usr/local/bin/python3.6 .py3-a2.5-env
[deploy@node1 ~]$ cd /home/deploy/.py3-a2.5-env/
# 安装ansible
[deploy@node1 .py3-a2.5-env]$ export http_proxy=http://10.11.0.148:808
[deploy@node1 .py3-a2.5-env]$ export https_proxy=http://10.11.0.148:808
[deploy@node1 .py3-a2.5-env]$ export ftp_proxy=http://10.11.0.148:808
# 克隆ansible仓库
[deploy@node1 .py3-a2.5-env]$ git clone https://github.com/ansible/ansible.git
# 加载py3-a2.5-env环境
[deploy@node1 .py3-a2.5-env]$ source /home/deploy/.py3-a2.5-env/bin/activate
(.py3-a2.5-env) [deploy@node1 .py3-a2.5-env]$
# 安装依赖包
(.py3-a2.5-env) [deploy@node1 .py3-a2.5-env]$ pip install paramiko PyYAML jinja2
# 切换ansible到2.5版本
(.py3-a2.5-env) [deploy@node1 ~]$ pwd
/home/deploy
(.py3-a2.5-env) [deploy@node1 ~]$ cd .py3-a2.5-env/
(.py3-a2.5-env) [deploy@node1 .py3-a2.5-env]$ ls
ansible bin include lib
(.py3-a2.5-env) [deploy@node1 .py3-a2.5-env]$ cd ansible/
(.py3-a2.5-env) [deploy@node1 ansible]$ git checkout stable-2.5
Branch stable-2.5 set up to track remote branch stable-2.5 from origin.
Switched to a new branch 'stable-2.5'
(.py3-a2.5-env) [deploy@node1 ansible]$ pwd
/home/deploy/.py3-a2.5-env/ansible
# 在子虚拟环境下加载ansible
.py3-a2.5-env) [deploy@node1 ansible]$ source /home/deploy/.py3-a2.5-env/ansible/hacking/env-setup –q
# 验证环境
(.py3-a2.5-env) [deploy@node1 ansible]$ ansible --version
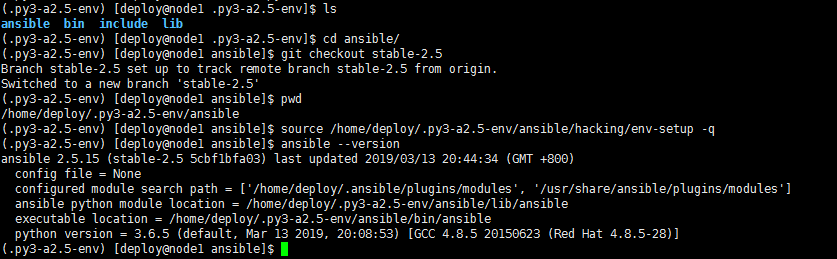
可以看到 python3.6的环境成功安装了ansible2.5,至此独立的ansible环境就搭建好了
ansible的常用方法
配置ansible和目标主机环境
ansible主机:
node1: 10.11.0.210
目标主机:
node2: 10.11.0.212(test.example.com)
# 添加hosts解析
[root@node1 ~]# cat /etc/hosts
10.11.0.212 test.example.com
切换到 deploy用户的ansible环境中
[root@node1 ~]# su - deploy
Last login: Wed Mar 13 20:42:04 CST 2019 on pts/2
[deploy@node1 ~]$ source .py3-a2.5-env/bin/activate
(.py3-a2.5-env) [deploy@node1 ~]$ source .py3-a2.5-env/ansible/hacking/env-setup -q
# 看环境是否正常
(.py3-a2.5-env) [deploy@node1 ~]$ ansible-playbook --version
ansible-playbook 2.5.15 (stable-2.5 5cbf1bfa03) last updated 2019/03/13 20:44:34 (GMT +800)
config file = None
configured module search path = ['/home/deploy/.ansible/plugins/modules', '/usr/share/ansible/plugins/modules']
ansible python module location = /home/deploy/.py3-a2.5-env/ansible/lib/ansible
executable location = /home/deploy/.py3-a2.5-env/ansible/bin/ansible-playbook
python version = 3.6.5 (default, Mar 13 2019, 20:08:53) [GCC 4.8.5 20150623 (Red Hat 4.8.5-28)]
# 搭建playbooks框架
(.py3-a2.5-env) [deploy@node1 ~]$
(.py3-a2.5-env) [deploy@node1 ~]$ mkdir test_playbooks
(.py3-a2.5-env) [deploy@node1 ~]$ cd test_playbooks/
(.py3-a2.5-env) [deploy@node1 test_playbooks]$ mkdir inventory
(.py3-a2.5-env) [deploy@node1 test_playbooks]$ mkdir roles
(.py3-a2.5-env) [deploy@node1 test_playbooks]$ cd inventory
(.py3-a2.5-env) [deploy@node1 inventory]$ vim testenv
(.py3-a2.5-env) [deploy@node1 inventory]$ cat testenv
[testservers]
test.example.com
[testserers:vars]
server_name=test.example.com
user=root
output=/root/test.txt
(.py3-a2.5-env) [deploy@node1 test_playbooks]$ tree .
.
├── deploy.yml
├── inventory
│ └── testenv
└── roles
└── testbox
└── tasks
└── main.yml
4 directories, 3 files
(.py3-a2.5-env) [deploy@node1 test_playbooks]$ ssh-keygen -t rsa
Generating public/private rsa key pair.
Enter file in which to save the key (/home/deploy/.ssh/id_rsa):
Created directory '/home/deploy/.ssh'.
Enter passphrase (empty for no passphrase):
Enter same passphrase again:
Your identification has been saved in /home/deploy/.ssh/id_rsa.
Your public key has been saved in /home/deploy/.ssh/id_rsa.pub.
The key fingerprint is:
SHA256:OezEOxKL6z0hf/XMYZ2cvnLp55kGasvDJdj3OqV74N4 deploy@node1
The key's randomart image is:
+---[RSA 2048]----+
| |
| |
| |
| o . |
| . S o o o |
| ...= +.oo==. |
| .oo.+..=*o*. |
| oo....==+=++|
| .o .o .o+BOE.|
+----[SHA256]-----+
# 建立ansible和目标机器的免秘钥认证
(.py3-a2.5-env) [deploy@node1 test_playbooks]$ ssh-copy-id -i /home/deploy/.ssh/id_rsa.pub root@test.example.com
/bin/ssh-copy-id: INFO: Source of key(s) to be installed: "/home/deploy/.ssh/id_rsa.pub"
The authenticity of host 'test.example.com (10.11.0.212)' can't be established.
ECDSA key fingerprint is SHA256:Q2YUBNf0DmqBgD9wso2dXiVhKZmJjwBnW08ul4o05ag.
ECDSA key fingerprint is MD5:e8:26:81:0d:0a:2e:62:33:d9:9f:dc:a1:a3:9c:6e:83.
Are you sure you want to continue connecting (yes/no)? yes
/bin/ssh-copy-id: INFO: attempting to log in with the new key(s), to filter out any that are already installed
/bin/ssh-copy-id: INFO: 1 key(s) remain to be installed -- if you are prompted now it is to install the new keys
root@test.example.com's password:
Number of key(s) added: 1
Now try logging into the machine, with: "ssh 'root@test.example.com'"
and check to make sure that only the key(s) you wanted were added.
# 验证能否免密码登录远程主机
(.py3-a2.5-env) [deploy@node1 test_playbooks]$ ssh root@test.example.com
Last login: Fri Mar 8 19:22:58 2019 from 10.11.0.148
[root@node02 ~]# ip a
1: lo: <LOOPBACK,UP,LOWER_UP> mtu 65536 qdisc noqueue state UNKNOWN group default qlen 1000
link/loopback 00:00:00:00:00:00 brd 00:00:00:00:00:00
inet 127.0.0.1/8 scope host lo
valid_lft forever preferred_lft forever
inet6 ::1/128 scope host
valid_lft forever preferred_lft forever
2: eth0: <BROADCAST,MULTICAST,UP,LOWER_UP> mtu 1500 qdisc pfifo_fast state UP group default qlen 1000
link/ether 00:0c:29:2c:b7:df brd ff:ff:ff:ff:ff:ff
inet 10.11.0.212/8 brd 10.255.255.255 scope global noprefixroute eth0
valid_lft forever preferred_lft forever
inet6 fe80::2734:eea:a47a:b02/64 scope link noprefixroute
valid_lft forever preferred_lft forever
# 定义相关的变量和脚本
(.py3-a2.5-env) [deploy@node1 test_playbooks]$ tree
.
├── deploy.yml
├── inventory
│ └── testenv
└── roles
└── testbox
└── tasks
└── main.yml
4 directories, 3 files
(.py3-a2.5-env) [deploy@node1 test_playbooks]$ pwd
/home/deploy/test_playbooks
(.py3-a2.5-env) [deploy@node1 test_playbooks]$ tree
.
├── deploy.yml
├── inventory
│ └── testenv
└── roles
└── testbox
└── tasks
└── main.yml
4 directories, 3 files
(.py3-a2.5-env) [deploy@node1 test_playbooks]$ cat roles/testbox/tasks/main.yml
- name: Print server name and username to remote testbox
shell: "echo 'Currently {{ user }} is logining {{ server_name }}' > {{ output }}"
(.py3-a2.5-env) [deploy@node1 test_playbooks]$ cat inventory/testenv
[testservers]
test.example.com
[testservers:vars]
server_name=test.example.com
user=root
output=/root/test.txt
(.py3-a2.5-env) [deploy@node1 test_playbooks]$ cat deploy.yml
- hosts: "testservers"
gather_facts: true
remote_user: root
roles:
- testbox
(.py3-a2.5-env) [deploy@node1 test_playbooks]$
# 执行playbook
(.py3-a2.5-env) [deploy@node1 test_playbooks]$ ansible-playbook -i inventory/testenv ./deploy.yml
PLAY [testservers] **************************************************************************************************************************************************************
TASK [Gathering Facts] **********************************************************************************************************************************************************
ok: [test.example.com]
TASK [testbox : Print server name and username to remote testbox] ***************************************************************************************************************
changed: [test.example.com]
PLAY RECAP **********************************************************************************************************************************************************************
test.example.com : ok=2 changed=1 unreachable=0 failed=0
(.py3-a2.5-env) [deploy@node1 test_playbooks]$
# 登录远程主机验证是否正确执行
(.py3-a2.5-env) [deploy@node1 test_playbooks]$ ssh root@test.example.com
Last login: Thu Mar 14 20:07:01 2019 from node1
[root@node02 ~]# ls
anaconda-ks.cfg test.txt
[root@node02 ~]# cat test.txt
Currently root is logining test.example.com
实战操作
# 进入ansible环境
[root@node1 ~]# su - deploy
Last login: Thu Mar 14 19:17:02 CST 2019 on pts/0
[deploy@node1 ~]$ source .py3-a2.5-env/bin/activate
(.py3-a2.5-env) [deploy@node1 ~]$ source .py3-a2.5-env/ansible/hacking/env-setup -q
(.py3-a2.5-env) [deploy@node1 ~]$ ansible-playbook --version
ansible-playbook 2.5.15 (stable-2.5 5cbf1bfa03) last updated 2019/03/13 20:44:34 (GMT +800)
config file = None
configured module search path = ['/home/deploy/.ansible/plugins/modules', '/usr/share/ansible/plugins/modules']
ansible python module location = /home/deploy/.py3-a2.5-env/ansible/lib/ansible
executable location = /home/deploy/.py3-a2.5-env/ansible/bin/ansible-playbook
python version = 3.6.5 (default, Mar 13 2019, 20:08:53) [GCC 4.8.5 20150623 (Red Hat 4.8.5-28)]
# 远程主机的操作
(.py3-a2.5-env) [deploy@node1 ~]$ ssh root@test.example.com
Last login: Mon Mar 18 19:41:46 2019 from 10.11.0.148
[root@node02 ~]# useradd foo
[root@node02 ~]# useradd deploy
[root@node02 ~]# mkdir /etc/nginx
[root@node02 ~]# rpm -Uvh http://nginx.org/packages/centos/7/noarch/RPMS/nginx-release-centos-7-0.el7.ngx.noarch.rpm
1.创建文件的操作
(.py3-a2.5-env) [deploy@node1 test_playbooks]$ cat roles/testbox/tasks/main.yml
- name: Print server name and username to remote testbox
shell: "echo 'Currently {{ user }} is logining {{ server_name }}' > {{ output }}"
- name: create a file
file: 'path=/root/foo.txt state=touch mode=0755 owner=foo group=foo'
# 看到可以成功执行
(.py3-a2.5-env) [deploy@node1 test_playbooks]$ ansible-playbook -i inventory/testenv ./deploy.yml
PLAY [testservers] **********************************************************************************************************************************************************************************************
TASK [Gathering Facts] ******************************************************************************************************************************************************************************************
ok: [test.example.com]
TASK [testbox : Print server name and username to remote testbox] ***********************************************************************************************************************************************
changed: [test.example.com]
TASK [testbox : create a file] **********************************************************************************************************************************************************************************
changed: [test.example.com]
PLAY RECAP ******************************************************************************************************************************************************************************************************
test.example.com : ok=3 changed=2 unreachable=0 failed=0
2.copy/stat和debug模块的使用
(.py3-a2.5-env) [deploy@node1 test_playbooks]$ mkdir roles/testbox/files
(.py3-a2.5-env) [deploy@node1 test_playbooks]$ vim roles/testbox/files/foo.sh
(.py3-a2.5-env) [deploy@node1 test_playbooks]$ cat roles/testbox/files/foo.sh
echo "this is a test script"
(.py3-a2.5-env) [deploy@node1 test_playbooks]$ vim roles/testbox/tasks/main.yml
(.py3-a2.5-env) [deploy@node1 test_playbooks]$ cat roles/testbox/tasks/main.yml
- name: Print server name and username to remote testbox
shell: "echo 'Currently {{ user }} is logining {{ server_name }}' > {{ output }}"
- name: create a file
file: 'path=/root/foo.txt state=touch mode=0755 owner=foo group=foo'
- name: copy a file
copy: 'remote_src=no src=roles/testbox/files/foo.sh dest=/root/foo.sh mode=0644 force=yes'
- name: check if foo.sh exists
stat: 'path=/root/foo.sh'
register: script_stat
- debug: msg="foo.sh exists" # 如果文件存在则输出消息
when: script_stat.stat.exists
# 执行测试
(.py3-a2.5-env) [deploy@node1 test_playbooks]$ ansible-playbook -i inventory/testenv ./deploy.yml
PLAY [testservers] **********************************************************************************************************************************************************************************************
TASK [Gathering Facts] ******************************************************************************************************************************************************************************************
ok: [test.example.com]
TASK [testbox : Print server name and username to remote testbox] ***********************************************************************************************************************************************
changed: [test.example.com]
TASK [testbox : create a file] **********************************************************************************************************************************************************************************
changed: [test.example.com]
TASK [testbox : copy a file] ************************************************************************************************************************************************************************************
ok: [test.example.com]
TASK [testbox : check if foo.sh exists] *************************************************************************************************************************************************************************
ok: [test.example.com]
TASK [testbox : debug] ******************************************************************************************************************************************************************************************
ok: [test.example.com] => {
"msg": "foo.sh exists"
}
PLAY RECAP ******************************************************************************************************************************************************************************************************
test.example.com : ok=6 changed=2 unreachable=0 failed=0
3.执行脚本
(.py3-a2.5-env) [deploy@node1 test_playbooks]$ cat roles/testbox/tasks/main.yml
- name: Print server name and username to remote testbox
shell: "echo 'Currently {{ user }} is logining {{ server_name }}' > {{ output }}"
- name: create a file
file: 'path=/root/foo.txt state=touch mode=0755 owner=foo group=foo'
- name: copy a file
copy: 'remote_src=no src=roles/testbox/files/foo.sh dest=/root/foo.sh mode=0644 force=yes'
- name: check if foo.sh exists
stat: 'path=/root/foo.sh'
register: script_stat
- debug: msg="foo.sh exists"
when: script_stat.stat.exists
- name: run the script
command: 'sh /root/foo.sh'
4.变量和jija模板的使用
# a.编辑变量
(.py3-a2.5-env) [deploy@node1 test_playbooks]$ cat inventory/testenv
[testservers]
test.example.com
[testservers:vars]
server_name=test.example.com
user=root
output=/root/test.txt
server_name=test.example.com
port=80
user=deploy
worker_processes=4
max_open_file=65505
root=/www
# b.编辑nginx的jija模板
(.py3-a2.5-env) [deploy@node1 test_playbooks]$ mkdir roles/testbox/templates
(.py3-a2.5-env) [deploy@node1 test_playbooks]$ cat roles/testbox/templates/nginx.conf.j2
# For more infomation on configuration, see:
user {{ user }};
worker_processes {{ worker_processes }};
error_log /var/log/nginx/error.log;
pid /var/run/nginx.pid;
worker_rlimit_nofile 65535;
events {
worker_connections {{ max_open_file }};
}
http {
include /etc/nginx/mime.types;
default_type application/octet-stream;
log_format main '$remote_addr - $remote_user [$time_local] "$request" '
'$status $body_bytes_sent "$http_referer" '
'"$http_user_agent" "$http_x_forwarded_for"';
access_log /var/log/nginx/access.log main;
sendfile on;
#tcp_nodelay on;
#keepalive_timeout 0;
keepalive_timeout 65;
gzip on;
#include vhost.d/*.conf;
server {
listen {{ port }} default_server;
server_name {{ server_name }};
#charset koi8-r;
#access_log logs/host.access.log main;
location / {
root {{ root }};
index index.html index.htm;
}
#error_page 404 /404.html;
# redirect server error pages to the static page /50x.html
#
error_page 500 502 503 504 /50x.html;
location = /50x.html {
root html;
}
}
}
# 执行测试
(.py3-a2.5-env) [deploy@node1 test_playbooks]$ ansible-playbook -i inventory/testenv ./deploy.yml
PLAY [testservers] **********************************************************************************************************************************************************************************************
TASK [Gathering Facts] ******************************************************************************************************************************************************************************************
ok: [test.example.com]
TASK [testbox : Print server name and username to remote testbox] ***********************************************************************************************************************************************
changed: [test.example.com]
TASK [testbox : create a file] **********************************************************************************************************************************************************************************
changed: [test.example.com]
TASK [testbox : copy a file] ************************************************************************************************************************************************************************************
ok: [test.example.com]
TASK [testbox : check if foo.sh exists] *************************************************************************************************************************************************************************
ok: [test.example.com]
TASK [testbox : debug] ******************************************************************************************************************************************************************************************
ok: [test.example.com] => {
"msg": "foo.sh exists"
}
TASK [testbox : run the script] *********************************************************************************************************************************************************************************
changed: [test.example.com]
TASK [testbox : write the nginx config file] ********************************************************************************************************************************************************************
changed: [test.example.com]
TASK [testbox : ensure nginx is at the latest version] **********************************************************************************************************************************************************
ok: [test.example.com]
TASK [testbox : start nginx service] ****************************************************************************************************************************************************************************
changed: [test.example.com]
PLAY RECAP ******************************************************************************************************************************************************************************************************
test.example.com : ok=10 changed=5 unreachable=0 failed=0
# 验证,远程nginx服务是否正常启动
(.py3-a2.5-env) [deploy@node1 test_playbooks]$ ssh root@test.example.com "ps -ef|grep nginx"
root 15637 1 0 20:36 ? 00:00:00 nginx: master process /usr/sbin/nginx -c /etc/nginx/nginx.conf
deploy 15638 15637 0 20:36 ? 00:00:00 nginx: worker process
deploy 15639 15637 0 20:36 ? 00:00:00 nginx: worker process
deploy 15640 15637 0 20:36 ? 00:00:00 nginx: worker process
deploy 15641 15637 0 20:36 ? 00:00:00 nginx: worker process
root 15687 15685 0 20:48 ? 00:00:00 bash -c ps -ef|grep nginx
root 15695 15687 0 20:48 ? 00:00:00 grep nginx
Gitlab_ansible_jenkins三剑客③Ansible的安装及使用的更多相关文章
- ansible网络模块安装httplib2
ansible网络模块安装httplib2 在进行使用ansible的网络模块的时候,需要安装httplib2模块 下载地址: https://pypi.python.org/pypi?%3Aacti ...
- ansible离线安装
目录 1. ansible离线安装 2. ansible配置文件 3. ansible常用的命令: 1. ansible离线安装 最近要在内网部署一台ansible服务器,只能手动离线安装ansibl ...
- CentOS7Linux中自动化运维工具Ansible的安装,以及通过模块批量管理多台主机
使用自动化运维工具Ansible集中化管理服务器 Ansible概述 Ansible是一款为类Unix系统开发的自由开源的配置和自动化工具.它用Python写成,类似于saltstack和Puppet ...
- [k8s]kubespray(ansible)自动化安装k8s集群
kubespray(ansible)自动化安装k8s集群 https://github.com/kubernetes-incubator/kubespray https://kubernetes.io ...
- ansible 提示安装sshpass
之前用ansible一直用的root身份.机器之间又早早的做好了ssh信任.所以一直也没有出现什么问题.今天想想自己不能这么浪了,还是用回普通用户吧: 然而马上就遇到了第一个问题,ansible提示安 ...
- ansible自动安装rabbitmq
ansible playbook 安装rabbitmq单机版,以下脚本在CentOS6.7服务器测试通过. 需要配置本机的yum源,用于安装socat软件. rabbitmq版本和Erlang版本需要 ...
- ansible的安装和简单使用
ansible是新出现的自动化运维工具,基于Python开发,集合了众多运维工具的优点,实现了批量系统配置.批量程序部署.批量运行命令等功能.ansible是基于模块工作的,本身没有批量部署的能力.真 ...
- 运维自动化之ansible的安装与使用 转
运维自动化之ansible的安装与使用 随着服务器数量的增长,我们需要一个批量工具去提高工作效率,之前用的是puppet,ansible的简单,适用让我眼前一亮,决定写一篇ansible从安装到基本配 ...
- Centos7 使用 Ansible 批量安装中文字体
需求背景 Centos7 下 Java 生成图片水印时中文乱码,原因是没有安装中文字体. 安装中文字体 以下是基于 Centos7 手动安装中文字体的详细步骤.当测试或者生产环境服务器比较多的时候,建 ...
随机推荐
- Oracle查询字符串数据进行排序,以及去重复
原本的的一张表,填写数据的字段为字符串varchar2类型,然后进行排序的时候,就会出现问题.会默直接默认判断为第一个数字9最大,而不判断整个数字的大小. 所以,就要用到TO_NUMBER函数 sel ...
- DAY30、网络编程
一.网络编程 软件开发 c/s架构 c:客户端 s:服务端 b/s架构 b:浏览器 s:服务端 本质:b/s其实也是c/s 服务端:24小时不间断提供服务,谁来救服务谁 客户端:想什么时候体验服务,就 ...
- 南邮 base64全家桶
这几天不想学逆向 做做crypto(菜还瞎j2做)..... 题目: 全家桶全家桶全家桶!我怎么饿了......密文(解密前删除回车):R1pDVE1NWlhHUTNETU4yQ0dZWkRNTUpY ...
- Vs2015 当前不会命中断点,没有与此关联的可执行代码
在学习Civil 3D本地化包程序的过程中, 使用.Net Reflector调试本地化包的主程序CountryKits.dll, .Net Reflector创建了相应的pdb文件等, 在我反编译并 ...
- 关于Aop切面中的@Before @Around等操作顺序的说明
[转]http://www.cnblogs.com/softidea/p/6123307.html 话不多说,直接上代码: package com.cdms.aop.aspectImpl; impor ...
- Day053--MySQL
MySQL安装和基本管理https://www.cnblogs.com/majj/p/9160383.html 管理员模式运行cmd 打开终端,输入mysqld,打开服务端. 打开终端,输入mysql ...
- 第七周java学习总结
学号 20175206 <Java程序设计>第七周学习总结 教材学习内容总结 第八章: 主要内容 String类 StringTokenizer类 Scanner类 StringBuffe ...
- 基础概念【softmax|normalizatoin|standardization】
目录 一.softmax 二.normalization 三.standardization 一.softmax 为什么使用softmax,不用normalization? “max” because ...
- [源码分析]StringBuilder
[源码分析]StringBuilder StringBuilder是继承自AbstractStringBuilder的. 这里附上另外两篇文章的连接: AbstractStringBuilder : ...
- ReactJS虚拟DOM效应带来的一则副作用探索
疑问 https://github.com/ruanyf/react-demos/blob/master/demo08/index.html 在如下代码中的 18 行, 需要将本类中的 方法,进行绑定 ...