
(Android UI)Action Bar
Action Bar 指明用户当前所在的界面,添加多个功能性按键和下拉式选择框,以提供能多功能。


主题一:让应用具备ActionBar
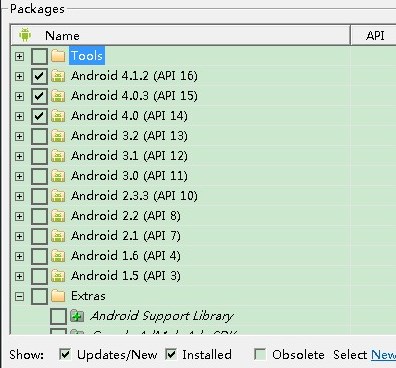
可能条件一:Support Android 3.0(API 11) and Above Only

步骤一:在<Application>标签中指明theme属性值,android:theme="@android:style/Theme.Hole",即可让应用具备ActionBar
<application

    android:name=".DemoApplication"

    android:allowBackup="true"

    android:icon="@drawable/ic_launcher"

    android:theme="@android:style/Theme.Holo" >

    <activity

        android:name=".MainActivity"

        android:label="@string/app_name" >

        <intent-filter>

            <action android:name="android.intent.action.MAIN" />

            <category android:name="android.intent.category.LAUNCHER" />

        </intent-filter>

    </activity>

    <activity android:name=".SecondActivity" >

    </activity>

</application>
可能条件二:Support Android 2.1(API 7) and Above 相当于比上者支持更低版本的Android系统

步骤一:使用ActionBarActivity
public class MainActivity extends ActionBarActivity {
步骤二:使用theme标签,指定特定主题,使用属性值:android:theme="@style/Theme.AppCompat.Light"
<activity

    android:theme="@style/Theme.AppCompat.Light"

    android:name=".MainActivity"

    android:label="@string/app_name" >

    <intent-filter>

        <action android:name="android.intent.action.MAIN" />

        <category android:name="android.intent.category.LAUNCHER" />

    </intent-filter>

</activity>
可以在<application>或者<activity>标签中指定theme均可达到以上效果。
主题二:为ActionBar添加Buttons
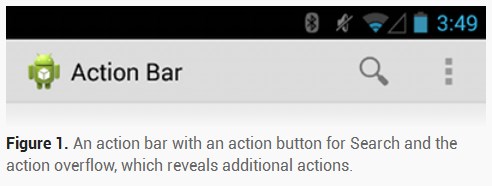
The action bar allows you to add buttons for the most important action items relating to the app's current context. 为当前所在的界面添加与之相关的功能按键。
步骤一:为ActionBar布局设计.xml文件,在res/menu目录下新建main_activity_actions.xml作为其布局文件
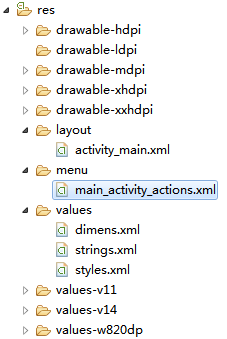
内容如下:
<menu xmlns:android="http://schemas.android.com/apk/res/android"

    xmlns:app="http://schemas.android.com/apk/res-auto"

    xmlns:tools="http://schemas.android.com/tools"

    tools:context="com.spt.MainActivity" >

    <item

        android:id="@+id/action_search"

        android:icon="@drawable/ic_menu_search"

        android:showAsAction="ifRoom"

        android:title="@string/action_search"/>

    <item

        android:id="@+id/action_settings"

        android:orderInCategory="100"

        android:title="@string/action_settings"

        android:showAsAction="never"/>

</menu>
让.xml文件显示到Activity中
    @Override

    public boolean onCreateOptionsMenu(Menu menu) {

        // Inflate the menu items for use in the action bar

        MenuInflater inflater = getMenuInflater();

        inflater.inflate(R.menu.main_activity_actions, menu);

        return super.onCreateOptionsMenu(menu);

    }
覆写onCreateOptionMenu(),并在其中指定.xml布局文件。
显示结果如下:
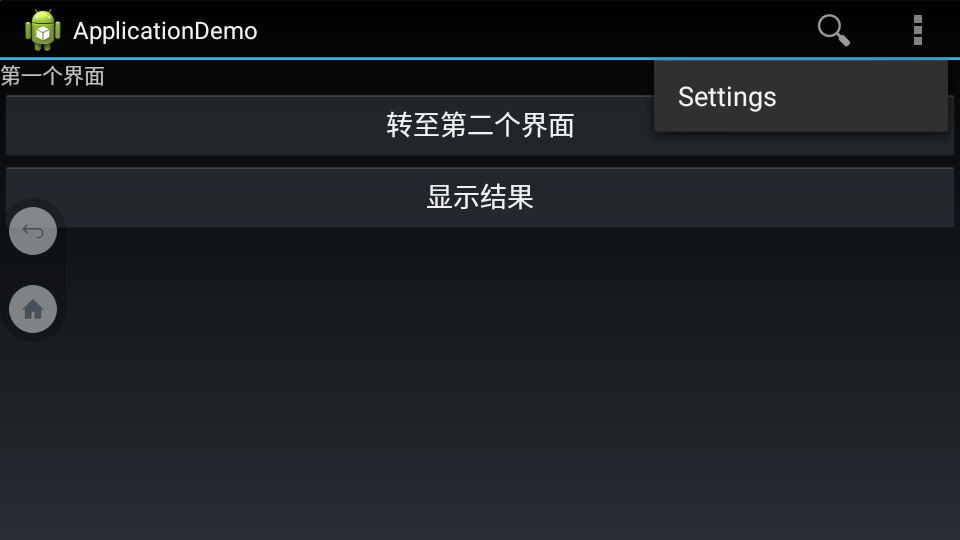
This declares that the Search action should appear as an action button when room is available in the action bar, but the Settings action should always appear in the overflow. (By default, all actions appear in the overflow, but it's good practice to explicitly declare your design intentions for each action.)
<item>标签中的android:showAsAction="ifRoom"属性,让图标已Button的形式显示;反之,赋值为"never",则显示在overflow中。
步骤二:为Button添加响应
    @Override

    public boolean onOptionsItemSelected(MenuItem item) {

        switch (item.getItemId()) {

            case R.id.action_search:

                openSearch();

                return true;

            case R.id.action_settings:

                openSettings();

                return true;

            default:

                return super.onOptionsItemSelected(item);

        }

    }
主题三:为Activity添加 Up Button

如上图所示,图中的“<”箭头实际上是可点击的Button;点击后,返回到指定Activity。
步骤一:为Activity指定Parent
<activity

    android:name=".SecondActivity"

    android:label="@string/title_activity_display_message"

    android:parentActivityName="com.spt.MainActivity" >

    <meta-data

        android:name="android.support.PARENT_ACTIVITY"

        android:value="com.spt.MainActivity" >

    </meta-data>

</activity>
步骤二:在显示 Up Button 中设置如下代码:
getActionBar().setDisplayHomeAsUpEnabled(true);
当前Activity已经知道其Parent,因此无需为其设置点击事件。
主题四:定制ActionBar主题
Android includes a few built-in activity themes that include "dark" or "light" action bar styles. You can also extend these themes to further customize the look for your action bar.
1. the Support Library APIs --> the Theme.AppCompat family of styles
2. API level 11 and higher --> the Theme.Holo family
android:theme="@android:style/Theme.Holo.Light.DarkActionBar"
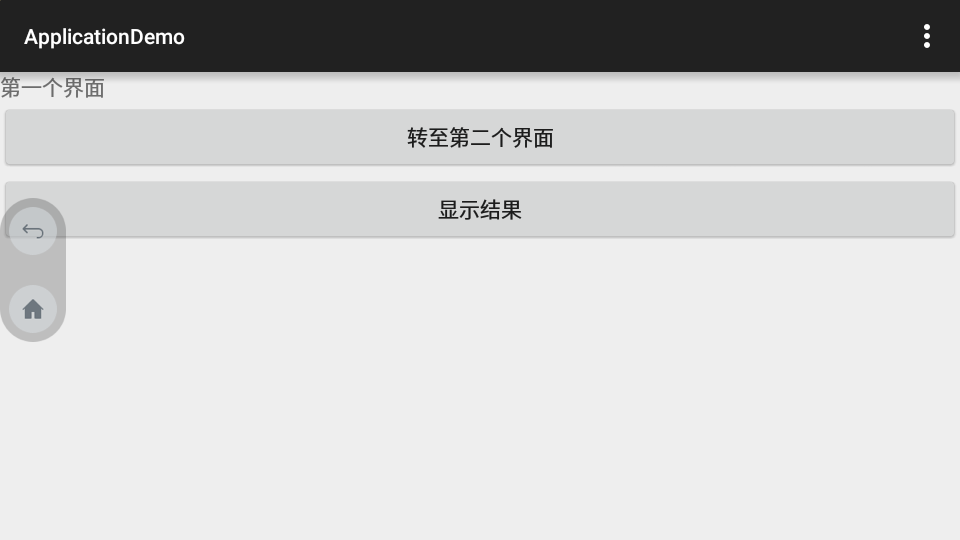
android:theme="@android:style/Theme.Holo.Light

当android:minSdkVersion="7"时,不能再使用“@android:style...”,而应该使用:android:theme="@style/Theme.AppCompat"

android:theme="@style/Theme.AppCompat.Light"

android:theme="@style/Theme.AppCompat.Light.DarkActionBar"

使用自定义的Theme:
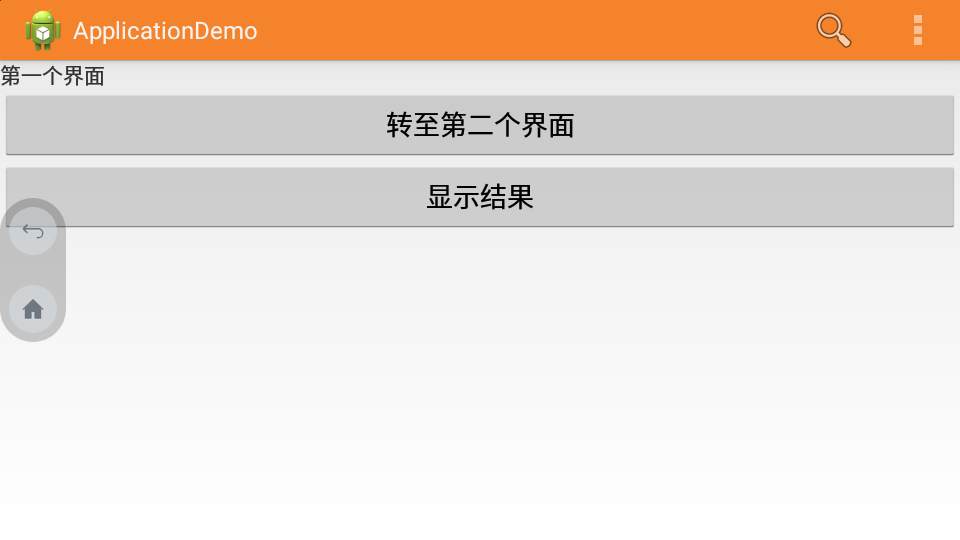
android:theme="@style/CustomActionBarTheme"
新建res/values/themes.xml文件,
<?xml version="1.0" encoding="utf-8"?>

<resources xmlns:android="http://schemas.android.com/apk/res/android">

    <!-- the theme applied to the application or activity -->

    <style name="CustomActionBarTheme" parent="@android:style/Theme.Holo.Light.DarkActionBar">

        <item name="android:actionBarStyle">@style/MyActionBar</item>

    </style>

    <style name="MyActionBar" parent="@android:style/Widget.Holo.Light.ActionBar.Solid.Inverse">

        <item name="android:background">@drawable/actionbar_background</item>

    </style>

</resources>
以上就是新建的style,名为:CustomActionBarTheme
其中使用到 @drawable/actionbar_background,指定颜色;res目录下新建drawable文件夹
<?xml version="1.0" encoding="utf-8"?>

<shape xmlns:android="http://schemas.android.com/apk/res/android"

    android:shape="rectangle" >

    <solid android:color="#FFF4832C" />

</shape>
对于使用到 Android 2.1 的应用,只需要将 @android:style/Theme.Holo.Light.DarkActionBar 替换为 @style/Theme.AppCompat.Light.DarkActionBar;同时,将 @android:style/Widget.Holo.Light.ActionBar.Solid.Inverse 替换为:@style/Widget.AppCompat.Light.ActionBar.Solid.Inverse
主题四:自定义ActionBar中字体颜色
<?xml version="1.0" encoding="utf-8"?>

<resources xmlns:android="http://schemas.android.com/apk/res/android">

    <!-- the theme applied to the application or activity -->

    <style name="CustomActionBarTheme" parent="@android:style/Theme.Holo">

        <item name="android:actionBarStyle">@style/MyActionBar</item>

        <item name="android:actionBarTabTextStyle">@style/MyActionBarTabText</item>

        <item name="android:actionMenuTextColor">@color/actionbar_text</item>

    </style>

    <!-- ActionBar styles -->

    <style name="MyActionBar" parent="@android:style/Widget.Holo.ActionBar">

        <item name="android:titleTextStyle">@style/MyActionBarTitleText</item>

    </style>

    <!-- ActionBar title text -->

    <style name="MyActionBarTitleText" parent="@android:style/TextAppearance.Holo.Widget.ActionBar.Title">

        <item name="android:textColor">@color/actionbar_text</item>

    </style>

    <!-- ActionBar tabs text styles -->

    <style name="MyActionBarTabText" parent="@android:style/Widget.Holo.ActionBar.TabText">

        <item name="android:textColor">@color/actionbar_text</item>

    </style>

</resources>
主题五:覆盖ActionBar,达到显示和隐藏目的
If, during the course of user interaction, you want to hide and show the action bar, you can do so by calling hide() and show() on the ActionBar. However, this causes your activity to recompute and redraw the layout based on its new size.
(Android UI)Action Bar的更多相关文章
- (Android UI)Android应用程序中资源:图片、字符串、颜色、布局等
Android系统设计采用代码和布局分离的设计模式,因此在设计Android应用程序时需要遵循该设计模式. “把非代码资源(如图片和字符串常量)和代码分离开来始终是一种很好的做法.”---<An ...
- 20155236 《Java程序设计》实验四(Android程序设计)实验报告
20155236 <Java程序设计>实验四(Android程序设计)实验报告 一.实验内容及步骤 第24章:初识Android 任务一:完成Hello World, 要求修改res目录中 ...
- Appium-001-测试开发环境搭建(Android - Win7)
随着移动端 App 测试自动化的兴起,为更好的控制产品质量,越来越多的中大型公司开始了移动端的自动化测试.Appium 自动化测试技术也是我很早之前就想学习的一门技术,却一直没有比较空余的时间来学习( ...
- 20145207《Java程序设计》实验四( Android程序设计)实验报告
<Java 程序设计>实验四( Android程序设计)实验报告 目录 改变 Android开发基础实验要求 实验成果 课后思考 改变 修改了之前仅仅是贴了图片,连代码都没粘的状态.增加了 ...
- 20155310 《Java程序设计》实验四 (Android程序设计)实验报告
20155310 <Java程序设计>实验四 (Android程序设计)实验报告 实验内容 1.基于Android Studio开发简单的Android应用并部署测试; 2.了解Andro ...
- 20155311 《Java程序设计》实验四 (Android程序设计)实验报告
20155311 <Java程序设计>实验四 (Android程序设计)实验报告 实验内容 基于Android Studio开发简单的Android应用并部署测试; 了解Android.组 ...
- 20155318 《Java程序设计》实验四 (Android程序设计)实验报告
20155318 <Java程序设计>实验四 (Android程序设计)实验报告 实验内容 基于Android Studio开发简单的Android应用并部署测试; 了解Android.组 ...
- 给你的移动网站加点料:推荐下载App,如果本地安装则直接打开本地App(Android/IOS)
纵观现在每家移动网站,打开首页的时候,都有各种各样的形式来提示你下载自身的移动App(Android/IOS),这是做移动客户端产品的一个很好地引流的手段.当然各家引流下载的交互和视觉各不相同,有的是 ...
- 推荐下载App,如果本地安装则直接打开本地App(Android/IOS)
推荐下载App,如果本地安装则直接打开本地App(Android/IOS) - 纵观现在每家移动网站,打开首页的时候,都有各种各样的形式来提示你下载自身的移动App(Android/IOS),这是做移 ...
随机推荐
- Day048--jQuery自定义动画和DOM操作
内容回顾 BOM location.reload() 全局刷新页面 location.href location.hash location.pathname location.hostname lo ...
- Shell脚本之grep
1. 过滤空行 grep -v ^$
- Entity Framework入门教程(8)---预先加载、延迟加载、显示加载
1.预先加载 预先加载:在对一种类型的实体进行查询时,将相关的实体作为查询的一部分一起加载.预先加载可以使用Include()方法实现. 1.加载一个相关实体类型 栗子:使用Include()方法从数 ...
- LeetCode 92. ReverseLinkedII
#include <iostream> using namespace std; struct ListNode { int val; ListNode *next; ListNode(i ...
- 第十二节: EF的三种模式(二) 之 ModelFirst模式(SQLServer为例)
一. 简介 顾名思义,ModelFirst是模型优先,是DBFirst的逆向模式,先建立实体数据模型,然后根据实体数据模型来生成数据库,从而驱动整个开发流程.(生成一个空的edmx文件,手动在里面建 ...
- 使用kqueue的str_cli函数
void str_cli(FILE *fp, int sockfd) { , isfile; char buf[MAXLINE]; ]; struct timespec ts; struct stat ...
- Nginx故障排错及一个网站小实例
Nginx访问403错误: 1.没有首页文件 2.没有权限 例:chmod 700 /application/nginx/html/index.html 3.nginx.conf配置文件和首页文件不 ...
- SQL Server - Partition by 和 Group by对比
参考:https://www.cnblogs.com/hello-yz/p/9962356.html —————————————————— 今天大概弄懂了partition by和group by的区 ...
- 我实在不懂Python的Asyncio
原语 事件循环(Event Loop) Awaitables和Coroutines Coroutine Wrappers Awaitables and Futures Tasks Handles Ex ...
- ubuntu 32/64 bit
https://askubuntu.com/questions/454253/how-to-run-32-bit-app-in-ubuntu-64-bit how to run 32-bit app ...