SecureCRT 的上传和下载操作
在网上找了两篇文章,分别关于ftp和ssh的上传下载,如果有好的大家可以留言分享,不胜感谢~
因为关于ftp的比较少,就copy上面,本人并没有验证。关于ssh用sr和sz发现一条错误,而且网上也有解决办法,但感觉get和put已经很方便,就没有继续深究。
《SecureCRT ftp操作》原文地址:http://m.blog.csdn.net/article/details?id=51371654
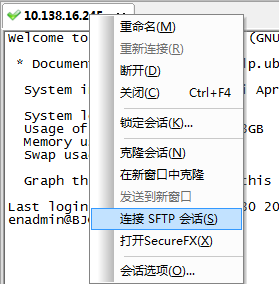
securecrt 按下ALT+P就开启新的会话 进行ftp操作。
输入:help命令,显示该FTP提供所有的命令
pwd: 查询linux主机所在目录(也就是远程主机目录)
lpwd: 查询本地目录(一般指windows上传文件的目录:我们可以通过查看"选项"下拉框中的"会话选项",我们知道本地上传目录为:D:/我的文档)
ls: 查询连接到当前linux主机所在目录有哪些文件
lls: 查询当前本地上传目录有哪些文件
cd: 改变远程上传目录
lcd: 改变本地上传目录的路径
get: 将远程目录中文件下载到本地目录
put: 将本地目录中文件上传到远程主机(linux)
quit: 断开FTP连接
securecrt 按下Ctrl+S会假死,在按下Ctrl+Q就可解决;
《使用SecureCRT的SFTP在WINDOWS与LINUX之间传输文件》
原文地址:http://www.cnblogs.com/xwdreamer/p/3673397.html
背景:
方案:
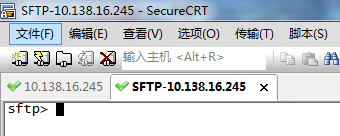
SFTP命令

sftp> help

Available commands:

ascii                          Set transfer mode to ASCII

binary                         Set transfer mode to binary

cd path                        Change remote directory to 'path'

lcd path                       Change local directory to 'path'

detail remote-path             Display system information about remote

                                 file or folder

ldetail local-path             Display system information about local

                                 file or folder

chgrp group path               Change group of file 'path' to 'group'

chmod mode path                Change permissions of file 'path' to 'mode'

chown owner path               Change owner of file 'path' to 'owner'

exit                           Quit sftp

help                           Display this help text

include filename               Include commands from 'filename'

                                 Alternate: < filename

get [-r][-a | -b] remote-path  Download file

                                 -r downloads directory recursively

                                 force ascii (-a) or binary (-b) mode

ln [-s] existingpath linkpath  Hardlink / symlink remote file

ls [options] [path]            Display remote directory listing

lls [options] [path]           Display local directory listing

mkdir path                     Create remote directory

lmkdir path                    Create local directory

mv oldpath newpath             Move remote file

lmv oldpath newpath            Move local file

open [user@]host[:port]        Connect to remote host

put [-r][-a | -b] local-path   Upload file

                                 -r uploads directory recursively

                                 force ascii (-a) or binary (-b) mode

pwd                            Display remote working directory

lpwd                           Print local working directory

quit                           Quit sftp

rename oldname newname         Rename remote file

lrename oldname newname        Rename local file

rmdir path                     Remove remote directory

lrmdir path                    Remove local directory

rm path                        Delete remote file

lrm path                       Delete local file

su username                    Substitutes the current user

                                 This is only supported with VShell for

                                 Windows 3.5 or later.

type [transfer-mode]           Display or set file transfer mode

view remote-path               Download and open file

version                        Display protocol version
翻译一下就是:
sftp-- help

可用命令:

cd 路径                        更改远程目录到“路径”

lcd 路径                       更改本地目录到“路径”

chgrp group path               将文件“path”的组更改为“group”

chmod mode path                将文件“path”的权限更改为“mode”

chown owner path               将文件“path”的属主更改为“owner”

exit                           退出 sftp

help                           显示这个帮助文本

get 远程路径                   下载文件

ln existingpath linkpath       符号链接远程文件

ls [选项] [路径]               显示远程目录列表

lls [选项] [路径]              显示本地目录列表

mkdir 路径                     创建远程目录

lmkdir 路径                    创建本地目录

mv oldpath newpath             移动远程文件

open [用户@]主机[:端口]        连接到远程主机

put 本地路径                   上传文件

pwd                            显示远程工作目录

lpwd                           打印本地工作目录

quit                           退出 sftp

rmdir 路径                     移除远程目录

lrmdir 路径                    移除本地目录

rm 路径                        删除远程文件

lrm 路径                       删除本地文件

symlink existingpath linkpath  符号链接远程文件

version                        显示协议版本
我们主要用到的就是一下六个命令
cd 路径                        更改远程目录到“路径”

lcd 路径                       更改本地目录到“路径”

ls [选项] [路径]               显示远程目录列表

lls [选项] [路径]              显示本地目录列表

put 本地路径                   上传文件

get 远程路径                   下载文件
这里在详细说明一下远程目录和本地目录。
远程目录:ls查看到的是ubuntu虚拟机上面的目录
本地目录:lls查看到的是windows实体机上面的目录。
实例:
假设我需要实现windows下的e:\sftp\test1.txt和ubuntu下/home/enadmin/test2.txt的互换,可以进行一下操作:
put操作:windows->linux
查看目录权限
root@BJCGNMON01:/home# ll

total 20

drwxr-xr-x  5 root    root    4096 Apr 18 15:21 ./

drwxr-xr-x 24 root    root    4096 Jan  3 14:14 ../

drwxr-xr-x  9 enadmin enadmin 4096 Apr 18 15:22 enadmin/

drwxr-xr-x  2 root    root    4096 Apr 18 15:21 sftp/--可以看到sftp的权限是root的

drwxr-xr-x  2 root    root    4096 Apr 18 14:57 test/

root@BJCGNMON01:/home# chown -R enadmin.enadmin sftp/

root@BJCGNMON01:/home# ll

total 20

drwxr-xr-x  5 root    root    4096 Apr 18 15:21 ./

drwxr-xr-x 24 root    root    4096 Jan  3 14:14 ../

drwxr-xr-x  9 enadmin enadmin 4096 Apr 18 15:22 enadmin/

drwxr-xr-x  2 enadmin enadmin 4096 Apr 18 15:21 sftp/--修改以后权限变成enadmin的了

drwxr-xr-x  2 root    root    4096 Apr 18 14:57 test/
拷贝文件
sftp> put test* --初始想将文件从windows系统put到ubuntu系统,发现失败,提示拒绝访问

Uploading test1.txt to /home/test1.txt

put: failed to upload e:/sftp/test1.txt. 拒绝访问。

Uploading test2.txt to /home/test2.txt

put: failed to upload e:/sftp/test2.txt. 拒绝访问。

Uploading test3.txt to /home/test3.txt

put: failed to upload e:/sftp/test3.txt. 拒绝访问。

sftp> pwd --查看当前目录是/home目录,权限是root的

/home

sftp> cd /home/enadmin/ --我切换到enadmin目录下

sftp> ls

Graphs.pm             msmtp                 ntp

sent                  smokeping.tar.gz      smokepingrtt.tar.gz

smokepingrtt2.tar.gz  Target                wqy

wqy-zenhei-0.8.38-1.deb

sftp> lls

test1.txt             test2.txt             test3.txt

sftp> put test* -再次尝试将windows下的文件put到/homg/enadmin目录下,这次成功

Uploading test1.txt to /home/enadmin/test1.txt

  100% 4 bytes      4 bytes/s 00:00:00

e:/sftp/test1.txt: 4 bytes transferred in 0 seconds (4 bytes/s)

Uploading test2.txt to /home/enadmin/test2.txt

  100% 4 bytes      4 bytes/s 00:00:00

e:/sftp/test2.txt: 4 bytes transferred in 0 seconds (4 bytes/s)

Uploading test3.txt to /home/enadmin/test3.txt

  100% 5 bytes      5 bytes/s 00:00:00

e:/sftp/test3.txt: 5 bytes transferred in 0 seconds (5 bytes/s)

sftp> cd /home/sftp/--在修改sftp目录权限以后,再次切换到sftp目录下

sftp> ls

sftp> lls

test1.txt             test2.txt             test3.txt

sftp> put test* --这回put成功。所以跟权限相关

Uploading test1.txt to /home/sftp/test1.txt

  100% 4 bytes      4 bytes/s 00:00:00

e:/sftp/test1.txt: 4 bytes transferred in 0 seconds (4 bytes/s)

Uploading test2.txt to /home/sftp/test2.txt

  100% 4 bytes      4 bytes/s 00:00:00

e:/sftp/test2.txt: 4 bytes transferred in 0 seconds (4 bytes/s)

Uploading test3.txt to /home/sftp/test3.txt

  100% 5 bytes      5 bytes/s 00:00:00

e:/sftp/test3.txt: 5 bytes transferred in 0 seconds (5 bytes/s)
注意点:这里需要注意权限的问题。加入我是使用enadmin账户初始连接ubuntu的,那么我put的文件只能放到文件夹权限是enadmin的目录下,不能放到文件夹权限是root的目录下。如果想放到文件夹权限是root的目录下,那么初始就使用root账户连接ubunut,然后再创建sftp会话,这样就可以了。
get操作:linux->windows
get操作没有权限设定
sftp> pwd

/home/enadmin

sftp> lpwd

e:/Documents

sftp> lcd e:/sftp --切换目录

sftp> lls

rc.local              test1.txt             test2.txt

test3.txt

sftp> ls

Graphs.pm             msmtp                 ntp

sent                  smokeping.tar.gz      smokepingrtt.tar.gz

smokepingrtt2.tar.gz  Target                test1.txt

test2.txt             test3.txt             wqy

wqy-zenhei-0.8.38-1.deb

sftp> get Graphs.pm --下载文件到windows

Downloading Graphs.pm from /home/enadmin/Graphs.pm

  100% 13KB     13KB/s 00:00:00

/home/enadmin/Graphs.pm: 13503 bytes transferred in 0 seconds (13 KB/s)

sftp> lls --查看windows目录

Graphs.pm             rc.local              test1.txt

test2.txt             test3.txt

sftp>
SecureCRT 的上传和下载操作的更多相关文章
- 每天一个linux命令(26):用SecureCRT来上传和下载
用SSH管理linux服务器时经常需要远程与本地之间交互文件.而直接用SecureCRT自带的上传下载功能无疑是最方便的,SecureCRT下的文件传输协议有ASCII.Xmodem.Zmodem.文 ...
- 每天一个linux命令(26):用SecureCRT来上传和下载文件
用SSH管理linux服务器时经常需要远程与本地之间交互文件.而直接用SecureCRT自带的上传下载功能无疑是最方便的,SecureCRT下的文件传输协议有ASCII.Xmodem.Zmodem. ...
- secureCRT简单上传、下载文件记录
secureCRT简单上传.下载文件记录: 1)sz下载 -y 覆盖 2)rz上传 -y 覆盖 3)以上两个命令属于安装时包含在“Dial-up Networking Support"组中 ...
- 每天一个linux命令(26)--用SecureCRT来上传和下载文件
用SSH管理Linux 服务器时经常需要远程与本地之间交互文件,而直接使用 SecureCRT 自带的上传下载功能无疑是最方便的,SecureCRT下的文件传输协议有ASCII.Xmodem.Zmod ...
- 每天一个linux命令(26):用SecureCRT来上传和下载文件(转载自竹子)
用SSH管理linux服务器时经常需要远程与本地之间交互文件.而直接用SecureCRT自带的上传下载功能无疑是最方便的,SecureCRT下的文件传输协议有ASCII.Xmodem.Zmodem. ...
- 用SecureCRT来上传和下载文件
用SSH管理linux服务器时经常需要远程与本地之间交互文件.而直接用SecureCRT自带的上传下载功能无疑是最方便的,SecureCRT下的文件传输协议有ASCII.Xmodem.Zmodem. ...
- linux常用命令:用SecureCRT来上传和下载文件
用SSH管理linux服务器时经常需要远程与本地之间交互文件.而直接用SecureCRT自带的上传下载功能无疑是最方便的,SecureCRT下的文件传输协议有ASCII.Xmodem.Zmodem. ...
- 【转】每天一个linux命令(26):用SecureCRT来上传和下载文件
原文网址:http://www.cnblogs.com/peida/archive/2012/11/28/2793181.html 用SSH管理linux服务器时经常需要远程与本地之间交互文件.而直接 ...
- 在windows和linux之间用SecureCRT来上传和下载文件
SecureCRT可以使用linux下的zmodem协议来快速的传送文件,使用非常方便.具体步骤:一.在使用SecureCRT上传下载之前需要给服务器安装lrzsz:A:CentOS中使用yum安装即 ...
随机推荐
- 大数据Hadoop-2
大数据Hadoop学习之搭建Hadoop平台(2.1) 关于大数据,一看就懂,一懂就懵. 大数据的发展也有些年头了,如今正走在风口浪尖上,作为小白,我也来凑一份热闹. 大数据经过多年的发展,有着不同的 ...
- 闲话JavaScript与Cookies
使用 Cookies 我们已经知道,在 document 对象中有一个 cookie 属性.但是 Cookie 又是什么?"某些 Web 站点在您的硬盘上用很小的文本文件存储了一些信息,这些 ...
- Codeforces Round #525 (Div. 2)B. Ehab and subtraction
B. Ehab and subtraction 题目链接:https://codeforc.es/contest/1088/problem/B 题意: 给出n个数,给出k次操作,然后每次操作把所有数减 ...
- 获取系统内RAR安装路径
RegistryKey the_Reg = Registry.LocalMachine.OpenSubKey(@"SOFTWARE\Microsoft\Windows\CurrentVers ...
- background-color和background-image问题
今天撸码的时候发现需要background-color和background-image 一起用,才开始考虑两个可不可以一起用 查阅多方资料才知道可以写成background:color url() ...
- 汕头市队赛 C SRM 05 - YYL 杯 R1 T3!
C SRM 05 - YYL 杯 R1 背景 tjmak 描述 给一个大小为n的序列V.序列里的元素有正有负.问至少要删除多少个元素使得序列里不存在区间(要求非空)和 >= S.如果答案大于m, ...
- 【洛谷 P1631】 序列合并 (堆)
题目链接 直接暴力搞是\(n\)方的复杂度.\(n^2\)个数选\(n\)个最小的,容易想到堆. 我们堆里记录两个信息:到\(A\)数组哪个位置了,到\(B\)数组哪个位置了, 我直接把这两个信息存在 ...
- 亮相SIGGRAPH 太极拳三维教学App制作揭秘
http://news.hxsd.com/CG-animation/201208/663303.html 编者按:<My Tai Chi>是一系列基于移动平台的三维互动产品,由北京七星汇工 ...
- python基础===正则表达式,常用函数re.split和re.sub
sub的用法: >>> rs = r'c..t' >>> re.sub(rs,'python','scvt dsss cvrt pocdst') 'scvt dss ...
- 连接Linux服务器:Win免费SSH客户端工具
连接Linux服务器:Win免费SSH客户端工具 http://blog.csdn.net/jiangdou88/article/details/51585555