mybatis3 step by step 快速上手
作者:Panda Fang
出处:http://www.cnblogs.com/lonkiss/p/6895617.html
原创文章,转载请注明作者和出处,未经允许不可用于商业营利活动
官方网站 http://www.mybatis.org/mybatis-3/zh/index.html , 汉化做的不错
首先安装 mysql ,不详述,前面写过
创建一个数据库, 命名为 mybatis
CREATE DATABASE IF NOT EXISTS `mybatis` DEFAULT CHARACTER SET utf8;
创建一个学生表
CREATE TABLE IF NOT EXISTS `t_student` (

  `id` int(11) NOT NULL AUTO_INCREMENT,

  `name` varchar(20) NOT NULL,

  `age` int(11) DEFAULT NULL,

  PRIMARY KEY (`id`)

) ENGINE=InnoDB DEFAULT CHARSET=utf8;
插入一条记录
INSERT INTO `t_student` (`id`, `name`, `age`) VALUES(1, '张三', 10);
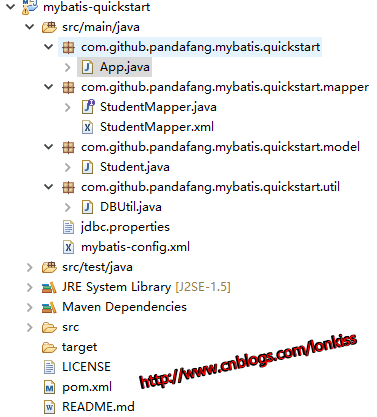
eclipse 中创建 maven project , archetype 选择 quickstart
最终结构预览
pom 中加入 依赖
<dependency>

    <groupId>org.mybatis</groupId>

    <artifactId>mybatis</artifactId>

    <version>3.2.8</version>

</dependency>
再加上 mysql jdbc 依赖
<dependency>

    <groupId>mysql</groupId>

    <artifactId>mysql-connector-java</artifactId>

    <version>5.1.42</version>

</dependency>
在src/main/java 目录中创建两个文件, jdbc.properties 和 mybatis-config.xml
jdbc.properties 内容
jdbc.driver=com.mysql.jdbc.Driver

jdbc.url=jdbc:mysql://localhost:3306/mybatis

jdbc.username=root

jdbc.password=123456
mybatis-config.xml 文件内容
<?xml version="1.0" encoding="UTF-8" ?>

<!DOCTYPE configuration

  PUBLIC "-//mybatis.org//DTD Config 3.0//EN"

  "http://mybatis.org/dtd/mybatis-3-config.dtd">

<configuration>

  <properties resource="jdbc.properties" />

  <environments default="development">

    <environment id="development">

      <transactionManager type="JDBC"/>

      <dataSource type="POOLED">

        <property name="driver" value="${jdbc.driver}"/>

        <property name="url" value="${jdbc.url}"/>

        <property name="username" value="${jdbc.username}"/>

        <property name="password" value="${jdbc.password}"/>

      </dataSource>

    </environment>

  </environments>

</configuration>
mybatis-config.xml 内容这么长, 哪里来, 可以直接复制官方文件 入门教程 中模板。 但是要稍作修改,比如指定 properties文件 通过 <properties resource="jdbc.properties" /> 放在 environments 内容之前
下面的value 名称引用的变量名也要改成 jdbc.properties 文件中的 key 名称, 又或者 jdbc.properties 中的key名称与官方教程中的名称一致则可以不用改
建一个util子包, 建一个DBUtil类
package com.github.pandafang.mybatis.quickstart.util;

import java.io.IOException;

import java.io.InputStream;

import org.apache.ibatis.io.Resources;

import org.apache.ibatis.session.SqlSession;

import org.apache.ibatis.session.SqlSessionFactory;

import org.apache.ibatis.session.SqlSessionFactoryBuilder;

public class DBUtil {

    private static SqlSessionFactory sqlSessionFactory;

    public static SqlSessionFactory getSqlSessionFactory()  {

        if (sqlSessionFactory == null ) {

            String resource = "mybatis-config.xml";

            InputStream inputStream = null;

            try {

                inputStream = Resources.getResourceAsStream(resource);

                sqlSessionFactory = new SqlSessionFactoryBuilder().build(inputStream);

            } catch (IOException e) {

                throw new RuntimeException(e.getMessage(), e);

            }

        }

        return sqlSessionFactory;

    }

    public static SqlSession openSqlSession() {

        return getSqlSessionFactory().openSession();

    }

}
注意 String resource = "mybatis-config.xml"; 如果mybatis-config.xml文件不是在 源代码的根目录下,而是在某个包下,则要写成 "org/mybatis/example/mybatis-config.xml" 这种形式。所谓源代码根目录,如果是个常见结构的项目,就是指在src目录下, 如果是maven约定结构的,就是在 src/main/java目录下 。
SqlSessionFactory和SqlSession是mybatis中操作数据库 的核心。
建一个model子包, 建一个 Student 类
package com.github.pandafang.mybatis.quickstart.model;

public class Student {

    private Integer id;

    private Integer age;

    private String name;

    public Student(String name, Integer age) {

        this.name = name;

        this.age = age;

    }

    public Integer getId() {

        return id;

    }

    public void setId(Integer id) {

        this.id = id;

    }

    public Integer getAge() {

        return age;

    }

    public void setAge(Integer age) {

        this.age = age;

    }

    public String getName() {

        return name;

    }

    public void setName(String name) {

        this.name = name;

    }

}
代码写好之后,在 mybatis-config.xml 中 增加 typeAlias , 注意位置 要在 properties之后 environments 之前
<configuration>

  <properties resource="jdbc.properties" />

    <typeAliases>

      <typeAlias alias="Student" type="com.github.pandafang.mybatis.quickstart.model.Student"/>

    </typeAliases>

  <environments default="development">

…………………………

其它内容

…………………………

</configuration>
建一个mapper子包, 建一个StudentMapper interface
package com.github.pandafang.mybatis.quickstart.mapper;

import com.github.pandafang.mybatis.quickstart.model.Student;

public interface StudentMapper {

    public int add(Student student);

}
再在同位置建一个StudentMapper.xml
<?xml version="1.0" encoding="UTF-8" ?>

<!DOCTYPE mapper

  PUBLIC "-//mybatis.org//DTD Mapper 3.0//EN"

  "http://mybatis.org/dtd/mybatis-3-mapper.dtd">

<mapper namespace="com.github.pandafang.mybatis.quickstart.mapper.StudentMapper">

  <insert id="add" parameterType="Student">

    INSERT INTO t_student(name, age) VALUES(#{name}, #{age})

  </insert>

</mapper>
namespace 就是 mapper的含包名的完整限定名, <insert> 就是插入操作,其他还有 select update delete 等等(官方文档:mybatis – MyBatis 3 | Mapper XML 文件), id 就是StudentMapp中定义的方法名, parameterType 就是这个方法的参数类型,此处Student, 就是mybatis-config.xml 中的 typeAlias 定义的alias, 如果没有定义 typeAlias ,这个parameterType 后面也要使用Student的含包名的完整限定名。mybatis是半自动的orm框架, 这里还是要写SQL , #{name} 这种形式就是取 Student类中的属性
准备工作做完, 开始真正通过mybatis操作数据库了。
maven project自带了一个App 类, 如果没有可以自己建一个,在main方法里面执行数据库增加记录的操作 ,代码如下
package com.github.pandafang.mybatis.quickstart;

import org.apache.ibatis.session.SqlSession;

import com.github.pandafang.mybatis.quickstart.mapper.StudentMapper;

import com.github.pandafang.mybatis.quickstart.model.Student;

import com.github.pandafang.mybatis.quickstart.util.DBUtil;

public class App

{

    public static void main( String[] args )

    {

        SqlSession ss = DBUtil.openSqlSession();

        try {

            Student student = new Student("李四", 22);

            StudentMapper studentMapper = ss.getMapper(StudentMapper.class);

            int result = studentMapper.add(student);

            ss.commit();

            if (result > 0) {

                System.out.println("增加成功, result:" + result);

            }

            else {

                System.out.println("增加失败");

            }

        }

        finally {

            ss.close();

        }

    }

}
所以步骤就是
- 通过 SqlSessionFactory 打开 SqlSession
- 通过 SqlSession 获得 Mapper
- 通过 Mapper 操作数据库
- SqlSession commit
- SqlSession close
至此 一个完整可运行的demo完成
代码在线阅读: https://coding.net/u/pandafang/p/mybatis-quickstart/git/tree/v1.0
前面已经做了 增,继续完成改、查、删。
修改 StudentMapper.xml, 内容变成下面这样
<?xml version="1.0" encoding="UTF-8" ?>

<!DOCTYPE mapper

  PUBLIC "-//mybatis.org//DTD Mapper 3.0//EN"

  "http://mybatis.org/dtd/mybatis-3-mapper.dtd">

<mapper namespace="com.github.pandafang.mybatis.quickstart.mapper.StudentMapper">

<resultMap type="Student" id="StudentResult">

    <id property="id" column="id"/>

    <result property="name" column="name"/>

    <result property="age" column="age"/>

</resultMap>

  <insert id="add" parameterType="Student">

    INSERT INTO t_student(name, age) VALUES(#{name}, #{age})

  </insert>

  <update id="update" parameterType="Student">

      UPDATE t_student SET name=#{name}, age=#{age} WHERE id=#{id}

  </update>

  <select id="findById" parameterType="Integer" resultType="Student">

      SELECT * FROM t_student WHERE id=#{id}

  </select>

  <select id="findAll" resultMap="StudentResult">

      SELECT * FROM t_student

  </select>

  <delete id="delete" parameterType="Integer">

      DELETE FROM t_student WHERE id=#{id}

  </delete>

</mapper>
修改 App.java 文件 内容变成下面这样
package com.github.pandafang.mybatis.quickstart;

import java.util.List;

import org.apache.ibatis.session.SqlSession;

import com.github.pandafang.mybatis.quickstart.mapper.StudentMapper;

import com.github.pandafang.mybatis.quickstart.model.Student;

import com.github.pandafang.mybatis.quickstart.util.DBUtil;

public class App

{

    public static void main( String[] args )

    {

        SqlSession ss = DBUtil.openSqlSession();

        try {

            Student student = new Student("李四", 22);

            StudentMapper studentMapper = ss.getMapper(StudentMapper.class);

            int result = studentMapper.add(student);

            ss.commit();

            if (result > 0) {

                System.out.println("增加成功, result:" + result);

            }

            else {

                System.out.println("增加失败");

            }

            Student student2 = new Student("王五", 23);

            student2.setId(2);

            studentMapper.update(student2);

            ss.commit();

            Student student3 = studentMapper.findById(2);

            if (student3 != null) {

                System.out.println("查到 student id=" + student3.getId() + " name=" + student3.getName() + " age=" + student3.getAge());

            }

            else {

                System.out.println("没有查到id 为2的 student");

            }

            System.out.println("------ 查询所有的Student -------");

            List<Student> students = studentMapper.findAll();

            for (Student stu : students) {

                System.out.println("查到 student id=" + stu.getId() + " name=" + stu.getName() + " age=" + stu.getAge());

            }

            studentMapper.delete(student3);

            ss.commit();

        }

        finally {

            ss.close();

        }

    }

}
运行App ,然而在执行 findById时 报错:
Error instantiating class …… with invalid types () or values (). Cause: java.lang.NoSuchMethodException:……<init>()
遇到这个错误,是因为前面写有参构造函数, 无参构造函数没了, 要为 Student 类显示写出无参数构造函数。
再次运行 App 就ok了。
至此,使用mybatis + mysql 增删改查就实现了。
代码在线阅读:https://coding.net/u/pandafang/p/mybatis-quickstart/git/tree/v1.1
延伸
之前add返回的整数是插入的行数, 并不是id , 那插入后如何获取自增的 id 呢,
修改 StudentMapper.xml , 在insert 上加入 useGeneratedKeys="true" keyProperty="id"
  <insert id="add" parameterType="Student" useGeneratedKeys="true" keyProperty="id">

    INSERT INTO t_student(name, age) VALUES(#{name}, #{age})

  </insert>
加了上面两个属性后, 插入后 数据库自增的主键id 会自动填充到作为参数的对象中
然后代码就是下面这样
Student student = new Student("李四", 22);

StudentMapper studentMapper = ss.getMapper(StudentMapper.class);

int result = studentMapper.add(student);

ss.commit();

Integer id = student.getId();

if (id != null) {

    System.out.println("插入成功 id=" + id);

}
参考资料 : http://www.cnblogs.com/fsjohnhuang/p/4078659.html
至此版本的代码在线阅读: https://coding.net/u/pandafang/p/mybatis-quickstart/git/tree/v1.2
历史版本代码下载:https://coding.net/u/pandafang/p/mybatis-quickstart/git/tags
这篇文章的测试代码都卸载main 方法中,为了不引入过多的外部知识提高难度。 实际开发应该用junit
mybatis3 step by step 快速上手的更多相关文章
- smarty 快速上手
smarty半小时快速上手入门教程 投稿:shichen2014 字体:[增加 减小] 类型:转载 时间:2014-10-27我要评论 这篇文章主要介绍了smarty半小时快速上手入门教程,以实例的形 ...
- WPF Step By Step 系列 - 开篇 ·
WPF Step By Step 系列 - 开篇 公司最近要去我去整理出一个完整的WPF培训的教程,我刚好将自己学习WPF的过程和经验总结整理成笔记的方式来讲述,这里就不按照书上面的东西来说了,书本上 ...
- smarty半小时快速上手入门教程
http://www.jb51.net/article/56754.htm http://www.yiibai.com/smarty/smarty_functions.html http://www. ...
- 『转载』Debussy快速上手(Verdi相似)
『转载』Debussy快速上手(Verdi相似) Debussy 是NOVAS Software, Inc(思源科技)发展的HDL Debug & Analysis tool,这套软体主要不是 ...
- Pandas快速上手(一):基本操作
本文包含一些 Pandas 的基本操作,旨在快速上手 Pandas 的基本操作. 读者最好有 NumPy 的基础,如果你还不熟悉 NumPy,建议您阅读NumPy基本操作快速熟悉. Pandas 数据 ...
- 三分钟快速上手TensorFlow 2.0 (中)——常用模块和模型的部署
本文学习笔记参照来源:https://tf.wiki/zh/basic/basic.html 前文:三分钟快速上手TensorFlow 2.0 (上)——前置基础.模型建立与可视化 tf.train. ...
- 三分钟快速上手TensorFlow 2.0 (上)——前置基础、模型建立与可视化
本文学习笔记参照来源:https://tf.wiki/zh/basic/basic.html 学习笔记类似提纲,具体细节参照上文链接 一些前置的基础 随机数 tf.random uniform(sha ...
- Github Action 快速上手指南
前言 各位读者,新年快乐,我是过了年匆忙赶回上海努力搬砖的蛮三刀. Github之前更新了一个Action功能(应该是很久以前了),可以实现很多自动化操作.用来替代用户自己设置的自动化脚本(比如:钩子 ...
- Linkerd 2.10(Step by Step)—2. 自动化的金丝雀发布
通过结合 Linkerd 和 Flagger 来根据服务指标自动金丝雀(canary)发布,从而降低部署风险. Linkerd 2.10 中文手册持续修正更新中: https://linkerd.ha ...
- Linkerd 2.10(Step by Step)—4. 如何配置外部 Prometheus 实例
Linkerd 2.10 系列 快速上手 Linkerd v2 Service Mesh(服务网格) 腾讯云 K8S 集群实战 Service Mesh-Linkerd2 & Traefik2 ...
随机推荐
- AndroidManifest.xml警告
新建一个android项目后,AndroidManifest.xml有一个黄色警告 作为一个新手,不知道这个警告来自哪里,点击界面下方的不同标签,才知道来自图中的位置 第8行中,application ...
- mysql ibdata 单独存储
简介ibdata1 ibdata1文件是InnoDB存储引擎的共享表空间文件,存放位置my.ini 中的 datadir="D:\phpStudy\MySQL\data",目录下. ...
- 蓝桥-青蛙跳杯子(bfs)
问题描述 X星球的流行宠物是青蛙,一般有两种颜色:白色和黑色. X星球的居民喜欢把它们放在一排茶杯里,这样可以观察它们跳来跳去. 如下图,有一排杯子,左边的一个是空着的,右边的杯子,每个里边有一只青蛙 ...
- Oracle Pipelined Table Functions简介
转自: http://www.linuxidc.com/Linux/2011-05/35797.htm //概况 //基本上,当你希望一个PLSQL(或者java或者c)程序作为数据源,而不是表, ...
- docker 创建容器时遇到的坑
坑一.时区问题 在创建系统镜像时,比如centos,会默认最小安装,并且时区默认的是UTC 所以在下好centos的原始镜像后,最好再重新构建一个新的镜像 # 命令 docker pull cento ...
- 4.整体架构和Smart Scan
寻道时间: 外圈,比内圈要多, 即外圈是比较快的. 第一次创建grid disk 时,是创建外圈,用于存放数据的,内圈存储归档这些数据 CellCLI> CREATE GRIDDISK ALL ...
- pyspark SparkSession及dataframe基本操作
from pyspark import SparkContext, SparkConf import os from pyspark.sql.session import SparkSession f ...
- GreenPlum 大数据平台--备份-邮件配置-gpcrondump & gpdbrestore(五)
01,备份 生成备份数据库 [gpadmin@greenplum01 ~]$ gpcrondump -l /gpbackup/back2/gpcorndump.log -x postgres -v [ ...
- 小程序 给最外层view设置百分之百高度不起作用
<view class="content"> <view class="today"> <view class="inf ...
- Angular4+NodeJs+MySQL 入门-05 接口调用
接口调用 今天讲一下,如果在前端页面上通过调用后台接口,返回来的数据.把前面的几章结合起来. 这里所有用的代码在 https://github.com/xiaotuni/angular-map-htt ...