Vue 实现 登陆后打开主页面(登陆组件 + 主页面组件)
本次演示,项目所需
iview,router
首先
在 views 目录 新建 两个 组件 ( login.vue ,index.vue )
login.vue
<template>

    <div class="wrap" id="wrap">

        <div class="logGet">

            <!-- 头部提示信息 -->

            <div class="logD logDtip">

                <p class="p1">登录</p>

            </div>

            <!-- 输入框 -->

            <div class="lgD">

                <img src="assets/logo.png" width="20" height="20" alt="" />

                <input type="text" placeholder="输入用户名" />

            </div>

            <div class="lgD">

                <img src="img/logPwd.png" width="20" height="20" alt="" />

                <input type="text" placeholder="输入用户密码" />

            </div>

            <div class="logC">

                <a><button @click="login">登 录</button></a>

            </div>

        </div>

    </div>

</template>

<script>

    export default {

        methods: {

            login() {
          // 假设登陆成功,则跳转到 index 组件

                this.$router.replace('/index');

            }

        }

    }

</script>

<style>

    body {

        background-image: url(../assets/timg2.jpg);

        background-size: 100%;

        background-repeat: no-repeat;

        background-position: center center;

    }

    * {

        margin: 0;

        padding: 0;

    }

    #wrap {

        height: 600px;

        width: 100%;

        background-position: center center;

        position: relative;

    }

    #head {

        height: 120px;

        width: 100;

        background-color: #66CCCC;

        text-align: center;

        position: relative;

    }

    #wrap .logGet {

        height: 408px;

        width: 368px;

        position: absolute;

        background-color: #FFFFFF;

        top: 100px;

        right: 15%;

    }

    .logC a button {

        width: 100%;

        height: 45px;

        background-color: #ee7700;

        border: none;

        color: white;

        font-size: 18px;

    }

    .logGet .logD.logDtip .p1 {

        display: inline-block;

        font-size: 28px;

        margin-top: 30px;

        width: 86%;

    }

    #wrap .logGet .logD.logDtip {

        width: 86%;

        border-bottom: 1px solid #ee7700;

        margin-bottom: 60px;

        margin-top: 0px;

        margin-right: auto;

        margin-left: auto;

    }

    .logGet .lgD img {

        position: absolute;

        top: 12px;

        left: 8px;

    }

    .logGet .lgD input {

        width: 100%;

        height: 42px;

        text-indent: 2.5rem;

    }

    #wrap .logGet .lgD {

        width: 86%;

        position: relative;

        margin-bottom: 30px;

        margin-top: 30px;

        margin-right: auto;

        margin-left: auto;

    }

    #wrap .logGet .logC {

        width: 86%;

        margin-top: 0px;

        margin-right: auto;

        margin-bottom: 0px;

        margin-left: auto;

    }

    .title {

        font-family: "宋体";

        color: #FFFFFF;

        position: absolute;

        top: 50%;

        left: 50%;

        transform: translate(-50%, -50%);

        /* 使用css3的transform来实现 */

        font-size: 36px;

        height: 40px;

        width: 30%;

    }

    .copyright {

        font-family: "宋体";

        color: #FFFFFF;

        position: absolute;

        top: 50%;

        left: 50%;

        transform: translate(-50%, -50%);

        /* 使用css3的transform来实现 */

        height: 60px;

        width: 40%;

        text-align: center;

    }

</style>
index.vue
<style scoped>

    .layout{

    border: 1px solid #d7dde4;

    background: #f5f7f9;

    position: relative;

    border-radius: 4px;

    overflow: hidden;

}

.layout-logo{

    width: 100px;

    height: 30px;

    background: #5b6270;

    border-radius: 3px;

    float: left;

    position: relative;

    top: 15px;

    left: 20px;

}

.layout-nav{

    width: 420px;

    margin: 0 auto;

    margin-right: 20px;

}

</style>

<template>

    <div class="layout">

        <Layout>

            <Header>

                <Menu mode="horizontal" theme="dark" active-name="1">

                    <div class="layout-logo"></div>

                    <div class="layout-nav">

                        <MenuItem name="1">

                        <Icon type="ios-navigate"></Icon>

                        Item 1

                        </MenuItem>

                        <MenuItem name="2">

                        <Icon type="ios-keypad"></Icon>

                        Item 2

                        </MenuItem>

                        <MenuItem name="3">

                        <Icon type="ios-analytics"></Icon>

                        Item 3

                        </MenuItem>

                        <MenuItem name="4">

                        <Icon type="ios-paper"></Icon>

                        Item 4

                        </MenuItem>

                    </div>

                </Menu>

            </Header>

            <Layout>

                <Sider hide-trigger :style="{background: '#fff'}">

                    <Menu active-name="1-2" theme="light" width="auto" :open-names="['1']">

                        <Submenu name="1">

                            <template slot="title">

                                <Icon type="ios-navigate"></Icon>

                                Item 1

                            </template>

                            <router-link to="/one">

                                <MenuItem name="1-1">Option 1</MenuItem>

                            </router-link>

                            <router-link to="/two">

                                <MenuItem name="1-2">Option 2</MenuItem>

                            </router-link>

                            <MenuItem name="1-3">Option 3</MenuItem>

                        </Submenu>

                        <Submenu name="2">

                            <template slot="title">

                                <Icon type="ios-keypad"></Icon>

                                Item 2

                            </template>

                            <MenuItem name="2-1">Option 1</MenuItem>

                            <MenuItem name="2-2">Option 2</MenuItem>

                        </Submenu>

                        <Submenu name="3">

                            <template slot="title">

                                <Icon type="ios-analytics"></Icon>

                                Item 3

                            </template>

                            <MenuItem name="3-1">Option 1</MenuItem>

                            <MenuItem name="3-2">Option 2</MenuItem>

                        </Submenu>

                    </Menu>

                </Sider>

                <Layout :style="{padding: '0 24px 24px'}">

                    <Breadcrumb :style="{margin: '24px 0'}">

                        <BreadcrumbItem>Home</BreadcrumbItem>

                        <BreadcrumbItem>Components</BreadcrumbItem>

                        <BreadcrumbItem>Layout</BreadcrumbItem>

                    </Breadcrumb>

                    <Content :style="{padding: '24px', minHeight: '480px', background: '#fff'}">

                        <!-- 渲染组件 -->

                        <router-view></router-view>

                    </Content>

                </Layout>

            </Layout>

        </Layout>

    </div>

</template>

<script>

    export default {

    }

</script>
index.vue 要渲染两个组件( 子组件,模拟 )
在 components 目录 中 新建两个 vue 文件
one.vue
<template>

    <div>

        index 页面 里 的 第一个 组件

    </div>

</template>

<script>

    export default {

        data() {

            return {

            };

        }

    }

</script>

<style>

</style>
two.vue
<template>

    <div>

        index 页面 里 的 第二个 组件

    </div>

</template>

<script>

    export default {

        data() {

            return {

            };

        }

    }

</script>

<style>

</style>
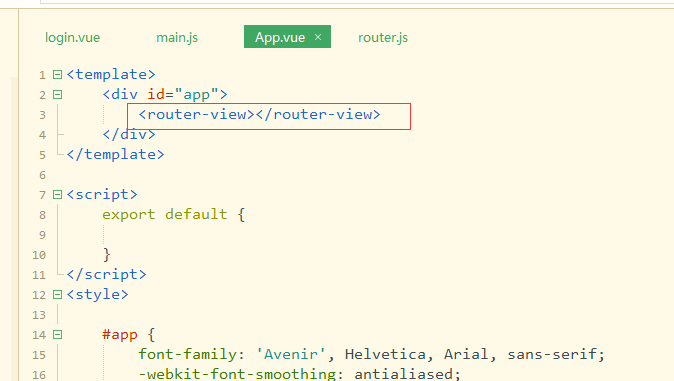
App.vue 文件中修改
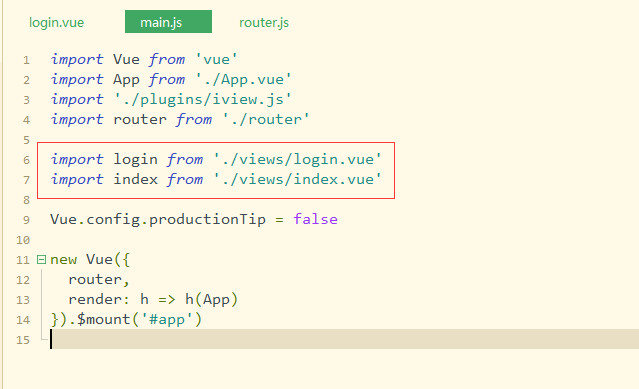
直接下来,在main.js 中 导入login 和 index 两个模块
在 router.js 文件 中 注册 组件
import Vue from 'vue'

import Router from 'vue-router'

Vue.use(Router)

export default new Router({

  routes: [//一级路由

    {

      path: '/',

      name: 'login',

      component: () => import('./views/login.vue')

    },

        {

            path:'/index',

            name:'index',

            component: () => import('./views/index.vue'),

            children:[//二级路由

                {

                    path:'/one',

                    name:'one',

                    component:() => import('./components/one.vue')

                },

                {

                    path:'/two',

                    name:'two',

                    component:() => import('./components/two.vue')

                }

            ]

        }

  ]

})
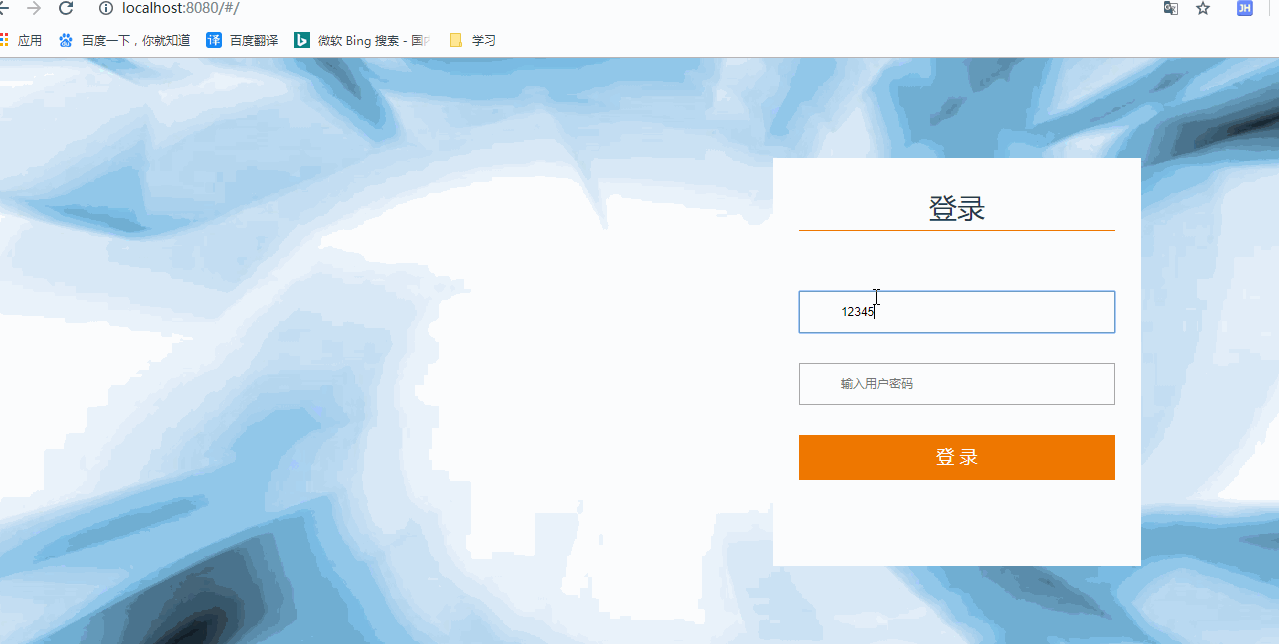
根目录下,访问直接是 显示 login.vue 组件
效果:
示例源码:
Vue 实现 登陆后打开主页面(登陆组件 + 主页面组件)的更多相关文章
- 本博文将一步步带领你实现抽屉官网的各种功能:包括登陆、注册、发送邮箱验证码、登陆验证码、页面登陆验证、发布文章、上传图片、form验证、点赞、评论、文章分页处理以及基于tronado的后端和ajax的前端数据处理。
本博文将一步步带领你实现抽屉官网的各种功能:包括登陆.注册.发送邮箱验证码.登陆验证码.页面登陆验证.发布文章.上传图片.form验证.点赞.评论.文章分页处理以及基于tronado的后端和ajax的 ...
- tornado web高级开发项目之抽屉官网的页面登陆验证、form验证、点赞、评论、文章分页处理、发送邮箱验证码、登陆验证码、注册、发布文章、上传图片
本博文将一步步带领你实现抽屉官网的各种功能:包括登陆.注册.发送邮箱验证码.登陆验证码.页面登陆验证.发布文章.上传图片.form验证.点赞.评论.文章分页处理以及基于tornado的后端和ajax的 ...
- 2016/3/24 ①数据库与php连接 三种输出fetch_row()、fetch_all()、fetch_assoc() ②增删改时判断(布尔型) ③表与表之间的联动 ④下拉菜单 ⑤登陆 三个页面
①数据库与php连接 图表 header("content-type:text/html;charset=utf-8"); //第一种方式: //1,生成连接,连接到数据库上的 ...
- vue定时器+弹框 跳到登陆页面
1.做一个请求拦截,并弹框提示几秒后,跳转到登陆首页或是点击确定之后直接跳转拦截用了this.$axios.interceptors.response页面上的弹框组件用了vux的组件vux地址:htt ...
- Vue、Vuex+Cookie 实现自动登陆 。
概述 1.自动登陆实现思路. 2.vuex + cookie 多标签页状态保持. 自动登陆的需求: 1.登陆时勾选自动登陆,退出登陆或登陆到期后再次登陆后自动填写表单(记住密码)或访问登陆页自动登陆. ...
- Centos系统创建用户oracle后,用该用户登陆系统,页面加载报错GConf error
Linux 的 GConf error 解决办法 问题: Centos系统创建用户oracle后,用该用户登陆系统,页面加载报错,导致重新进入Centos系统后出现: GConf error:Fail ...
- 登陆weblogic后页面控制台卡主
输入http://localhost:7001/console进入控制页面,能登陆进去,但是登陆进去后页面就马上卡死,可以看到页面头部,其余都显示不出来. 重启后启动访问,能够正常进入,关闭weblo ...
- 利用websocket实现手机扫码登陆后,同步登陆信息到web端页面
新手必看 广播系统 事件系统 准备工作 初始化项目 引入 laravel-websockets 软件包 启动 websocket 监听 主要流程 创建两个页面 建立 socket 连接 手机端扫码登陆 ...
- vue父组件获取子组件页面的数组 以城市三级联动为例
父组件调用子组件 <Cselect ref="registerAddress"></Cselect> import Cselect from '../../ ...
随机推荐
- Oracle导入/导出某个用户下的数据库
导出 exp用户名/密码@数据库实例owner=用户名file=文件存储路径 例如:exp MM/123456@ORCL owner=MM file=F\abcd.dmp 导入 imp用户名/密码@数 ...
- js 中的 number 为何很怪异
js 中的 number 为何很怪异 声明:需要读者对二进制有一定的了解 对于 JavaScript 开发者来说,或多或少都遇到过 js 在处理数字上的奇怪现象,比如: > 0.1 + 0.2 ...
- Docker——网络和存储(数据卷)
iptables -t nat -vnL |grep docker 查看docker桥接网卡:brctl show 本地端口随机映射到docker容器的80端口上: docker run -d -P ...
- Codeforces 1237B. Balanced Tunnel
传送门 这一题有点意思 首先预处理出 $pos[x]$ 表示编号 $x$ 的车是第几个出隧道的 然后按进入隧道的顺序枚举每辆车 $x$ 考虑有哪些车比 $x$ 晚进入隧道却比 $x$ 早出隧道 显然是 ...
- Struts2 流程原理
一.流程图 (转) 二.流程详解 1.服务器传递来的请求,通过ActionContextClearUp.other filters.最后到达StrutsPrepareAndExecuteFilter ...
- ASP.NET Core MVC里面Razor如何获取URL参数
原文:ASP.NET Core MVC里面Razor如何获取URL参数 版权声明:本文为博主原创文章,遵循CC 4.0 BY-SA版权协议,转载请附上原文出处链接和本声明. 本文链接:https:// ...
- Eclipse 快捷键、文档注释、多行注释的快捷键
关于快捷键 Eclipse 的很多操作都提供了快捷键功能,我们可以通过键盘就能很好的控制 Eclipse 各个功能: 一.多行注释快捷键 1.选中你要加注释的区域,用ctrl+shift+C 或者ct ...
- R语言学习笔记:读取前n行数据
常规读取 一般我们读取文件时都会读取全部的文件然后再进行操作,因为R是基于内存进行计算的. data <- read.table("C:\\Users\\Hider\\Desktop\ ...
- OSCP-Kioptrix2014-2 漏洞利用
pChart 2.1.3 文件包含漏洞 搜索漏洞 查看漏洞理由代码: hxxp://localhost/examples/index.php?Action=View&Script=%2f..% ...
- 4.Struts2-OGNL
/*ognl 是 strut2 特有的表达式,使用 ognl,struts2 就无需将对象手动放值进request等范围,页面(从值栈中)直接传值*/ OGNL <?xml version=&q ...