
Nginx在线服务状态下平滑升级或新增模块
nginx在使用过程中,有时需要在不影响当前业务的情况下,进行升级或新增模块。nginx的升级有两种方法:1.半自动化升级;2.手动升级
不过都需要先查看安装的nginx版本和配置信息,然后前往官网下载所需的版本,并上传
[root@youxi1 ~]# nginx -V

nginx version: nginx/1.14.1

built by gcc 4.8.5 20150623 (Red Hat 4.8.5-36) (GCC)

configure arguments: --prefix=/usr/local/nginx --with-http_dav_module --with-http_stub_status_module --with-http_addition_module --with-http_sub_module

 --with-http_flv_module --with-http_mp4_module --with-pcre=/usr/local/src/pcre-8.41 --user=nginx --group=nginx
下载地址:http://nginx.org/en/download.html
一、半自动化升级
半自动化升级,其实就是在最后迁移的时候不使用make install,而使用源码自带的升级命令make upgrade来自动完成。
(1).解压文件,并编译(只编译不安装)
只编译不安装。./configure后面的参数可以保持一致,也可以改动;另外我这里指定了--with-pcre,需要保证后面的参数存在。
[root@youxi1 ~]# tar zxf nginx-1.16.0.tar.gz -C /usr/local/src/

[root@youxi1 ~]# cd /usr/local/src/nginx-1.16.0/

[root@youxi1 nginx-1.16.0]# ./configure --prefix=/usr/local/nginx --with-http_dav_module --with-http_stub_status_module --with-http_addition_module --with-http_sub_module --with-http_flv_module --with-http_mp4_module --with-pcre=/usr/local/src/pcre-8.41 --user=nginx --group=nginx

[root@youxi1 nginx-1.16.0]# make -j 4  //这里指定的是CPU内核数量,加快编译速度

[root@youxi1 nginx-1.16.0]# echo $?

0
(2).备份旧的二进制文件,复制新的二进制文件到nginx目录
[root@youxi1 nginx-1.16.0]# mv /usr/local/nginx/sbin/nginx{,.old}  //备份

[root@youxi1 nginx-1.16.0]# cp objs/nginx /usr/local/nginx/sbin/  //复制
(3).执行升级语句
[root@youxi1 nginx-1.16.0]# make upgrade

/usr/local/nginx/sbin/nginx -t  //查看配置文件是否正确,这里使用的是刚复制过来的nginx二进制文件

nginx: the configuration file /usr/local/nginx/conf/nginx.conf syntax is ok

nginx: configuration file /usr/local/nginx/conf/nginx.conf test is successful

kill -USR2 `cat /usr/local/nginx/logs/nginx.pid`  //发送平滑迁移信号给旧的nginx进程

sleep 1  //等待1秒

test -f /usr/local/nginx/logs/nginx.pid.oldbin  //检测旧的nginx.pid进程是否变为nginx.pid.oldbin

kill -QUIT `cat /usr/local/nginx/logs/nginx.pid.oldbin`  //结束工作进程,完成此次升级
test -f [文件]如果为一个普通文件,则为真。这里用来判断文件是否存在。
手动升级其实就是使用打印出来的这些语句,加上kill –WINCH `cat /usr/local/nginx/log/nginx.pid.oldbin`(从容关闭nginx.pid.oldbin)和kill –HUP `cat /url/local/nginx/log/nginx.pid.oldbin`(不重启旧的nginx进程)。
(4).检测是否升级成功
首先看看是否正在运行
[root@youxi1 nginx-1.16.0]# ps aux | grep nginx  //查看是否正常运行,如果之前就能使用systemctl,也可以使用systemctl查看

nginx      1338  0.0  0.1 216972  6244 ?        S    13:08   0:00 php-fpm: pool www

nginx      1340  0.0  0.1 216972  6244 ?        S    13:08   0:00 php-fpm: pool www

root       7556  0.0  0.0  18252  1728 ?        S    17:05   0:00 nginx: master process /usr/local/nginx/sbin/nginx

nginx      7557  0.0  0.0  18624  1360 ?        S    17:05   0:00 nginx: worker process

root       7563  0.0  0.0 112724   988 pts/0    S+   17:06   0:00 grep --color=auto nginx
接着看看配置文件是否有错,还有nginx的版本和配置选项信息。我能直接使用nginx是因为配置了环境变量。
[root@youxi1 nginx-1.16.0]# nginx -t  //查看配置文件是否有错

nginx: the configuration file /usr/local/nginx/conf/nginx.conf syntax is ok

nginx: configuration file /usr/local/nginx/conf/nginx.conf test is successful

[root@youxi1 nginx-1.16.0]# nginx -V  //查看版本和配置选项信息

nginx version: nginx/1.16.0

built by gcc 4.8.5 20150623 (Red Hat 4.8.5-36) (GCC)

configure arguments: --prefix=/usr/local/nginx --with-http_dav_module --with-http_stub_status_module --with-http_addition_module --with-http_sub_module --with-http_flv_module --with-http_mp4_module --with-pcre=/usr/local/src/pcre-8.41 --user=nginx --group=nginx
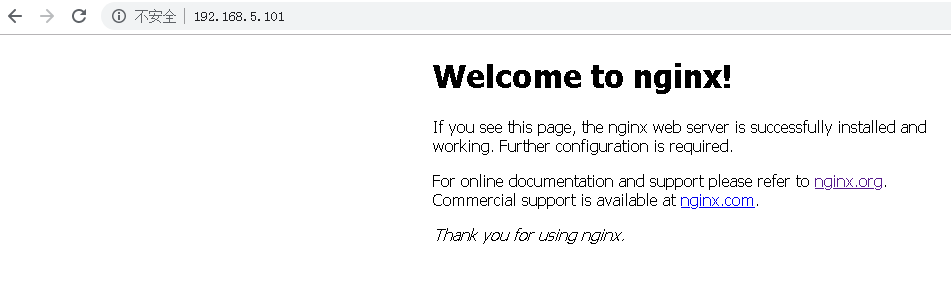
最后使用Windows查看
二、手动升级
手动升级和半自动化升级大同小异,只是在执行升级语句时,手动输入打印的命令
(1).解压文件并编译
只编译不安装。./configure后面的参数可以保持一致,也可以改动;另外我这里指定了--with-pcre,需要保证后面的参数存在。
[root@youxi1 ~]# tar zxf nginx-1.16.0.tar.gz -C /usr/local/src/

[root@youxi1 ~]# cd /usr/local/src/nginx-1.16.0/

[root@youxi1 nginx-1.16.0]# ./configure --prefix=/usr/local/nginx --with-http_dav_module --with-http_stub_status_module --with-http_addition_module --with-http_sub_module --with-http_flv_module --with-http_mp4_module --with-pcre=/usr/local/src/pcre-8.41 --user=nginx --group=nginx

[root@youxi1 nginx-1.16.0]# make -j 4  //这里指定的是CPU内核数量,加快编译速度

[root@youxi1 nginx-1.16.0]# echo $?

0
(2).备份旧的二进制文件,复制新的二进制文件到nginx目录
[root@youxi1 nginx-1.16.0]# mv /usr/local/nginx/sbin/nginx{,.old}  //备份

[root@youxi1 nginx-1.16.0]# ls /usr/local/nginx/sbin/

nginx.old

[root@youxi1 nginx-1.16.0]# cp objs/nginx /usr/local/nginx/sbin/  //复制

[root@youxi1 nginx-1.16.0]# ls /usr/local/nginx/sbin/

nginx nginx.old
(3).执行取代make upgrade的命令
注意:这里的nginx.pid(nginx进程文件)所在地址不是固定的,需要查看nginx目录下的conf/nginx.conf配置文件
[root@youxi1 nginx-1.16.0]# /usr/local/nginx/sbin/nginx -t  //查看配置文件是否正确,这里使用的是刚复制过来的nginx二进制文件

nginx: the configuration file /usr/local/nginx/conf/nginx.conf syntax is ok

nginx: configuration file /usr/local/nginx/conf/nginx.conf test is successful

[root@youxi1 nginx-1.16.0]# kill -USR2 `cat /usr/local/nginx/logs/nginx.pid`    //发送平滑迁移信号给旧的nginx

[root@youxi1 nginx-1.16.0]# test -f /usr/local/nginx/logs/nginx.pid.oldbin  //我们判断是否平滑迁移到nginx.pid.oldbin,test -f与echo $?的组合

[root@youxi1 nginx-1.16.0]# echo $?

0

[root@youxi1 nginx-1.16.0]# ls /usr/local/nginx/logs/nginx.pid*  //判断是否平滑迁移也可以ls命令查看是否存在nginx.pid.oldbin文件

/usr/local/nginx/logs/nginx.pid /usr/local/nginx/logs/nginx.pid.oldbin

[root@youxi1 nginx-1.16.0]# kill -WINCH `cat /usr/local/nginx/logs/nginx.pid.oldbin`  //从容关闭nginx进程

[root@youxi1 nginx-1.16.0]# kill -HUP `cat /usr/local/nginx/logs/nginx.pid.oldbin`  //不重启旧的nginx进程

[root@youxi1 nginx-1.16.0]# kill -QUIT `cat /usr/local/nginx/logs/nginx.pid.oldbin`  //结束工作进程,完成此次升级
test -f [文件]和echo $?组合判断平滑迁移,与直接ls [文件]判断平滑迁移只要使用一个就可以了。
(4).检测是否升级成功
首先看看是否正在运行
[root@youxi1 nginx-1.16.0]# ps aux | grep nginx

nginx      1307  0.0  0.1 216972  6244 ?        S    10:34   0:00 php-fpm: pool www

nginx      1308  0.0  0.1 216972  6244 ?        S    10:34   0:00 php-fpm: pool www

root       7476  0.0  0.0  18252  1728 ?        S    10:45   0:00 nginx: master process /usr/local/nginx/sbin/nginx

nginx      7477  0.0  0.0  18624  1360 ?        S    10:45   0:00 nginx: worker process

nginx      7493  0.0  0.0  18600  1344 ?        S    10:47   0:00 nginx: worker process

root       7571  0.0  0.0 112724   988 pts/0    S+   11:08   0:00 grep --color=auto nginx
接着看看配置文件是否有错,还有nginx的版本和配置选项信息。我能直接使用nginx是因为配置了环境变量。
[root@youxi1 nginx-1.16.0]# nginx -V

nginx version: nginx/1.16.0

built by gcc 4.8.5 20150623 (Red Hat 4.8.5-36) (GCC)

configure arguments: --prefix=/usr/local/nginx --with-http_dav_module --with-http_stub_status_module --with-http_addition_module --with-http_sub_module

 --with-http_flv_module --with-http_mp4_module --with-pcre=/usr/local/src/pcre-8.41 --user=nginx --group=nginx
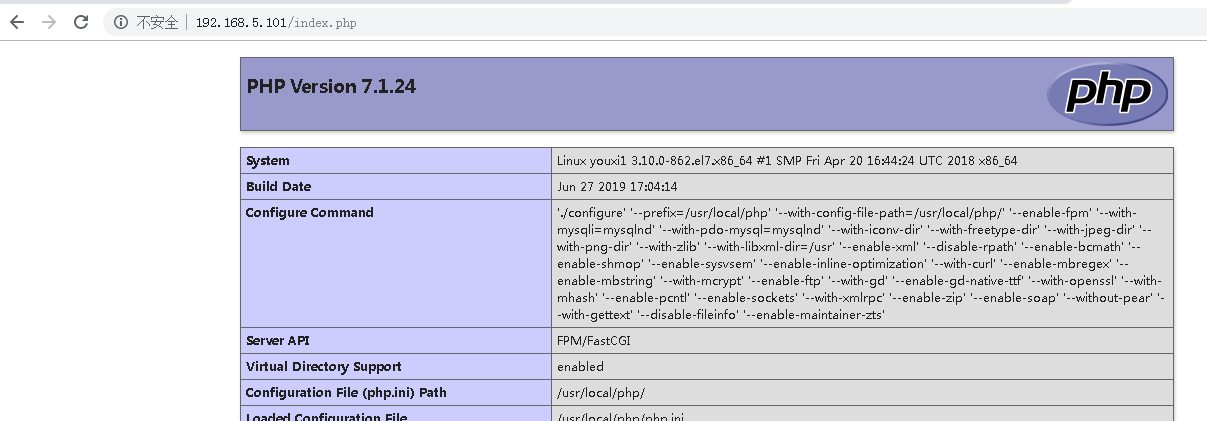
最后使用Windows查看
参考:https://blog.csdn.net/xiaolong20081/article/details/82871878
https://www.cnblogs.com/happlyp/p/6090409.html
Nginx在线服务状态下平滑升级或新增模块的更多相关文章
- Nginx在线服务状态下平滑升级或新增模块的详细操作
今天应开发的需求,需要在Nginx增加一个模块,并不能影响现有的业务,所以就必须要平滑升级Nginx,好了,不多说了 1:查看现有的nginx编译参数 /usr/local/nginx/sbin/ng ...
- Nginx在线服务状态下平滑升级及ab压力测试【转】
今天,产品那边发来需求,说有个 APP 的 IOS 版本下载包需要新增 https 协议,在景安购买了免费的 SSL 证书.当我往 nginx 上新增 ssl 时,发现服务器上的 nginx 居然没编 ...
- Linux下平滑升级nginx
一.升级前准备 1.对nginx的配置文件nginx.conf做备份: 2.新建目录/root/nginx,将安装包和脚本上传到该目录下: 二.平滑升级nginx 1.开始编译新版本的nginx cd ...
- Nginx编译安装和平滑升级
一.Nginx的编译安装 1.安装依赖包gcc,gcc-c++,pcre,openssl-devel 命令:yum -y install gcc gcc-c++ pcre-devel openssl- ...
- nginx : TCP代理和负载均衡的stream模块
一直以来,Nginx 并不支持tcp协议,所以后台的一些基于TCP的业务就只能通过其他高可用负载软件来完成了,比如Haproxy. 这算是一个nginx比较明显的缺憾.不过,在1.90发布后这个认知将 ...
- Nginx版本平滑升级方案
背景:由于负载均衡测试服务器中nginx版本过低,存在安全漏洞,查询相关修复漏洞资料,需要采取nginx版本升级形式对漏洞进行修复. Nginx平滑升级方案 1.案例采用版本介绍 旧版本 nginx- ...
- 源码安装nginx以及平滑升级
源码安装nginx以及平滑升级 ...
- Nginx服务器的平滑启动、平缓停止、平滑升级
注:Nginx服务在运行时,会保持一个主进程(master process)和一个或多个工作进程(worker process). 每一个进程都会有一个PID进程号,可以通过向主进程的PID进程号发送 ...
- 让你的网站免费支持 HTTPS 及 Nginx 平滑升级
为什么要使用 HTTPS ? 首先来说一下 HTTP 与 HTTPS 协议的区别吧,他们的根本区别就是 HTTPS 在 HTTP 协议的基础上加入了 SSL 层,在传输层对网络连接进行加密.简单点说在 ...
随机推荐
- 13 复习 - webpack基本配置2
在webpack下使用样式表 1.安装处理样式表的loader cnpm i style-loader css-loader -D //css cnpm i less-loader less -D / ...
- [Ynoi2017]由乃的OJ
题意 由乃正在做她的OJ.现在她在处理OJ上的用户排名问题.OJ上注册了n个用户,编号为1-",一开始他们按照编号 排名.由乃会按照心情对这些用户做以下四种操作,修改用户的排名和编号:然而由 ...
- XSLT可扩展样式表语言转换 System.Xml.Xsl、XslCompiledTransform类
XML文件 books.xml: <?xml version="1.0" encoding="utf-8" ?> <bookstore> ...
- 聊聊MVCC多版本并发控制
一.介绍 MVCC只在RR和RC 2个隔离级别下才能工作.MySQL的大多数事务存储引擎实现的都不是简单的行级锁机制.基于提升并发性能的考虑,它们一般都同时实现了MVCC. 通俗的来讲,MVCC是行级 ...
- 用vue开发一个所谓的数独
1.前言 最近的后台管理系统页面,功能暂时没有新的需求,就在想首页放什么东西,最近我想到的就是放个所谓的数独,为什么是所谓的数独,因为规则不同于标准的数独,只要求每一行每一列数字不一样就可以了!这个实 ...
- linux基础第四周
天津SEO: 1.统计出/etc/passwd文件中默认shell为非/sbin/nologin的用户个数,并将用户都显示出来 [root@localhost ~]# awk -F: -v i=&qu ...
- python func(*args, **kwargs)
func(*args, **kwargs) *args, **kwargs表示函数的可变参数 *args 表示任何多个无名参数,它是一个tuple **kwargs 表示关键字参数,它是一个dict ...
- 两数最大公约数 GCD
原理辗转相除法. public int gcd(int i, int j) { if (i == 0 || j == 0) { return 0; } int a = 0, b = 0; if (i ...
- 题解 [51nod1225]余数之和
题解 [51nod1225]余数之和 题面 解析 首先可以发现,\(a\)%\(b\)\(=a-b*\lfloor a/b \rfloor\). 而对于一段连续的\(b\)来说\(\lfloor a/ ...
- Codeforces Round #438 by Sberbank and Barcelona Bootcamp (Div. 1 + Div. 2 combined) A,B,C【真的菜·】
8说了 #include<bits/stdc++.h> using namespace std; #define int long long signed main(){ string s ...