
Ionic JPush极光推送 插件实例
1.需要去这里注册https://www.jiguang.cn
注册成功获取AppKey
备注填写应用包名规范点,在项目还要用那
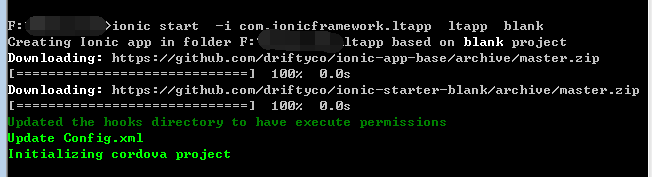
2.创建ionic 项目 指定你注册时候的包名(假如:com.ionicframework.ltapp)
ionic start -i com.ionicframework.ltapp ltapp blank
3.添加JPush 插件
进入 项目目录下 cd ltapp
git clone https://github.com/jpush/jpush-phonegap-plugin.git
cordova 添加jpush
cordova plugin add $dir\jpush-phonegap-plugin --variable API_KEY=you key
备注:you key =注册成功获取AppKey $dir=当前插件所在位置 添加完成,去项目下面plugins =》plugin.xml 文件查看这个节点是否和你appkey 一样

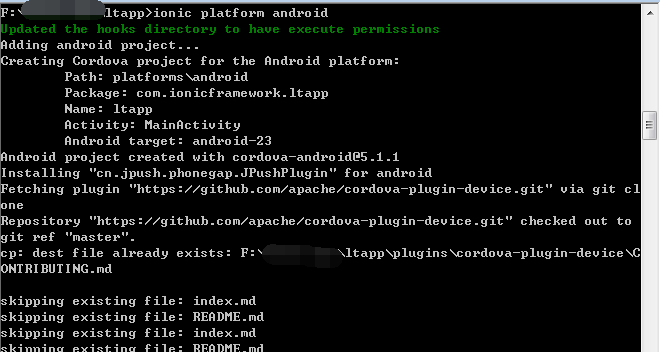
4.添加平台 android
5.编写代码
index.html
 <!DOCTYPE html>

 <html>

   <head>

     <meta charset="utf-8">

     <meta name="viewport" content="initial-scale=1, maximum-scale=1, user-scalable=no, width=device-width">

     <title></title>

     <link href="lib/ionic/css/ionic.css" rel="stylesheet">

     <link href="css/style.css" rel="stylesheet">

     <!-- IF using Sass (run gulp sass first), then uncomment below and remove the CSS includes above

     <link href="css/ionic.app.css" rel="stylesheet">

     -->

     <!-- ionic/angularjs js -->

     <script src="lib/ionic/js/ionic.bundle.js"></script>

     <!-- cordova script (this will be a  during development) -->

     <script src="cordova.js"></script>

     <!-- your app's js -->

     <script src="js/app.js"></script>

     <script src="js/controllers.js"></script>

     <script src="js/services.js"></script>

   </head>

   <body ng-app="starter">

   <ion-nav-bar class="bar-positive">

     <ion-nav-back-button></ion-nav-back-button>

   </ion-nav-bar>

   <ion-nav-view name="mainContainer"></ion-nav-view>

   </body>
mian.html
 <ion-view view-title="极光推送Ionic Demo">

   <ion-content class="padding">

         <form name="jPushForm">

           <button class="button button-block button-positive" ng-click="init()">启动推送服务</button>

           <button class="button button-block button-energized" ng-click="stopPush()">停止推送服务</button>

           <button class="button button-block button-royal" ng-click="resumePush()">重启推送服务</button>

           <button class="button button-block button-light" ng-click="getPushState()">查看服务状态</button>

           <div class="list">

             <div class="item item-input-inset">

               <label class="item-input-wrapper">

                 <input type="text" placeholder="设置tag,多个tag用逗号分隔" required ng-trim="true" ng-model="options.tags" />

               </label>

               <input type="submit" class="button button-small button-positive" value="设置" ng-click="setTags()" />

               <!-- <button class="button button-small button-positive" ng-click="setTags()">

                 设置

               </button>-->

             </div>

             <div class="item item-input-inset">

               <label class="item-input-wrapper">

                 <input type="text" placeholder="设置alias" required ng-trim="true" ng-model="options.alias" />

               </label>

               <input type="submit" class="button button-small button-positive" value="设置" ng-click="setAlias()" />

               <!-- <button class="button button-small button-positive" ng-click="setAlias()">

                 设置

               </button> -->

             </div>

           </div>

           <button class="button button-block button-balanced" ng-click="setTagsWithAlias()">同时设置</button>

           <button class="button button-block button-royal" ng-click="cleanTagAndAlias()">清空设置</button>

           <a href="#/list">消息列表</a>

           <span class="error" ng-show="jPushForm.input.$error.required">要求输入设置值</span>

           <p>{{result}}</p>

         </form>

       </ion-content>

 </ion-view>
list.html
 <ion-view title="消息列表">

     <ion-content>

         <ion-list>

             <ion-item ng-repeat="item in items" href="#/detail?id={{item.id}}">

             对应消息:{{item.id}}

             </ion-item>

         </ion-list>

     </ion-content>

 </ion-view>
detail.html
<ion-view title="消息内容">

    <ion-content class="padding">

        {{message}}

    </ion-content>

</ion-view>
app.js
 var jpushdemo=angular.module('starter', ['ionic']);

 jpushdemo.run(function($ionicPlatform,$state,jpushService) {

   $ionicPlatform.ready(function() {

     // Hide the accessory bar by default (remove this to show the accessory bar above the keyboard

     // for form inputs)

     if(window.cordova && window.cordova.plugins.Keyboard) {

       cordova.plugins.Keyboard.hideKeyboardAccessoryBar(true);

     }

     if(window.StatusBar) {

       StatusBar.styleDefault();

     }

     //推送初始化

     var setTagsWithAliasCallback=function(event){

       window.alert('result code:'+event.resultCode+' tags:'+event.tags+' alias:'+event.alias);

     }

     var openNotificationInAndroidCallback=function(data){

       var json=data;

       window.alert(json);

       if(typeof data === 'string'){

         json=JSON.parse(data);

       }

       var id=json.extras['cn.jpush.android.EXTRA'].id;

       //window.alert(id);

       var alert = json.extras['cn.jpush.android.ALERT'];

       $state.go('detail',{id:id+alert});

     }

     var config={

       stac:setTagsWithAliasCallback,

       oniac:openNotificationInAndroidCallback

     };

     jpushService.init(config);

     //启动极光推送服务

     window.plugins.jPushPlugin.init();

     window.plugins.jPushPlugin.setDebugMode(true);

   });

   window.onerror = function(msg, url, line) {

    var idx = url.lastIndexOf("/");

    if(idx > -) {

     url = url.substring(idx+);

    }

    alert("ERROR in " + url + " (line #" + line + "): " + msg);

    return false;

   };

 })

 jpushdemo.config(['$stateProvider', '$urlRouterProvider', function ($stateProvider,$urlRouterProvider) {

   $stateProvider.state('main',{

     url:'/main?url',

     views:{

       'mainContainer':{

         templateUrl: "templates/main.html",

         controller:'mainCtrl'

       }

     }

   }).state('list',{

     url:'/list',

     views:{

       'mainContainer':{

         templateUrl:'templates/list.html',

         controller:'listCtrl'

       }

     }

   }).state('detail',{

     url:'/detail?id',

     views:{

       'mainContainer':{

         templateUrl:'templates/detail.html',

         controller:'detailCtrl'

       }

     }

   });

   $urlRouterProvider.otherwise('/main')

 }])
controller.js
 jpushdemo.controller('mainCtrl', ['$scope','$ionicPopup','$stateParams','$state','jpushService',

   function ($scope,$ionicPopup,$stateParams,$state,jpushService) {

     $scope.message="";

     $scope.options={

         tags:"",

         alias:""

     };

     $scope.result="";

     // $scope.$on('$ionicView.beforeEnter',function(){

     //     var url=$stateParams.url;

     //     if(url){

     //         $state.go(url);

     //     }

     // });

     $scope.init=function(){

         jpushService.init();

         window.alert('执行启动');

     };

     $scope.stopPush=function(){

         jpushService.stopPush();

         window.alert('执行停止');

     };

     $scope.resumePush=function(){

         jpushService.resumePush();

         window.alert('执行重启');

     };

     $scope.getPushState=function(){

         jpushService.isPushStopped(function(data){

             if(data==){

                 window.alert('启动');

             }else{

                 window.alert('停止');

             }

         });

     };

     $scope.setTags=function(){

         var tagArr=$scope.options.tags.split(',');

         setTagsWithAlias(tagArr,null);

         //jpushService.setTags(tagArr);

     }

     $scope.setAlias=function(){

         var alias=$scope.options.alias;

         setTagsWithAlias(null,alias);

         //jpushService.setAlias(alias);

     }

     var setTagsWithAlias=function(tags,alias){

         jpushService.setTagsWithAlias(tags,alias);

     }

     $scope.setTagsWithAlias=function(){

         var tagArr=$scope.options.tags.split(',')

         if(tagArr.length==){

             tagArr=null;

         }

         var alias=$scope.options.alias;

         if(alias===''){

             alias=null;

         }

         setTagsWithAlias(tagArr,alias);

     }

     $scope.cleanTagAndAlias=function(){

         var tags=[];

         var alias="";

         setTagsWithAlias(tags,alias);

     }

 }])

 .controller('listCtrl', ['$scope','noticeService' ,function ($scope,noticeService) {

     $scope.items=noticeService.notices;

 }])

 .controller('detailCtrl', ['$scope','$stateParams', function ($scope,$stateParams) {

     var id=$stateParams.id;

     $scope.message='消息id:'+id;

 }])
services.js
 jpushdemo.factory('jpushService',['$http','$window','$document',function($http,$window,$document){

     var jpushServiceFactory={};

     //var jpushapi=$window.plugins.jPushPlugin;

     //启动极光推送

     var _init=function(config){

         $window.plugins.jPushPlugin.init();

         //设置tag和Alias触发事件处理

         document.addEventListener('jpush.setTagsWithAlias',config.stac,false);

         //打开推送消息事件处理

         $window.plugins.jPushPlugin.openNotificationInAndroidCallback=config.oniac;

         $window.plugins.jPushPlugin.setDebugMode(true);

     }

     //获取状态

     var _isPushStopped=function(fun){

         $window.plugins.jPushPlugin.isPushStopped(fun)

     }

     //停止极光推送

     var _stopPush=function(){

         $window.plugins.jPushPlugin.stopPush();

     }

     //重启极光推送

     var _resumePush=function(){

         $window.plugins.jPushPlugin.resumePush();

     }

     //设置标签和别名

     var _setTagsWithAlias=function(tags,alias){

         $window.plugins.jPushPlugin.setTagsWithAlias(tags,alias);

     }

     //设置标签

     var _setTags=function(tags){

         $window.plugins.jPushPlugin.setTags(tags);

     }

     //设置别名

     var _setAlias=function(alias){

         $window.plugins.jPushPlugin.setAlias(alias);

     }

     jpushServiceFactory.init=_init;

     jpushServiceFactory.isPushStopped=_isPushStopped;

     jpushServiceFactory.stopPush=_stopPush;

     jpushServiceFactory.resumePush=_resumePush;

     jpushServiceFactory.setTagsWithAlias=_setTagsWithAlias;

     jpushServiceFactory.setTags=_setTags;

     jpushServiceFactory.setAlias=_setAlias;

     return jpushServiceFactory;

 }])

 .factory('noticeService', [function () {

     var notices=[

         {id:,msg:'消息一'},

         {id:,msg:'消息二'},

         {id:,msg:'消息三'},

         {id:,msg:'消息四'},

         {id:,msg:'消息五'},

         {id:,msg:'消息六'},

         {id:,msg:'消息七'},

         {id:,msg:'消息八'}

     ];

     return {

         notices:notices

     };

 }])
6编译apk 运行文件
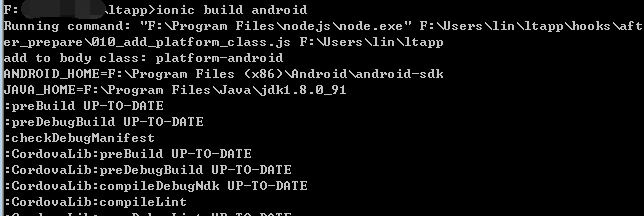
备注:编译过程中可能有错误,具体看情况处理 ,一般能生成apk 就运行了
7.生成apk 目录在项目文件 platforms\android\build\outputs 安装运行
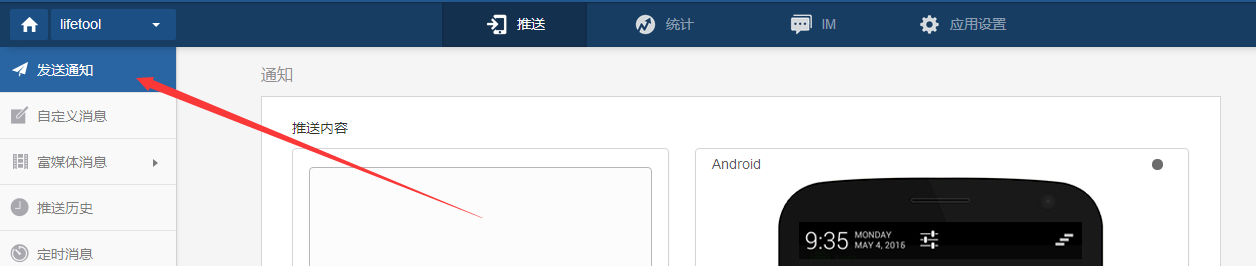

8.查看终端 手机通知信息 以上代码都是从网上当得,修修改测试通过
Ionic JPush极光推送 插件实例的更多相关文章
- Ionic JPush极光推送二
1.看图解决问题 2.解决出现统计代码提示问题 修改这个java 文件 导入命名空间 import cn.jpush.android.api.JPushInterface; 添加方法 @Overr ...
- 在ionic/cordova中使用极光推送插件(jpush)
Stpe1:创建一个项目(此处使用的是tab类型的项目,创建方式可参照我前一篇如何离线创建Ionic1项目) Stpe2:修改项目信息 打开[config.xml]修改下图内容:
- atitit.web 推送实现方案集合(2)---百度云,jpush 极光推送 ,个推的选型比较.o99
atitit.web 推送实现方案集合(2)---百度云,jpush 极光推送 ,个推的选型比较.o99 1.1. 云推送有推送次数或频率的限制吗? 1 1.2. 推送的消息长度 1 1.3. 离线消 ...
- 极光推送使用实例(二) Android客户端
上一篇简单介绍了极光推送在Java服务端的实现,如果感兴趣的可以看一下极光推送使用实例(一)JAVA服务端.这篇文章介绍下极光推送在Android客户端的实现. JPush Android SDK 是 ...
- 使用JPush(极光推送)实现远程通知
使用JPush(极光推送)实现远程通知 远程推送是APP 必备的功能, 现在第三方的 SDK 已经做的非常完备了, 在 iOS10.0出来之后, 极光推送也及时更新了他的 SDK, 今天小试了一下效果 ...
- Laravel 集成 JPush 极光推送指北
我是一个 Laravel 小白,我是一个 Laravel 小白,我是一个 Laravel 小白(默念三遍再往下读,如果非小白就不用看了). Laravel 使用 Composer 来管理代码依赖.所以 ...
- PhoneGap 的消息推送插件JPush极光推送
一. 什么是极光推送 极光推送,使得开发者可以即时地向其应用程序的用户推送通知或者消息,与用户保持互动, 从而有效地提高留存率,提升用户体验.平台提供整合了 Android 推送.iOS 推送的统一推 ...
- ionic中极光推送的集成
1.到极光官网注册账号,新建应用获得appkey. 详见:https://www.jiguang.cn/app/list 2.引入jpush插件 详见:https://github.com/jpush ...
- cordova极光推送插件使用
首先是在极光官网注册登录账号,然后创建推送应用,创建完应用之后,点击打开应用,设置应用的包名,保存: 然后回到应用主界面,看到AppKey,以及MasterSecret,这时候MasterSecret ...
随机推荐
- angularJS ng-repeat="item in XXX track by $index"问题记录
参考:https://blog.csdn.net/lunhui1994_/article/details/80236315 问题:项目中对数据做了分页效果,理想是:当页数大于6时,隐藏>6的页数 ...
- Algo: Dynamic programming
Copyright © 1900-2016, NORYES, All Rights Reserved. http://www.cnblogs.com/noryes/ 欢迎转载,请保留此版权声明. -- ...
- 廖雪峰Java11多线程编程-3高级concurrent包-6ExecutorService
Java语言内置多线程支持: 创建线程需要操作系统资源(线程资源,栈空间) 频繁创建和销毁线程需要消耗大量时间 如果可以复用一个线程 线程池: 线程池维护若干个线程,处于等待状态 如果有新任务,就分配 ...
- thinkphp 虚拟模型
虚拟模型是指虽然是模型类,但并不会真正的操作数据库的模型.有些时候,我们建立模型类但又不需要进行数据库操作,仅仅是借助模型类来封装一些业务逻辑,那么可以借助虚拟模型来完成.虚拟模型不会自动连接数据库, ...
- LUOGU P1505 [国家集训队]旅游 (树链剖分+线段树)
传送门 解题思路 快被调死的码农题,,,其实就是一个边权下放到点权的线段树+树剖. #include<iostream> #include<cstdio> #include&l ...
- SpringData_01_SpringData的快速入门
1.1SpringData JPA概述 Spring Data JPA 是 Spring 基于 ORM 框架.JPA 规范的基础上封装的一套JPA应用框架,可使开发者用极简的代码即可实现对数据库的访问 ...
- CreateProcess函数详解及示例
WIN32API函数CreateProcess用来创建一个新的进程和它的主线程,这个新进程运行指定的可执行文件. 函数原型: BOOL CreateProcess ( LPCTSTR lpApplic ...
- vue中使用watch函数,当数据改变时自动引发事件
本来我的需求是这样的,使用ElementUI的日期选择器,当日期选择器被更改时需要根据新日期来向服务器获取新数据,但是发现这个日期选择器没有change事件,后来终于发现vue有个watch函数就是用 ...
- 设置和修改Linux的swap分区大小
在Linux编译gcc时,遇到编译错误,究其根源是因为内存不足,这时通过修改swap大小解决了问题 相关操作如下: 1. 查看当前分区情况free -m 2. 增加 swap 大小, 2G 左右dd ...
- Python快速搭建HTTP服务器
<wiz_tmp_tag id="wiz-table-range-border" contenteditable="false" style=&q ...