使用 linux kernel +busybox 定制linux系统
目的:
了解linux的启动过程
主要内容:
1.grub 是启动程序的bootloader
2.linux-kernel 是linux的开源内核
3.busybox 是linux的工具集合
启动顺序:
grub-> bzimage > initrd > init > chroot sbin/init (从内存镜像转换成rootfs)>/etc/inittab > fstab>etc/init.d/rcS
实验环境:
操作系统(编译使用): CentOS 7.4Kernel 版本 :5.5.2
1.编译linux kernel
- 下载及解压:
https://www.kernel.org/

目前最新版本5.5.2

https://cdn.kernel.org/pub/linux/kernel/v5.x/linux-5.5.2.tar.xz

复制文件到 /usr/src/linux-5.5.2.tar.xz

解压 tar -xvf linux-5.5.2.tar.xz
2)编译linux kernel:
1 yum install ncusres‐devel # 按照需要编译的一些包

2 cd /usr/src/linux‐5.5.2 # 切换到linux源代码目录

3 make menuconfig #配置内核编译内容,配置一些信息 ,由于是演示,默认就可以了

4 make ‐j4 #执行多cpu方式编译

5 midir /usr/src/modules

6 make modules_install INSTALL_MOD_PATH=/usr/src/modules #将modules安装在这里
2.编译busybox
- 下载及解压:
https://busybox.net/

目前最新版本1.31.1

https://busybox.net/downloads/busybox-1.31.1.tar.bz2

复制文件到 /usr/src/busybox-1.31.1.tar.bz2

解压 tar -jxvf busybox-1.31.1.tar.bz2- 编译busybox
1 yum install glibc‐static # 按照需要编译的静态库包

2 cd /usr/src/busybox‐1.31.1 # 切换到busybox源代码目录

3 make menuconfig # 配置 Settings‐>Build Options‐>Build static binary

4 make install
3.根据busybox 制作initrd.gz文件
1 make /usr/src/initrd # 创建初始化目录

2 cd /usr/src/initrd # 进入工作目录

3 cp /usr/src/busybox‐1.31.1/_install/* ‐a . #复制所有busybox文件

4 mkdir proc sys mnt/sysroot dev tmp etc ‐pv #创建必要的目录

5 mknod dev/console c 5 1 # 创建console设备

6 mknod dev/null c 1 3 # 创建null设备

7 rm linuxrc # 删除软连接,这个文件没啥用看着不舒服而已

8 touch init # 创建init 引导程,具体内容见下面信息

9 chmod +x init # 设置可运行程序

10 find . | cpio ‐H newc ‐‐quiet ‐o | gzip ‐9 > /usr/src/initrd.gz #打包initrd
init 文件内容:
1 #!/bin/sh

2

3 echo "Mounting proc and sys..."

4 mount ‐t sysfs sysfs /sys

5 mount ‐t proc proc /proc

6

7 echo "Detect and export hardware infomation..."

8 mdev ‐s

9

10 echo "Mount real rootfs to /mnt/sysroot..."

11 mount ‐t ext4 ‐o ro /dev/sda2 /mnt/sysroot

12

13 echo "Switch to real rootfs..."

14 exec chroot /mnt/sysroot /sbin/init
4.根据linux kernel 编译输出整理成 vmlinuz
1 cp /usr/src/linux‐5.5.2/arch/x86/boot/bzImage /usr/src/vmlinuz #复制内核5.根据busybox 制作rootfs 系统真正的linux目录
1 make /usr/src/sysroot #创建工作目录

2 cd sysroot #进入工作目录

3 cp /usr/src/busybox‐1.31.1/_install/* ‐a . #复制所有busybox文件

4 rm linuxrc # 删除软连接,这个文件没啥用看着不舒服而已

5 # 创建目录

6 mkdir dev var sys mnt etc proc lib home tmp root boot

7 mkdir var/{log,run,lock}

8 mkdir lib/modules

9 mknod dev/console c 5 1 # 创建console设备

10 mknod dev/null c 1 3 # 创建null设备

11 vim etc/inittab #创建rootfs启动文件,内容见下图

12 vim etc/init.d/rcS #创建启动脚本

13 chmod +x rcS

14 vim etc/fstab #当执行mount ‐a 的时候就会执行这个文件里的挂载
inittab 文件内容:
1 ::sysinit:/etc/init.d/rcS

2 ::askfirst:‐/bin/sh

3 ::ctrlaltdel:/sbin/reboot

4 ::shutdown:/bin/umount ‐a ‐r

5 ::restart:/sbin/init
rcS 文件内容:
1 #!/bin/sh

2

3 echo ‐e "Welcome To My Linux"

4

5 echo "Remount the rootfs..."

6 mount ‐t ext4 ‐o remount,rw /dev/sda2 /

7 echo "Detect and export hardware infomation..."

8 mdev ‐s

9 echo "Mount the other filesystem...fstab"

10 mount ‐a
fstab:
1 # device mount‐point type options dump fsck

2 sysfs /sys sysfs defaults 0 0

3 proc /proc proc defaults 0 0

4 /dev/sda1 /boot ext4 defaults 0 0

5 /dev/sda2 / ext4 defaults 1 1
6.经过上面的步骤已经实现了 vmlinuz(linux 内核) initrd.gz(内存系统盘) sysroot (真正的linux rootfs系统) 都已经准备好了,接下来开始准备一块磁盘。
通过virtual box 创建一块sata磁盘10G 并分成两个区.
1 [root@centos ~]# lsblk

2 NAME MAJ:MIN RM SIZE RO TYPE MOUNTPOINT

3 sda 8:0 0 100G 0 disk

4 ├─sda1 8:1 0 1G 0 part /boot

5 └─sda2 8:2 0 99G 0 part

6 ├─cl‐root 253:0 0 50G 0 lvm /

7 ├─cl‐swap 253:1 0 2G 0 lvm [SWAP]

8 └─cl‐home 253:2 0 47G 0 lvm /home

9 sdb 8:16 0 10G 0 disk

10 sr0 11:0 1 1024M 0 rom

11 ###############################################

12 [root@centos ~]# fdisk /dev/sdb #开始格式化

13 Welcome to fdisk (util‐linux 2.23.2).

14

15 Changes will remain in memory only, until you decide to write them.

16 Be careful before using the write command.

17

18 Device does not contain a recognized partition table

19 Building a new DOS disklabel with disk identifier 0x3f5d5436.

20

21 Command (m for help): n

22 Partition type:

23 p primary (0 primary, 0 extended, 4 free)

24 e extended

25 Select (default p): p

26 Partition number (1‐4, default 1): 1

27 First sector (2048‐20971519, default 2048): 2048

28 Last sector, +sectors or +size{K,M,G} (2048‐20971519, default 20971519):

+5G

29 Partition 1 of type Linux and of size 5 GiB is set

30

31 Command (m for help): n

32 Partition type:

33 p primary (1 primary, 0 extended, 3 free)

34 e extended

35 Select (default p): p

36 Partition number (2‐4, default 2):

37 First sector (10487808‐20971519, default 10487808):

38 Using default value 10487808

39 Last sector, +sectors or +size{K,M,G} (10487808‐20971519, default 209715

19):

40 Using default value 20971519

41 Partition 2 of type Linux and of size 5 GiB is set

42

43 Command (m for help): p

44

45 Disk /dev/sdb: 10.7 GB, 10737418240 bytes, 20971520 sectors

46 Units = sectors of 1 * 512 = 512 bytes

47 Sector size (logical/physical): 512 bytes / 512 bytes

48 I/O size (minimum/optimal): 512 bytes / 512 bytes

49 Disk label type: dos

50 Disk identifier: 0x3f5d5436

51

52 Device Boot Start End Blocks Id System

53 /dev/sdb1 2048 10487807 5242880 83 Linux

54 /dev/sdb2 10487808 20971519 5241856 83 Linux

55

56 Command (m for help): w

57 The partition table has been altered!

58

59 Calling ioctl() to re‐read partition table.

60 Syncing disks.

61 [root@centos ~]#
开始挂载分好区的盘,并将文件复制到这两分区中,第一个分区定义为boot,第二个分区定义为sysroot ;
1 mkdir /mnt/boot /mnt/sysroot # 在centos系统上创建两个目录

2 [root@centos src]# lsblk # 查看刚刚分好区的sdb 盘

3 NAME MAJ:MIN RM SIZE RO TYPE MOUNTPOINT

4 sda 8:0 0 100G 0 disk

5 ├─sda1 8:1 0 1G 0 part /boot

6 └─sda2 8:2 0 99G 0 part

7 ├─cl‐root 253:0 0 50G 0 lvm /

8 ├─cl‐swap 253:1 0 2G 0 lvm [SWAP]

9 └─cl‐home 253:2 0 47G 0 lvm /home

10 sdb 8:16 0 10G 0 disk

11 ├─sdb1 8:17 0 5G 0 part

12 └─sdb2 8:18 0 5G 0 part

13 sr0 11:0 1 1024M 0 rom

14

15 [root@centos mnt]# mkfs.ext4 /dev/sdb1 #创建文件系统格式

16 mke2fs 1.42.9 (28‐Dec‐2013)

17 Filesystem label=

18 OS type: Linux

19 Block size=4096 (log=2)

20 Fragment size=4096 (log=2)

21 Stride=0 blocks, Stripe width=0 blocks

22 327680 inodes, 1310720 blocks

23 65536 blocks (5.00%) reserved for the super user

24 First data block=0

25 Maximum filesystem blocks=1342177280

26 40 block groups

27 32768 blocks per group, 32768 fragments per group

28 8192 inodes per group

29 Superblock backups stored on blocks:

30 32768, 98304, 163840, 229376, 294912, 819200, 884736

31

32 Allocating group tables: done

33 Writing inode tables: done

34 Creating journal (32768 blocks): done

35 Writing superblocks and filesystem accounting information: done

36

37 [root@centos mnt]# mkfs.ext4 /dev/sdb2

38 mke2fs 1.42.9 (28‐Dec‐2013)

39 Filesystem label=

40 OS type: Linux

41 Block size=4096 (log=2)

42 Fragment size=4096 (log=2)

43 Stride=0 blocks, Stripe width=0 blocks

44 327680 inodes, 1310464 blocks

45 65523 blocks (5.00%) reserved for the super user

46 First data block=0

47 Maximum filesystem blocks=1342177280

48 40 block groups

49 32768 blocks per group, 32768 fragments per group

50 8192 inodes per group

51 Superblock backups stored on blocks:

52 32768, 98304, 163840, 229376, 294912, 819200, 884736

53

54 Allocating group tables: done

55 Writing inode tables: done

56 Creating journal (32768 blocks): done

57 Writing superblocks and filesystem accounting information: done

58

59 [root@centos mnt]# blkid

60 /dev/sda1: UUID="cbf299b0‐d76d‐4efe‐8643‐c900502683d4" TYPE="xfs"

61 /dev/sda2: UUID="L416ib‐7Z3D‐rtXt‐FqTb‐ChsW‐j6zH‐heeuF2" TYPE="LVM2_memb

er"

62 /dev/mapper/cl‐root: UUID="12c02980‐3012‐4884‐8a7d‐437195398fdb" TYPE="x

fs"

63 /dev/mapper/cl‐swap: UUID="c4ea26e2‐7424‐4a52‐aa34‐8d9fb4f3fbd2" TYPE="s

wap"

64 /dev/mapper/cl‐home: UUID="7be941f2‐fcf6‐44b7‐b673‐f999f1c876b0" TYPE="x

fs"

65 /dev/sdb1: UUID="78df7716‐e32f‐421e‐a756‐8fe89407e9ec" TYPE="ext4"

66 /dev/sdb2: UUID="c905f4d2‐ae58‐41f8‐85e6‐69d1f0237ad2" TYPE="ext4"

67 [root@centos mnt]#

68 [root@centos mnt]# mount /dev/sdb1 /mnt/boot

69 [root@centos mnt]# mount /dev/sdb2 /mnt/sysroot

70 [root@centos mnt]# df ‐h

71 Filesystem Size Used Avail Use% Mounted on

72 /dev/mapper/cl‐root 50G 27G 24G 53% /

73 devtmpfs 910M 0 910M 0% /dev

74 tmpfs 920M 0 920M 0% /dev/shm

75 tmpfs 920M 8.5M 912M 1% /run

76 tmpfs 920M 0 920M 0% /sys/fs/cgroup

77 /dev/sda1 1014M 185M 830M 19% /boot

78 /dev/mapper/cl‐home 47G 33M 47G 1% /home

79 tmpfs 184M 0 184M 0% /run/user/0

80 /dev/sdb1 4.8G 20M 4.6G 1% /mnt/boot

81 /dev/sdb2 4.8G 20M 4.6G 1% /mnt/sysroot
开始复制之前编译好的文件
1 cp /usr/src/vmlinuz /mnt/boot/ #linux kernel

2 cp /usr/src/initrd.gz /mnt/boot/ #ramdisk 内存镜像(来自于busybox改造)

3 cp ‐a /usr/src/sysroot/* /mnt/sysroot/ #系统目录集合(来自于busybox改造)

4 [root@centos /]# tree mnt ‐L 2

5 mnt

6 ├── boot

7 │ ├── initrd.gz

8 │ └── vmlinuz

9 └── sysroot

10 ├── bin

11 ├── boot

12 ├── dev

13 ├── etc

14 ├── home

15 ├── lib

16 ├── mnt

17 ├── proc

18 ├── root

19 ├── sbin

20 ├── sys

21 ├── tmp

22 ├── usr

23 └── var
7.安装grub引导程序到sdb1中
1 yum install grub2‐install #由于centos7以后采用的是grub2 所以直接安装了这个

2 [root@centos mnt]# grub2‐install ‐‐boot‐directory=/mnt/boot /dev/sdb #安装

到boot目录下

3 Installing for i386‐pc platform.

4 Installation finished. No error reported.

5 [root@centos boot]# ll

6 total 9248

7 drwxr‐xr‐x. 5 root root 4096 Feb 6 08:25 grub2

8 ‐rw‐r‐‐r‐‐. 1 root root 1484989 Feb 6 08:03 initrd.gz

9 ‐rw‐r‐‐r‐‐. 1 root root 7975904 Feb 6 08:04 vmlinuz

10 [root@centos boot]#grub2‐mkconfig ‐o /mnt/boot/grub2/grub.cfg #为了方便我采用了先根据系统自动生成,然后再编辑这个文件

11 [root@centos boot]# vim /mnt/boot/grub2/grub.cfg #编辑内容见下图,去掉很多用不到的内容
grub.cfg 文件内容,仅仅保留了几个核心的信息
1 # relay display

2 set timeout=5

3 # entry

4 menuentry 'My Linux' {

5 insmod gzio

6 insmod part_msdos

7 insmod xfs

8 set root='hd0,msdos1'

9 linux16 /vmlinuz root=/dev/sda2

10 initrd16 /initrd.gz

11 }
8.通过virtual 将刚刚创建的虚拟硬盘加载进来,并启动虚拟机。。。开始见证奇迹的时候。
欢迎界面出现,成功引导系统。

出错啦。。。
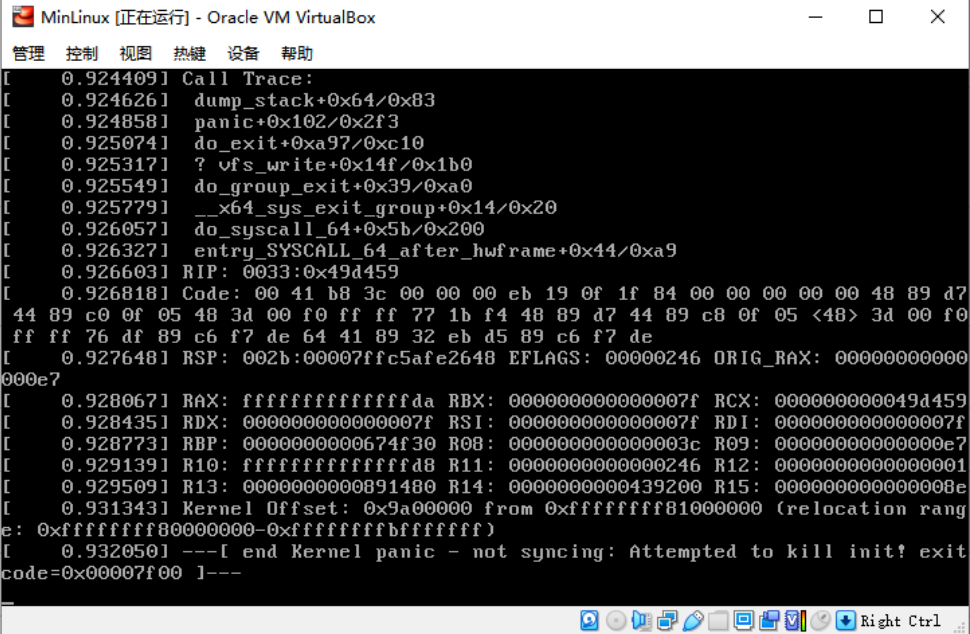
估计猜测分析:
由于系统启动的时候需要挂载/dev/sda2 这块真正的rootfs 系统,可是在加载内存镜像initrd.gz 后,想启动挂载rootfs的时候,找不到硬盘分区了。
这里有个我们打包的时候,在涉及 第三方模块如ext4 驱动的时候,是没有打包到内核中的,但是默认是支持扩展挂载的,所以采用修改initrd.gz 这个文件,这个时候就需要用到modules了(前面只是生成了,还没有用到,所以需要先把这个modules打包进initrd.gz中,让他能找到ext4驱动)同时也顺便把rootfs 的目录中也一并处理成镜像的样子。
sysroot 和initrd 两个目录一样操作:
1 cd /mnt/sysroot

2 cp ‐a /usr/src/modules/lib usr/ #复制modules进入这个文件夹

3 mkdir usr/lib64 #创建空文件夹,只是为了规范一点

4 ln ‐s usr/lib64 lib64

5 ln ‐s usr/lib lib

6 #initrd 同样操作

7 cd /usr/src/initrd

8 cp ‐a /usr/src/modules/lib usr/ #复制modules进入这个文件夹

9 mkdir usr/lib64 #创建空文件夹,只是为了规范一点

10 ln ‐s usr/lib64 lib64

11 ln ‐s usr/lib lib

12 # 重新生成initrd.gz 由于模块我没有精简所以耗时比较久

13 find . | cpio ‐H newc ‐‐quiet ‐o | gzip ‐9 > /usr/src/initrd.gz

14 # 替换 旧的initrd.gz

15 cp initrd.gz /mnt/boot/
通过修改init文件,我虽然进去了镜像系统,但是由于始终没有找到硬盘,导致rootfs没有能进入,也请各位大神帮忙解开这个结,我不知道哪里出了问题。
开始修改 init 不进行rootfs转换,直接进入内存系统:
1 #!/bin/sh
2
3 echo "Mounting proc and sys..."
4 mount ‐t sysfs sysfs /sys
5 mount ‐t proc proc /proc
6
7 echo "Detect and export hardware infomation..."
8 mdev ‐s
9
10 exec /bin/sh
11 把项目两句话注释掉,改成直接执行 exec /bin/sh 作为主进程
12
13 echo "Mount real rootfs to /mnt/sysroot..."
14 #mount ‐t ext4 ‐o ro /dev/sda2 /mnt/sysroot
15
16 echo "Switch to real rootfs..."
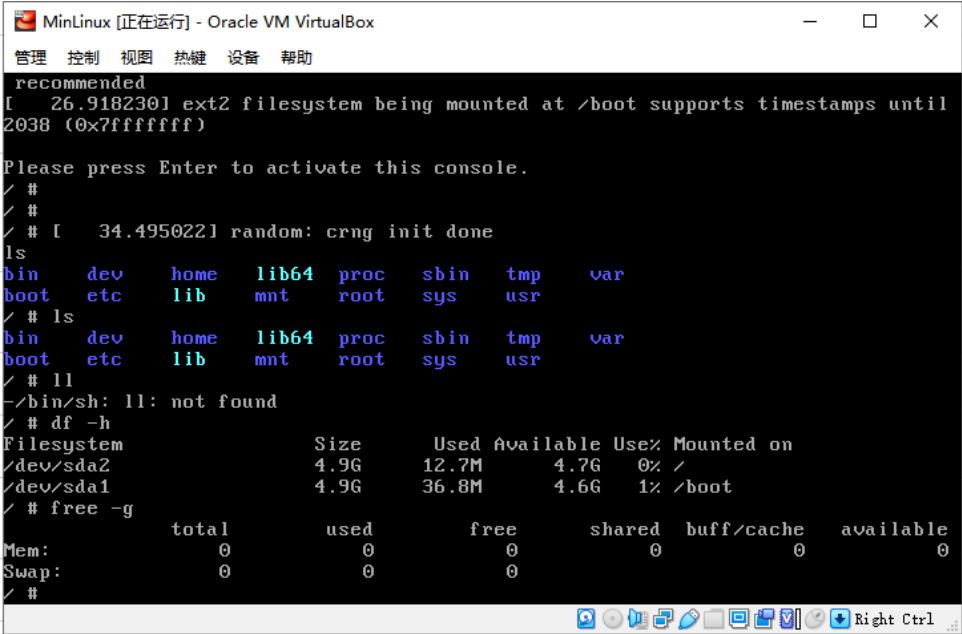
17 # exec chroot /mnt/sysroot /sbin/init这个时候内存系统进去了:

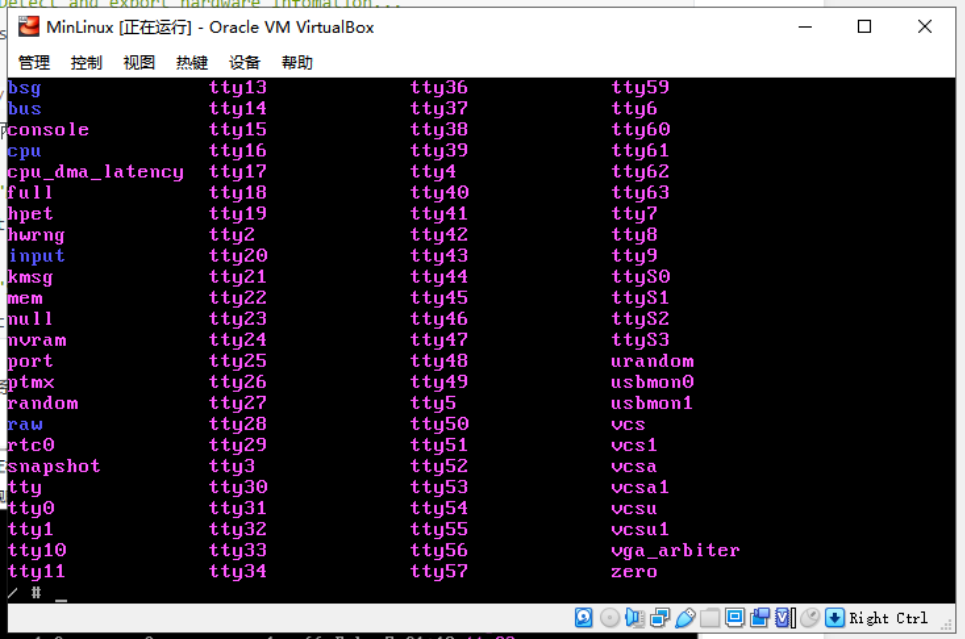
但是根本但是在/dev/ 下根本没有sdaX的硬盘分区。首先驱动也是有的,通过grub也是能看到的。
cat /proc/filesystems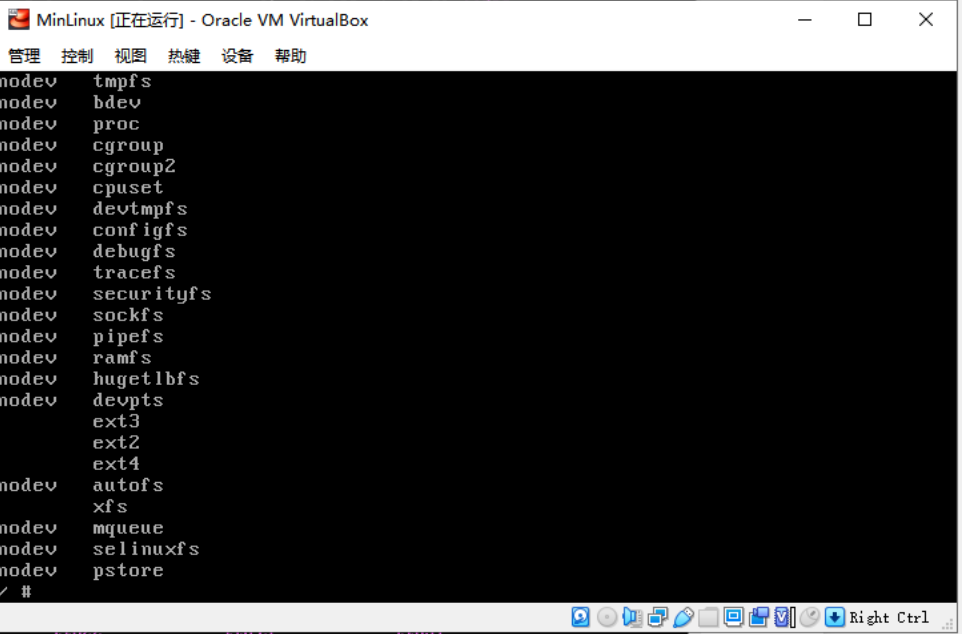
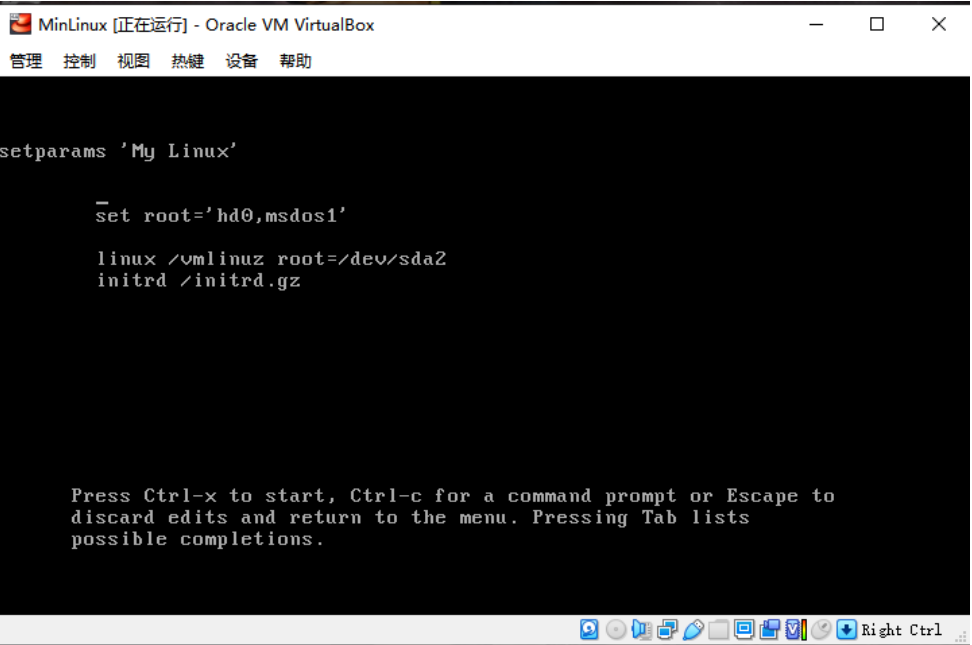
进入刚刚启动时候的grub界面,是能看到硬盘分区的:
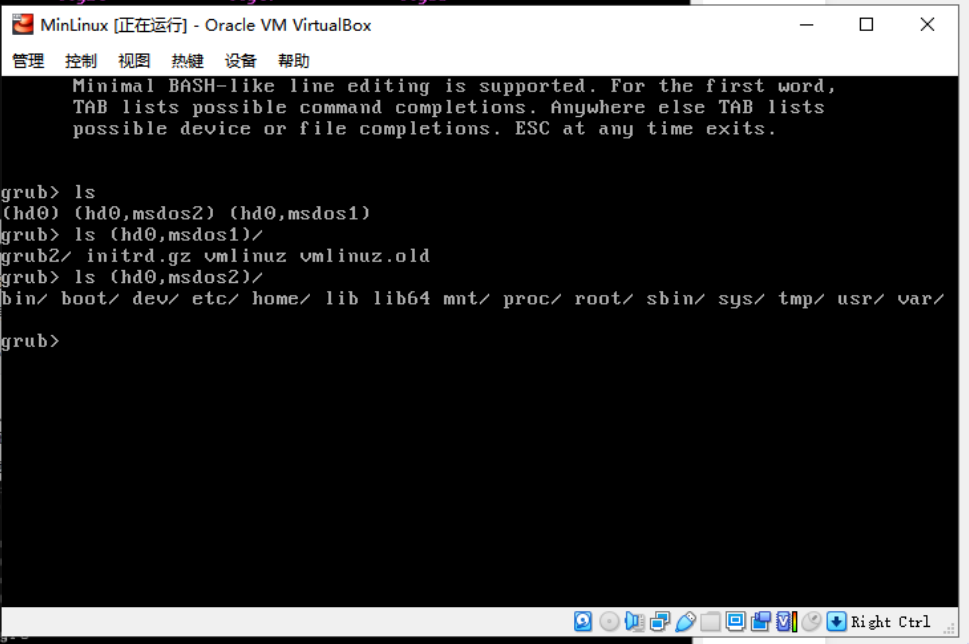
---硬盘找不到的问题已经解决,补充进去:
通过修改配置linux kernel 已经解决硬盘找不到的问题:
Device Drivers > SCSI device Support >SCSI Disk Support

SCSI generic support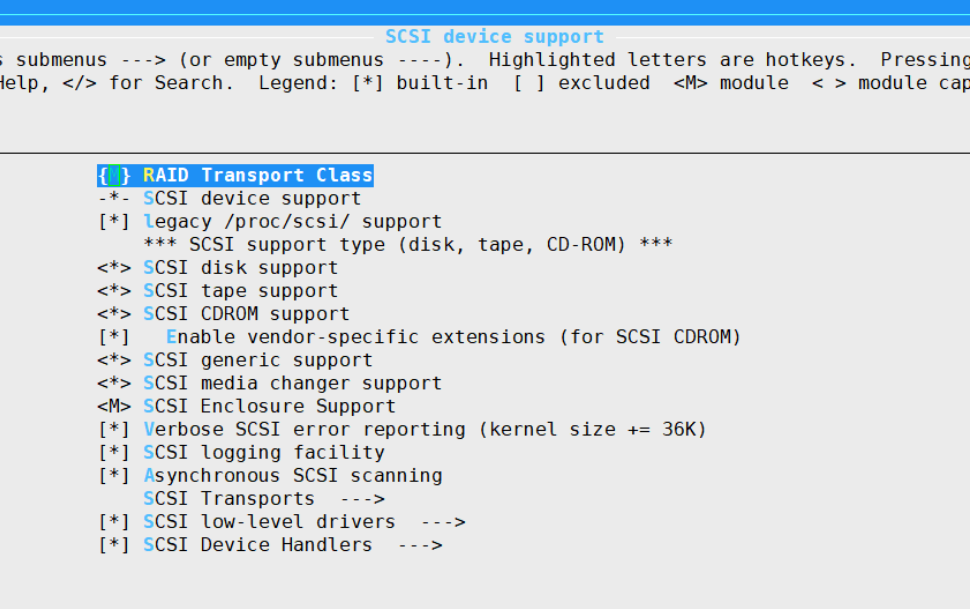
以上通过修改内核kernel配置后,终于找到了硬盘:
使用 linux kernel +busybox 定制linux系统的更多相关文章
- [中英对照]Linux kernel coding style | Linux内核编码风格
Linux kernel coding style | Linux内核编码风格 This is a short document describing the preferred coding sty ...
- Linux Kernel - Debug Guide (Linux内核调试指南 )
http://blog.csdn.net/blizmax6/article/details/6747601 linux内核调试指南 一些前言 作者前言 知识从哪里来 为什么撰写本文档 为什么需要汇编级 ...
- Linux kernel pwn notes(内核漏洞利用学习)
前言 对这段时间学习的 linux 内核中的一些简单的利用技术做一个记录,如有差错,请见谅. 相关的文件 https://gitee.com/hac425/kernel_ctf 相关引用已在文中进行了 ...
- Intel 80x86 Linux Kernel Interrupt(中断)、Interrupt Priority、Interrupt nesting、Prohibit Things Whthin CPU In The Interrupt Off State
目录 . 引言 . Linux 中断的概念 . 中断处理流程 . Linux 中断相关的源代码分析 . Linux 硬件中断 . Linux 软中断 . 中断优先级 . CPU在关中断状态下编程要注意 ...
- Linux Kernel 本地内存损坏漏洞
漏洞名称: Linux Kernel 本地内存损坏漏洞 CNNVD编号: CNNVD-201310-663 发布时间: 2013-11-05 更新时间: 2013-11-05 危害等级: 漏洞类 ...
- Linux kernel 内存损坏漏洞
漏洞名称: Linux kernel 内存损坏漏洞 CNNVD编号: CNNVD-201310-143 发布时间: 2013-10-11 更新时间: 2013-10-11 危害等级: 中危 漏洞类 ...
- Linux kernel ‘fib6_add_rt2node’函数安全漏洞
漏洞名称: Linux kernel ‘fib6_add_rt2node’函数安全漏洞 CNNVD编号: CNNVD-201307-265 发布时间: 2013-07-16 更新时间: 2013-07 ...
- Linux kernel ‘ip6_sk_dst_check’函数拒绝服务漏洞
漏洞名称: Linux kernel ‘ip6_sk_dst_check’函数拒绝服务漏洞 CNNVD编号: CNNVD-201307-070 发布时间: 2013-07-05 更新时间: 2013- ...
- 从基本理解到深入探究 Linux kernel 通知链(notifier chain)【转】
转自:https://blog.csdn.net/u014134180/article/details/86563754 版权声明:本文为博主原创文章,未经博主允许不得转载.——Wu_Being ht ...
随机推荐
- Redis(六):list/lpush/lrange/lpop 命令源码解析
上一篇讲了hash数据类型的相关实现方法,没有茅塞顿开也至少知道redis如何搞事情的了吧. 本篇咱们继续来看redis中的数据类型的实现: list 相关操作实现. 同样,我们以使用者的角度,开始理 ...
- shh登入不能自动执行.bashrc
在linux 上新安装的anconda来管理软件,把环境变量放在home目录的.bashrc.结果每次开终端,不能直接使用conda.需要手动加环境变量. 用户登入后计算机执行了哪些文件 用户登录时b ...
- JS基础——ATM机终端程序编写(3.0)
利用函数进行代码实现,要点:将每一项操作单独写成一个函数,在需要时进行调用,弄清参数的传递. 创建模拟账户 使用数组创建账户 let user = ["xiaohei", 1234 ...
- STM8 ADC 多个通道连续扫描缓冲区数据带中断模式的正确写法
近日调试了STM8S的ADC采集多通道数据的程序,按照之前的立即,将ADC1设置为:扫描模式,连续采集,数据缓存模式,中断使能后应该可以在中断后读取到数值了,可是无论怎样都只能读取到第一个缓冲器的数据 ...
- Unicode标准以及其常见的编码方案
目录 基本概念 码位 码位的类型 编码方案 UTF-32 UTF-16 UTF-8 参考资料 Unicode标准为每一个字符提供一个唯一的数字,而不用区分平台.语言等因素. The Unicode S ...
- 学习记录一(Python算数运算符与if语句)
从网上找到一个Python的学习视频,之前的环境都装好了,今天看的就是算术运算符和变量的命名 其中Python的除法直接就是 / %用于求余 其中还可以进行幂运算** 例如2 ** 3 = 8 ...
- 实验13:VLAN/TRUNK/VTP/
实验10-1: 划分VLAN Ø 实验目的通过本实验,读者可以掌握如下技能:(1) 熟悉VLAN 的创建(2) 把交换机接口划分到特定VLAN Ø 实验拓扑 实验步骤要配置VLAN,首先要 ...
- tmobst3
1.(单选题)如果数据库是oracle,则generator属性值不可以使用(). A)native B)identity C)hilo D)sequence 2.(单选题)为了获得用户提交的表单参数 ...
- VC获取cookies的几种方法
方法一: CInternetSession::GetCookie This member function implements the behavior of the Win32 function ...
- sock.listen()
(转载) 函数原型: int listen(int sockfd, int backlog); 当服务器编程时,经常需要限制客户端的连接个数,下面为问题分析以及解决办法: 下面只讨论TCP UDP不 ...