编译安装vsftpd-3.0.2
编译安装vsftpd
首先下载源码包(我一般喜欢放在/home/test)

解压:tar -zxvf vsftpd-3.0.2.tar.gz
进入目录进行编译
cd vsftpd-3.0.2
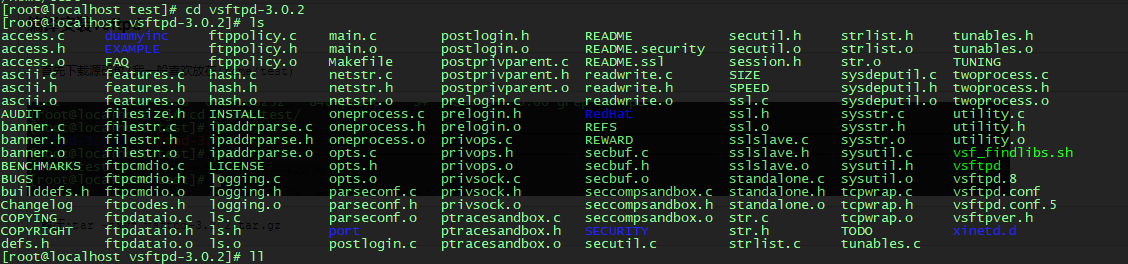
编译之前记得gcc c++已经安装(低级错误)还有几个依赖yum一下呗
yum install libcap tcp_wrappers tcp_wrappers_devel
编译安装
make && make install
编译安装成功,启动文件在/usr/local/sbin

然后就到配置文件
新建目录
mkdir -p /etc/vsftpd
新建配置文件vsftpd.conf或者把源码的配置文件cp过来
touch /etc/vsftpd/vsftpd.conf
cp /home/test/vsftpd-3.0.2/vsftpd.conf /etc/vsftpd/
新建启动脚本(没有也可以,可以目录启动)把脚本扔进/etc/init.d/下
#!/bin/bash

#

# vsftpd This shell script takes care of starting and stopping

#             standalone vsftpd.

#

# chkconfig: - 60 50

# description: Vsftpd is a ftp daemon, which is the program \

#              that answers incoming ftp service requests.

# processname: vsftpd

# config: /etc/vsftpd.conf

# Source function library.

. /etc/rc.d/init.d/functions

# Source networking configuration.

. /etc/sysconfig/network

# Check that networking is up.

[ ${NETWORKING} = "no" ] && exit 0

[ -x /usr/local/sbin/vsftpd ] || exit 0

RETVAL=0

prog="vsftpd"

start() {

        # Start daemons.

        if [ -d /etc ] ; then

                for i in `ls /etc/vsftpd/vsftpd.conf`; do

                        site=`basename $i .conf`

                        echo -n $"Starting $prog for $site: "

                        /usr/local/sbin/vsftpd $i &

                        RETVAL=$?

                        [ $RETVAL -eq 0 ] && {

                           touch /var/lock/subsys/$prog

                           success $"$prog $site"

                        }

                        echo

                done

        else

                RETVAL=1

        fi

        return $RETVAL

}

stop() {

        # Stop daemons.

        echo -n $"Shutting down $prog: "

        killproc $prog

        RETVAL=$?

        echo

        [ $RETVAL -eq 0 ] && rm -f /var/lock/subsys/$prog

        return $RETVAL

}

# See how we were called.

case "$1" in

start)

        start

        ;;

stop)

        stop

        ;;

restart|reload)

        stop

        start

        RETVAL=$?

        ;;

condrestart)

        if [ -f /var/lock/subsys/$prog ]; then

            stop

            start

            RETVAL=$?

        fi

        ;;

status)

        status $prog

        RETVAL=$?

        ;;

*)

        echo $"Usage: $0 {start|stop|restart|condrestart|status}"

        exit 1

esac

exit $RETVAL
授予执行权
chmod +x vsftpd
加入服务
chkconfig --add vsftpd
开机启动
chkconfig vsftpd on
或者
chkconfig vsftpd 2345 on
下面是/etc/vsftpd/下的文件
chroot_list vsftpd.conf vsftpd.conf_bck vuser_conf vuser_passwd.db vuser_passwd.txt welcome.txt
首先配置vsftpd.conf
anonymous_enable=NO

local_enable=YES

local_root=/home/test

chroot_list_enable=YES

chroot_list_file=/etc/vsftpd/chroot_list

ascii_upload_enable=YES

ascii_download_enable=YES

pam_service_name=vsftpd

guest_enable=YES

guest_username=ftpadmin

user_config_dir=/etc/vsftpd/vuser_conf

allow_writeable_chroot=YES

banner_file=/etc/vsftpd/welcome.txt
接着chroot_list
test1

ftpadmin

vsftpd
然后welcome.txt
Hello, Welcome to vsftpd !!
跟着vuser_passwd.txt
test

test

test1

test1

test2

test2
这里还有一步, 生成db密码文件
db_load –T –t hash –f /etc/vsftpd/vuser_passwd.txt /etc/vsftpd/vuser_passwd.db
最后新建vuser_conf文件夹
mkdir vuser_conf
里面放的是用户限制

举个例子: test用户的
local_root=/opt/var/ftp1    #test用户能进入的目录

write_enable=YES

anon_umask=022

anon_world_readable_only=NO

anon_upload_enable=YES

anon_mkdir_write_enable=YES

anon_other_write_enable=YES
已经完成的差不多了, 最后就是开放21端口
iptables -I INPUT -p tcp --dport 21 -j ACCEPT
保存这个规则
service iptables save
重启这个防火墙
service iptables restart
最后尝试连接:账号test密码test
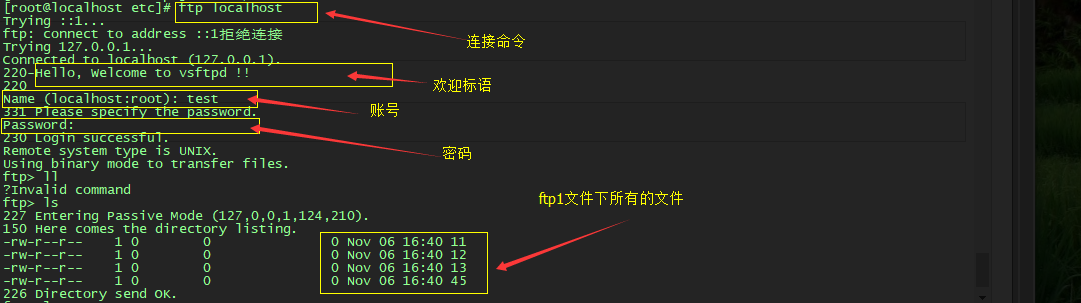
验证一下test指定的目录下/opt/var/ftp1是否是这几个文件

接下来是外网连接
我使用的是ftp小黄
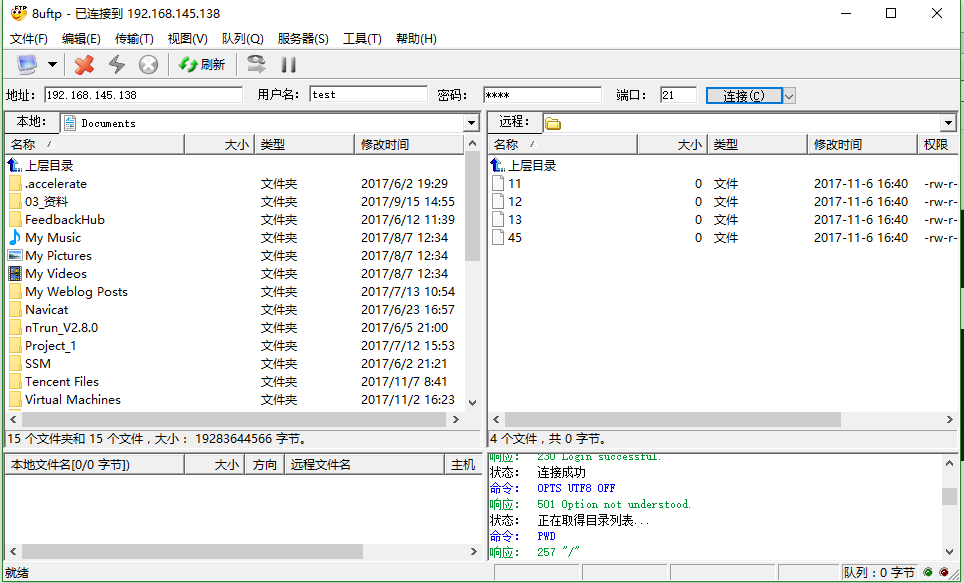
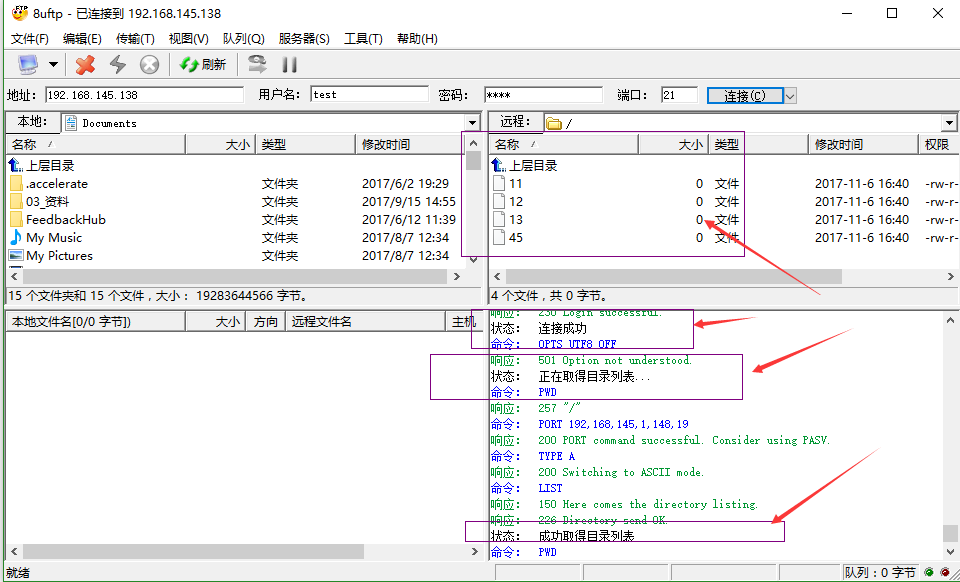
第一次连接的时候我的情况是这样的
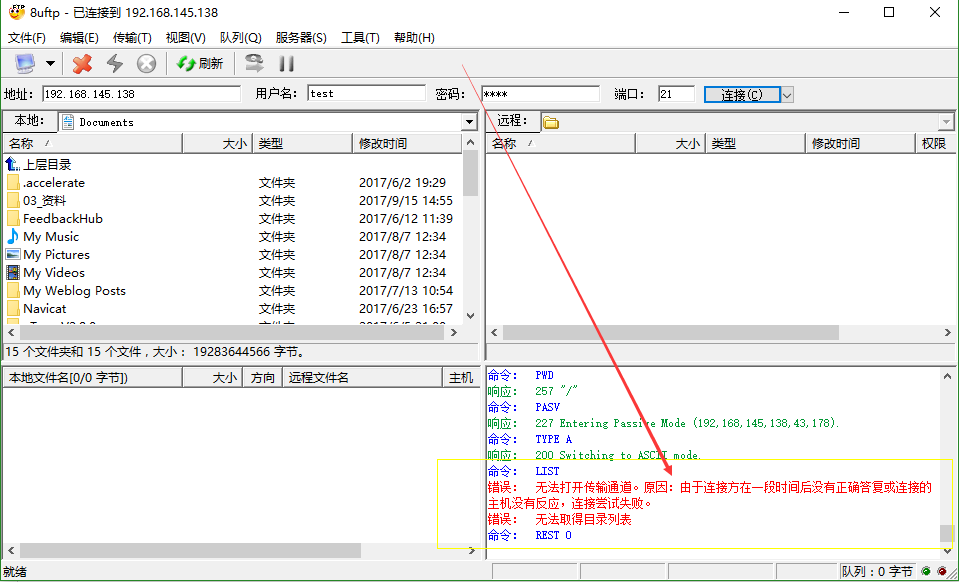
然后我取消PASV验证
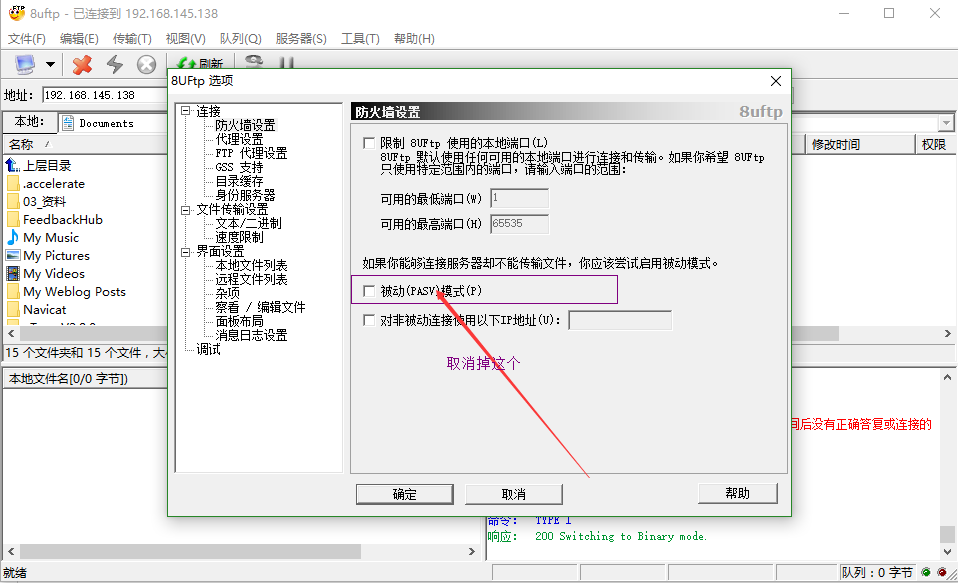
最后是这样的, 连接成功!
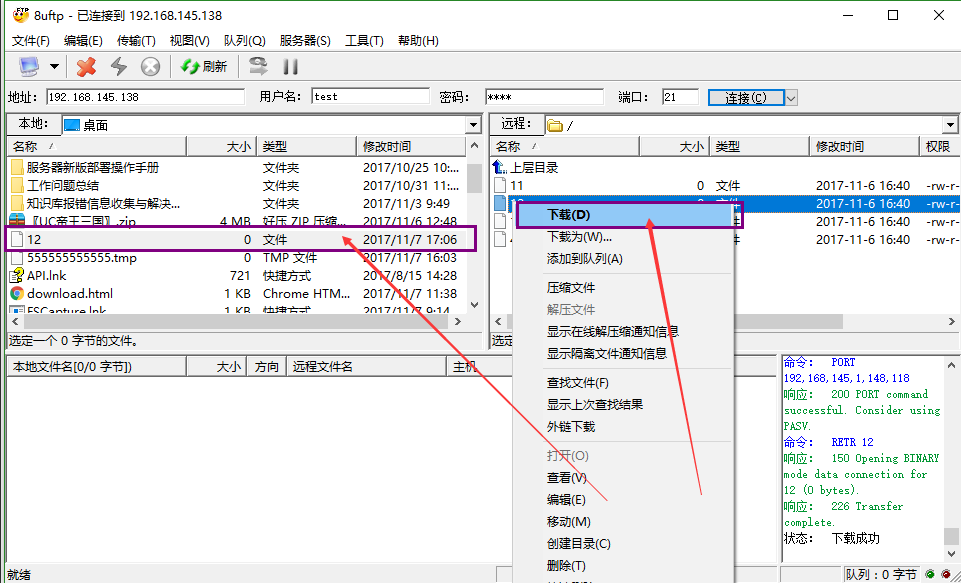
尝试下载文件
编译安装vsftpd-3.0.2的更多相关文章
- CentOS 7.0编译安装Nginx1.6.0+MySQL5.6.19+PHP5.5.14
准备篇: CentOS 7.0系统安装配置图解教程 http://www.osyunwei.com/archives/7829.html 一.配置防火墙,开启80端口.3306端口 CentOS 7. ...
- CentOS7 编译安装 nginx-1.10.0
对于NGINX 支持epoll模型 epoll模型的优点 定义: epoll是Linux内核为处理大批句柄而作改进的poll,是Linux下多路复用IO接口select/poll的增强版本,它能显著的 ...
- CentOS 6.2编译安装Nginx1.2.0+MySQL5.5.25+PHP5.3.13
CentOS 6.2编译安装Nginx1.2.0+MySQL5.5.25+PHP5.3.132013-10-24 15:31:12标签:服务器 防火墙 file 配置文件 written 一.配置好I ...
- CentOS 6.2编译安装Nginx1.2.0+MySQL5.5.25+PHP5.3.13+博客系统WordPress3.3.2
说明: 操作系统:CentOS 6.2 32位 系统安装教程:CentOS 6.2安装(超级详细图解教程): http://www.osyunwei.com/archives/1537.html 准备 ...
- CentOS 7.0编译安装Nginx1.6.0+MySQL5.6.19+PHP5.5.14方法分享
一.配置防火墙,开启80端口.3306端口 CentOS 7.0默认使用的是firewall作为防火墙,这里改为iptables防火墙. 1.关闭firewall: systemctl stop fi ...
- 在CUDA8.0下编译安装OpenCV3.1.0来实现GPU加速(Compiling OpenCV3.1.0 with CUDA8.0 support)
在CUDA8.0下编译安装OpenCV3.1.0 一.本人电脑配置:ubuntu 14.04, NVIDIA GTX1060. 二.编译OpenCV3.1.0前,读者需要成功安装CUDA8.0(网上有 ...
- Ubuntu16.04下编译安装OpenCV3.4.0(C++ & python)
Ubuntu16.04下编译安装OpenCV3.4.0(C++ & python) 前提是已经安装了python2,python3 1)安装各种依赖库 sudo apt-get update ...
- 保姆级教程——Ubuntu16.04 Server下深度学习环境搭建:安装CUDA8.0,cuDNN6.0,Bazel0.5.4,源码编译安装TensorFlow1.4.0(GPU版)
写在前面 本文叙述了在Ubuntu16.04 Server下安装CUDA8.0,cuDNN6.0以及源码编译安装TensorFlow1.4.0(GPU版)的亲身经历,包括遇到的问题及解决办法,也有一些 ...
- [笔记] Ubuntu 18.04源码编译安装OpenCV 4.0流程
标准常规安装方法安装的OpenCV版本比较低,想尝鲜使用4.0版本,只好源码安装. 安装环境 OS:Ubuntu 18.04 64 bit 显卡:NVidia GTX 1080 CUDA:10.0 c ...
- 在CUDA8.0下指定位置编译安装OpenCV3.1.0来实现GPU加速(Compiling OpenCV3.1.0 with CUDA8.0 support)
在CUDA8.0下指定位置编译安装OpenCV3.1.0 一.本人电脑配置:ubuntu 14.04, NVIDIA GTX1060. 二.编译OpenCV3.1.0前,读者需要成功安装CUDA8.0 ...
随机推荐
- ZH奶酪:JavaScript调用AngularJS的函数/$scope/变量
使用背景: 需要在其他JavaScript文件中调用AngularJS内部方法或改变$scope变量,同时还要保持双向数据绑定: 首先获取AngularJS application: 方法一:通过co ...
- MySQL 重做日志文件
一.innodb log的基础知识 · innodb log顾名思义:即innodb存储引擎产生的日志,也可以称为重做日志文件,默认在innodb_data_home_dir下面有两个文件ib_log ...
- ArcGIS API for javascript开发笔记(四)——GP服务调用之GP模型的规范化制作详解
感谢一路走来默默陪伴和支持的你~~~ -------------------欢迎来访,拒绝转载------------------- 在之前的利用Python分析GP服务运行结果的输出路径 & ...
- 算法提炼是落脚点-php数组-字符串函数
int array_unshift ( array &$array , mixed $value1 [, mixed $... ] ) array_unshift() prep ...
- 44(function pointer 2)
#include<iostream> using namespace std; class A { public: int x; int sayhello() { cout<< ...
- linux UVC and hardware viewer
至于从哪个版本开始内核支持UVC,官方的话是“Linux 2.6.26 and newer includes the Linux UVC driver natively.” 1.查看摄像头ID: [r ...
- ArcGIS URL 组成
转自帮助文档:http://server.arcgis.com/zh-cn/server/latest/administer/windows/components-of-arcgis-urls.htm ...
- SPARQL 入门教程
1.准备工作 1.1 下载ZIP 1.2 配置环境变量 1.3 查询文件 vc-db-1.rdf 2. 查询操作 2.1 普通查询 /** * 查询family为"Smith"的 ...
- .NET数据挖掘与机器学习开源框架
1. 数据挖掘与机器学习开源框架 1.1 框架概述 1.1.1 AForge.NET AForge.NET是一个专门为开发者和研究者基于C#框架设计的,他包括计算机视觉与人工智能,图像处理,神经 ...
- visio 的使用方法
1:往visio中添加商务图形和形状的方法.例如饼状图. 文件>形状>商务>图表和图形>绘制图表形状 2:visio 画半弧形,用铅笔 3: visio 画的图形,如果想要和v ...