springMVC数据回显
1、web.xml
 <?xml version="1.0" encoding="UTF-8"?>

 <web-app xmlns:xsi="http://www.w3.org/2001/XMLSchema-instance" xmlns="http://java.sun.com/xml/ns/javaee" xsi:schemaLocation="http://java.sun.com/xml/ns/javaee http://java.sun.com/xml/ns/javaee/web-app_2_5.xsd" id="WebApp_ID" version="2.5">

   <display-name>springmvc1</display-name>

   <filter>

     <filter-name>characterEncoding</filter-name>

     <filter-class>org.springframework.web.filter.CharacterEncodingFilter</filter-class>

     <init-param>

       <param-name>encoding</param-name>

       <param-value>UTF-8</param-value>

     </init-param>

   </filter>

   <filter-mapping>

     <filter-name>characterEncoding</filter-name>

     <url-pattern>/*</url-pattern>

   </filter-mapping>

   <servlet>

     <servlet-name>springmvc</servlet-name>

     <servlet-class>org.springframework.web.servlet.DispatcherServlet</servlet-class>

     <init-param>

       <param-name>contextConfigLocation</param-name>

       <param-value>classpath:springmvc.xml</param-value>

     </init-param>

   </servlet>

   <servlet-mapping>

     <servlet-name>springmvc</servlet-name>

     <url-pattern>*.do</url-pattern>

   </servlet-mapping>

   <!-- <servlet-mapping>

     <servlet-name>springmvc</servlet-name>

     <url-pattern>/rest/*</url-pattern>

   </servlet-mapping> -->

   <welcome-file-list>

     <welcome-file>index.html</welcome-file>

     <welcome-file>index.htm</welcome-file>

     <welcome-file>index.jsp</welcome-file>

     <welcome-file>default.html</welcome-file>

     <welcome-file>default.htm</welcome-file>

     <welcome-file>default.jsp</welcome-file>

   </welcome-file-list>

 </web-app>
2、springmvc.xml
 <?xml version="1.0" encoding="UTF-8"?>

 <beans xmlns="http://www.springframework.org/schema/beans"

     xmlns:mvc="http://www.springframework.org/schema/mvc"

     xmlns:aop="http://www.springframework.org/schema/aop"

     xmlns:tx="http://www.springframework.org/schema/tx"

     xmlns:context="http://www.springframework.org/schema/context"

     xmlns:xsi="http://www.w3.org/2001/XMLSchema-instance"

     xsi:schemaLocation="http://www.springframework.org/schema/beans

                         http://www.springframework.org/schema/beans/spring-beans-3.2.xsd

                         http://www.springframework.org/schema/mvc

                         http://www.springframework.org/schema/mvc/spring-mvc-3.2.xsd

                         http://www.springframework.org/schema/context

                         http://www.springframework.org/schema/context/spring-context-3.2.xsd

                         http://www.springframework.org/schema/aop

                         http://www.springframework.org/schema/aop/spring-aop-3.2.xsd

                         http://www.springframework.org/schema/tx

                         http://www.springframework.org/schema/tx/spring-tx-3.2.xsd">

         <!-- 把Controller交给spring管理 -->

         <context:component-scan base-package="com.xiaostudy"/>

         <!-- <mvc:annotation-driven/> --><!-- 这个可以替代下面处理器映射器和处理器适配器,仅在注解情况下可用 -->

         <!-- 配置注解处理器映射器 功能:寻找执行类Controller -->

         <bean class="org.springframework.web.servlet.mvc.method.annotation.RequestMappingHandlerMapping"/>

         <!-- 配置注解处理器适配器 功能:调用controller方法,执行controller -->

         <bean class="org.springframework.web.servlet.mvc.method.annotation.RequestMappingHandlerAdapter"/>

         <!-- 配置sprigmvc视图解析器:解析逻辑试图

              后台返回逻辑试图:index

             视图解析器解析出真正物理视图:前缀+逻辑试图+后缀====/WEB-INF/index.jsp -->

         <bean class="org.springframework.web.servlet.view.InternalResourceViewResolver">

             <property name="prefix" value="/WEB-INF/"/>

             <property name="suffix" value=".jsp"/>

         </bean>

 </beans>
3、domain类
 package com.xiaostudy.domain;

 public class User {

     private int id;

     private String username;

     private String password;

     private int age;

     public int getId() {

         return id;

     }

     public void setId(int id) {

         this.id = id;

     }

     public String getUsername() {

         return username;

     }

     public void setUsername(String username) {

         this.username = username;

     }

     public String getPassword() {

         return password;

     }

     public void setPassword(String password) {

         this.password = password;

     }

     public int getAge() {

         return age;

     }

     public void setAge(int age) {

         this.age = age;

     }

     @Override

     public String toString() {

         return "User [id=" + id + ", username=" + username + ", password=" + password + ", age=" + age + "]";

     }

 }
4、注解类
 package com.xiaostudy.controller;

 import org.springframework.stereotype.Controller;

 import org.springframework.ui.Model;

 import org.springframework.web.bind.annotation.PathVariable;

 import org.springframework.web.bind.annotation.RequestMapping;

 import org.springframework.web.bind.annotation.RequestMethod;

 import org.springframework.web.bind.annotation.RequestParam;

 import com.xiaostudy.domain.User;

 @Controller//<bean class="com.xiaostudy.controller.MyController"/>

 @RequestMapping(value="/myController")//访问该类的方法时,前面多这样一个路径

 public class MyController {

 //    @RequestMapping("hello")//http://localhost:8080/demo2/hello.do

 //    @RequestMapping("/hello")//http://localhost:8080/demo2/hello.do

 //    @RequestMapping(value="/hello.do")//http://localhost:8080/demo2/hello.do

 //    @RequestMapping(value="/hello.do",method=RequestMethod.GET)//http://localhost:8080/demo2/hello.do

 //    @RequestMapping(value="/hello.do",method= {RequestMethod.GET,RequestMethod.POST})//http://localhost:8080/demo2/hello.do

     public String print() {

         return "index";

     }

     @RequestMapping("hi")//http://localhost:8080/demo2/myController/hi.do

     public String hello() {

         return "index";

     }

     @RequestMapping("requestint")//http://localhost:8080/demo2/myController/requestint.do

     public String requestint(int id) {

         System.out.println(id);

         return "index";

     }

     @RequestMapping("requestint_2")//http://localhost:8080/demo2/myController/requestint2.do

     public String requestint_2(@RequestParam(value="id2",required=true)int id) {//value="id2"表示:更改参数别名,required=true表示:直接访问地址会报错,必须要转跳

         System.out.println(id);

         return "index";

     }

     @RequestMapping("requestint2")//http://localhost:8080/demo2/myController/requestint2.do

     public String requestint2(int id, int i) {

         System.out.println(id + "   " + i);

         return "index";

     }

     @RequestMapping("requestint3")//http://localhost:8080/demo2/myController/requestint3.do

     public String requestint3(User user) {

         System.out.println(user);

         return "index";

     }

     @RequestMapping("requestint4")//http://localhost:8080/demo2/myController/requestint4.do

     public String requestint4(CustomUser customUser) {

         System.out.println(customUser);

         return "index";

     }

     @RequestMapping("xiaostudy")//http://localhost:8080/demo2/myController/xiaostudy.do

     public String add() {

         return "xiaostudy";

     }

     @RequestMapping("ok")//http://localhost:8080/demo2/myController/ok.do

     public String ok(Model model) {//Model作用:用于回显数据

         User user = new User();

         user.setId(2);

         user.setUsername("xiaostudy");

         user.setPassword("123456");

         user.setAge(23);

         model.addAttribute("user", user);

         return "ok";

     }

     @RequestMapping("id/{id}")//http://localhost:8080/demo2/myController/id/?.do

     public String id(@PathVariable int id) {//@PathVariable:说明{id}是对参数的id

         System.out.println(id);

         return "index";

     }

     @RequestMapping("test")//http://localhost:8080/demo2/myController/test.do

     public String test() {

         return "forward:index";//转发

     }

     @RequestMapping("test2")//http://localhost:8080/demo2/myController/test2.do

     public String test2() {

         return "redirect:index";//重定向

     }

 }
5、回显数据jsp
 <%@ page language="java" contentType="text/html; charset=UTF-8" pageEncoding="UTF-8"%>

 <!DOCTYPE html PUBLIC "-//W3C//DTD HTML 4.01 Transitional//EN"

             "http://www.w3.org/TR/html4/loose.dtd">

 <html>

 <head>

     <meta http-equiv="Content-Type" content="text/html; charset=UTF-8">

     <title>springMVC_demo</title>

 </head>

 <body>

     ${user.id }||${user.username }||${user.password }||${user.age }<br/>

     <a href="${pageContext.request.contextPath }/myController/id/${user.id}.do">id</a><br/>

     <%-- <a href="${pageContext.request.contextPath }/rest/myController/id/${user.id}">id2</a><br/> --%>

 </body>

 </html>
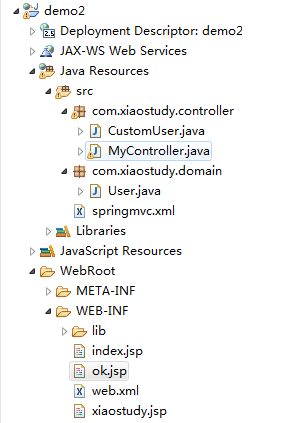
项目文件结构
springMVC数据回显的更多相关文章
- springmvc 数据回显功能
按下 修改数据之后 修改功能实现-转向修改页面 2)控制层实现准备数据,并转向修改页面 ~ PersonController.java package cn.itcast.springmvc.cont ...
- SpringMVC学习--数据回显
简介 表单提交失败需要再回到表单页面重新填写,原来提交的数据需要重新在页面上显示. 简单数据类型 对于简单数据类型,如:Integer.String.Float等使用Model将传入的参数再放到req ...
- SpringMVC(三) —— 参数绑定和数据回显
参数绑定的过程:就是页面向后台传递参数,后台接受的一个过程. 默认支持的参数类型:(就是你在方法上以形参的形式去定义一下的类型,就可以直接使用它) HttpServletRequest HttpSer ...
- SpringMVC第五篇【方法返回值、数据回显、idea下配置虚拟目录、文件上传】
Controller方法返回值 Controller方法的返回值其实就几种类型,我们来总结一下-. void String ModelAndView redirect重定向 forward转发 数据回 ...
- SpringMVC【参数绑定、数据回显、文件上传】
前言 本文主要讲解的知识点如下: 参数绑定 数据回显 文件上传 参数绑定 我们在Controller使用方法参数接收值,就是把web端的值给接收到Controller中处理,这个过程就叫做参数绑定.. ...
- SpringMVC学习(四)———— 数据回显与自定义异常处理器
一.数据回显技术 Springmvc默认支持对pojo类型的数据回显,默认不支持简单类型的数据回显 1.1.什么是数据回显? 在信息校验时,如果发生校验错误,那么把校验的数据信息,依然停留在当前页面, ...
- springmvc(五) 数据回显与自定义异常处理器
这章讲解一下springmvc的数据回显和自定义异常处理器的使用,两个都很简单 --WH 一.数据回显技术 Springmvc默认支持对pojo类型的数据回显,默认不支持简单类型的数据回显 1.1.什 ...
- SpringMVC由浅入深day02_5数据回显_6异常处理器
5 数据回显 5.1 什么数据回显 表单提交失败需要再回到表单页面重新填写,原来提交的数据需要重新在页面上显示. 5.2 pojo数据回显方法 1.springmvc默认对pojo数据进行回显. po ...
- springMVC学习(8)-数据回显
什么是数据回显: 提交后,如果出现错误(或者别的情况),将刚才提交的数据回显到刚才的提交页面. pojo数据回显方法: 一.springmvc默认对pojo数据进行回显. 比如现在的jsp页面提示出现 ...
随机推荐
- django中同源策略和跨域解决方案
一 同源策略 1.1何谓同源? 如果两个页面的协议,端口(如果有指定)和域名都相同,则两个页面具有相同的源. 举个例子: 下表给出了相对http://a.xyz.com/dir/page.html同 ...
- python发送邮件的2种方式
发送邮件的2种方式1.匿名发送 smtpObj = smtplib.SMTP(host, port) smtpObj.sendmail(from_addr, to_addrs, message.as_ ...
- sql server常用性能计数器
https://blog.csdn.net/kk185800961/article/details/52462913?utm_source=blogxgwz5 https://blog.csdn.ne ...
- python select poll
http://www.cnblogs.com/coser/archive/2012/01/06/2315216.html
- [Windows Powershell]-学习笔记(4)
Powershell 定义变量 在powershell中变量名均是以美元符"$"开始,剩余字符可以是数字.字母.下划线的任意字符,并且powershell变量名大小写不敏感($a和 ...
- Linux优雅退出问题
问题:Springboot框架开发的项目中会内嵌tomcat容器,在杀死进程的时候tomcat为被正常杀死,导致端口未被释放,第二次启动的时候报端口冲突. 先讲一个基本概念:如何在shell中终止一个 ...
- git 常用的撤销操作
git 开发时的使用流程,从同事那里学习的, 第一步,先建立一个新的分支,可以在GITLAB或通过命令git checkout -b newbranch 或通过IDE插件 第二步,让项目切换到该分支, ...
- SqlHelper简单实现(通过Expression和反射)6.Providor模式(工厂+策略)可配置数据库选择
基本思想,将MsSqlDbUtility和MySqlDbUtility设计成单例模式,通过App.config或Web.config进行默认的数据库设置,然后通过DbUtilityFactory获取D ...
- 使用tar解压文件报归档中找不到
1.今天使用tar命令解压jdk安装包时,报如下错误.tar -zxvf jdk-8u181-linux-x64.tar.gz /usr/local/java/ 2.后来查了一下,因为我解压当前的文件 ...
- netbeans通过wsdl生成webservice的UTF8问题
在netbeans通过wsdl方式生成的webservice,打开类文件时,提示无法通过UTF-8打开. 这是因为默认生成的文件不是UTF-8格式的,解决方案如下: 1.打开netbeans的安装目录 ...