004-集成maven和Spring boot的profile功能打包
参考地址:https://blog.csdn.net/lihe2008125/article/details/50443491
一、主要目标
1、通过mvn在命令行中打包时,可以指定相应的profile。
2、需使用了maven的profile功能
3、使用了Spring Boot的profile功能
二、profile简介
什么是profile,解决什么问题呢?
一般在开发项目的时候要有多个环境,如开发环境、测试环境、生产环境,配置文件一般不同。当要向各个环境发布程序时,需要人工处理这些配置文件。有了profile,只要在maven打包时使用下面命令即可。
mvn clean package -Dmaven.test.skip=true -P prod
-P prod 就是告诉maven要使用名字为prod的profile来打包,即所有的配置文件都使用生产环境(prod:生产;test:测试;dev:开发)。
三、实现过程
maven支持profile功能,当使用maven profile打包时,可以打包指定目录和指定文件,且可以修改文件中的变量。
spring boot也支持profile功能,只要在application.properties文件中指定spring.profiles.active=xxx 即可,其中xxx是一个变量,当maven打包时,修改这个变量即可。
3.1、父pom增加profile配置
<profiles>

        <profile>

            <id>dev</id>

            <properties>

                <profileActive>dev</profileActive>

            </properties>

            <activation>

                <activeByDefault>true</activeByDefault>

            </activation>

        </profile>

        <profile>

            <id>test</id>

            <properties>

                <profileActive>test</profileActive>

            </properties>

        </profile>

        <profile>

            <id>prod</id>

            <properties>

                <profileActive>properties</profileActive>

            </properties>

        </profile>

    </profiles>
方式一、基本打包
测试环境:springboot 1.5.1下
在build中配置,下文 中会有详细解释
        <resources>

            <resource>

                <directory>src/main/resources</directory>

                <filtering>true</filtering>

                <excludes>

                    <exclude>application-dev.properties</exclude>

                    <exclude>application-test.properties</exclude>

                    <exclude>application-produce.properties</exclude>

                </excludes>

            </resource>

            <resource>

                <directory>src/main/resources</directory>

                <filtering>true</filtering>

                <includes>

                    <include>application.properties</include>

                    <include>application-${profiles.active}.properties</include>

                    <include>**/*.xml</include>

                </includes>

            </resource>

            <resource>

                <directory>src/main/java</directory>

                <includes>

                    <include>**/*.xml</include>

                </includes>

                <filtering>false</filtering>

            </resource>

        </resources>
因可能版本较低,需要配置 maven-resources-plugin,否则变量不替换,但是更换了springboot 2.0.4后不用配置既可以
        <plugins>

            <plugin>

                <groupId>org.springframework.boot</groupId>

                <artifactId>spring-boot-maven-plugin</artifactId>

            </plugin>

            <plugin>

                <groupId>org.apache.maven.plugins</groupId>

                <artifactId>maven-resources-plugin</artifactId>

                <configuration>

                    <delimiters><!-- 使用${..}作为占位符 -->

                        <delimiter>${*}</delimiter>

                    </delimiters>

                    <!-- 使用默认的占位符(@..@) -->

                    <useDefaultDelimiters>true</useDefaultDelimiters>

                </configuration>

            </plugin>

        </plugins>
方式二、自定义配置的打包
1、配置好:assembly/depolyment.xml
<?xml version="1.0" encoding="UTF-8"?>

<assembly xmlns="http://maven.apache.org/plugins/maven-assembly-plugin/assembly/1.1.3" xmlns:xsi="http://www.w3.org/2001/XMLSchema-instance"

          xsi:schemaLocation="http://maven.apache.org/plugins/maven-assembly-plugin/assembly/1.1.3 http://maven.apache.org/xsd/assembly-1.1.3.xsd">

    <id>dist</id>

    <formats>

        <format>zip</format>

        <format>dir</format>

    </formats>

    <includeBaseDirectory>false</includeBaseDirectory>

    <fileSets>

        <fileSet>

            <directory>src/main/bin</directory>

            <outputDirectory>bin/</outputDirectory>

        </fileSet>

        <!--<fileSet>-->

            <!--<directory>src/main/resources</directory>-->

            <!--<outputDirectory>/</outputDirectory>-->

        <!--</fileSet>-->

        <fileSet>

            <directory>${project.build.directory}</directory>

            <outputDirectory>/</outputDirectory>

            <includes>

                <include>*.jar</include>

            </includes>

        </fileSet>

    </fileSets>

    <dependencySets>

        <dependencySet>

            <outputDirectory>lib</outputDirectory>

            <scope>runtime</scope>

            <excludes>

                <exclude>${groupId}:${artifactId}</exclude>

            </excludes>

        </dependencySet>

    </dependencySets>

</assembly>
2、多环境配置
方式2.1、文件后缀方式
在需要打包的子项目pom设置
    <build>

        <resources>

            <resource>

                <!--指定打包时需要特殊处理的目录文件-->

                <directory>src/main/resources</directory>

                <!--处理文件是时,需要变量替换-->

                <filtering>true</filtering>

                <!--打包时,排除文件-->

                <excludes>

                    <exclude>application.properties</exclude>

                    <exclude>application-dev.properties</exclude>

                    <exclude>application-test.properties</exclude>

                    <exclude>application-prod.properties</exclude>

                </excludes>

            </resource>

            <resource>

                <!--指定打包时需要特殊处理的目录文件-->

                <directory>src/main/resources</directory>

                <!--处理文件是时,需要变量替换-->

                <filtering>true</filtering>

                <!--打包时,包含文件-->

                <includes>

                    <include>application.properties</include>

                    <include>application-${profileActive}.properties</include>

                </includes>

            </resource>

        </resources>

        <plugins>

            <plugin>

                <groupId>org.apache.maven.plugins</groupId>

                <artifactId>maven-compiler-plugin</artifactId>

                <configuration>

                    <source>${java.version}</source>

                    <target>${java.version}</target>

                </configuration>

            </plugin>

            <!--打jar包-->

            <plugin>

                <groupId>org.apache.maven.plugins</groupId>

                <artifactId>maven-jar-plugin</artifactId>

                <version>2.6</version>

                <configuration>

                    <archive>

                        <manifest>

                            <!--jar入口累-->

                            <mainClass>com.jd.bt.gateway.ZuulApplication</mainClass>

                            <!-- classpath路径 -->

                            <addClasspath>true</addClasspath>

                            <classpathPrefix>lib/</classpathPrefix>

                        </manifest>

                        <manifestEntries>

                            <Class-Path>./</Class-Path>

                        </manifestEntries>

                    </archive>

                    <excludes>

                        <!--注意从编译结果目录开始算目录结构-->

                        <!--<exclude>/*.yml</exclude>-->

                        <!--<exclude>/*.properties</exclude>-->

                        <!--<exclude>/*.xml</exclude>-->

                        <!--<exclude>/*.txt</exclude>-->

                    </excludes>

                </configuration>

            </plugin>

            <!--自定义打包-->

            <plugin>

                <artifactId>maven-assembly-plugin</artifactId>

                <configuration>

                    <finalName>${artifactId}</finalName>

                    <!-- not append assembly id in release file name -->

                    <appendAssemblyId>false</appendAssemblyId>

                    <descriptors>

                        <descriptor>src/main/assembly/depolyment.xml</descriptor>

                    </descriptors>

                </configuration>

                <executions>

                    <execution>

                        <id>dist</id>

                        <phase>package</phase>

                        <goals>

                            <goal>single</goal>

                        </goals>

                    </execution>

                </executions>

            </plugin>

        </plugins>

    </build>
在resources配置管理boot 文件
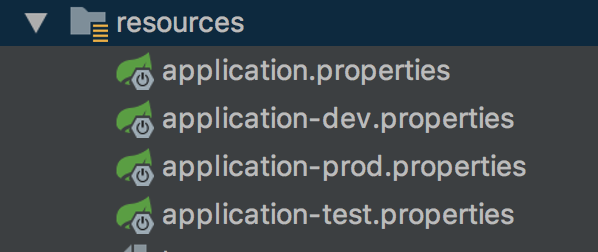
工程中有4个文件:
application.properties, 包含通用配置的文件。文件中有spring.profiles.active=@profileActive@的属性。spring boot的profile是通过spring.profiles.active属性来配置的,这里的profileActive和上面coolpro工程中配置的profileActive属性名要一致。这样,在运行mvn命令时,maven就会帮我们将@profileActive@替换成指定的profile。
application-dev.properties, 当mvn -P dev时, 需要打包这个文件。
application-test.properties, 当mvn -P test时, 需要打包这个文件。
application-prod.properties, 当mvn -P prod时, 需要打包这个文件。
application.properties
spring.profiles.active=@profileActive@

server.port=8040
application-dev.properties
server.port=8050
……
方式2.2、以文件夹方式
在需要打包的子项目pom设置
    <build>

        <resources>

            <!--文件夹-->

            <resource>

            <!--指定打包时需要特殊处理的目录文件-->

                <directory>src/main/resources</directory>

                <!--处理文件是时,需要变量替换-->

                <filtering>true</filtering>

                <!--打包时,排除文件-->

                <excludes>

                    <exclude>dev_conf/*</exclude>

                    <exclude>test_conf/*</exclude>

                    <exclude>prod_conf/*</exclude>

                </excludes>

            </resource>

            <resource>

                <!--指定打包时需要特殊处理的目录文件-->

                <directory>src/main/resources/${profileActive}_conf</directory>

                <!--处理文件是时,需要变量替换-->

                <filtering>true</filtering>

            </resource>

        </resources>

        <plugins>

            <plugin>

                <groupId>org.apache.maven.plugins</groupId>

                <artifactId>maven-compiler-plugin</artifactId>

                <configuration>

                    <source>${java.version}</source>

                    <target>${java.version}</target>

                </configuration>

            </plugin>

            <!--打jar包-->

            <plugin>

                <groupId>org.apache.maven.plugins</groupId>

                <artifactId>maven-jar-plugin</artifactId>

                <version>2.6</version>

                <configuration>

                    <archive>

                        <manifest>

                            <!--jar入口累-->

                            <mainClass>com.jd.bt.gateway.ZuulApplication</mainClass>

                            <!-- classpath路径 -->

                            <addClasspath>true</addClasspath>

                            <classpathPrefix>lib/</classpathPrefix>

                        </manifest>

                        <manifestEntries>

                            <Class-Path>./</Class-Path>

                        </manifestEntries>

                    </archive>

                    <excludes>

                        <!--注意从编译结果目录开始算目录结构-->

                        <!--<exclude>/*.yml</exclude>-->

                        <!--<exclude>/*.properties</exclude>-->

                        <!--<exclude>/*.xml</exclude>-->

                        <!--<exclude>/*.txt</exclude>-->

                    </excludes>

                </configuration>

            </plugin>

            <!--自定义打包-->

            <plugin>

                <artifactId>maven-assembly-plugin</artifactId>

                <configuration>

                    <finalName>${artifactId}</finalName>

                    <!-- not append assembly id in release file name -->

                    <appendAssemblyId>false</appendAssemblyId>

                    <descriptors>

                        <descriptor>src/main/assembly/depolyment.xml</descriptor>

                    </descriptors>

                </configuration>

                <executions>

                    <execution>

                        <id>dist</id>

                        <phase>package</phase>

                        <goals>

                            <goal>single</goal>

                        </goals>

                    </execution>

                </executions>

            </plugin>

        </plugins>

    </build>
在resources
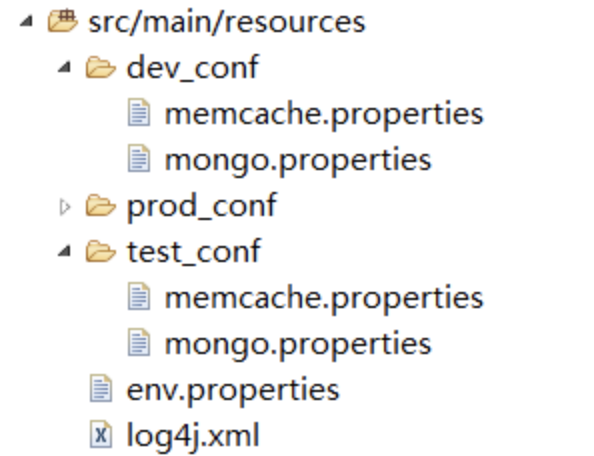
log4j.xml:共有文件
env.properties:
env.profile.active=@profileActive@
注意:使用$符号,不能替换,maven的maven-resources-plugin使用@替换的符号。
3.4、打包即可
mvn clean package -Dmaven.test.skip=true -P dev -e
004-集成maven和Spring boot的profile功能打包的更多相关文章
- [Spring Boot 系列] 集成maven和Spring boot的profile功能
由于项目的需要, 今天给spirng boot项目添加了profile功能.再网上搜索了一圈,也没有找到满意的参考资料,其实配置并不难,就是没有一个one stop(一站式)讲解的地方,所以有了写这篇 ...
- 集成maven和Spring boot的profile功能
思路:maven支持profile功能,当使用maven profile打包时,可以打包指定目录和指定文件,且可以修改文件中的变量.spring boot也支持profile功能,只要在applica ...
- 集成maven和Spring boot的profile 专题
maven中配置profile节点: <project> .... <profiles> <profile> <!-- 生产环境 --> <id& ...
- [Spring Boot 系列] 集成maven和Spring boot的profile 专题
maven中配置profile节点: <project> .... <profiles> <profile> <!-- 生产环境 --> <id& ...
- 集成maven和Spring boot的profile
如果在配置中勾选了多套配置,则以pom.xml文件中 profiles中 配置 最后一个配置为准. maven中配置profile节点: <project> .... <profi ...
- Spring boot 的profile功能如何实现多环境配置自动切换
通常服务端应用开发需要经过以下几个流程: 开发 -> 测试 -> RC验证 -> 上线 这就涉及到四个不同的环境,开发环境.测试环境.RC环境以及生产环境,为了避免不同环境之间相互干 ...
- 借助Maven入手Spring Boot第一个程序
目前网上有不少Spring Boot的入门文章,都很有帮助,本人最近在深入学习Spring Cloud,在搭建第一个Hello World程序时,感觉对于新手而言,介绍文章怎么详细都不为过,因为其中坑 ...
- Maven 搭建spring boot多模块项目(附源码),亲测可以,感谢原创
原创地址:https://segmentfault.com/a/1190000005020589 我的DEMO码云地址,持续添加新功能: https://gitee.com/itbase/Spring ...
- Myeclipse下使用Maven搭建spring boot项目
开发环境:Myeclipse2017.JDK1.6.Tomcat 8.0.Myeclipse下使用Maven搭建spring boot项目,详细过程如下: 1. New -> Project.. ...
随机推荐
- PHP多进程编程(3):多进程抓取网页的演示
我们知道,从父进程到子经常的数据传递相对比较容易一些,但是从子进程传递到父进程就比较的困难. 有很多办法实现进程交互,在php中比较方便的是 管道通信.当然,还可以通过 socket_pair 进行通 ...
- 学习记录jQuery的animate函数
很久之前就对jQuery animate的实现非常感兴趣,不过前段时间很忙,直到前几天端午假期才有时间去研究. jQuery.animate的每种动画过渡效果都是通过easing函数实现的.jQuer ...
- Linux中安装配置hadoop集群
一. 简介 参考了网上许多教程,最终把hadoop在ubuntu14.04中安装配置成功.下面就把详细的安装步骤叙述一下.我所使用的环境:两台ubuntu 14.04 64位的台式机,hadoop选择 ...
- Apache -- 压力测试工具ab.exe
ab全称ApacheBench是Apache超文本传输协议(HTTP)的性能测试工具.是描绘当前所安装的Apache的执行性能, 主要是显示你安装的Apache每秒可以处理多少个请求Apache自带的 ...
- 【UVa】Salesmen(dp)
http://uva.onlinejudge.org/index.php?option=com_onlinejudge&Itemid=8&page=show_problem&p ...
- remote指令添加远程数据库
git remote add <name> <url> git remote add origin https://[your_space_id].backlogtool.co ...
- adb server is out of date.killing的解决办法
当把手机连接到电脑端口运行adb程序调试时,出现了下面这样的情况: 分析:出错的原因是adb的端口被其他程序的进程占领了,所以要做的就是找到并kill该进程. 工具/原料 cmd.exe. ...
- LoadRunner中的异常处理
在脚本的Run-time Settings中,可以设置在脚本运行过程中发生错误的处理方式.进入到Run-time Settings中,切换到Miscellaneous标签页,可以看到Error Han ...
- WebApi 异常处理解决方案
1.继承ExceptionFilterAttribute类,重写OnException方法 public class WebApiExceptionFilterAttribute : Exceptio ...
- openssl之EVP系列之8---EVP_Digest系列函数具体解释
openssl之EVP系列之8---EVP_Digest系列函数具体解释 ---依据openssl doc/crypto/EVP_DigestInit.pod翻译和自己的理解写成 (作 ...