
使用jetty-maven-plugin运行maven多项目
1.准备工作
org.eclipse.jetty jetty-maven-plugin 9.2.11.v20150529
jdk 1.7
maven 3.1
2.采用maven管理多项目的方式
1> pom工程nemo-pom的pom.xml,这里packaging要声明成pom以使用管理web modules.
<project xmlns="http://maven.apache.org/POM/4.0.0" xmlns:xsi="http://www.w3.org/2001/XMLSchema-instance"

    xsi:schemaLocation="http://maven.apache.org/POM/4.0.0 http://maven.apache.org/maven-v4_0_0.xsd">

    <modelVersion>4.0.0</modelVersion>

    <groupId>river</groupId>

    <artifactId>nemo-pom</artifactId>

    <packaging>pom</packaging>

    <version>0.0.1-SNAPSHOT</version>

    <name>nemo-pom</name>

    <url>http://maven.apache.org</url>

    <properties>

        <project.build.sourceEncoding>UTF-8</project.build.sourceEncoding>

        <spring.version>4.3.1.RELEASE</spring.version>

        <jetty_version>9.2.11.v20150529</jetty_version>

    </properties>

    <dependencies>

        <dependency>

            <groupId>junit</groupId>

            <artifactId>junit</artifactId>

            <version>4.11</version>

            <scope>test</scope>

        </dependency>

        <dependency>

            <groupId>org.eclipse.jetty</groupId>

            <artifactId>jetty-maven-plugin</artifactId>

            <version>${jetty_version}</version>

            <exclusions>

                <exclusion>

                    <artifactId>apache-jsp</artifactId>

                    <groupId>org.mortbay.jasper</groupId>

                </exclusion>

            </exclusions>

        </dependency>

    </dependencies>

    <build>

        <finalName>${project.artifactId}-${project.version}</finalName>

        <plugins>

            <plugin>

                <groupId>org.apache.maven.plugins</groupId>

                <artifactId>maven-compiler-plugin</artifactId>

                <version>3.1</version>

                <configuration>

                    <source>1.7</source>

                    <target>1.7</target>

                    <encoding>UTF-8</encoding>

                </configuration>

            </plugin>

            <plugin>

                <groupId>org.eclipse.jetty</groupId>

                <artifactId>jetty-maven-plugin</artifactId>

                <version>${jetty_version}</version>

                <configuration>

                    <scanIntervalSeconds>10</scanIntervalSeconds>

                    <reload>automatic</reload>

                    <webApp>

                        <contextPath>/</contextPath>

                    </webApp>

                    <httpConnector>

                        <port>8180</port>

                    </httpConnector>

                    <contextHandlers>

                        <contextHandler

                            implementation="org.eclipse.jetty.maven.plugin.JettyWebAppContext">

                            <contextPath>/sample</contextPath>

                            <resourceBase>${basedir}/../sample/target/sample-${project.version}</resourceBase>

                        </contextHandler>

                        <contextHandler

                            implementation="org.eclipse.jetty.maven.plugin.JettyWebAppContext">

                            <contextPath>/samplefront</contextPath>

                            <resourceBase>${basedir}/../samplefront/target/samplefront-${project.version}</resourceBase>

                        </contextHandler>

                    </contextHandlers>

                </configuration>

            </plugin>

        </plugins>

    </build>

    <modules>

        <module>../sample</module>

        <module>../samplefront</module>

    </modules>

</project>
2>web项目sample的pom.xml
<project xmlns="http://maven.apache.org/POM/4.0.0" xmlns:xsi="http://www.w3.org/2001/XMLSchema-instance"

    xsi:schemaLocation="http://maven.apache.org/POM/4.0.0 http://maven.apache.org/xsd/maven-4.0.0.xsd">

    <modelVersion>4.0.0</modelVersion>

    <parent>

        <groupId>river</groupId>

        <artifactId>nemo-pom</artifactId>

        <version>0.0.1-SNAPSHOT</version>

        <relativePath>../nemo-pom/pom.xml</relativePath>

    </parent>

    <artifactId>sample</artifactId>

    <packaging>war</packaging>

    <name>sample</name>

    <properties>

        <spring.version>4.3.1.RELEASE</spring.version>

    </properties>

    <dependencies>

        <!-- Spring dependencies -->

        <dependency>

            <groupId>org.springframework</groupId>

            <artifactId>spring-core</artifactId>

            <version>${spring.version}</version>

        </dependency>

        <dependency>

            <groupId>org.springframework</groupId>

            <artifactId>spring-beans</artifactId>

            <version>${spring.version}</version>

        </dependency>

        <dependency>

            <groupId>org.springframework</groupId>

            <artifactId>spring-expression</artifactId>

            <version>${spring.version}</version>

        </dependency>

        <dependency>

            <groupId>org.springframework</groupId>

            <artifactId>spring-context</artifactId>

            <version>${spring.version}</version>

        </dependency>

        <dependency>

            <groupId>org.springframework</groupId>

            <artifactId>spring-web</artifactId>

            <version>${spring.version}</version>

        </dependency>

        <dependency>

            <groupId>org.springframework</groupId>

            <artifactId>spring-webmvc</artifactId>

            <version>${spring.version}</version>

        </dependency>

        <dependency>

            <groupId>org.springframework</groupId>

            <artifactId>spring-aop</artifactId>

            <version>${spring.version}</version>

        </dependency>

    </dependencies>

</project>
3>web项目samplefront的pom.xml
<project xmlns="http://maven.apache.org/POM/4.0.0" xmlns:xsi="http://www.w3.org/2001/XMLSchema-instance"

    xsi:schemaLocation="http://maven.apache.org/POM/4.0.0 http://maven.apache.org/xsd/maven-4.0.0.xsd">

    <modelVersion>4.0.0</modelVersion>

    <parent>

        <groupId>river</groupId>

        <artifactId>nemo-pom</artifactId>

        <version>0.0.1-SNAPSHOT</version>

        <relativePath>../nemo-pom/pom.xml</relativePath>

    </parent>

    <artifactId>samplefront</artifactId>

    <packaging>war</packaging>

    <name>samplefront</name>

    <properties>

        <spring.version>4.3.1.RELEASE</spring.version>

    </properties>

    <dependencies>

        <dependency>

            <groupId>javax.servlet</groupId>

            <artifactId>servlet-api</artifactId>

            <version>2.5</version>

        </dependency>

        <dependency>

            <groupId>javax.servlet</groupId>

            <artifactId>jstl</artifactId>

            <version>1.2</version>

        </dependency>

        <dependency>

            <groupId>taglibs</groupId>

            <artifactId>standard</artifactId>

            <version>1.1.2</version>

        </dependency>

    </dependencies>

</project>
4>cd进入 pom工程nemo-pom下,执行mvn clean package
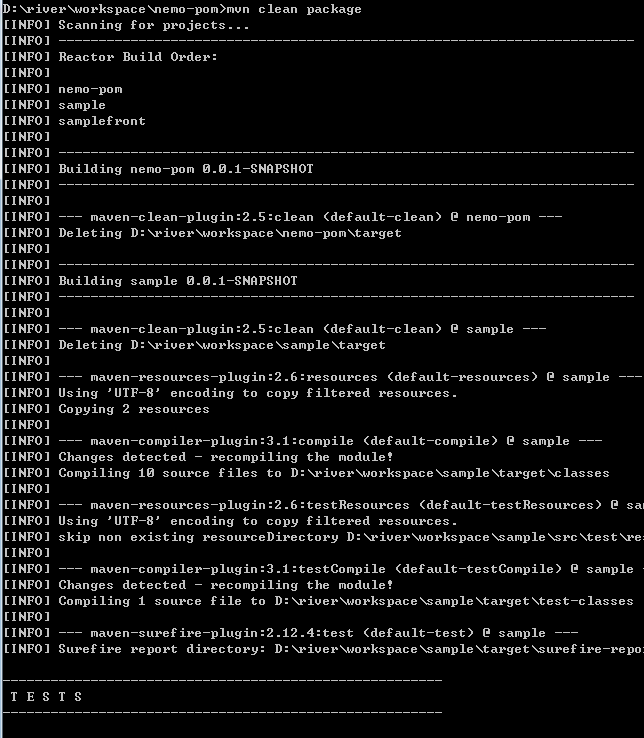
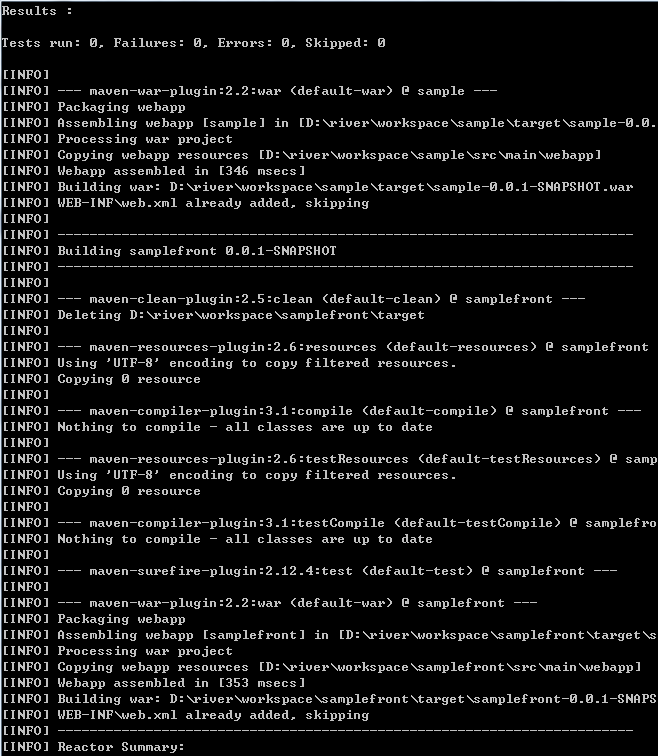
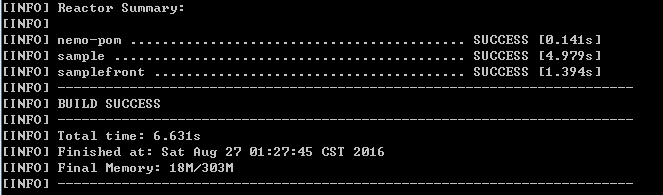
现在可以在sample和samplefront两个web modules 的target目录里分别看到sample-0.0.1-SNAPSHOT.war和samplefront-0.0.1-SNAPSHOT.war两上包已经生成.
5>接着执行mvn jetty:run 如下:
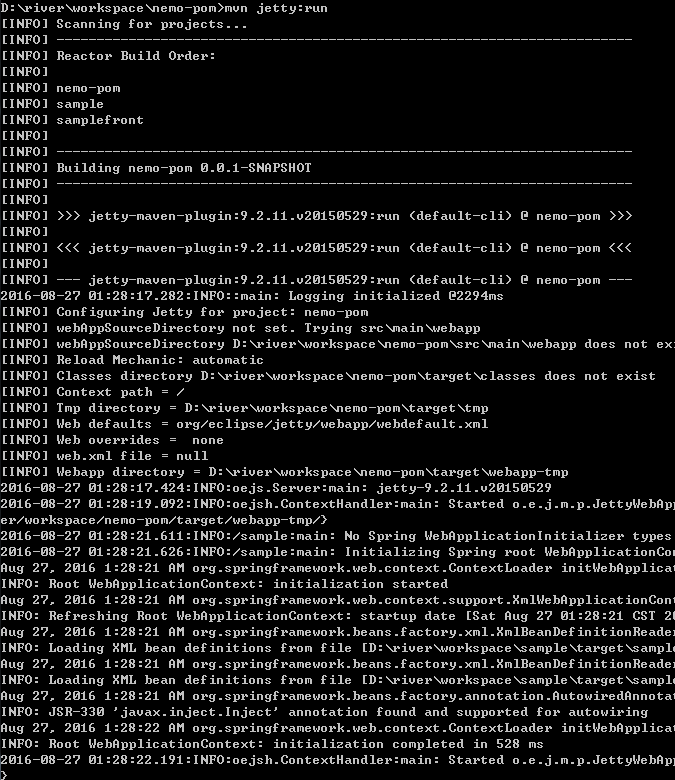
可以看到server已经启动,测试地址如下:
http://localhost:8180/sample/index.jsp
http://localhost:8180/samplefront/index.jsp
使用jetty-maven-plugin运行maven多项目的更多相关文章
- Maven配置tomcat和jetty插件来运行项目
针对eclipse中的Run on Server有些情况下并不是那么好操作,比如配置maven下的springmvc插件,如果使用此方法运行会很容易出现组件缺少导致错误出现一大堆的问题. 那么针对这种 ...
- 图文详解 IntelliJ IDEA 15 创建 Maven 构建的 Java Web 项目(使用 Jetty 容器)
图文详解 IntelliJ IDEA 15 创建 maven 的 Web 项目 搭建 maven 项目结构 1.使用 IntelliJ IDEA 15 新建一个项目. 2.设置 GAV 坐标 3. ...
- eclipse构建及运行maven web项目
1:环境 eclipse indigo, JDK1.6, maven 3.2.1, tomcat7.0.42 2:安装eclipse maven插件 m2eclipse 第一种方法:从网上下载m2ec ...
- 使用maven 命令运行项目
安装好maven3 配置好环境变量后, 输入mvn -v 查看安装是否成功, 然后导入maven项目, 选择import 导入选择Exsting Maven Projects, 接下来就准备运行一下m ...
- eclipse 创建并运行maven web项目
这两天想在eclipse上运行maven web项目,折腾了许久,总算success啦. 1,利用eclipse创建dynamic web project(eclipse需要安装m2eclipse). ...
- 图文具体解释 IntelliJ IDEA 15 创建 Maven 构建的 Java Web 项目(使用 Jetty 容器)
图文具体解释 IntelliJ IDEA 15 创建 maven 的 Web 项目 搭建 maven 项目结构 1.使用 IntelliJ IDEA 15 新建一个项目. 2.设置 GAV 坐标 3. ...
- idea 创建maven web项目部署在 tomcat maven plugin中
前提:1.安装jdk,多数系统使用jdk1.8.xxx,因此选择下载此版本的居多 2.安装Maven 3.部署到tomcat我们可以有两种方式,一种是利用tomcat插件来进行部署,另一种是下载tom ...
- 解决Jetty Maven Plugin:Please initialize the log4j system properly(转)
解决Jetty Maven Plugin:Please initialize the log4j system properly.Jetty Maven Plugin环境: <plugin> ...
- 如何在Linuxt系统下运行maven项目
如何在Linuxt系统下运行maven项目 我们知道现在利用MAVEN来管理JAVA项目是非常常见的.比如公司一般都有一个自己的MAVEN仓库,通过MAVEN仓库来解决我们的项目依赖,更加方便的构建项 ...
随机推荐
- spring boot 配置 freemarker
1.springboot 中自带的页面渲染工具为thymeleaf 还有freemarker 这两种模板引擎 简单比较下两者不同, 1.1freemaker 优点 freemarker 不足:thym ...
- 查询中mybatis的if判断里传入0
1.传入的是long 或者 Integer类型 ,<if test="id != null "> 但是id传值为0时(前提是id对应的类型为long 或者 Intege ...
- Sum of Consecutive Prime Numbers
Sum of Consecutive Prime Numbers http://poj.org/problem?id=2739 Time Limit: 1000MS Memory Limit: 6 ...
- TZOJ 2755 国际象棋(广搜+哈希)
描述 在n*n的国际象棋棋盘中,给定一“马(Knight)”和一“后(Queen)”的位置,问“马”能否在m步之内(包括m步)到达“后”的位置?马的走法是:每步棋先横走或直走一格,然后再斜走一格,即走 ...
- Task/Parallel实现异步多线程
代码: #region Task 异步多线程,Task是基于ThreadPool实现的 { //TestClass testClass = new TestClass(); //Action<o ...
- 关于bootstrap的认识
学习一个框架最好的方法当然就是去它的官网查看它的官方文档,看看官网是怎么描述这个框架的吧------Sleek, intuitive, and powerful front-end framework ...
- Pycharm及python安装详细教程
首先我们来安装python 1.首先进入网站下载:点击打开链接(或自己输入网址https://www.python.org/downloads/),进入之后如下图,选择图中红色圈中区域进行下载. 2. ...
- 779A Pupils Redistribution
/* A. Pupils Redistribution time limit per test 1 second memory limit per test 256 megabytes input s ...
- BZOJ3170: [Tjoi2013]松鼠聚会 - 暴力
描述 有N个小松鼠,它们的家用一个点x,y表示,两个点的距离定义为:点(x,y)和它周围的8个点即上下左右四个点和对角的四个点,距离为1.现在N个松鼠要走到一个松鼠家去,求走过的最短距离. 题解 简直 ...
- Codeforces 631C. Report 模拟
C. Report time limit per test:2 seconds memory limit per test:256 megabytes input:standard input out ...