Qt使用gtest进行C++单元测试-01
环境: win7/win10+qt5.8.0(MinGW),
1.gtest获取: 从:https://www.bogotobogo.com/cplusplus/google_unit_test_gtest.php
获取gtest-1.7.0-rc1.zip,下载链接,下载打包的源码
或在git仓库下载: git clone https://github.com/google/googletest.git
2.解压gtest-1.7.0;在Qt创建一个静态C++库项目,将生成的Qt project文件拷贝到gtest-1.7.0目录下,命名为:gtest.pro;
3.编辑gtest.pro:主要添加源文件(SOURCES)信息和包含信息如下:
SOURCES += src/gtest_main.cc\
src/gtest.cc\
......
(所有src目录下所有源文件)
INCLUDEPATH += ./include
TEMPLATE +=lib
代码如下:
 #-------------------------------------------------

 #

 # Project created by QtCreator --24T17::

 #

 #-------------------------------------------------

 QT       -= gui

 TARGET = gtest

 TEMPLATE = lib

 CONFIG += staticlib

 INCLUDEPATH +=./include

 # The following define makes your compiler emit warnings if you use

 # any feature of Qt which as been marked as deprecated (the exact warnings

 # depend on your compiler). Please consult the documentation of the

 # deprecated API in order to know how to port your code away from it.

 DEFINES += QT_DEPRECATED_WARNINGS

 # You can also make your code fail to compile if you use deprecated APIs.

 # In order to do so, uncomment the following line.

 # You can also select to disable deprecated APIs only up to a certain version of Qt.

 #DEFINES += QT_DISABLE_DEPRECATED_BEFORE=0x060000    # disables all the APIs deprecated before Qt 6.0.

 SOURCES += src/gtest.cc\

                 src/gtest_main.cc\

                 src/gtest-all.cc\

                 src/gtest-death-test.cc\

                 src/gtest-filepath.cc\

                 src/gtest-port.cc\

                 src/gtest-printers.cc\

                 src/gtest-test-part.cc\

                 src/gtest-typed-test.cc

 HEADERS += qtlib.h

 unix {

     target.path = /usr/lib

     INSTALLS += target

 }
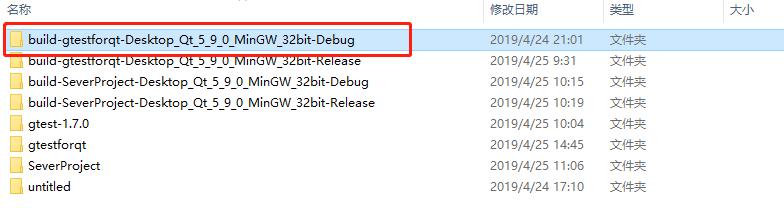
4.使用Qt打开gtest.pro工程, 进行构建, Qt会在.pro的上一级目录下生成对应的编译目录和输出目录, 如下图:
在输出目录下, 可以看到MinGW编译出的gtest库文件libgtest.a和main.o,如下图:

5.编译得到想要的gtest库后, 开始使用在Qt环境下使用:
使用Qt新建一个console的验证工程gtestforqt;
将gtest-1.7.0\include路径下的文件夹gtest拷贝到验证工程的gtestforqt文件夹下,同时将MinGW编译出的gtest库文件libgtest.a也拷贝到gtestforqt文件夹;
编辑gtestforqt.pro文件, 使其可以连接到我们编译的gtest库文件, 代码如下:
QT += core

QT -= gui

CONFIG += c++

INCLUDEPATH += ..\gtestforqt\include  //增加对gtest头文件的链接路径

LIBS += ..\gtestforqt\libgtest.a    //是增加对gtest库文件的链接路径

TARGET = gtestforqt

CONFIG += console

CONFIG -= app_bundle

TEMPLATE = app

SOURCES += main.cpp

# The following define makes your compiler emit warnings if you use

# any feature of Qt which as been marked deprecated (the exact warnings

# depend on your compiler). Please consult the documentation of the

# deprecated API in order to know how to port your code away from it.

DEFINES += QT_DEPRECATED_WARNINGS

# You can also make your code fail to compile if you use deprecated APIs.

# In order to do so, uncomment the following line.

# You can also select to disable deprecated APIs only up to a certain version of Qt.

#DEFINES += QT_DISABLE_DEPRECATED_BEFORE=0x060000    # disables all the APIs deprecated before Qt 6.0.
编辑源文件(main.cpp),include gtest的文件,并初始化gtest, 代码如下:
#include <QCoreApplication>

#include "gtest\gtest.h"

int main(int argc, char *argv[])

{

    QCoreApplication a(argc, argv);

    testing::InitGoogleTest(&argc,argv);

    return RUN_ALL_TESTS();

/*在编译的时候会链接src/gtest_main.cc 文件,这个文件包含了

main()函数,在main()函数里调用RUN_ALL_TESTS(), 而此函数会调用我们所定义

的所有TEST()函数,并打印运行结果,返回值为0表示成功,为1表示失败。*/
构建运行后, gtest成功执行;
6.简单的单元测试举例如下:
#include <QCoreApplication>

#include "gtest\gtest.h"

using namespace std;

int Factorial(int n) {

    int result = ;

    for (int i = ; i <= n; i++) {

        result *= i;

    }

    return result;

}

bool IsPrime(int n)

{

  if (n <= ) return false;

  if (n %  == ) return n == ;

  for (int i = ; ; i += )

  {

    if (i > n/i) break;

       if (n % i == ) return false;

  }

    return true;

}

TEST(zhengshu_Test,zhengshu)

{

    EXPECT_EQ(, Factorial());             //EXPECT_EQ(expected,actual)与EXPECT_TRUE((expected) == (actual))等同,

    EXPECT_EQ(,Factorial());

    EXPECT_EQ(, Factorial());             //当EXPECT_EQ(expected,actual)失败时会打印出期望的值与实际的值

    EXPECT_EQ(, Factorial());             //但EXPECT_TRUE可以接受任何类型的布尔表达式

    EXPECT_EQ(, Factorial());             //eg:falied case

}

TEST(IsPrimeTest, Trivial) {

    EXPECT_FALSE(IsPrime());                //eg:falied case

    EXPECT_FALSE(IsPrime());

    EXPECT_TRUE(IsPrime());

    EXPECT_TRUE(IsPrime());

}

int main(int argc, char *argv[])

{

    QCoreApplication a(argc, argv);

    testing::InitGoogleTest(&argc,argv);

    return RUN_ALL_TESTS();

}
运行结果如下图:

Qt使用gtest进行C++单元测试-01的更多相关文章
- Qt Creator 源码学习笔记01,初识QTC
阅读本文大概需要 4 分钟 Qt Creator 是一款开源的轻量级 IDE,整个架构代码全部使用 C++/Qt 开发而成,非常适合用来学习C++和Qt 知识,这也是我们更加深入学习Qt最好的方式,学 ...
- Junit单元测试--01
如何编写单元测试 燕双龙 一 单元测试简介 单元测试是代码正确性验证的最重要的工具,也是系统测试当中最重要的环节.也是唯一需要编写代码才能进行测试的一种测试方法.在标准的开发过程中,单元测试的代码与实 ...
- C++单元测试 之 gtest -- 组合数计算.
本文将介绍如何使用gtest进行单元测试. gtest是google单元测试框架.使用非常方便. 首先,下载gtest (有些google项目包含gtest,如 protobuf),复制目录即可使用. ...
- Qt高级——QTestLib单元测试框架
一.QTestLib简介 1.QTestLib简介 QTestLib是Qt提供的一种针对基于Qt编写的程序或库的单元测试框架.QTestLib提供了单元测试框架的基本功能,并提供了针对GUI测试的扩展 ...
- 白盒测试之gtest第一个demo
认识gtest工具后,关于它的使用,下面将用一个demo程序演示一下gtest的用法以及成果展示. 一.需要测试的C++代码: #include "myfunction.h" // ...
- Qt 5.7 > Qt Applications
本文翻译自Qt官方文档: http://doc.qt.io/qt-5/qmlapplications.html QML 应用 QML是声明式语言,它使得用户界面以及交互行为可以被"描述&qu ...
- 使用 ViS2005 进行单元测试
1. 新建一个空白解决方案,命名为"单元测试- 01"吧. 2.在该解决方案下创建一个类库,作为此次单元测试的测试对象:我们就创建一个数学类(用于实现运算的简单类).命名为&quo ...
- Qt Creator 源码学习笔记04,多插件实现原理分析
阅读本文大概需要 8 分钟 插件听上去很高大上,实际上就是一个个动态库,动态库在不同平台下后缀名不一样,比如在 Windows下以.dll结尾,Linux 下以.so结尾 开发插件其实就是开发一个动态 ...
- TFS(Taobao File System)安装方法
文章目录: 一.TFS(Taobao File System)安装方法 二.TFS(Taobao File System)配置dataServer.分区.挂载数据盘 三.TFS(Taobao File ...
随机推荐
- Spring框架的事务管理的分类
1. Spring的事务管理的分类 1. Spring的编程式事务管理(不推荐使用) * 通过手动编写代码的方式完成事务的管理(不推荐) 2. Spring的声明式事务管理(底层采用AOP的技术) * ...
- 使用jsonp跨域发送请求
如果获取的数据文件存放在远程服务器上(域名不同,也就是跨域获取数据),则需要使用jsonp类型. 使用这种类型的话,会创建一个查询字符串参数 callback=? ,这个参数会加在请求的URL后面. ...
- 深入php内核,从底层c语言剖析php实现原理
深入php内核,从底层c语言剖析php实现原理 非常好的电子书:http://www.cunmou.com/phpbook/preface.md 这是它的目录: PHP的生命周期 让我们从SAPI ...
- [BAT] 执行xcopy命令后出现Invalid num of parameters错误的解决办法
如果是Windows下的命令行,对于有空格的文件路径要加引号,对于xcopy命令就是源路径和目标路径都要加引号 xcopy "C:\ppt" "D:\Program do ...
- 常见sql for oracle
select to_char(current_timestamp,'yyyy-mm-dd hh24:mi:ss.ff3'),to_char(sysdate,'yyyy-mm-dd hh24:mi:ss ...
- java实现从url路径中下载pdf文档到本地
package com.cellstrain.icell.util; import java.io.*;import java.net.*; public class DownloadPdf { /* ...
- 2018.06.30 BZOJ1857: [Scoi2010]传送带(三分套三分)
1857: [Scoi2010]传送带 Time Limit: 1 Sec Memory Limit: 64 MB Description 在一个2维平面上有两条传送带,每一条传送带可以看成是一条线段 ...
- js模态窗口返回值(table)
<!DOCTYPE html PUBLIC "-//W3C//DTD XHTML 1.0 Transitional//EN" "http://www.w3.org/ ...
- modelsim编译altera的库
http://www.cnblogs.com/LJWJL/p/3515586.html 在modelsim的安装目录下,把配置文件modelsim.ini的只读属性去掉,然后在modelsim中运行T ...
- nodejs中如何使用mysql数据库[node-mysql翻译]
nodejs中如何使用mysql数据库 db-mysql因为node-waf: not found已经不能使用,可以使用mysql代替. 本文主要是[node-mysql]: https://www. ...