HTML:Input元素标签的详细介绍
Input表示Form表单中的一种输入对象,其又随Type类型的不同而分文本输入框,密码输入框,单选/复选框,提交/重置按钮等,下面一一介绍。
1,type=text
输入类型是text,这是我们见的最多也是使用最多的,比如登陆输入用户名,注册输入电话号码,电子邮件,家庭住址等等。当然这也是Input的默认类型。
参数name:同样是表示的该文本输入框名称。
参数size:输入框的长度大小。
参数maxlength:输入框中允许输入字符的最大数。
参数value:输入框中的默认值
特殊参数readonly:表示该框中只能显示,不能添加修改。
<form>
  your name:
  <input type="text" name="yourname" size="30" maxlength="20" value="输入框的长度为30,允许最大字符数为20"><br>
  <input type="text" name="yourname" size="30" maxlength="20" readonly value="你只能读不能修改">
</form>
测试代码:
<!doctype html>
<html lang="zh-CN">
<head>
<meta charset="utf-8">
<meta name="description" content="all kinds of input">
<meta name="keywords" content="input,html"> <title>各种input的测试</title> </head> <body>
<form action="">
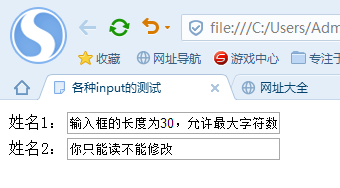
姓名1:<input type="text" name="yourname" size="30" maxlength="20" value="输入框的长度为30,允许最大字符数为20"><br>
姓名2:<input type="text" name="yourname" size="30" maxlength="20" readonly value="你只能读不能修改"><br>
</form>
</body>
</html>
效果图如下:
2,type=password
不用我说,一看就明白的密码输入框,最大的区别就是当在此输入框输入信息时显示为保密字符。
参数和“type=text”相类似。
<form>
  //your password:
  <input type="password" name="yourpwd" size="20" maxlength="15" value="123456">密码长度小于15
</form>
测试代码如下:
<!doctype html>

<html lang="zh-CN">

  <head>

     <meta charset="utf-8">

     <meta name="description" content="all kinds of input">

     <meta name="keywords" content="input,html">

      <title>各种input的测试</title>

  </head>

  <body>

          <form action="">

            密码:<input type="password" name="yourpwd" size="20" maxlength="15" value="123456">密码长度小于15

          </form>

  </body>

</html>
效果图如下:

3,type=file
当你在BBS上传图片,在EMAIL中上传附件时一定少不了的东西:)
提供了一个文件目录输入的平台,参数有name,size。
<form>
  //your file:
  <input type="file" name="yourfile" size="30">
</form>
测试代码如下:
<!doctype html>
<html lang="zh-CN">
<head>
<meta charset="utf-8">
<meta name="description" content="all kinds of input">
<meta name="keywords" content="input,html"> <title>各种input的测试</title> </head> <body>
<form action="">
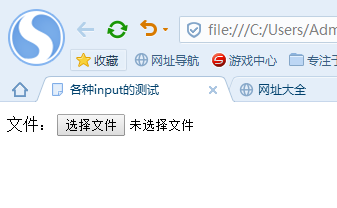
文件:<input type="file" name="yourfile" size="30">
</form>
</body>
</html>
效果图如下:
4,type=hidden
非常值得注意的一个,通常称为隐藏域:如果一个非常重要的信息需要被提交到下一页,但又不能或者无法明示的时候。
一句话,你在页面中是看不到hidden在哪里。最有用的是hidden的值。
<form name="form1">
  //your hidden info here:
  <input type="hidden" name="yourhiddeninfo" value="cnbruce.com">
</form>
<script>
  alert("隐藏域的值是 "+document.form1.yourhiddeninfo.value)
</script>
测试代码如下:
<!doctype html>
<html lang="zh-CN">
<head>
<meta charset="utf-8">
<meta name="description" content="all kinds of input">
<meta name="keywords" content="input,html"> <title>各种input的测试</title> <script>
window.onload = function() {
document.getElementById('button').addEventListener('click',function () {
alert("隐藏域的值是 "+ document.getElementById('yourhiddeninfo').value);
},false);
}
</script> </head> <body>
<form action="">
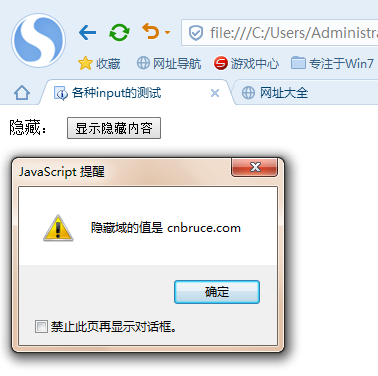
隐藏:<input type="hidden" name="yourhiddeninfo" id="yourhiddeninfo" value="cnbruce.com">
<button id="button">显示隐藏内容</button>
</form>
</body>
</html>
点击获取隐藏内容效果图如下:
5,type=button
标准的一windows风格的按钮,当然要让按钮跳转到某个页面上还需要加入写JavaScript代码
<form name="form1">
  //your button:
  <input type="button" name="yourhiddeninfo" value="Go,Go,Go!" onclick="window.open('http://www.cnbruce.com')">
</form>
测试代码如下:
<!doctype html>
<html lang="zh-CN">
<head>
<meta charset="utf-8">
<meta name="description" content="all kinds of input">
<meta name="keywords" content="input,html"> <title>各种input的测试</title> </head> <body>
<form action="">
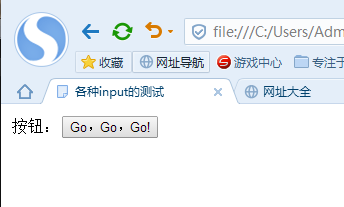
按钮:<input type="button" name="yourhiddeninfo" value="Go,Go,Go!" onclick="window.open('http://www.cnbruce.com')">
</form>
</body>
</html>
效果图如下:
6,type=checkbox
多选框,常见于注册时选择爱好、性格、等信息。参数有name,value及特别参数checked(表示默认选择)
其实最重要的还是value值,提交到处理页的也就是value。(附:name值可以不一样,但不推荐。)
<form name="form1">
  a:<input type="checkbox" name="checkit" value="a" checked><br>
  b:<input type="checkbox" name="checkit" value="b"><br>
  c:<input type="checkbox" name="checkit" value="c"><br>
</form>
name值可以不一样,但不推荐<br>
<form name="form1">
  a:<input type="checkbox" name="checkit1" value="a" checked><br>
  b:<input type="checkbox" name="checkit2" value="b"><br>
  c:<input type="checkbox" name="checkit3" value="c"><br>
</form>
测试代码如下:
<!doctype html>

<html lang="zh-CN">

  <head>

     <meta charset="utf-8">

     <meta name="description" content="all kinds of input">

     <meta name="keywords" content="input,html">

      <title>各种input的测试</title>

  </head>

  <body>

          <form action="">

             a:<input type="checkbox" name="checkit" value="a" checked><br>

           b:<input type="checkbox" name="checkit" value="b"><br>

           c:<input type="checkbox" name="checkit" value="c"><br>

          </form>

  </body>

</html>
效果图如下:7,type=radio
即单选框,出现在多选一的页面设定中。参数同样有name,value及特别参数checked.
不同于checkbox的是,name值一定要相同,否则就不能多选一。当然提交到处理页的也还是value值。
<form name="form1">
a:<input type="radio" name="checkit" value="a" checked><br>
b:<input type="radio" name="checkit" value="b"><br>
c:<input type="radio" name="checkit" value="c"><br>
</form>
下面是name值不同的一个例子,就不能实现多选一的效果了<br>
<form name="form1">
a:<input type="radio" name="checkit1" value="a" checked><br>
b:<input type="radio" name="checkit2" value="b"><br>
c:<input type="radio" name="checkit3" value="c"><br>
</form>
测试代码如下:
<!doctype html>

<html lang="zh-CN">

  <head>

     <meta charset="utf-8">

     <meta name="description" content="all kinds of input">

     <meta name="keywords" content="input,html">

      <title>各种input的测试</title>

  </head>

  <body>

          <form action="">

            a:<input type="radio" name="checkit" value="a" checked><br>

          b:<input type="radio" name="checkit" value="b"><br>

          c:<input type="radio" name="checkit" value="c"><br>

          </form>

  </body>

</html>
效果图如下:
8,type=image
比较另类的一个,自己看看效果吧,可以作为提交式图片
<form name="form1" action="xxx.asp">
  //your Imgsubmit:
  <input type="image" src="../blog/images/face4.gif">
</form>
测试代码如下:
<!doctype html>

<html lang="zh-CN">

  <head>

     <meta charset="utf-8">

     <meta name="description" content="all kinds of input">

     <meta name="keywords" content="input,html">

      <title>各种input的测试</title>

  </head>

  <body>

          <form action="">

            <input type="image" src="https://ss0.baidu.com/73t1bjeh1BF3odCf/it/u=3466314416,2888444446&fm=73">

          </form>

  </body>

</html>
效果图如下:
9,type=submit and type=reset
分别是“提交”和“重置”两按钮
submit主要功能是将Form中所有内容进行提交action页处理,reset则起个快速清空所有填写内容的功能。
<form name="form1" action="xxx.asp">
  <input type="text" name="yourname">
  <input type="submit" value="提交">
  <input type="reset" value="重置">
</form>
测试代码如下:
<!doctype html>

<html lang="zh-CN">

  <head>

     <meta charset="utf-8">

     <meta name="description" content="all kinds of input">

     <meta name="keywords" content="input,html">

      <title>各种input的测试</title>

  </head>

  <body>

          <form action="">

            <input type="text" name="yourname">

          <input type="submit" value="提交">

          <input type="reset" value="重置">

          </form>

  </body>

</html>
效果图如下:

HTML:Input元素标签的详细介绍的更多相关文章
- 【转】JSF中的三大核心组件 UI标签的详细介绍和使用举例
JSF提供了大量的UI标签来简化创建视图.这些UI标签类似于ASP.NET中的服务器组件.使用这些标签,可以通过其value,binding,action,actionListener等属性直接绑定到 ...
- HTML5中<template>标签的详细介绍
HTML5中<template>标签的详细介绍(图文) 这篇文章主要介绍了HTML5中的template标签,是HTML5入门中的重要知识,需要的朋友可以参考 一.HTML5 templa ...
- maven中的pom配置文件标签的详细介绍
<span style="padding:0px; margin:0px"><project xmlns="http://maven.apache.or ...
- html meta标签用法详细介绍
meta是html语言head区的一个辅助性标签. 在页面中都有类似这样的html代码: <head> <meta http-equiv="content-Type&quo ...
- (十二)Sun公司的Jstl标签库详细介绍
JSP 本身提供的标签很少,不能满足我们日常开发需要,好在 Sun 公司自己提供了一套标签库: JSTL标签库快速入门(可点击) 目录 < c : out > 标签 < c : se ...
- MyBatis:SQL语句中的foreach标签的详细介绍
foreach 也就是遍历迭代,在SQL中通常用在 in 这个关键词的后面 foreach元素的属性主要有 item,index,collection,open,separator,close. 分别 ...
- Mybatis逆向工程文件标签的详细介绍:
?xml version="1.0" encoding="UTF-8"?> <!DOCTYPE generatorConfiguration PUB ...
- html <input>标签类型属性type(file、text、radio、hidden等)详细介绍
html <input>标签类型属性type(file.text.radio.hidden等)详细介绍 转载请注明:文章转载自:[169IT-最新最全的IT资讯] html <inp ...
- web前端之 HTML标签详细介绍
html标签的分类 点我查看完整的html标签介绍 在html中,标签一般分为块级标签和行内标签 块级标签:块元素一般都从新行开始,它可以容纳内联元素和其他块元素,常见块元素是段落标签"p& ...
随机推荐
- 禁止ViewState的3种解决方法
默认情况下,ViewState是被启用的,比如提交表单后,表单中输入的值会自动保留.但是如果不需要保留,也可以将其禁用,这样可以节省资源. 下面3种方式就可以分别禁用某一个控件.某一个页面和整个应 ...
- salt安装zabbix
states文件: [root@super65 base]# cat top.sls base: '*': - init.env_init[root@super65 base]# cat init/e ...
- vs2005中删除最近打开的项目和文件的记录
vs2005中总是保留最近打开的项目和文件的记录,甚至是以删除的它也不删,-_-!下面介绍几种删除的方法: 第一种:建立一个bat文件,以后双击即可清除,内置代码如下: @echo off@REG D ...
- [转]Entity Framework走马观花之把握全局
本文转自:http://blog.csdn.net/bitfan/article/details/12887007 Entity Framework走马观花 之 把握全局 ============== ...
- Linux 计划任务 Crontab 笔记与总结(3)Crontab 配置文件
[全局(系统)配置文件] /etc/crontab Linux 主要的配置文件都在 etc 目录下. cd /etc ls cron* vim crontab 进入 cron.d(服务) cd cro ...
- jedis操作
Jedis jedis = RedisUtil.getJedis(); try { // 向key-->name中放入了value-->minxr jedis.set("name ...
- 免费手机号码归属地API查询接口和PHP使用实例分享
免费手机号码归属地API查询接口和PHP使用实例分享 最近在做全国性的行业分类信息网站,需要用到手机号归属地显示功能,于是就穿梭于各大权威站点之间偷来了API的接口地址. 分享出来,大家可以用到就拿去 ...
- IT运维的五大基础知识
IT运维的五大基础知识 | 浏览:331 | 更新:2014-09-25 11:36 IT运维对于很多企业都很重要,接下来运维的一些基础知识天天客服IT运维总监龙少文,就给大家介绍下IT运维的基础知识 ...
- img base64
<?php header('Content-type:text/html;charset=utf-8'); //读取图片文件,转换成base64编码格式 $image_file = './429 ...
- word size
Computer Systems A Programmer's Perspective Second Edition Running throughout the system is a collec ...