
Spring Boot 构建一个 RESTful Web Service
1 项目目标:
构建一个 web service,接收get 请求
http://localhost:8080/greeting
响应一个json 结果:
{"id":1,"content":"Hello, World!"}可以在请求中添加自定义参数namehttp://localhost:8080/greeting?name=User
响应结果:
{"id":1,"content":"Hello, User!"}2 环境准备: 1) 开发工具 IntelliJ IDEA (自己下载安装) cdkey 网上找吧。 2) JAVA JDK1.8+ (http://www.oracle.com/technetwork/java/javase/downloads/jdk8-downloads-2133151.html) // 本示例是用的 jdk1.8.0_172 Windows x64 2).1 配置 JDK 环境变量。 http://www.cnblogs.com/iampkm/p/8805493.html 根据JDK 的安装路径,在系统环境变量中配置 (JAVA_HOME,PATH,CLASSPATH) 3) 配置Maven 3.2+ 下载:https://maven.apache.org/download.cgi (我用的是3.5) 3).1 新建本地库目录repository (位置可以随意)。我是在apache-maven-3.5.2 目录下 创建的。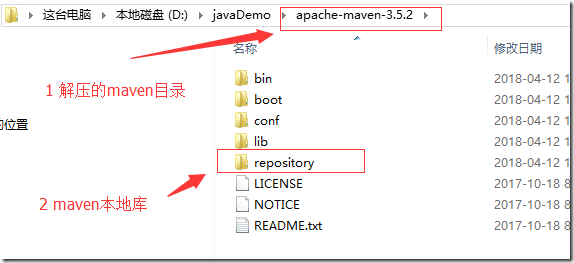
3) .2 settings.xml 中 配置本地库 。打开maven 目录下的 conf/settings.xml 文件,修改自己的库目录
3).3 settings.xml 中修改maven镜像下载地址为淘宝,在配置文件中,加入红色代码部分
<mirrors>
<!-- mirror
| Specifies a repository mirror site to use instead of a given repository. The repository that
| this mirror serves has an ID that matches the mirrorOf element of this mirror. IDs are used
| for inheritance and direct lookup purposes, and must be unique across the set of mirrors.
|
<mirror>
<id>mirrorId</id>
<mirrorOf>repositoryId</mirrorOf>
<name>Human Readable Name for this Mirror.</name>
<url>http://my.repository.com/repo/path</url>
</mirror>
-->
<mirror>
<id>alimaven</id>
<name>aliyun maven</name>
<url>http://maven.aliyun.com/nexus/content/groups/public/</url>
<mirrorOf>central</mirrorOf>
</mirror>
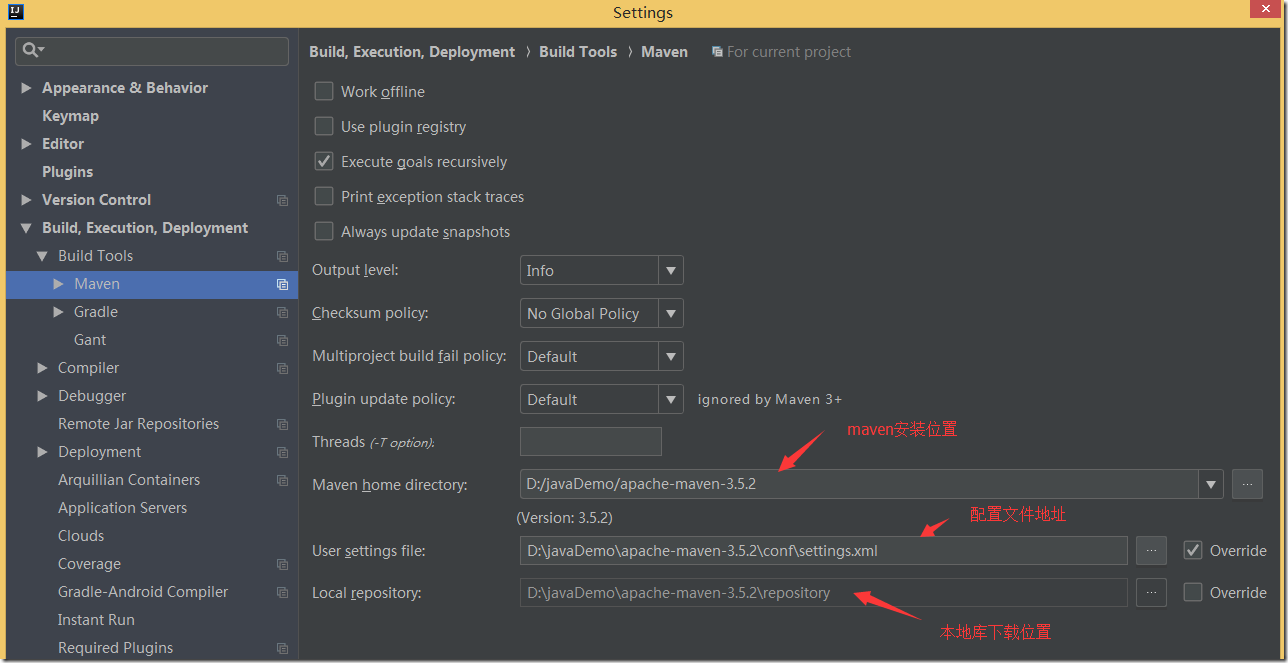
</mirrors>3) .4在idea 中,把maven 改成本地位置。 打开Idea ,选择File > Settings > 按照如下图配置 本地maven 的三个位置即可。

3 新建项目greeting。 启用spring boot 初始化

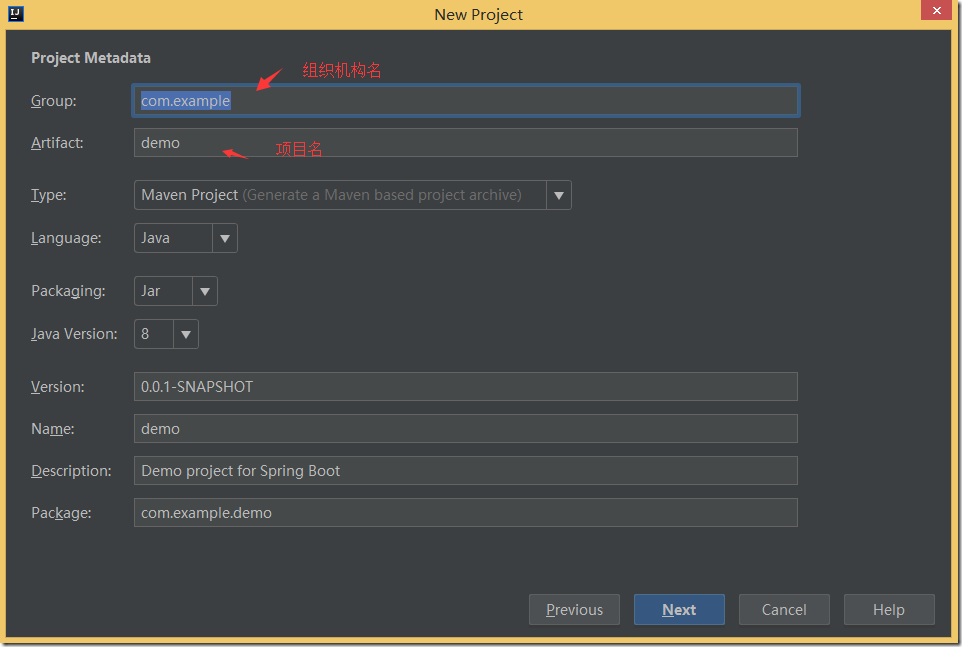
输入项目名,我本地取名 quickstart
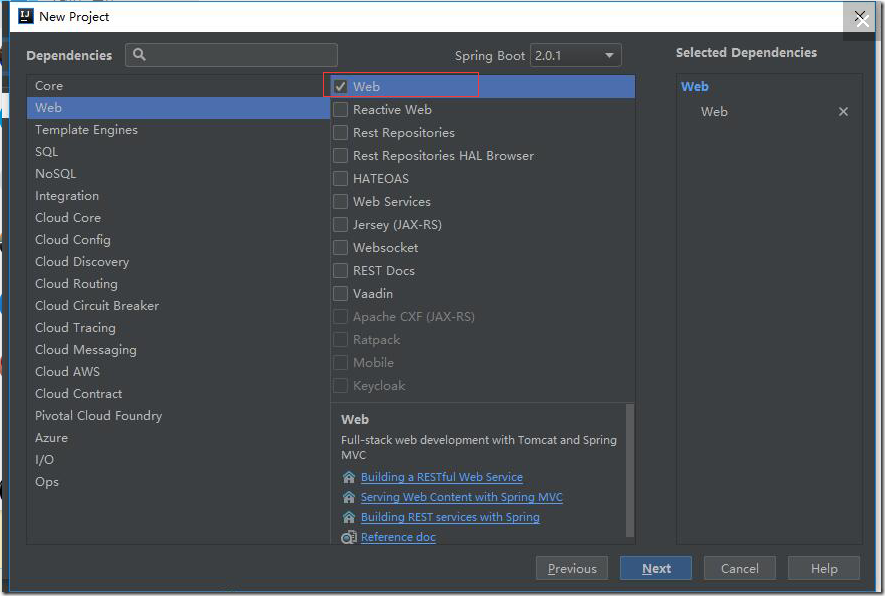
选择web
创建一个资源 java 类 model
Create a resource representation class
Now that you’ve set up the project and build system, you can create your web service.
Begin the process by thinking about service interactions.
The service will handle GET requests for /greeting, optionally with a name parameter in the query string. The GET request should return a 200 OK response with JSON in the body that represents a greeting. It should look something like this:
package com.example.qucikstart;
public class Greeting {
private final long id;
.csharpcode, .csharpcode pre |
这个就是返回的结果内: 该类在返回时,会自动被转换成json格式
|
创建一个java 控制类 GreetingController
Create a resource controller
In Spring’s approach to building RESTful web services, HTTP requests are handled by a controller. These components are easily identified by the @RestController annotation, and the GreetingController below handles GET requests for /greeting by returning a new instance of the Greeting class:
package com.example.qucikstart; import java.util.concurrent.atomic.AtomicLong; .csharpcode, .csharpcode pre |
This controller is concise and simple, but there’s plenty going on under the hood. Let’s break it down step by step.
The @RequestMapping annotation ensures that HTTP requests to /greeting are mapped to the greeting() method.
当请求 RequestMapping 注解会把 greeting 的请求,映射到 greeting 方法。
确保main 程序用springboot 启动
Make the application executable
Although it is possible to package this service as a traditional WAR file for deployment to an external application server, the simpler approach demonstrated below creates a standalone application. You package everything in a single, executable JAR file, driven by a good old Java main() method. Along the way, you use Spring’s support for embedding the Tomcat servlet container as the HTTP runtime, instead of deploying to an external instance.
package com.example.qucikstart; import org.springframework.boot.SpringApplication; .csharpcode, .csharpcode pre |
项目结构:

最后执行:
1 ctrl+F9 编译,确保程序无错误。
2 Shift+F10 启动程序
Now that the service is up, visit http://localhost:8080/greeting, where you see:
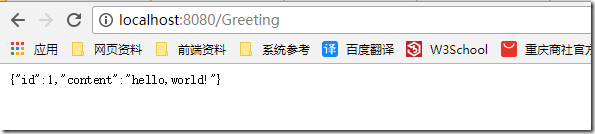
使用 name 参数
http://localhost:8080/greeting?name=java
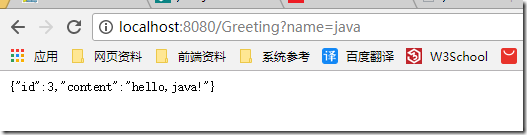
到此,java spring boot hello 就搞定了。
参考spring boot 官方文档资料链接:https://spring.io/guides/gs/rest-service/
-----------------------------------------------------------------
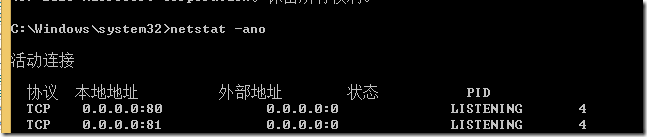
8080 端口占用解决办法:
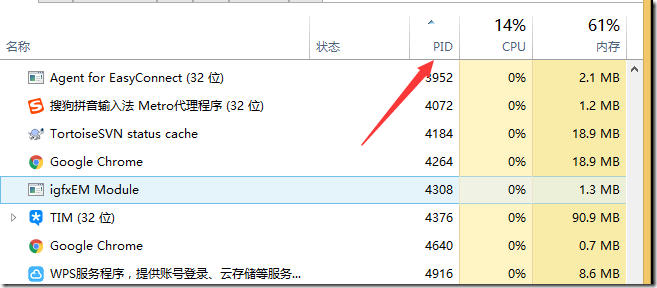
打开命令窗口,输入 netstat –ano
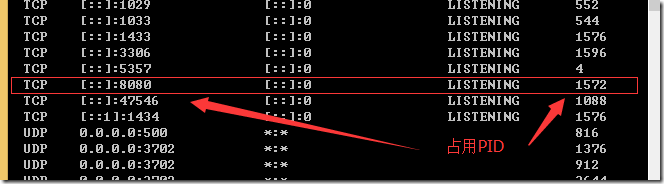
打开任务管理器,找到1572PID 的任务,关掉
Spring Boot 构建一个 RESTful Web Service的更多相关文章
- [译]Spring Boot 构建一个RESTful Web服务
翻译地址:https://spring.io/guides/gs/rest-service/ 构建一个RESTful Web服务 本指南将指导您完成使用spring创建一个“hello world”R ...
- 用Spring Tools Suite(STS)开始一个RESTful Web Service
spring.io官方提供的例子Building a RESTful Web Service提供了用Maven.Gradle.STS构建一个RESTFul Web Service,实际上采用STS构建 ...
- 译:3.消费一个RESTful Web Service
这节课我们根据官网教程学习如何去消费(调用)一个 RESTful Web Service . 原文链接 https://spring.io/guides/gs/consuming-rest/ 本指南将 ...
- 【转】Spring 4.x实现Restful web service
http://my.oschina.net/yuyidi/blog/352909 首先我们还是跟之前一样,创建一个maven项目,不过因为Spring Restful web service是基于Sp ...
- 在GlassFish应用服务器上创建并运行你的第一个Restful Web Service【翻译】
前言 本人一直开发Android应用,目前Android就业形势恶劣,甚至会一路下滑,因此决定学习服务器开发.采用的语言是java,IDE是Intellij,在下载Intellij的同时看到官网很多优 ...
- 利用spring boot构建一个简单的web工程
1.选择Spring InitiaLizr, jdk选择好路径 2.设置项目信息 3.这一步是设置选择使用哪些组件,这里我们只需要选择web 4.设置工程名和路径
- Spring Boot . 2 -- 用Spring Boot 创建一个Java Web 应用
通过 start.spring.io 创建工程 通过 IDEA 创建工程
- 使用Ratpack与Spring Boot构建高性能JVM微服务
在微服务天堂中Ratpack和Spring Boot是天造地设的一对.它们都是以开发者为中心的运行于JVM之上的web框架,侧重于生产率.效率以及轻量级部署.他们在服务程序的开发中带来了各自的好处.R ...
- Apache CXF实现Web Service(2)——不借助重量级Web容器和Spring实现一个纯的JAX-RS(RESTful) web service
实现目标 http://localhost:9000/rs/roomservice 为入口, http://localhost:9000/rs/roomservice/room为房间列表, http: ...
随机推荐
- HTML绝对路径和相对路径
HTML路径: 绝对路径:从根目录开始 相对路径:../ 相对于html文件,上一级 ./ 相对于html文件,当前路径(可以省略) 文件夹名 相对于html文件,往文件里面走
- 有标号的DAG计数系列问题
传送门 II 设 \(f_i\) 表示 \(i\) 个点的答案 那么枚举至少 \(j\) 个点的出度为 \(0\) \[\sum_{j=0}^{i}(-1)^j\binom{i}{j}f_{i-j}2 ...
- JS算法之八皇后问题(回溯法)
八皇后这个经典的算法网上有很多种思路,我学习了之后自己实现了一下,现在大概说说我的思路给大家参考一下,也算记录一下,以免以后自己忘了要重新想一遍. 八皇后问题 八皇后问题,是一个古老而著名的问题,是回 ...
- Activiti 数据库表自动生成策略
Activiti 引擎启动时默认会检测数据库版本与程序版本是否相符,不相符就会抛出异常停止引擎的初始化. 这一策略可以通过引擎的初始化配置参数databaseSchemaUpdate来控制, 如下图的 ...
- Java 开源博客 Solo 1.6.0 发布 - 新后台
简介 Solo 是一款一个命令就能搭建好的 Java 开源博客系统,并内置了 15+ 套精心制作的皮肤.除此之外,Solo 还有着非常活跃的社区,文章分享到社区后可以让很多人看到,产生丰富的交流互动. ...
- 转:Linux中tomcat服务成功发布但局域网浏览器无法访问
转自:http://blog.csdn.net/mooncom/article/details/53168143 昨天,我在搭建Linux中服务器环境时,碰见一个问题,这里和大家分享一下. 问题描述: ...
- 浏览器好玩的的 console.log
现在很多网站,你在访问他页面的时候, 你要查看 console 的话, 看到有文章介绍的,一定想知道是怎么展示来的吧 如 baidu 的 你懂的,其实很简单,代码如下, console 输出下就行 c ...
- Android 图片缩略图显示
//通过openRawResource获取一个inputStream对象 InputStream inputStream = getResources().openRawResource(R.draw ...
- Sqlserver新建随机测试数据
USE Test --使用数据库Test(如果没有则需要新建一个) ----1.新建一个users表 create table users( uId int primary key identity( ...
- c#多线程调用有参数的方法
Thread (ParameterizedThreadStart) 初始化 Thread 类的新实例,指定允许对象在线程启动时传递给线程的委托. Thread (ThreadStart) 初始 ...