Activity组件:(一)通过显式意图和隐式意图来实现Activity间的跳转
一、通过显式意图来实现Activity间的跳转
显式意图是指在创建Intent对象时就指定接受者组件
 /**

         * 下面是通过显式意图进行跳转,即明确写出要跳转到SecondActivity.class组件中去

         */

        Intent intent =new Intent(this,SecondActivity.class);

        intent.putExtra("account",account);

        intent.putExtra("password",password);

        startActivity(intent);
注意:创建Activity时要在manifests里进行静态注册,示例如下:
<activity android:name=".SecondActivity">

        </activity>
之后再要跳转到的界面接受Intent传递的内容
 //通过getIntent获取MainActivity传来的intent

        Intent intent = getIntent();

        String account = intent.getStringExtra("account");

        String password = intent.getStringExtra("password");
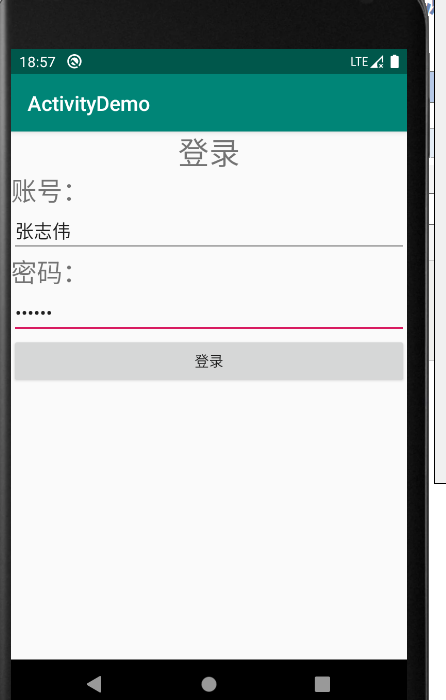
点击登录按钮
二、通过隐式意图来实现Activity间的跳转
隐式意图就是通过intent过滤器来进行匹配跳转
 /**

         * 下面是通隐式意图进行跳转,要在manifests里添加意图过滤

         */

        Intent intent = new Intent();

        intent.setAction("com.example.activitydemo.LoginInfo");

        intent.addCategory(Intent.CATEGORY_DEFAULT);

        intent.putExtra("account",account);

        intent.putExtra("password",password);

        startActivity(intent);
进行注册的同时添加intent过滤
<activity android:name=".SecondActivity">

            <intent-filter>

                <action android:name="com.example.activitydemo.LoginInfo"/>

                <category  android:name="android.intent.category.DEFAULT"/>

            </intent-filter>

        </activity>
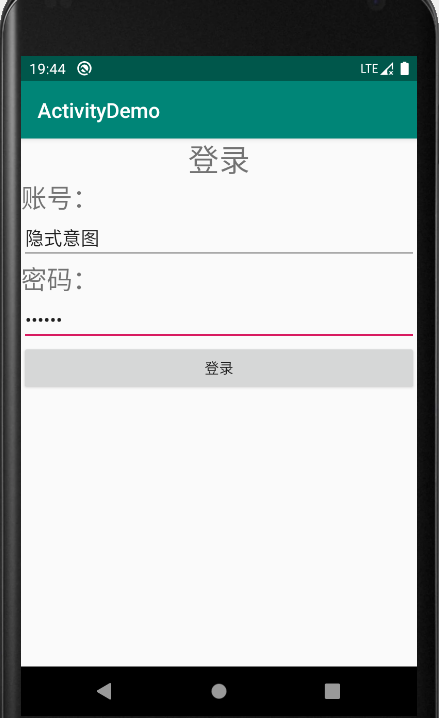
点击登录
三、原码
AndroidManifest.xml
<?xml version="1.0" encoding="utf-8"?>

<manifest xmlns:android="http://schemas.android.com/apk/res/android"

    package="com.example.activitydemo">

    <application

        android:allowBackup="true"

        android:icon="@mipmap/ic_launcher"

        android:label="@string/app_name"

        android:roundIcon="@mipmap/ic_launcher_round"

        android:supportsRtl="true"

        android:theme="@style/AppTheme">

        <activity android:name=".MainActivity">

            <intent-filter>

                <action android:name="android.intent.action.MAIN" />

                <category android:name="android.intent.category.LAUNCHER" />

            </intent-filter>

        </activity>

        <activity android:name=".SecondActivity">

            <intent-filter>

                <action android:name="com.example.activitydemo.LoginInfo"/>

                <category  android:name="android.intent.category.DEFAULT"/>

            </intent-filter>

        </activity>

    </application>

</manifest>
MainActivity.java
package com.example.activitydemo;

import androidx.appcompat.app.AppCompatActivity;

import android.content.Intent;

import android.os.Bundle;

import android.text.TextUtils;

import android.util.Log;

import android.view.View;

import android.widget.Button;

import android.widget.EditText;

import android.widget.Toast;

public class MainActivity extends AppCompatActivity {

    private static final String TAG = "MainActivity";

    private EditText mAccount;

    private EditText mPassword;

    private Button mLogin;

    @Override

    protected void onCreate(Bundle savedInstanceState) {

        super.onCreate(savedInstanceState);

        setContentView(R.layout.activity_main);

        initView();

        initListener();

    }

    private void initListener() {

        mLogin.setOnClickListener(new View.OnClickListener() {

            @Override

            public void onClick(View v) {

                //登录按钮被点击了

                Log.d(TAG,"Login Click。。。");

                handlerLogin();

            }

        });

    }

    private void handlerLogin() {

        //.trim()用于去空格

        String account = mAccount.getText().toString().trim();

        if (TextUtils.isEmpty(account)) {

            Toast.makeText(this,"输入的账号为空",Toast.LENGTH_SHORT).show();

            return;

        }

        String password = mPassword.getText().toString().trim();

        if (TextUtils.isEmpty(password)) {

            Toast.makeText(this,"输入的密码为空",Toast.LENGTH_SHORT).show();;

        }

        //先要创建一个意图对象,然后通过StartActivity()来实现跳转

        /**

         * 下面是通过显式意图进行跳转,即明确写出要跳转到SecondActivity.class组件中去

         */

//        Intent intent =new Intent(this,SecondActivity.class);

//        intent.putExtra("account",account);

//        intent.putExtra("password",password);

//        startActivity(intent);

        /**

         * 下面是通隐式意图进行跳转,要在manifests里添加意图过滤

         */

        Intent intent = new Intent();

        intent.setAction("com.example.activitydemo.LoginInfo");

        intent.addCategory(Intent.CATEGORY_DEFAULT);

        intent.putExtra("account",account);

        intent.putExtra("password",password);

        startActivity(intent);

    }

    private void initView() {

        mAccount = (EditText) this.findViewById(R.id.account);

        mPassword = (EditText) this.findViewById(R.id.password);

        mLogin = (Button)  this.findViewById(R.id.login);

    }

}
activity_main.xml
<?xml version="1.0" encoding="utf-8"?>

<LinearLayout

    xmlns:android="http://schemas.android.com/apk/res/android"

    xmlns:app="http://schemas.android.com/apk/res-auto"

    xmlns:tools="http://schemas.android.com/tools"

    android:layout_width="match_parent"

    android:layout_height="match_parent"

    android:orientation="vertical"

    tools:context=".MainActivity">

    <TextView

        android:layout_width="wrap_content"

        android:text="登录"

        android:textSize="30sp"

        android:layout_gravity="center"

        android:layout_height="wrap_content">

    </TextView>

    <TextView

        android:layout_width="wrap_content"

        android:text="账号:"

        android:textSize="25sp"

        android:layout_height="wrap_content">

    </TextView>

    <EditText

        android:id="@+id/account"

        android:layout_width="match_parent"

        android:layout_height="wrap_content">

    </EditText>

    <TextView

        android:layout_width="wrap_content"

        android:text="密码:"

        android:textSize="25sp"

        android:layout_height="wrap_content">

    </TextView>

    <EditText

        android:id="@+id/password"

        android:layout_width="match_parent"

        android:inputType="textPassword"

        android:layout_height="wrap_content">

    </EditText>

    <Button

        android:id="@+id/login"

        android:layout_width="match_parent"

        android:text="登录"

        android:layout_height="wrap_content">

    </Button>

</LinearLayout>
SecondActivity.java
package com.example.activitydemo; import android.app.Activity;
import android.content.Intent;
import android.os.Bundle;
import android.widget.TextView; import androidx.annotation.Nullable; public class SecondActivity extends Activity {
@Override
protected void onCreate(@Nullable Bundle savedInstanceState) {
super.onCreate(savedInstanceState);
setContentView(R.layout.activity_second); TextView info =(TextView) this.findViewById(R.id.info);
//通过getIntent获取MainActivity传来的intent
Intent intent = getIntent();
String account = intent.getStringExtra("account");
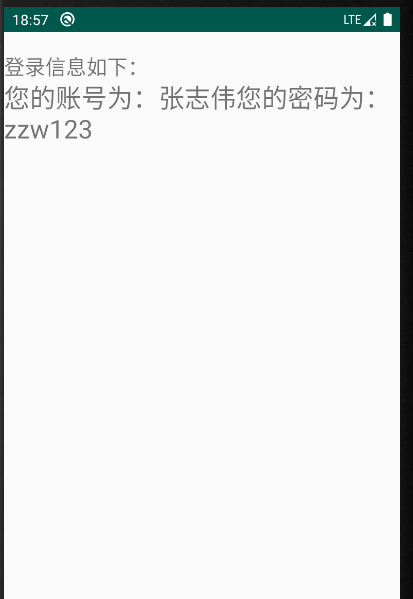
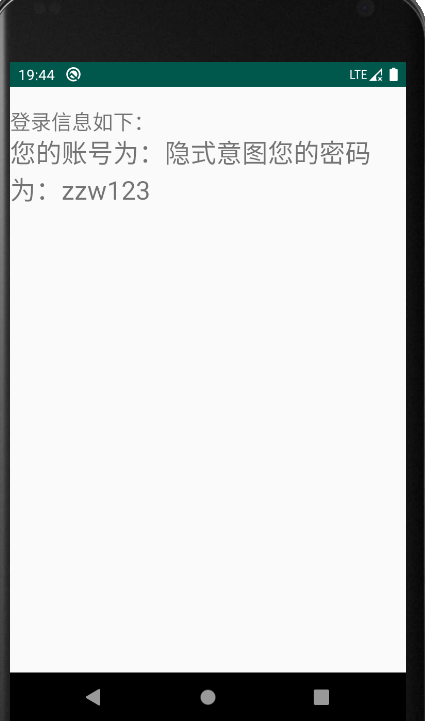
String password = intent.getStringExtra("password"); info.setText("您的账号为:"+account+"您的密码为:"+password);
}
}
activity_second_.xml
<?xml version="1.0" encoding="utf-8"?>

<LinearLayout

    xmlns:android="http://schemas.android.com/apk/res/android"

    android:orientation="vertical"

    android:layout_width="match_parent"

    android:layout_height="match_parent">

    <TextView

        android:layout_width="match_parent"

        android:text="登录信息如下:"

        android:layout_marginTop="20dp"

        android:textSize="20sp"

        android:layout_height="wrap_content">

    </TextView>

    <TextView

        android:id="@+id/info"

        android:layout_width="match_parent"

        android:textSize="25sp"

        android:text=""

        android:layout_height="wrap_content">

    </TextView>

</LinearLayout>
Activity组件:(一)通过显式意图和隐式意图来实现Activity间的跳转的更多相关文章
- Android 显示意图和隐式意图的区别
意图在android的应用开发中是很重要的,明白了意图的作用和使用后,对开发会有很大帮助.如果没有把意图搞懂,以后开发应用会感觉缺些什么. 意图的作用: 1.激活组件 ...
- 转】C#接口-显式接口和隐式接口的实现
[转]C#接口-显式接口和隐式接口的实现 C#中对于接口的实现方式有隐式接口和显式接口两种: 类和接口都能调用到,事实上这就是“隐式接口实现”. 那么“显示接口实现”是神马模样呢? interface ...
- C# Interface显式实现和隐式实现
c#中对接口的实现方式有两种:隐式实现和显式实现,之前一直没仔细看过,今天查了些资料,在这里整理一下. 隐式实现的例子 interface IChinese { string Speak(); } p ...
- 多态设计 zen of python poem 显式而非隐式 延迟赋值
总结 1.python支持延迟赋值,但是给调用者带来了困惑: 2.显式而非隐式,应当显式地指定要初始化的变量 class Card: def __init__(self, rank, suit): s ...
- C# 数据类型转换 显式转型、隐式转型、强制转型
C# 的类型转换有 显式转型 和 隐式转型 两种方式. 显式转型:有可能引发异常.精确度丢失及其他问题的转换方式.需要使用手段进行转换操作. 隐式转型:不会改变原有数据精确度.引发异常,不会发生任何问 ...
- selenium-webdriver中的显式等待与隐式等待
在selenium-webdriver中等待的方式简单可以概括为三种: 1 导入time包,调用time.sleep()的方法传入时间,这种方式也叫强制等待,固定死等一个时间 2 隐式等待,直接调用i ...
- (java)selenium webdriver学习---三种等待时间方法:显式等待,隐式等待,强制等待
selenium webdriver学习---三种等待时间方法:显式等待,隐式等待,强制等待 本例包括窗口最大化,刷新,切换到指定窗口,后退,前进,获取当前窗口url等操作: import java. ...
- Java并发之显式锁和隐式锁的区别
Java并发之显式锁和隐式锁的区别 在面试的过程中有可能会问到:在Java并发编程中,锁有两种实现:使用隐式锁和使用显示锁分别是什么?两者的区别是什么?所谓的显式锁和隐式锁的区别也就是说说Synchr ...
- Scala 中的隐式转换和隐式参数
隐式定义是指编译器为了修正类型错误而允许插入到程序中的定义. 举例: 正常情况下"120"/12显然会报错,因为 String 类并没有实现 / 这个方法,我们无法去决定 Stri ...
- Scala 深入浅出实战经典 第61讲:Scala中隐式参数与隐式转换的联合使用实战详解及其在Spark中的应用源码解析
王家林亲授<DT大数据梦工厂>大数据实战视频 Scala 深入浅出实战经典(1-87讲)完整视频.PPT.代码下载: 百度云盘:http://pan.baidu.com/s/1c0noOt ...
随机推荐
- .Net有哪些大型项目、大型网站的案例?
.Net开发的部分知名网站案例:http://www.godaddy.com 全球最大域名注册商http://www.ips.com 环迅支付,国内最早的在线支付平台http://www.icbc.c ...
- 12.Python的高级语法和用法
# from enum import Enum # 枚举 # class VIP(Enum): # YELLOW = # YELLOW_ALIAS = # 别名 # GREEN = # BLACK = ...
- 记--linux 下svn安装配置,同步web目录
安装#yum install subversion 1.创建版本库 # svnadmin create /svn/project 2.配置svn服务的配置文件svnserver.conf文件 anon ...
- SPOJ DQUERY D-query 离线+树状数组
本来是想找个主席树的题目来练一下的,这个题目虽说可以用主席树做,但是用这个方法感觉更加叼炸天 第一次做这种离线方法,所谓离线,就在把所有询问先存贮起来,预处理之后再一个一个操作 像这个题目,每个操作要 ...
- C# 使用复选框实现循环添加多条信息入库!
先在前台获取到所有要添加信息的Id $('.imgid').each(function () { if ($(this).attr("src" ...
- linux 命令之 objdump 简单使用
objdump 介绍 objdump命令是用查看目标文件或者可执行的目标文件的构成的gcc工具 objdump 选项介绍 --archive-headers -a 显示档案库的成员信息,类似ls -l ...
- 自定义 radio 的样式,更改选中样式
思路: 1. 可以为<label>元素添加生成性内容(伪元素),并基于单选按钮的状态来为其设置样式: 2. 然后把真正的单选按钮隐藏起来: 3. 最后把生成内容美化一下. 解决方法: ...
- HDU 5475:An easy problem 这题也能用线段树做???
An easy problem Time Limit: 8000/5000 MS (Java/Others) Memory Limit: 65536/65536 K (Java/Others) ...
- tx2的一些系统命令
查看TX2 ubuntu系统版本命令:https://blog.csdn.net/zhengxiangwen/article/details/60324802 sudo uname --m
- mysql日期
查询当前时间 select now() 结果:2017-04-24 18:11:26 格式化当前日期 SELECT DATE_FORMAT(NOW(), '%Y-%m-%d') 结果:2017-04- ...