windows在cygwin64下使用acme.sh批量签发Let's Encrypt的ssl证书,并用powershell重新分配iis证书
使用前提
本脚本是在使用阿里云Windows服务器的前提,如果使用其他dns服务,请参看acme.sh的dns相关文档
配置好cygwin64、acme.sh并配置好阿里云账户,openssl最好也安装上
cygwin64配置参考
acme.sh配置
openssl参考,添加-certpbe PBE-SHA1-3DES -keypbe PBE-SHA1-3DES -nomac 是为了应对pfx输入密钥不正确
最终路径就是项目路径
一、安装cygwin64
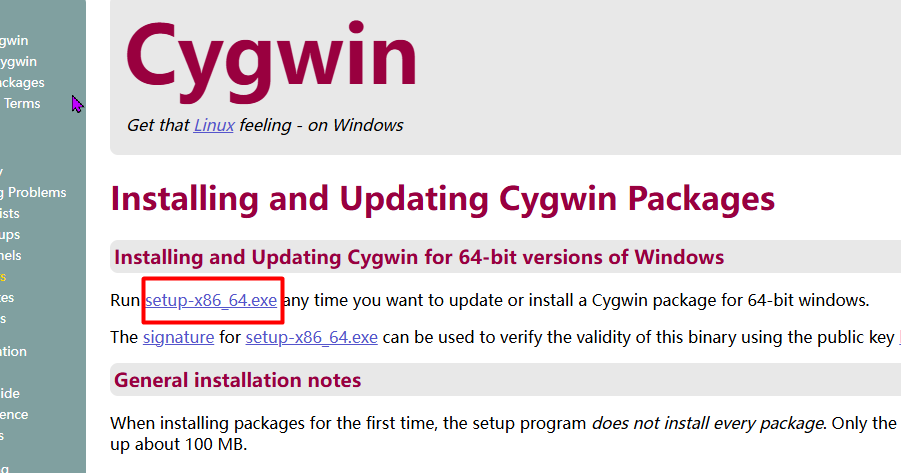
1. 下载
cygwin64官网下载
cygwin64百度云
如果windows server 08R2启动安装程序失败,请使用cmd运行
setup-x86_64.exe --allow-unsupported-windows --site http://ctm.crouchingtigerhiddenfruitbat.org/pub/cygwin/circa/64bit/2024/01/30/231215 --no-verify
其他老旧系统请参考cygwin64官网网页的How can I install the last Cygwin version for an old, unsupported Windows回答
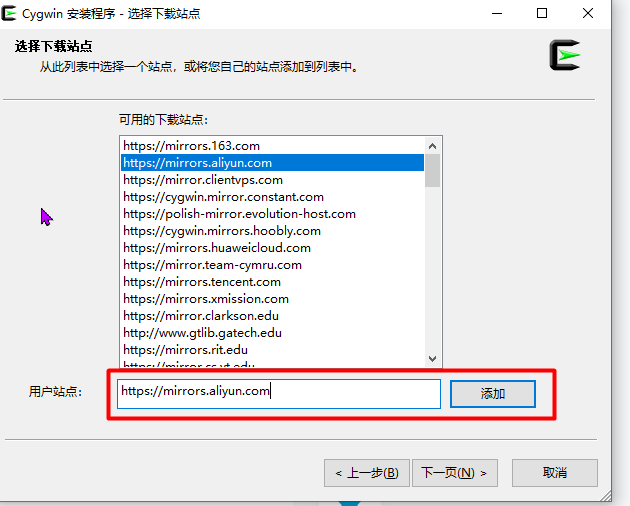
2. 非老旧系统配置镜像点
如果不是老久系统 ,则可以考虑使用阿里云镜像
阿里云镜像点: https://mirrors.aliyun.com
3. 安装包参考列表
curl
cron
bzip2
wget
gcc-core
gcc-g++
make
openssh
openssl
lynx
dos2unix
vim
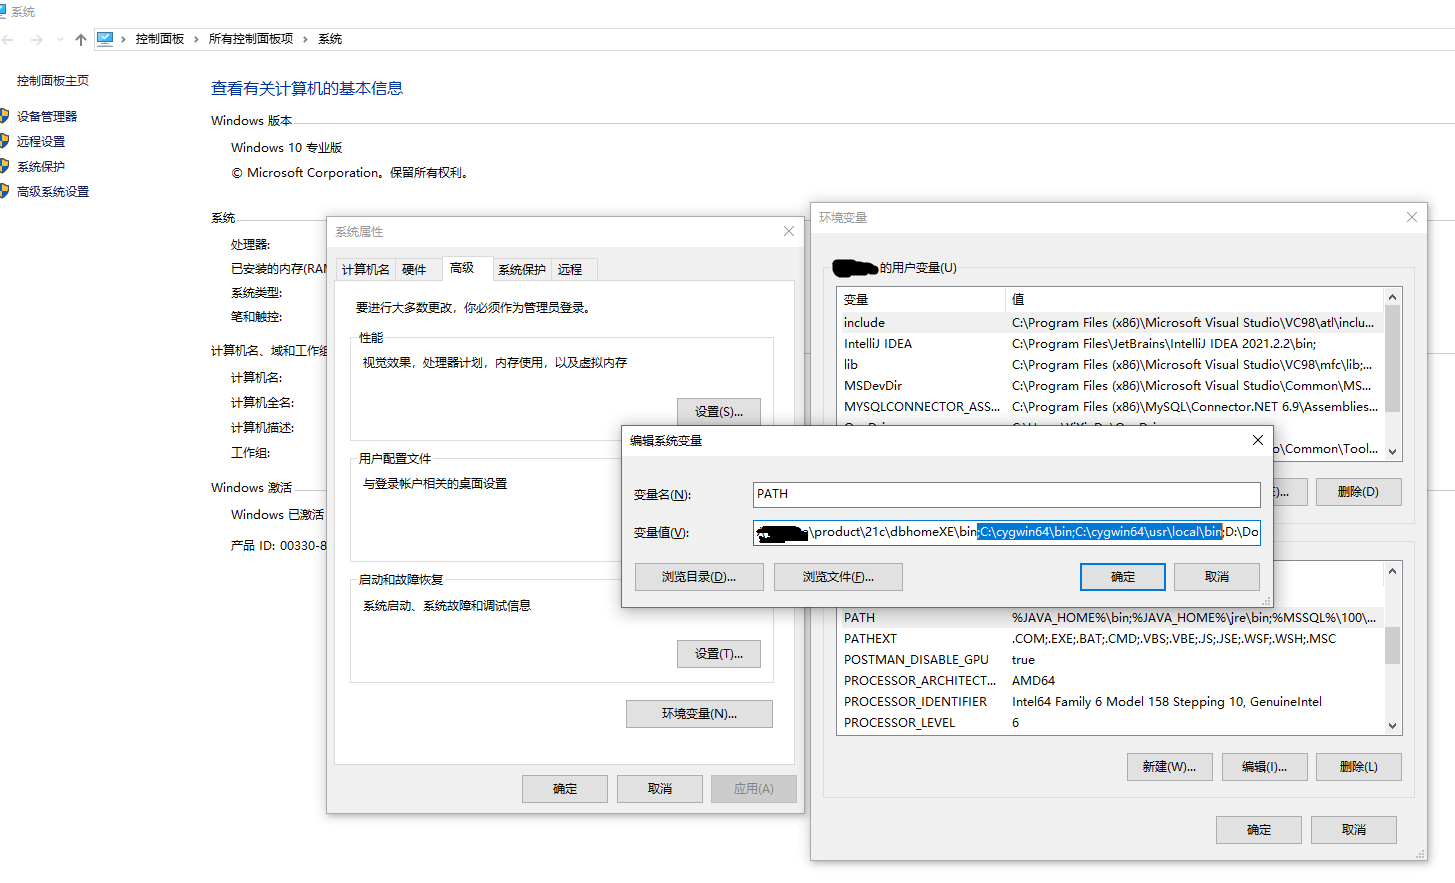
4. Windows配置环境变量
在Path后加;C:\cygwin64\bin;C:\cygwin64\usr\local\bin
5. 如果遇到VIM不能粘贴复制
打开cygwin64桌面图标Cygwin64 Terminal,进入控制台
cd /home
vim .vimrc
i键进入编辑模式,键入以下内容
set mouse=c

syntax on
esc键退出编辑模式,输入:wq即可保存文件
shift+ins 是cygwin64控制台下的粘贴键
二、安装acme.sh
1. 通过curl命令直接安装acme.sh
curl -k https://raw.githubusercontent.com/acmesh-official/acme.sh/master/acme.sh | sh -s -- --install-online -m my@example.com
如果报错如图

输入以下,使curl忽略全局ssl认证,成功后 ,再去通过curl安装acme.sh试试
echo insecure > ~/.curlrc
2. 如果步骤二.1成功则不需要看此条
1)直接去git下载acme.sh的源码
acme.sh git资源
acme.sh 百度云
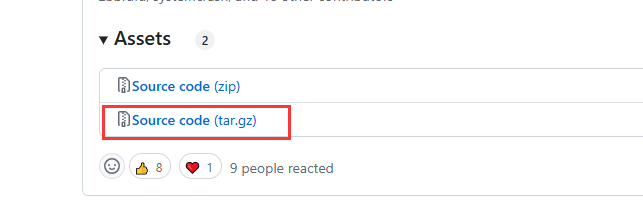
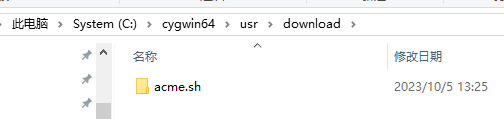
使用解压软件如7z将acme.sh-3.0.7.tar.gz解压两次放在/usr/download目录下,并重命名为acme.sh,如图
2)安装acme.sh
切换到cygwin64控制台
cd /usr/download/acme.sh

./acme.sh --install -m example@qq.com
3. 配置acme.sh
0)安装完成后重新加载 Bash
source ~/.bashrc
1)配置自动更新
acme.sh --upgrade --auto-upgrade
2)切换至Letsencrypt
acme.sh --set-default-ca --server letsencrypt
3)配置DNSApi,这里是参考阿里云的dnsapi,其他请参考acme.sh的dns相关文档
cd /home/Administrator/.acme.sh
vim account.conf
i键进入编辑模式,输入阿里云帐号的AccessKey相关内容
export Ali_Key="LTAIsadfd8J9qs4fxxxxxxxxxx"

export Ali_Secret="Xp3adgfNDOW0CJcPLKoUwqxxxxxxxxxx"
esc键退出编辑模式,输入 :wq 保存文件并退出
三、准备powershell脚本
PowerShell 脚本,使用前,更改执行策略
Set-ExecutionPolicy -ExecutionPolicy Unrestricted -Scope CurrentUser
以下是PowerShell脚本,如果乱码,请将文件保存为GB2312字符文件
1.acme自动申请证书脚本,请保存在cygwin64批量自动签发证书.ps1文件中
# 设定bash别名,如果系统装了wsl可能冲突,使用别名强制使用cygwin64命令

Set-Alias -Name bash C:\cygwin64\bin\bash.exe

# 设定openssl别名,如果系统装了wsl可能冲突,使用别名强制使用cygwin64命令

Set-Alias -Name openssl C:\cygwin64\bin\openssl.exe

# 公共证书备份路径,务必带盘符

$commonPath = "E:\cert"

# cygwin64用户路径,务必带盘符,Administrator是计算机安装cygwin64的用户名,不同情况名字不同

$userPath = "C:\Cygwin64\home\Administrator"

# cygwin64内部用户路径

$cygwinUserPath = "/home/Administrator"

# pfx文件密钥

$pfxPassword = "dgfdgsdfg"

# 证书在以下列表中添加即可

$data = @(

    [pscustomobject]@{

        # 要申请的域名

        domain = "buy.test.com";

        # 项目路径,可空

        path   = "D:\Web\Main"

    },

    [pscustomobject]@{

        domain = "go.test.com";

    },

    [pscustomobject]@{

        domain = "*.test.com";

    }

)

# 如果公共路径不存在,那么创建,如果路径已存在,不影响命令继续执行

if (![System.IO.Directory]::Exists($commonPath)) {

    md $commonPath

}

# 获取公共证书备份路径在cygwin64环境下的路径

$cygwinCommonPath = "/cygdrive/" + $commonPath.Replace(":", "").Replace("\", "/");

# 重试次数

$retryCnt = 0

function IssueKey {

    param (

        [string]$currDomain,

        [string]$currPath,

        [bool]$force

    )

    # 如果重试次数大于2,那么退出当前函数

    if ($retryCnt -gt 2) {

        return

    }

    # 替换特殊路径名

    $domain = $currDomain.Replace("*", "_")

    $cygDomain = $currDomain.Replace("*", "\*")

    # 设置执行命令后缀,这里是acme.sh相关命令,修改dns api就在这里

    $issueCmd = "--issue --dns dns_ali -d $($currDomain) --key-file $($cygwinCommonPath)/$($domain).key --fullchain-file $($cygwinCommonPath)/$($domain)_fullchain.cer"

    #如果是强制重发

    if ($force) {

        $issueCmd += " --force"

    }

    Write-Host 被执行的acme.sh后缀命令 $issueCmd

    bash --login -i -c "acme.sh $($issueCmd)"

    Write-Host 检查$currDomain key文件大小和backup目录是否存在文件

    $commonFullChainPath = "$($commonPath)\$($domain)_fullchain.cer"

    $commonKeyPath = "$($commonPath)\$($domain).key"

    $commonPfxPath = "$($commonPath)\$($domain).pfx"

    $commonPemPath = "$($commonPath)\$($domain).pem"

    # cygwin环境下的目录

    $cygwinCertPath = "$($cygwinUserPath)/.acme.sh/$($cygDomain)_ecc"

    Write-Host 赋予权限

    bash --login -i -c "chmod -R g+rw $($cygwinCertPath)"

    Write-Host 拷贝Key、Fullchain文件到公共目录

    bash --login -i -c "cp -f $($cygwinCertPath)/$($cygDomain).key $($cygwinCommonPath)/$($domain).key"

    bash --login -i -c "cp -f $($cygwinCertPath)/fullchain.cer $($cygwinCommonPath)/$($domain)_fullchain.cer"

    # 判断绝对路径下证书文件是否存在,如果不存在直接强制重新生成证书

    Write-Host 第一次检查$commonKeyPath 文件是否存在

    if (![System.IO.File]::Exists($commonKeyPath)) {

        Write-Host 检查key.bak是否存在

        # 尝试从备份中恢复文件到原目录

        bash --login -i -c "cp -f $($cygwinCertPath)/backup/key.bak $($cygwinCertPath)/$($cygDomain).key"

        # 尝试从原目录拷贝文件到公共目录

        bash --login -i -c "cp -f $($cygwinCertPath)/$($cygDomain).key $($cygwinCommonPath)/$($domain).key"

        Write-Host 第二次检查$commonKeyPath 文件是否存在

        if (![System.IO.File]::Exists($commonKeyPath)) {

            Write-Host 公共路径证书文件不存在 $commonKeyPath 即将强制重新申请

            # 重试次数+1

            $retryCnt += 1

            IssueKey -currDomain $currDomain -currPath $currPath -force $true

        }

    }

    Write-Host 第一次检查 $($domain).pfx 文件是否存在

    if (![System.IO.File]::Exists($commonPfxPath)) {

        Write-Host openssl转换pfx

        # openssl 3.x 版本

        openssl pkcs12 -export -certpbe PBE-SHA1-3DES -keypbe PBE-SHA1-3DES -nomac -out $commonPfxPath -inkey $commonKeyPath -in $commonFullChainPath -password pass:$pfxPassword

        # openssl 1.0 版本

        # openssl pkcs12 -export -out $commonPfxPath -inkey $commonKeyPath -in $commonFullChainPath -password pass:$pfxPassword

    }

    Write-Host 第二次检查 $($domain).pfx 文件是否存在

    if (![System.IO.File]::Exists($commonPfxPath)) {

        # 如果重试次数大于2,那么退出当前函数

        if ($retryCnt -gt 2) {

            return

        }

        else {

            # 重试次数+1

            $retryCnt += 1

            IssueKey -currDomain $currDomain -currPath $currPath -force $true

        }

    }

    # 如果pem格式文件不存在,那么使用openssl转换成pem格式

    if (![System.IO.File]::Exists($commonPemPath)) {

        Write-Host openssl转换pem

        openssl pkcs12 -in $commonPfxPath -out $commonPemPath -nodes -password pass:$pfxPassword

    }

    # 如果对象path不为空且存在,将证书拷贝到项目路径下

    if (![string]::IsNullOrEmpty($currPath)) {

        Write-Host 拷贝$domain 证书文件到项目目录

        Copy-Item -Path $commonKeyPath -Destination "$($currPath)\$($domain).key" -Force

        Copy-Item -Path $commonPfxPath -Destination "$($currPath)\$($domain).pfx" -Force

        Copy-Item -Path $commonPemPath -Destination "$($currPath)\$($domain).pem" -Force

    }

}

foreach ($curr in $data) {

    # 每次弄新的,就重置次数

    $retryCnt = 0

    try {

        # 登录到cygwin使用acme.sh签发证书,并将文件拷贝到公共证书目录,并转成pfx格式,密码统一使用$pfxPassword

        Write-Host 地址 $curr.path

        Write-Host 签发 $curr.domain 证书

        IssueKey -currDomain $curr.domain -currPath $curr.path -force $false

    }

    catch {

        Write-Host "发生异常:$_"

        break

    }

}

# 执行完后退出

exit
2.iis分配证书脚本,请保存在iis批量重新分配证书.ps1文件中
# 使用前先将策略设置为不严格 Set-ExecutionPolicy -ExecutionPolicy Unrestricted -Scope CurrentUser

# 保证证书有效的情况下再运行次脚本,将证书名称、证书目录、密钥放入以下数组

# 公共证书密钥

$pfxpassword = "dgfdgsdfg"

# 公共证书路径

$pfxCommandDir= "E:\cert"

# 域名

$domain="test.com"

# 服务器上的证书与端口映射关系

$data = @(

    [pscustomobject]@{subDomain = '*';port=443}

    [pscustomobject]@{subDomain = 'buy';port=8443}

    [pscustomobject]@{subDomain = 'go';port=7443}

)

$certRootStore = "LocalMachine"

$certStore = "My"

# 创建证书存储

$store = new-object System.Security.Cryptography.X509Certificates.X509Store($certStore, $certRootStore)

$store.open("MaxAllowed")

# 开始循环数组操作

foreach ($element in $data) {

    $currDomain=$element.subDomain.Replace("*","_");

    $pfxPath = "$($pfxCommandDir)\$($currDomain).$($domain).pfx"

    Write-Host $pfxPath

    # 创建pfx对象

    try {

        $certificateObject = New-Object System.Security.Cryptography.X509Certificates.X509Certificate2($pfxPath, $pfxpassword)

        if (!$certificateObject.Verify()) {

            Write-Host $element.subDomain证书验证失败, 请检查相关配置

            break

        }

        else {

            Write-Host 证书验证成功

        }

        # 存储证书到个人

        if (!$store.Certificates.Contains($certificateObject)) {

            $store.Add($certificateObject)

            Write-Host 导入证书成功

        }

        $newThumbprint = $certificateObject.Thumbprint

        Write-Host 获取证书信息成功

        $guid = [System.Guid]::NewGuid()

        $applicationID = "{$($guid)}"

        $addr = "0.0.0.0:$($element.port)"

        Write-Host $addr $newThumbprint

        # netsh删除原有监听端口

        netsh http delete sslcert ipport=$addr

        # netsh添加端口

        netsh http add sslcert ipport=$addr certhash=$newThumbprint appid=$applicationID

        # 如果对象path不为空且存在,将证书拷贝到项目路径下

        if (![string]::IsNullOrEmpty($element.path)) {

            $dest = "$($element.path)\$($currDomain).$($domain).pfx"

            Copy-Item -Path $pfxPath -Destination $dest -Force

            Write-Host 拷贝文件到项目目录成功

        }

    }

    catch {

        Write-Host "发生异常:$_"

        break

    }

}

# 关闭证书存储

$store.close()

# 执行完后退出

exit
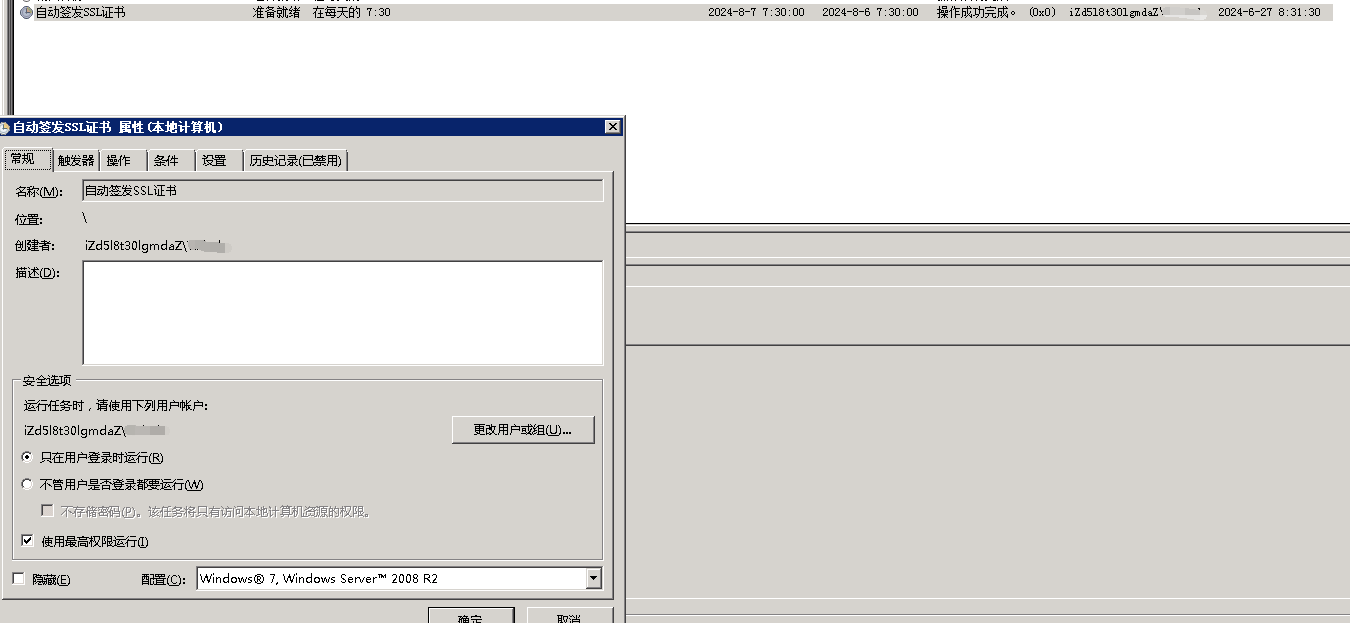
创建任务计划程序参考
在常规页面中,勾选“只在用户登录时运行”以及“使用最高权限”,保存即可
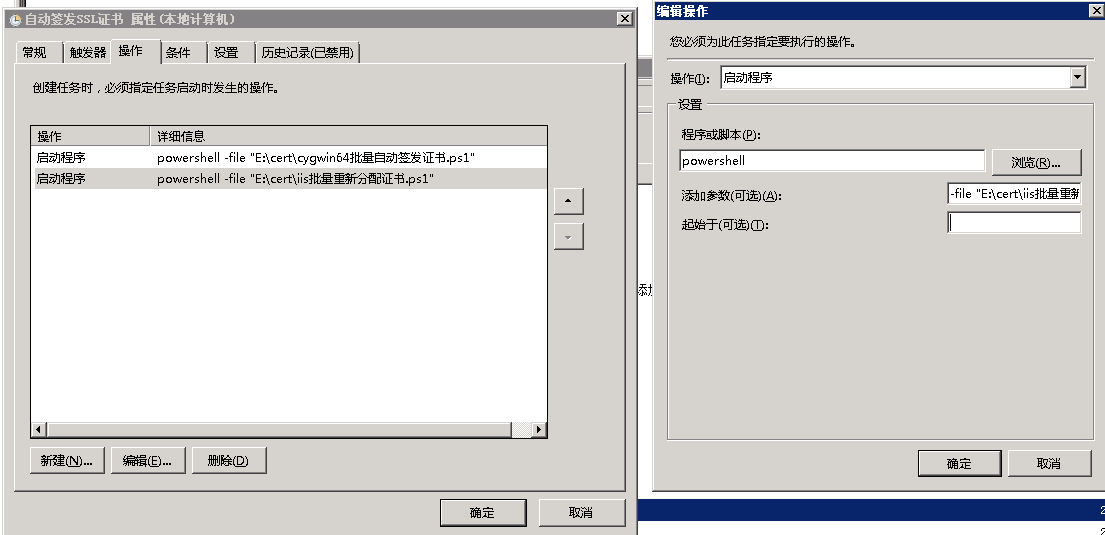
任务计划程序是按照顺序执行的。
任务计划程序设置界面效果最终如图
以Windows Server 2008R2所示:
windows在cygwin64下使用acme.sh批量签发Let's Encrypt的ssl证书,并用powershell重新分配iis证书的更多相关文章
- Linux下使用acme.sh 配置https 免费证书
acme.sh 简单来说acme.sh 实现了 acme 协议, 可以从 let‘s encrypt 生成免费的证书.acme.sh 有以下特点:一个纯粹用Shell(Unix shell)语言编写的 ...
- Linux下使用acme.sh申请和管理Let’s Encrypt证书
关于Let's Encrypt 免费SSL证书 Let's Encrypt 作为一个公共且免费 SSL 的项目逐渐被广大用户传播和使用,是由 Mozilla.Cisco.Akamai.IdenTrus ...
- windows server使用 LetsEncrypt-Win-Simple来安装和使用用Let's Encrypt免费SSL证书
一.网站部署 LetsEncrypt-Win-Simple可以自动发现已经部署的网站供我们选择要生成证书的网站,而且还需要进行验证.所以在生成证书之前,确保网站已经部署好并可以正常访问. 二.生成证书 ...
- 使用 acme.sh 签发续签 Let‘s Encrypt 证书 泛域名证书
1. 安装 acme.sh 安装很简单, 一个命令: curl https://get.acme.sh | sh 并创建 一个 bash 的 alias, 方便你的使用 alias acme.sh=~ ...
- Let's Encrypt之acme.sh
前言 Let's Encrypt 是一个证书颁发机构(CA).是由互联网安全研究小组(ISRG,Internet Security Research Group)主导并开发的一个新型数字证书认证机构( ...
- 使用acme.sh申请&自动续期LetsEncrypt免费SSL证书(转)
一.简介 LetsEncrypt是一个免费.自动.开放的证书颁发机构.acme.sh 实现了 acme 协议, 可以从 LetsEncrypt 生成免费的证书. 本文介绍如何使用acme.sh来签发并 ...
- acme.sh官方中文说明文档
转载自:https://github.com/acmesh-official/acme.sh/wiki/说明 acme.sh 实现了 acme 协议, 可以从 letsencrypt 生成免费的证书. ...
- acme.sh建立SAN证书 和泛域名证书
文件来源 https://github.com/Neilpang/acme.sh/wiki/How-to-issue-a-cert domain=$domain time=`date +%Y%m%d% ...
- 用脚本如何实现将Linux下的txt文件批量转化为Windows下的txt文件?
众所周知,Windows和Linux的文件换行回车格式不同,Windows下换行格式是\r\n(回车+换行),Linux下换行格式为\n(只是换行),因此,其中一个操作系统的文本文件若需要在另外一个中 ...
- Windows和Unix下的编码问题
今天测试shell脚本时,执行报错: ./report.sh: /tmp/tmp.E8ekx6r5Qq/report.sh: /bin/bash^M: bad interpreter: No such ...
随机推荐
- SQL Server 截取字符串
select top 100 substring(qr_code,8,8) ,* from [LiuJun_PKh_lcfc_hf] --where right(ri,8) or substring( ...
- [oeasy]python0003_ 终端大冒险_终端命令_whoami_pwd_ls
终端大冒险_终端命令_ls_pwd_whoami 回忆 上次 了解基本环境 简称 含义 CLI 命令行界面 GUI 图形用户界面 在 CLI 中 通过终端 连接 远程服务器的 壳(shell) 控制 ...
- [oeasy]python0074_设置高亮色_color_highlight_ansi_控制终端颜色
更多颜色 回忆上次内容 上次我们搞的还是颜色 FG foreground 前景色 30-37 BG background 背景色 40-47 这些 都可以和字体样式 结合起来 难道 就这几种颜色 吗? ...
- oeasy教您玩转vim - 46 - # 范围控制
范围控制 回忆上节课内容 这次我们主要就是看命令行 首先是选择一个 [range] 这个范围 然后进行相应的操作 :11,30d :2,7y 还可以指定寄存器 :"a3,40y :&qu ...
- 个人使用 sudo 方法
sudo 作用:允许 系统管理员 授予某些用户或用户组以 其他用户身份 运行某些或所有命令的权限 su 用于变更为其他使用者的身份的命令,一般需要键入该使用者的密码 sudo 则是对 su 使用的简化 ...
- SMU Summer 2024 Contest Round 3(7.10)zhaosang
打的最菜一次,最惨一次,题读假了 A-A http://162.14.124.219/contest/1007/problem/A 签到题 要解决这道题,素数对,数据量不是很大,所以我们可以先预处理素 ...
- CF1950B Upscaling题解
CF1950B Upscaling题解 题意 给予你一个正整数 \(n\),构造一个如图的字符矩阵. 思路 注意数据 \(1\le n \le 20\),可以发现数据很小,于是我们可以暴力模拟. 我们 ...
- 仓颉编程语言技术指南:嵌套函数、Lambda 表达式、闭包
本文分享自华为云社区<[华为鸿蒙开发技术]仓颉编程语言技术指南[嵌套函数.Lambda 表达式.闭包]>,作者:柠檬味拥抱. 仓颉编程语言(Cangjie)是一种面向全场景应用开发的通用编 ...
- C++命名空间、标准输入输出、引用
1.简述C++中命名空间的作用. 答:避免重复定义全局变量的问题. 2.定义两个命名空间A 和 B 分别在A中和B中定义变量value.在main函数中将两个空间的value打印出来. #includ ...
- RHCA cl210 016 流表 overlay
Overlay网络是建立在Underlay网络上的逻辑网络 underlay br-int 之间建立隧道 数据流量还是从eth1出去 只有vlan20 是geneve隧道.只有租户网络有子网,子网需要 ...