使用Web Audio API绘制音波图
摘要:Web Audio API是对<audio> 标签功能上的补充,我们可以用它完成混音、音效、平移等各种复杂的音频处理,本文简单的使用其完成音波图的绘制。
PS:本例子使用ES6编程,最好在新版chrome中运行。
一、前端文件index.html
<!DOCTYPE html>

<html lang="en">

<head>

    <meta charset="UTF-8">

    <meta name="viewport" content="width=device-width, initial-scale=1.0, maximum-scale=1.0, user-scalable=0">

    <meta http-equiv="X-UA-Compatible" content="ie=edge" />

    <title>audiogram</title>

</head>

<body>

<canvas id="canvas" width="400" height="100"></canvas>

<button class="play" style="width: 50px;height: 50px;">开始</button>

<button class="stop" style="width: 50px;height: 50px;">停止</button>

</body>

<script type="module" src="Main.js"></script>

</html>
PS:浏览器加载ES6模板使用<script>标签时,要加入type = “module”属性,浏览器会默认异步加载,并知道Main.js是一个ES6模块。
二、创建Audio类
//audit类,用于加载,播放音乐

export class Audio {

    //单例

    static getInstance() {

        if (!Audio.instance) {

            Audio.instance = new Audio();

        }

        return Audio.instance;

    }

    //构造函数

    constructor() {

        this.ctx = new (window.AudioContext || window.webkitAudioContext)();

    }

    //加载资源

    getData() {

        this.analyser = this.ctx.createAnalyser();

        //从元素创建媒体节点 可以直接将audio元素传入后创建,就不用request来请求资源

        //this.source = this.ctx.createMediaElementSource(audio);

        this.source = this.ctx.createBufferSource();

        this.source.loop = true;

        //创建AnalyserNode,用来显示音频时间和频率的数据

        this.source.connect(this.analyser);

        //最后连接到音频渲染设备,发出声音

        this.analyser.connect(this.ctx.destination);

        //获取频率

        this.freqs = new Uint8Array(this.analyser.frequencyBinCount);

        //请求资源

        let request = new XMLHttpRequest();

        request.open('get', 'res/bgm.mp3', true);

        //responseType属性须设置为arraybuffer

        request.responseType = 'arraybuffer';

        //decodeAudioData方法用于解码音频文件

        request.onload = () => {

            var audioData = request.response;

            this.ctx.decodeAudioData(audioData, (buffer) => {

                //将解码后的音频文件作为声音的来源

                this.source.buffer = buffer;

                //立即开始播放声音

                this.source.start(0);

            }, (e) => {

                "Error with decoding audio data" + e.error

            });

        };

        request.send();

    }

}
三、创建Main类
import {Audio} from "./js/Audio.js";

//用于控制整个页面的流程

 class Main {

    constructor() {

        //获取audio实例

        this.audio = Audio.getInstance();

        this.init();

    }

    //初始化

    init() {

        //初始化按钮

        this.play = document.querySelector('.play');

        this.stop = document.querySelector('.stop');

        //确保加载完资源后开始输出

        let promise = new Promise((resolve) => {

            this.audio.getData();

            resolve();

        });

        promise.then(() => {

            this.initCanvas();

            this.outPut()

        });

        //播放按钮

        this.play.onclick = () => {

            this.audio.ctx.resume();

            this.outPut();

            this.play.setAttribute('disabled', 'disabled');

        }

        //停止按钮

        this.stop.onclick = () => {

            this.audio.ctx.suspend();

            //this.audio.source.stop(0);使用stop停止时无法恢复,需要重载资源

            cancelAnimationFrame(this.timer);

            this.play.removeAttribute('disabled');

        }

    }

    //初始化canvas

    initCanvas() {

        let cv = document.querySelector('#canvas');

        this.canvasWidth = cv.width;

        this.canvasHeight = cv.height;

        this.canvas = cv.getContext("2d");

        this.canvas.translate(0.5, 0.5);

        this.outPutData = this.audio.freqs;

    }

    //输出图像

    outPut() {

        var height = this.canvasHeight;

        var width = this.canvasWidth;

        var outPutData = this.outPutData;

        var length = outPutData.length;

        this.audio.analyser.getByteFrequencyData(outPutData);

        //将缓冲区的数据绘制到Canvas上

        this.canvas.clearRect(-0.5, -0.5, width, height);

        this.canvas.beginPath(), this.canvas.moveTo(0, height);

        for (var i = 0; i < width; i++)

            this.canvas.lineTo(i, height - height * outPutData[Math.round(length * i / width)] / 255);

        this.canvas.lineTo(i, height), this.canvas.fill();

        //请求下一帧

        this.timer = requestAnimationFrame(() => {

            this.outPut()

        });

    }

}

new Main();
PS:在ES6中使用箭头函数时,箭头函数中的this指向Main,真的超级好用。
注意:使用chrome打开时会出现 Origin 'null' is therefore not allowed access.这是由于在本地html页面ajax请求本地或者局域网server的资源时,被浏览器禁止了,跨域请求会带来安全隐患,因此谷歌浏览器对此做出了限制。
在服务端我们可以设置response.setHeader("Access-Control-Allow-Origin: *")允许这么做,如果是客户端的话我们可以右键chrome快捷方式—>属性->目标-> 将"--allow-file-access-from-files"添加至最后重启浏览器即可。
工程目录结构:
└── audiogram ├── js │ └── Audio.js ├── res 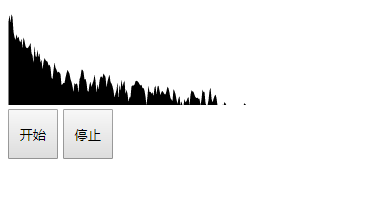
使用Web Audio API绘制音波图的更多相关文章
- Web Audio API之手把手教你用web api处理声音信号:可视化音乐demo
1.Web Audio API 介绍 Web Audio API 提供了在Web上控制音频的一个非常有效通用的系统 ,这些通用系统通俗的讲就是我们可以利用Web Audio API提供的各种方法操作各 ...
- HTML5 ——web audio API 音乐可视化(二)
上一篇 web audio API 音乐可视化(一)介绍了一些基本的API,以及如何简单的播放一个音频,本篇介绍一下怎么对获取到的音频进行分析,并将分析后的数据绘制成图像. 最终效果请戳这里; 完整版 ...
- 【HTML5】Web Audio API打造超炫的音乐可视化效果
HTML5真是太多炫酷的东西了,其中Web Audio API算一个,琢磨着弄了个音乐可视化的demo,先上效果图: 项目演示:别说话,点我! 源码已经挂到github上了,有兴趣的同学也可以去st ...
- 关于HTML5音频——audio标签和Web Audio API各平台浏览器的支持情况
对比audio标签 和 Web Audio API 各平台浏览器的支持情况: audio element Web Audio API desktop browsers Chrome 14 Yes ...
- [Javascript] Intro to the Web Audio API
An introduction to the Web Audio API. In this lesson, we cover creating an audio context and an osci ...
- 关于Web Audio API的入门
Web Audio API提供了一个简单强大的机制来实现控制web应用程序的音频内容.它允许你开发复杂的混音,音效,平移以及更多. 可以先看一下MDN的这篇文章<Web Audio API的运用 ...
- H5的Web Audio Api
概述 研究Web Audio Api的主要原因是:工作中需要在ios中实现声音的淡出效果,主要是通过setInterval来改audio标签的volume属性实现的,但是ios上面volume属性是只 ...
- HTML5 ——web audio API 音乐可视化(一)
使用Web Audio API可以对音频进行分析和操作,最终实现一个音频可视化程序. 最终效果请戳这里; 完整版代码请戳这里,如果还看得过眼,请给一个start⭐ 一.API AudioContext ...
- 【Web Audio API】 — 那些年的 web audio
转 TAT.Jdo:[Web Audio API] - 那些年的 web audio 这主题主要是早期对 web audio api的一些尝试,这里整理一下以便以后翻阅,如有错误,诚请指正. 在这之前 ...
随机推荐
- PHP7链接MySQL
1 <?php $mysqli = new mysqli("localhost", "root", "123"); if($mysql ...
- O(logN)中logN的底数
转载:http://blog.csdn.net/jdbc/article/details/42173751 问题: 无论是计算机算法概论.还是数据结构书中, 关于算法的时间复杂度很多都用包含O(log ...
- centos系统升级PHP版本程序
鉴于Centos 默认yum源的php版本太低了,手动编译安装又有点一些麻烦,那么如何采用Yum安装的方案安装最新版呢.那么,今天我们就来学习下如何用yum安装php最新版. 1.检查当前安装的PHP ...
- Android:认识R类、findViewById方法查找组件、@string查找字符、@color查找颜色、@drawable查找图片、@dimen某个组件尺寸定义、项目引入资源国际化
导入 之前都是断断续续的看了一些于如何使用android开发的文章.资料等,到目前位置很多基础的东西都不清楚,于是去学习了别人的课程,才了认识了R类.findViewById方法查找组件.项目引入资源 ...
- Frame
Frame意为框架,是在屏幕上的一个矩形区域. Frame主要作为其他组件的框架基础,或为其他组件提供间距补充. 何时使用Frame组件呢? Frame组件主要用于在复杂的布局中奖其他组件分组,也用于 ...
- 极速下载百度网盘-吴水成老师的-dubbo课程
极速下载百度网盘-吴水成老师的-dubbo课程,极速下载百度网盘-吴水成老师的-dubbo课程,极速下载百度网盘-吴水成老师的-dubbo课程,极速下载百度网盘-吴水成老师的-dubbo课程 先看主目 ...
- angulajs_删除功能
- jacascript JSON对象的学习
前言:这是笔者学习之后自己的理解与整理.如果有错误或者疑问的地方,请大家指正,我会持续更新! JSON (javascript object notation) 全称是 javascript 对象表示 ...
- @OnetoOne @OnetoMany @ManyToOne(2)
在班主任(id,name,bjid) 班级(id name) 学生(id name bjid)的 关系中 班主任一对一关联班级 班级一对多关联学生 @OnetoOne @joinColumn(bjid ...
- drupal 8 建立我的相册
一.先建一个存图片的内容类型 1.创建内容类型 点击[结构]>[内容类型]>[+add content type] 点击[保存和管理字段] 2.添加字段 点击[+添加字段] 点击[保存并继 ...