Spring Boot 入门之基础篇(一)
原文地址:Spring Boot 入门之基础篇(一)
博客地址:http://www.extlight.com
一、前言
Spring Boot 是由 Pivotal 团队提供的全新框架,其设计目的是用来简化新 Spring 应用的初始搭建以及开发过程。该框架使用了特定的方式来进行配置,从而使开发人员不再需要定义样板化的配置。
本系列以快速入门为主,可当作工具小手册阅读
二、环境搭建
创建一个 maven 工程,目录结构如下图:
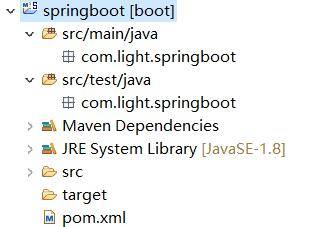
2.1 添加依赖
创建 maven 工程,在 pom.xml 文件中添加如下依赖:
<!-- 定义公共资源版本 -->

<parent>

	<groupId>org.springframework.boot</groupId>

	<artifactId>spring-boot-starter-parent</artifactId>

	<version>1.5.6.RELEASE</version>

	<relativePath />

</parent>

<properties>

	<project.build.sourceEncoding>UTF-8</project.build.sourceEncoding>

	<project.reporting.outputEncoding>UTF-8</project.reporting.outputEncoding>

	<java.version>1.8</java.version>

</properties>

<dependencies>

    <!-- 上边引入 parent,因此 下边无需指定版本 -->

    <!-- 包含 mvc,aop 等jar资源 -->

	<dependency>

		<groupId>org.springframework.boot</groupId>

		<artifactId>spring-boot-starter-web</artifactId>

	</dependency>

</dependencies>

<build>

    <plugins>

        <plugin>

            <groupId>org.springframework.boot</groupId>

            <artifactId>spring-boot-maven-plugin</artifactId>

        </plugin>

    </plugins>

</build>
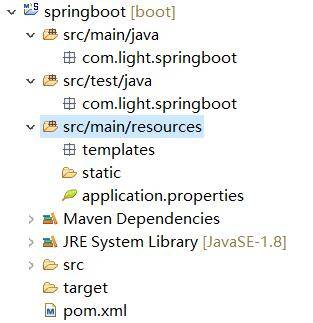
2.2 创建目录和配置文件
创建 src/main/resources 源文件目录,并在该目录下创建 application.properties 文件、static 和 templates 的文件夹。
application.properties:用于配置项目运行所需的配置数据。
static:用于存放静态资源,如:css、js、图片等。
templates:用于存放模板文件。
目录结构如下:
2.3 创建启动类
在 com.light.springboot 包下创建启动类,如下:
/**

 该注解指定项目为springboot,由此类当作程序入口

 自动装配 web 依赖的环境

**/

@SpringBootApplication

public class SpringbootApplication {

	public static void main(String[] args) {

		SpringApplication.run(SpringbootApplication.class, args);

	}

}
2.4 案例演示
创建 com.light.springboot.controller 包,在该包下创建一个 Controller 类,如下:
@RestController

public class TestController {

	@GetMapping("/helloworld")

	public String helloworld() {

		return "helloworld";

	}

}
在 SpringbootApplication 文件中右键 Run as -> Java Application。当看到 “Tomcat started on port(s): 8080 (http)” 字样说明启动成功。
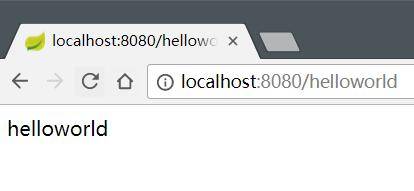
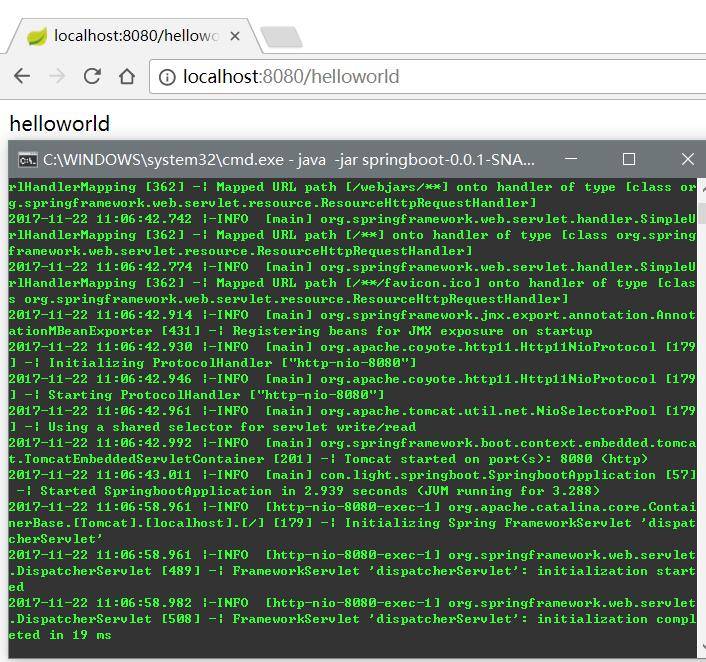
打开浏览器访问 http://localhost:8080/helloworld,结果如下:
读者可以使用 STS 开发工具,里边集成了插件,可以直接创建 Spingboot 项目,它会自动生成必要的目录结构。
三、热部署
当我们修改文件和创建文件时,都需要重新启动项目。这样频繁的操作很浪费时间,配置热部署可以让项目自动加载变化的文件,省去的手动操作。
在 pom.xml 文件中添加如下配置:
<!-- 热部署 -->

<dependency>

	<groupId>org.springframework.boot</groupId>

	<artifactId>spring-boot-devtools</artifactId>

	<optional>true</optional>

	<scope>true</scope>

</dependency>
<build>

	<plugins>

		<plugin>

			<groupId>org.springframework.boot</groupId>

			<artifactId>spring-boot-maven-plugin</artifactId>

			<configuration>

				<!-- 没有该配置,devtools 不生效 -->

				<fork>true</fork>

			</configuration>

		</plugin>

	</plugins>

</build>
配置好 pom.xml 文件后,我们启动项目,随便创建/修改一个文件并保存,会发现控制台打印 springboot 重新加载文件的信息。
演示图如下:
四、多环境切换
application.properties 是 springboot 在运行中所需要的配置信息。
当我们在开发阶段,使用自己的机器开发,测试的时候需要用的测试服务器测试,上线时使用正式环境的服务器。
这三种环境需要的配置信息都不一样,当我们切换环境运行项目时,需要手动的修改多出配置信息,非常容易出错。
为了解决上述问题,springboot 提供多环境配置的机制,让开发者非常容易的根据需求而切换不同的配置环境。
在 src/main/resources 目录下创建三个配置文件:
application-dev.properties:用于开发环境

application-test.properties:用于测试环境

application-prod.properties:用于生产环境
我们可以在这个三个配置文件中设置不同的信息,application.properties 配置公共的信息。
在 application.properties 中配置:
spring.profiles.active=dev
表示激活 application-dev.properties 文件配置, springboot 会加载使用 application.properties 和 application-dev.properties 配置文件的信息。
同理,可将 spring.profiles.active 的值修改成 test 或 prod 达到切换环境的目的。
演示图如下:
五、配置日志
5.1 配置 logback(官方推荐使用)
5.1.1 配置日志文件
spring boot 默认会加载 classpath:logback-spring.xml 或者 classpath:logback-spring.groovy。
如需要自定义文件名称,在 application.properties 中配置 logging.config 选项即可。
在 src/main/resources 下创建 logback-spring.xml 文件,内容如下:
<?xml version="1.0" encoding="UTF-8"?>

<configuration>

    <!-- 文件输出格式 -->

    <property name="PATTERN" value="%-12(%d{yyyy-MM-dd HH:mm:ss.SSS}) |-%-5level [%thread] %c [%L] -| %msg%n" />

    <!-- test文件路径 -->

    <property name="TEST_FILE_PATH" value="d:/test.log" />

    <!-- pro文件路径 -->

    <property name="PRO_FILE_PATH" value="/opt/test/log" />

    <!-- 开发环境 -->

    <springProfile name="dev">

        <appender name="CONSOLE" class="ch.qos.logback.core.ConsoleAppender">

            <encoder>

                <pattern>${PATTERN}</pattern>

            </encoder>

        </appender>

        <logger name="com.light.springboot" level="debug" />

        <root level="info">

            <appender-ref ref="CONSOLE" />

        </root>

    </springProfile>

    <!-- 测试环境 -->

    <springProfile name="test">

        <!-- 每天产生一个文件 -->

        <appender name="TEST-FILE" class="ch.qos.logback.core.rolling.RollingFileAppender">

            <!-- 文件路径 -->

            <file>${TEST_FILE_PATH}</file>

            <rollingPolicy class="ch.qos.logback.core.rolling.TimeBasedRollingPolicy">

                <!-- 文件名称 -->

                <fileNamePattern>${TEST_FILE_PATH}/info.%d{yyyy-MM-dd}.log</fileNamePattern>

                <!-- 文件最大保存历史数量 -->

                <MaxHistory>100</MaxHistory>

            </rollingPolicy>

            <layout class="ch.qos.logback.classic.PatternLayout">

                <pattern>${PATTERN}</pattern>

            </layout>

        </appender>

        <root level="info">

            <appender-ref ref="TEST-FILE" />

        </root>

    </springProfile>

    <!-- 生产环境 -->

    <springProfile name="prod">

        <appender name="PROD_FILE" class="ch.qos.logback.core.rolling.RollingFileAppender">

            <file>${PRO_FILE_PATH}</file>

            <rollingPolicy class="ch.qos.logback.core.rolling.TimeBasedRollingPolicy">

                <fileNamePattern>${PRO_FILE_PATH}/warn.%d{yyyy-MM-dd}.log</fileNamePattern>

                <MaxHistory>100</MaxHistory>

            </rollingPolicy>

            <layout class="ch.qos.logback.classic.PatternLayout">

                <pattern>${PATTERN}</pattern>

            </layout>

        </appender>

        <root level="warn">

            <appender-ref ref="PROD_FILE" />

        </root>

    </springProfile>

</configuration>
其中,springProfile 标签的 name 属性对应 application.properties 中的 spring.profiles.active 的配置。
即 spring.profiles.active 的值可以看作是日志配置文件中对应的 springProfile 是否生效的开关。
5.2 配置 log4j2
5.2.1 添加依赖
<dependency>

	<groupId>org.springframework.boot</groupId>

	<artifactId>spring-boot-starter-log4j2</artifactId>

</dependency>
5.2.2 配置日志文件
spring boot 默认会加载 classpath:log4j2.xml 或者 classpath:log4j2-spring.xml。
如需要自定义文件名称,在 application.properties 中配置 logging.config 选项即可。
log4j2.xml 文件内容如下:
<?xml version="1.0" encoding="utf-8"?>

<configuration>

    <properties>

        <!-- 文件输出格式 -->

        <property name="PATTERN">%d{yyyy-MM-dd HH:mm:ss.SSS} |-%-5level [%thread] %c [%L] -| %msg%n</property>

    </properties>

    <appenders>

        <Console name="CONSOLE" target="system_out">

            <PatternLayout pattern="${PATTERN}" />

        </Console>

    </appenders>

    <loggers>

        <logger name="com.light.springboot" level="debug" />

        <root level="info">

            <appenderref ref="CONSOLE" />

        </root>

    </loggers>

</configuration>
log4j2 不能像 logback 那样在一个文件中设置多个环境的配置数据,只能命名 3 个不同名的日志文件,分别在 application-dev,application-test 和 application-prod 中配置 logging.config 选项。
除了在日志配置文件中设置参数之外,还可以在 application-*.properties 中设置,日志相关的配置:
logging.config                    # 日志配置文件路径,如 classpath:logback-spring.xml

logging.exception-conversion-word # 记录异常时使用的转换词

logging.file                      # 记录日志的文件名称,如:test.log

logging.level.*                   # 日志映射,如:logging.level.root=WARN,logging.level.org.springframework.web=DEBUG

logging.path                      # 记录日志的文件路径,如:d:/

logging.pattern.console           # 向控制台输出的日志格式,只支持默认的 logback 设置。

logging.pattern.file              # 向记录日志文件输出的日志格式,只支持默认的 logback 设置。

logging.pattern.level             # 用于呈现日志级别的格式,只支持默认的 logback 设置。

logging.register-shutdown-hook    # 初始化时为日志系统注册一个关闭钩子
六、打包运行
打包的形式有两种:jar 和 war。
6.1 打包成可执行的 jar 包
默认情况下,通过 maven 执行 package 命令后,会生成 jar 包,且该 jar 包会内置了 tomcat 容器,因此我们可以通过 java -jar 就可以运行项目,如下图:
6.2 打包成部署的 war 包
让 SpringbootApplication 类继承 SpringBootServletInitializer 并重写 configure 方法,如下:
@SpringBootApplication

public class SpringbootApplication extends SpringBootServletInitializer {

    @Override

    protected SpringApplicationBuilder configure(SpringApplicationBuilder application) {

        return application.sources(SpringbootApplication.class);

    }

	public static void main(String[] args) {

		SpringApplication.run(SpringbootApplication.class, args);

	}

}
修改 pom.xml 文件,将 jar 改成 war,如下:
<packaging>war</packaging>
打包成功后,将 war 包部署到 tomcat 容器中运行即可。
七、参考资料
Spring Boot 入门之基础篇(一)的更多相关文章
- Spring Boot 入门之 Web 篇(二)
原文地址:Spring Boot 入门之 Web 篇(二) 博客地址:http://www.extlight.com 一.前言 上一篇<Spring Boot 入门之基础篇(一)>介绍了 ...
- Spring Boot 入门之消息中间件篇(五)
原文地址:Spring Boot 入门之消息中间件篇(五) 博客地址:http://www.extlight.com 一.前言 在消息中间件中有 2 个重要的概念:消息代理和目的地.当消息发送者发送消 ...
- Spring Boot 入门之单元测试篇(五)
博客地址:http://www.moonxy.com 一.前言 JUnit 是一个由 Java 语言编写的开源的回归测试(回归测试是指重复以前全部或部分的相同测试)框架,由Erich Gamma 和 ...
- Spring Boot 入门之消息中间件篇(转发)
一.前言 在消息中间件中有 2 个重要的概念:消息代理和目的地.当消息发送者发送消息后,消息就被消息代理接管,消息代理保证消息传递到指定目的地. 我们常用的消息代理有 JMS 和 AMQP 规范.对应 ...
- Spring Boot 入门之基础构建篇(一)
博客地址:http://www.moonxy.com 一.前言 随着 Spring 的功能越来越强,在使用 Spring 的时候,门槛也变得高了起来,诸如搭建一个基于 Spring 的 Web 程序却 ...
- Spring Boot 入门之 Cache 篇(四)
博客地址:http://www.moonxy.com 一.前言 Spring Cache 对 Cahce 进行了抽象,提供了 @Cacheable.@CachePut.@CacheEvict 等注解. ...
- spring boot入门教程——Spring Boot快速入门指南
Spring Boot已成为当今最流行的微服务开发框架,本文是如何使用Spring Boot快速开始Web微服务开发的指南,我们将使创建一个可运行的包含内嵌Web容器(默认使用的是Tomcat)的可运 ...
- Spring Boot 入门之持久层篇(三)
原文地址:Spring Boot 入门之持久层篇(三) 博客地址:http://www.extlight.com 一.前言 上一篇<Spring Boot 入门之 Web 篇(二)>介绍了 ...
- Spring Boot 入门之缓存和 NoSQL 篇(四)
原文地址:Spring Boot 入门之缓存和 NoSQL 篇(四) 博客地址:http://www.extlight.com 一.前言 当系统的访问量增大时,相应的数据库的性能就逐渐下降.但是,大多 ...
随机推荐
- R 语言 decostand() 函数
参考自:https://wenku.baidu.com/view/ae5f76f94b35eefdc9d3336e.html
- IOS 下载app
---------------------------------------------------------------------------------------------------- ...
- echarts tooltip巧用
tooltip : { trigger: 'item', triggerOn: 'click', formatter:function(params,ticket,callback){ var res ...
- scala面试题总结
一.scala语言有什么特点?什么是函数式编程?有什么优点? 1.scala语言集成面向对象和函数式编程 2.函数式编程是一种典范,将电脑的运算视作是函数的运算. 3.与过程化编程相比,函数式编程里的 ...
- axios和promise
什么是axios axios is a promise based HTTP client for the browser and node.js Features: Make XMLHttpRequ ...
- vue里面的v-model的变量不要使用下划线
遇到一个问题,就是如果变量名是text_right,的时候更改v-model的值,则text_right不会更新,如果改成textRight就会更新,目前还不知道原因,先记录下来
- 『计算机视觉』感受野和anchor
原文链接:关于感受野的总结 论文链接:Understanding the Effective Receptive Field in Deep Convolutional Neural Networks ...
- node模块之events模块
events 模块只提供了一个对象: events.EventEmitter. [EventEmitter 的核心就是事件触发与事件监听器功能的封装.] EventEmitter 的每个事件由一个事件 ...
- 第5天(半天)【shell编程初步、grep及正则表达式】
第5天(半天)[shell编程初步.grep及正则表达式] shell编程初步(01)_recv shell脚本:文本文件 #!:/bin/bash #!:/usr/bin/python #!:/us ...
- Eclipse ee项目 Java Resources文件报错解决方法
通常是JDK版本配置问题,这里使用的是JDK1.8版本 确保jre版本为本机配置的版本 打开Navigator目录的.settings文件夹修改org.eclipse.wst.common.compo ...