SSM框架整合过程总结
-----------------------siwuxie095
SSM 框架整合过程总结
1、导入相关
jar 包(共 26 个)
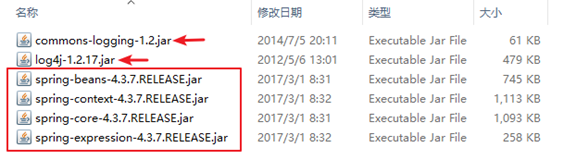
(1)导入
Spring 的核心 jar 包和日志相关的 jar 包(6 个)
Commons Logging
下载链接:
http://commons.apache.org/proper/commons-logging/download_logging.cgi
LOG4J 下载链接:
https://www.apache.org/dist/logging/log4j/
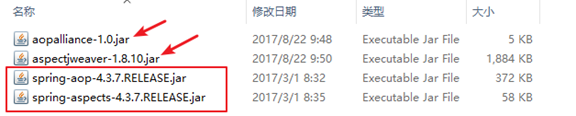
(2)导入
Spring 的 AOP 开发的 jar 包(4 个)
AOP Alliance
下载链接:
http://mvnrepository.com/artifact/aopalliance/aopalliance
AspectJ Weaver
下载链接:
http://mvnrepository.com/artifact/org.aspectj/aspectjweaver
(3)导入
Spring 的
JDBC 开发的 jar 包(2 个)

(4)导入
Spring 整合 Web 项目的 jar 包(1 个)

(5)导入
SpringMVC 的 jar 包(1 个)

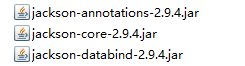
(6)导入
SpringMVC 中使用 JSON 所需的 jar 包(3 个)
Jackson Core 下载链接:
http://repo1.maven.org/maven2/com/fasterxml/jackson/core/jackson-core/
Jackson Annotations 下载链接:
http://repo1.maven.org/maven2/com/fasterxml/jackson/core/jackson-annotations/
Jackson Databind 下载链接:
http://repo1.maven.org/maven2/com/fasterxml/jackson/core/jackson-databind/
(7)导入
MyBatis 的 jar 包(1 个)

(8)导入
MyBatis 所需的日志相关的 jar 包(2 个)

「MyBatis 也需要 LOG4J,但前面 Spring 已导入,不再重复导入」
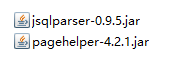
(9)导入
MyBatis 分页相关的 jar 包(2 个)
PageHelper 下载链接:
http://repo1.maven.org/maven2/com/github/pagehelper/pagehelper/
JSqlParser 下载链接:
http://repo1.maven.org/maven2/com/github/jsqlparser/jsqlparser/0.9.5/
(10)导入
MySQL 的 JDBC 驱动的 jar 包(1 个)

MySQL Connector/J
下载链接:
https://dev.mysql.com/downloads/connector/j/
(11)导入
Spring 整合 MyBatis 的 jar 包(1 个)

MyBatis-Spring 下载链接:
https://github.com/mybatis/spring/releases
(12)导入
BoneCP 的 jar 包和其依赖的 Guava 的 jar 包(2 个)

BoneCP 下载链接:
http://repo1.maven.org/maven2/com/jolbox/bonecp/
Guava 下载链接:
http://repo1.maven.org/maven2/com/google/guava/guava/
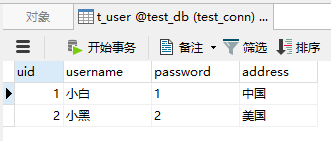
2、创建数据库和表
创建数据库
test_db, 再创建表 t_user,并插入若干数据,
其中:uid 为主键,且为自动增长
3、测试
(1)编写一个实体类
User.java:
|
package com.siwuxie095.entity; // 实体类 public class User {
private Integer uid; private String username; private String password; private String address;
public Integer getUid() { return uid; } public this.uid = uid; }
public String getUsername() { return username; } public this.username = username; }
public String getPassword() { return password; } public this.password = password; }
public String getAddress() { return address; } public this.address = address; }
@Override public String toString() { return ", password=" + password + ", address=" + address + "]"; }
} |
(2)编写一个
Controller 类
UserController.java:
|
package com.siwuxie095.controller; import org.springframework.http.HttpStatus; import org.springframework.stereotype.Controller; import org.springframework.web.bind.annotation.RequestMapping; import org.springframework.web.bind.annotation.ResponseStatus; import com.siwuxie095.entity.User; import com.siwuxie095.service.UserService; // Controller 类 @Controller @RequestMapping("/user") public class UserController {
private UserService userService;
public this.userService = userService; }
/** */ @RequestMapping("/show") @ResponseStatus(HttpStatus.OK) public
User user = userService.getUser(1); System.out.println(user); }
} |
(3)编写一个
Service 类
UserService.java:
|
package com.siwuxie095.service; import org.springframework.transaction.annotation.Transactional; import com.siwuxie095.entity.User; import com.siwuxie095.mapper.UserMapper; // Service 类 @Transactional public class UserService { private UserMapper userMapper;
public this.userMapper = userMapper; }
public User getUser(Integer uid){ return userMapper.getUser(uid); }
} |
(4)编写一个映射器接口
UserMapper.java:
|
package com.siwuxie095.mapper; import org.apache.ibatis.annotations.Param; import com.siwuxie095.entity.User; // 映射器接口 public interface UserMapper { User getUser(@Param("uid") Integer uid);
} |
(5)在
MyBatis 映射配置文件中进行配置
UserMapper.xml:
|
<?xml <!DOCTYPE mapper PUBLIC "-//mybatis.org//DTD Mapper 3.0//EN" "http://mybatis.org/dtd/mybatis-3-mapper.dtd">
<mapper <select select * from t_user where uid = #{uid} </select>
</mapper> |
(6)在
MyBatis 核心配置文件中进行配置
mybatis-config.xml:
|
<?xml <!DOCTYPE configuration PUBLIC "-//mybatis.org//DTD Config 3.0//EN" "http://mybatis.org/dtd/mybatis-3-config.dtd"> <configuration>
<settings> <!-- 开启自动驼峰命名规则映射 --> <setting </settings>
<!-- 配置类型别名 --> <typeAliases> <typeAlias </typeAliases>
<!-- 引入映射配置文件 --> <mappers> <package </mappers> </configuration> |
(7)在数据库连接信息的属性文件中进行配置
jdbc.properties:
|
jdbc.driverClassName=com.mysql.jdbc.Driver jdbc.url=jdbc:mysql:///test_db jdbc.username=root |
其中:
jdbc:mysql:///test_db 是 jdbc:mysql://localhost:3306/test_db 的简写
(8)在
Spring 核心配置文件中进行配置
applicationContext.xml:
|
<?xml <beans xmlns:xsi="http://www.w3.org/2001/XMLSchema-instance" xmlns:aop="http://www.springframework.org/schema/aop" xmlns:context="http://www.springframework.org/schema/context" xmlns:tx="http://www.springframework.org/schema/tx" xsi:schemaLocation=" http://www.springframework.org/schema/beans http://www.springframework.org/schema/beans/spring-beans.xsd http://www.springframework.org/schema/aop http://www.springframework.org/schema/aop/spring-aop.xsd http://www.springframework.org/schema/context http://www.springframework.org/schema/context/spring-context.xsd http://www.springframework.org/schema/tx http://www.springframework.org/schema/tx/spring-tx.xsd">
<!-- 使用spring自带的占位符替换功能 --> <bean
<!-- 允许JVM参数覆盖 --> <property
<!-- 忽略没有找到的资源文件 --> <property
<!-- 配置资源文件(也称 <property <list> <value>classpath:jdbc.properties</value> </list> </property>
</bean>
<!-- 配置 BoneCP 连接池 --> <bean
<!-- 数据库驱动 --> <property
<!-- 相应驱动的jdbcUrl --> <property
<!-- 数据库的用户名 --> <property
<!-- 数据库的密码 --> <property
,如果要取消则设置为0 --> <property
,如果要永远存活设置为0 --> <property
<!-- 每个分区最大的连接数 --> <property
<!-- 每个分区最小的连接数 --> <property
</bean>
<!-- 将 SqlSessionFactory 对象的创建交给 Spring 进行管理 --> <bean <!-- 指定数据源 --> <property <!-- 指定 MyBatis 核心配置文件的位置(路径) --> <property </bean>
<!-- 配置 Service 对象 --> <bean <property </bean>
<!-- 配置映射器接口(Mapper 接口)的扫描包 --> <bean <!-- 如有多个包,以逗号 <property </bean>
<!-- 配置映射器接口(以下方法二选一即可,这里选择法二):
法一:逐个配置:配置映射器接口(Mapper 接口)的对象
<bean id="userMapper" class="org.mybatis.spring.mapper.MapperFactoryBean"> <property name="mapperInterface" value="com.siwuxie095.mapper.UserMapper"/> <property name="sqlSessionFactory" ref="sqlSessionFactory"/> </bean>
法二:统一配置:配置映射器接口(Mapper 接口)的扫描包
<bean class="org.mybatis.spring.mapper.MapperScannerConfigurer"> <property name="basePackage" value="com.siwuxie095.mapper"/> </bean>
-->
<!-- 配置事务管理器 --> <bean class="org.springframework.jdbc.datasource.DataSourceTransactionManager"> <!-- 注入 dataSource --> <property </bean> <!-- 配置事务注解,即 <tx:annotation-driven
<!-- 一般事务管理都是在 Service 层进行,只需在 Service 类上加上 @Transactional 注解 --> </beans> |
(9)在
SpringMVC 核心配置文件中进行配置
dispatcher-servlet.xml:
|
<?xml <beans xmlns:xsi="http://www.w3.org/2001/XMLSchema-instance" xmlns:context="http://www.springframework.org/schema/context" xmlns:mvc="http://www.springframework.org/schema/mvc" xsi:schemaLocation=" http://www.springframework.org/schema/beans http://www.springframework.org/schema/beans/spring-beans.xsd http://www.springframework.org/schema/context http://www.springframework.org/schema/context/spring-context.xsd http://www.springframework.org/schema/mvc http://www.springframework.org/schema/mvc/spring-mvc.xsd">
<!-- 启用注解驱动 --> <mvc:annotation-driven/>
<!-- 配置 Controller(必须,即
class 为自定义 Controller 类的完全限定名,这里通过 Controller 类中的 @RequestMapping 注解来设置访问路径
使用纯注解时,另一种配置 Controller 的方式:配置扫描包 <context:component-scan base-package="com.siwuxie095.controller" /> --> <bean <property </bean>
<!-- 配置 ViewResolver(必须,即 <bean <!-- 配置视图解析的前缀 prefix 和后缀 suffix: (1)前缀:如果在 WebContent 目录下,则为 /,如果在 WEB-INF 目录下,则为 /WEB-INF/ (2)后缀:一般为 JSP 文件,所以为 .jsp
例如:prefix="/",suffix=".jsp",viewname="test",则:"/test.jsp" --> <property <property </bean>
</beans> |
(10)在部署描述文件中进行配置
web.xml:
|
<?xml <web-app xmlns:xsi="http://www.w3.org/2001/XMLSchema-instance" <display-name>TestSpringMVCAndSpring</display-name> <welcome-file-list> <welcome-file>index.html</welcome-file> <welcome-file>index.htm</welcome-file> <welcome-file>index.jsp</welcome-file> <welcome-file>default.html</welcome-file> <welcome-file>default.htm</welcome-file> <welcome-file>default.jsp</welcome-file> </welcome-file-list>
<!-- 配置 Spring 的监听器 ContextLoaderListener --> <listener> <listener-class>org.springframework.web.context.ContextLoaderListener</listener-class> </listener>
<!-- 配置 Spring 核心配置文件的位置(路径) --> <context-param> <param-name>contextConfigLocation</param-name> <param-value>classpath:applicationContext.xml</param-value> </context-param>
<!-- 配置 SpringMVC 的核心分发器 --> <servlet> <servlet-name>dispatcher</servlet-name> <servlet-class>org.springframework.web.servlet.DispatcherServlet</servlet-class> <!-- 配置 SpringMVC 核心配置文件的位置(路径) --> <init-param> <param-name>contextConfigLocation</param-name> <param-value>classpath:dispatcher-servlet.xml</param-value> </init-param> <!-- 自动加载:随 Tomcat 容器启动,完成初始化 --> <load-on-startup>1</load-on-startup> </servlet>
<servlet-mapping> <servlet-name>dispatcher</servlet-name> <url-pattern>*.do</url-pattern> </servlet-mapping>
</web-app> |
(11)访问路径
http://localhost:8080/工程名/user/show.do
附:
另一种配置方式,即
纯注解,对以上「测试」做如下修改:
(1)在
Controller 类中:
1)在 userService 属性上加 @Autowired 注解
2)删掉
userService 属性的 setter 方法
(2)在
Service 类中:
1)在类上加 @Service 注解
2)在 userMapper 属性上加 @Autowired 注解
3)删掉
userMapper 属性的 setter 方法
(3)在
Spring 核心配置文件中:
1)删掉 userService 的 Bean
2)加上
<context:component-scan base-package="com.siwuxie095.service"/>
(4) 在 SpringMVC 核心配置文件中:
1)删掉 userController 的 Bean
2)加上
<context:component-scan base-package="com.siwuxie095.controller"/>
或
综合(3)(4):删掉两个
Bean,在 SpringMVC 核心配置文件中
加上如下内容:
<context:component-scan base-package="com.siwuxie095"/>
【made by siwuxie095】
SSM框架整合过程总结的更多相关文章
- ssm框架整合-过程总结(第二次周总结)
距离上次写博客已经有4.5天的时间了. 这次写博客目的是总结一下项目开始到现在,过程中遇到的问题.和学到的知识.经验. 初略总结下自己从中学到的: Spring :在学习中被反复强调的Ioc(反转控制 ...
- ssm框架整合-过程总结(第三次周总结)
本周主要是完成前端界面和后端的整合. 犹豫前后端的工作完成程度不一致,只实现了部分整合. 登录界面. 可能自己最近没有把重心放在短学期的项目上,导致我们工作的总体进度都要比别慢. 虽然我们只是三个人的 ...
- 使用IntelliJ IDEA创建Maven聚合工程、创建resources文件夹、ssm框架整合、项目运行一体化
一.创建一个空的项目作为存放整个项目的路径 1.选择 File——>new——>Project ——>Empty Project 2.WorkspaceforTest为项目存放文件夹 ...
- SpringMVC札集(10)——SSM框架整合
自定义View系列教程00–推翻自己和过往,重学自定义View 自定义View系列教程01–常用工具介绍 自定义View系列教程02–onMeasure源码详尽分析 自定义View系列教程03–onL ...
- SSM框架整合:转自:http://blog.csdn.net/zhshulin
使用SSM(Spring.SpringMVC和Mybatis)已经有三个多月了,项目在技术上已经没有什么难点了,基于现有的技术就可以实现想要的功能,当然肯定有很多可以改进的地方.之前没有记录SSM整合 ...
- (转)淘淘商城系列——SSM框架整合之Dao层整合
http://blog.csdn.net/yerenyuan_pku/article/details/72721093 一个项目中往往有三层即Dao层.Service层和Web层,看标题就知道了,本文 ...
- 【转载】使用IntelliJ IDEA创建Maven聚合工程、创建resources文件夹、ssm框架整合、项目运行一体化
一.创建一个空的项目作为存放整个项目的路径 1.选择 File——>new——>Project ——>Empty Project 2.WorkspaceforTest为项目存放文件夹 ...
- SSM框架整合项目 :租房管理系统
使用ssm框架整合,oracle数据库 框架: Spring SpringMVC MyBatis 导包: 1, spring 2, MyBatis 3, mybatis-spring 4, fastj ...
- 基于maven的ssm框架整合
基于maven的ssm框架整合 第一步:通过maven建立一个web项目. 第二步:pom文件导入jar包 (1 ...
随机推荐
- session token两种登陆方式
Session 和 Token 其实Session和Token总体上还是很相似的,但是也有以下区别: 1. 过期时间:Session的过期时间存在cookie的Max-age字段,Token的过期时间 ...
- redis使用get key中文变成十六进制编码
redis-cli 后面加上 --raw 解决中文显示问题 redis-cli -h 127.0.0.1 -p 端口 -a 密码 --raw 不带 --raw 参数: redis-cli -h &g ...
- C++ Primer Plus (Stephen Prata 著)
第1章 预备知识 (已看) 第2章 开始学习C++ (已看) 第3章 处理数据 (已看) 第4章 复合类型 (已看) 第5章 循环和关系表达式 (已看) 第6章 分支语句和逻辑运算符 (已看) 第7章 ...
- JDK8安装与配置
如果是免安装包 配置方法 1.配置java环境变量 注意:jdk文件夹名字取名不要用汉语取名. 1)鼠标右键点击我的电脑(计算机)选择属性栏 2)再点击左边高级系统设置 3)点击环境变量 4)在系统变 ...
- 中文分词算法工具hanlp源码解析
词图 词图指的是句子中所有词可能构成的图.如果一个词A的下一个词可能是B的话,那么A和B之间具有一条路径E(A,B).一个词可能有多个后续,同时也可能有多个前驱,它们构成的图我称作词图. 需要稀疏2维 ...
- VirtualBox网络的Host-Only配置
创建host-only虚拟网卡 VBox管理器页面-管理-主机网络管理器,如果已经存在默认的虚拟网卡则下一步,如果不存在则创建一个虚拟网卡,不启用DHCP服务器,这里ip地址为192.168.137. ...
- Kong安装教程(v1.0.2)
使用的软件 Unbuntu 虚拟机(有自己的服务器更好) PostgreSQL kong kong-dashboard docker spring boot 安装 PostgreSQL kong 需要 ...
- Cookie深度解析
最近在公司做了Web端单点登录(SSO)功能,基于Cookie实现,做完之后感觉有必要总结一下,本文着重讲解Cookie,下文会说明单点登录的实现方案. Cookie简介 众所周知,Web协议(也就是 ...
- C++Primer第五版——习题答案详解(八)
习题答案目录:https://www.cnblogs.com/Mered1th/p/10485695.html 第9章 顺序容器 练习9.1 a.list,需要按字典序插入,可能插入位置在中间 b.d ...
- iOS之iOS11、iPhone X、Xcode9 适配指南
更新iOS11后,发现有些地方需要做适配,整理后按照优先级分为以下三类: 1.单纯升级iOS11后造成的变化: 2.Xcode9 打包后造成的变化: 3.iPhoneX的适配 一.单纯升级iOS11后 ...