linux (centOS)安装 oracle 11g 以及卸载oracle
目录
首先、1、
一、参数以及环境配置
1、创建用户和组
2、创建数据库软件目录和数据文件存放目录
3、配置oracle用户的环境变量
4、修改linux内核,修改/etc/sysctl.conf文件
5、修改/etc/security/limits.conf文件,修改用户的SHELL的限制
6、修改/etc/pam.d/login 文件
7、修改/etc/profile
二、解压安装文件,安装
1、解压
2、图形化安装
三、数据库自启动
四、数据库建库
五、基本操作
首先:
1、 添加主机与IP的对应关系(不添加后面安装过程可能会报Oracle Net Configuration Assisant failed的错误)
[root@oracledb ~]#vi /etc/hosts
192.168.62.128 ww

最后面一行添加:

2、关闭防火墙 :
service iptables stop
service ip6tables stop
一、修改配置文件
1、
创建用户组oinstall:
groupadd oinstall
创建用户组dba:
groupadd dba
创建oracle用户,并加入到oinstall和dba用户组:
useradd -g oinstall -g dba -m oracle
设置用户oracle登录密码,需要确认一次,注意两次密码要一样(注意:此处的密码是oracle账户登录密码):passwd oracle
查看新建的oracle用户:
id oracle
2、创建数据库软件目录和数据文件存放目录
mkdir -p /home/oracle/app/oraInventory
mkdir -p /home/oracle/app/oradata
mkdir -p /home/oracle/app/oracle/product
修改目录权限,更改目录属主为Oracle用户所有,输入命令:
chown -R oracle:oinstall /home/oracle/app
3、配置oracle用户的环境变量。
用命令su - oracle切换到oracle用户下。
#:su oracle
输入命令:vi ~/.bash_profile,将下列内容加入该文件。
export ORACLE_BASE=/home/oracle/app/oracle
export ORACLE_HOME=$ORACLE_BASE/product/11.2.0/dbhome_1
export ORACLE_SID=orcl
export PATH=$PATH:$HOME/bin:$ORACLE_HOME/bin
export LD_LIBRARY_PATH=$ORACLE_HOME/lib:/usr/lib
export NLS_LANG="SIMPLIFIED CHINESE_CHINA.ZHS16GBK"
4、修改linux内核,修改/etc/sysctl.conf文件
输入命令: vi /etc/sysctl.conf ,将下列内容加入该文件。
fs.aio-max-nr = 1048576
fs.file-max = 6815744
kernel.shmall = 2097152
kernel.shmmax = 1200000000
kernel.shmmni = 4096
kernel.sem = 250 32000 100 128
net.ipv4.ip_local_port_range = 9000 65500
net.core.rmem_default = 262144
net.core.rmem_max = 4194304
net.core.wmem_default = 262144
net.core.wmem_max = 1048576
5、修改/etc/security/limits.conf文件,修改用户的SHELL的限制。
输入命令:vi /etc/security/limits.conf,将下列内容加入该文件。
oracle   soft    nproc    2047

oracle   hard    nproc    16384

oracle   soft    nofile   1024

oracle   hard    nofile   65536

6、修改/etc/pam.d/login 文件。
输入命令:vi /etc/pam.d/login,将下列内容加入该文件。
session required /lib/security/pam_limits.so
session required pam_limits.so
7、修改/etc/profile。
输入命令:vi /etc/profile,将下列内容加入该文件。
if [ $USER = "oracle" ]; then
if [ $SHELL = "/bin/ksh" ]; then
ulimit -p 16384
ulimit -n 65536
else
ulimit -u 16384 -n 65536
fi
fi
二、解压安装文件,安装
1、解压
unzip linux.x64_11gR2_database_1of2.zipunzip linux.x64_11gR2_database_2of2.zip2、图形化安装
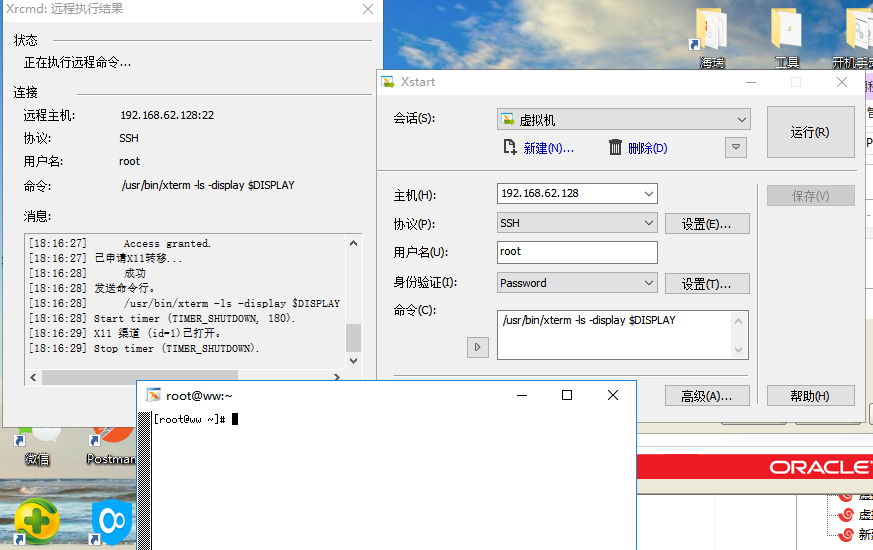
图形化安装需要先在window本地下载xmanager并安装;
运行Xstart
(安装Oracle
--如果linux没有安装图形界面,则需要先安装。
# yum grouplist
# yum groupinstall "X Window System"
# yum groupinstall Desktop
#yum install xterm
#yum install xclock )
也可参考以下链接:https://www.cnblogs.com/songyuejie/p/6372534.html
xshell中:
用命令su - oracle切换到oracle用户,执行安装命令./runInstaller,具体如下。
[root@localhost database]# su - oracle
[oracle@localhost database]$ DISPLAY=192.168.0.107:0.0
[oracle@localhost database]$ export DISPLAY
[oracle@localhost database]$ export LANG=en-US
[oracle@localhost database]$ ./runInstaller
如果是远程连接Linux服务器安装,需要输入命令
DISPLAY=192.168.0.107:0.0 //此处为本地电脑的IP地址,不是服务器的IP地址
export DISPLAY //将安装界面映射显示到本地电脑
export LANG=en-US //如果安装界面出现乱码,文字显示不了,需要输入该命令

根据实际情况安装缺少的组件。没有的组件可以百度谷歌搜索下载,然后上传上去安装,安装好后点击Check Again按钮进行检查,安装的版本适用就可以通过了。
rpm -ivh pdksh-5.2.14-37.el5_8.1.x86_64.rpm
rpm -ivh libaio-devel-0.3.105-2.x86_64.rpm
rpm -ivh elfutils-libelf-devel-0.152-1.el6.x86_64.rpm
rpm -ivh compat-libstdc++-33-3.2.3-69.el6.x86_64.rpm
yum -y install libstdc++-devel*
yum -y install libstdc++-devel-4.4.7-11.el6.x86_64.rpm
yum install gcc-c++-*
3、安装,
当出现此提示时,切换到root用户运行对应的 .sh文件
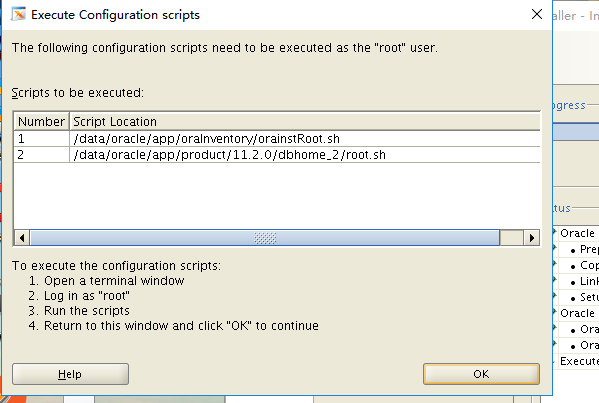
出现选择,默认就可以

后续安装同 window安装

4、安装完成测试连接:
su - oracle
用su - 用户或者su -l 用户才能把登录环境也切换掉。
#:sqlplus.

三、数据库自启动
设置 oracle 自动启动
完成 oracle 安装后,我们可以通过命令启动停止数据库,但是当机器重启时并不能随机器启动,这也给我们带来了一些不便,下面记录了,如何将 oralce 加入服务中,并随机机器启动。
修改配置文件 /etc/oratab
修改 /etc/oratab 的最后一行的最后一个字符,将 N 修改为 Y。此举主要是为了使 oracle 的 dbstart 命令能在系统启动时能运行。如下所示:
|
1
2
3
4
5
6
7
8
9
10
11
12
13
14
15
16
17
18
19
20
|
[root@oracle ~]# vi /etc/oratab## This file is used by ORACLE utilities. It is created by root.sh# and updated by the Database Configuration Assistant when creating# a database.# A colon, ':', is used as the field terminator. A new line terminates# the entry. Lines beginning with a pound sign, '#', are comments.## Entries are of the form:# $ORACLE_SID:$ORACLE_HOME:<N|Y>:## The first and second fields are the system identifier and home# directory of the database respectively. The third filed indicates# to the dbstart utility that the database should , "Y", or should not,# "N", be brought up at system boot time.## Multiple entries with the same $ORACLE_SID are not allowed.##orcl:/u01/app/oracle/product/11.2.0/dbhome_1:Y |
创建 /etc/init.d/oracle
在 /etc/init.d/下创建文件 oracle,此为 oracle 自启动脚本。内容如下:
|
1
2
3
4
5
6
7
8
9
10
11
12
13
14
15
16
17
18
19
20
21
22
23
24
25
26
27
28
29
30
31
32
33
34
35
36
|
#!/bin/sh# chkconfig: 345 61 61# description: Oracle 11g R2 AutoRun Servimces# /etc/init.d/oracle## Run-level Startup script for the Oracle Instance, Listener, and# Web InterfaceORACLE_HOME="/home/oracle/app/oracle/product/11.2.0/dbhome_1"ORA_OWNR="oracle"# if the executables do not exist -- display errorif [ ! -f "$ORACLE_HOME/bin/dbstart" ]thenecho "Oracle startup: cannot start"exit 1fi# parameter: start, stop, restartcase "$1" instart)# Oracle listener and instance startupsu $ORA_OWNR -s /bin/bash $ORACLE_HOME/bin/dbstart $ORACLE_HOMEecho "Oracle Start Succesful!OK.";;stop)# Oracle listener and instance shutdownsu $ORA_OWNR -s /bin/bash $ORACLE_HOME/bin/dbshut $ORACLE_HOMEecho "Oracle Stop Succesful!OK.";;restart)$0 stop$0 start;;*)echo $"Usage: `basename $0` {start|stop|restart}"exit 1esacexit 0 |
赋予启动脚本执行权限并链接好:
|
1
2
3
|
# chmod 750 /etc/init.d/oracle# ln -s /etc/init.d/oracle /etc/rc1.d/K61oracle# ln -s /etc/init.d/oracle /etc/rc3.d/S61oracle |
启动脚本设置好了之后,可以使用 service 命令来启动停止 oracle 了,这时候 oracle 已经是系统服务了。
|
1
2
3
|
service oracle startservice oracle stopservice oracle restart |
设置 oracle 服务为自启动
|
1
2
|
# chkconfig --add oracle# chkconfig --level 345 oracle on |
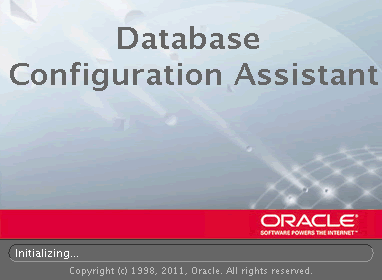
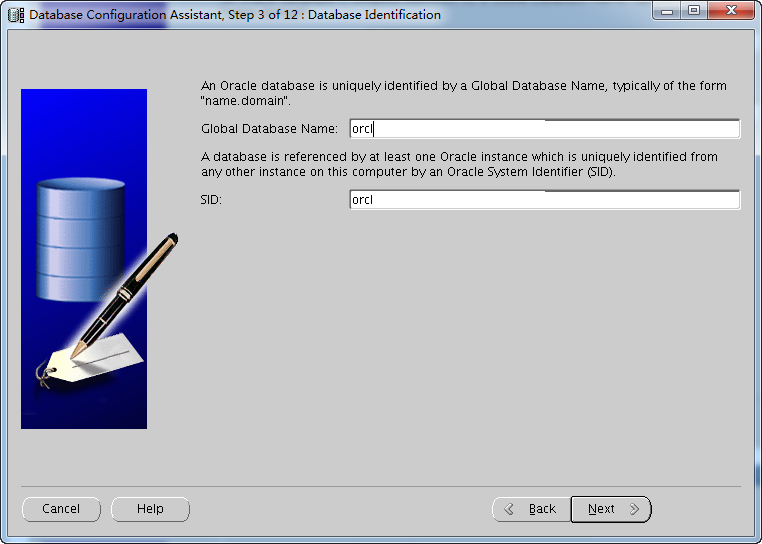
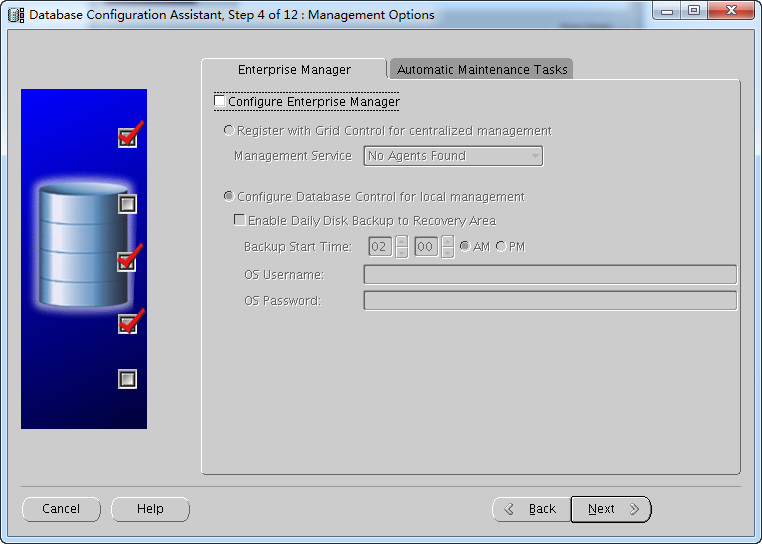
四、单独数据库建库
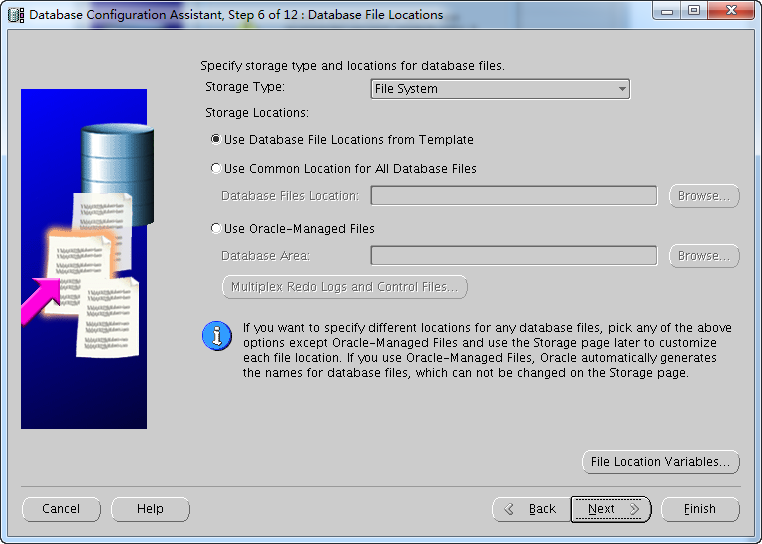
在当前终端窗口中输入命令dbca,弹出建库界面。
[oracle@localhost database]$ dbca
[root@localhost dbhome_1]# dbca
-bash: dbca: command not found
如果没有弹出建库界面,或找不到dbca命令。按前面方式执行完两个脚本,然后按如下操作进行。
- [root@localhost bin]# su - oracle
- [oracle@localhost ~]$ cd /home/oracle/app/oracle/product/11.2.0/dbhome_1/bin
- [oracle@localhost bin]$ DISPLAY=192.168.0.107:0.0
- [oracle@localhost bin]$ export DISPLAY
- [oracle@localhost bin]$ export LANG=en-US
- [oracle@localhost bin]$ ./dbca


推荐设置统一的用户密码。
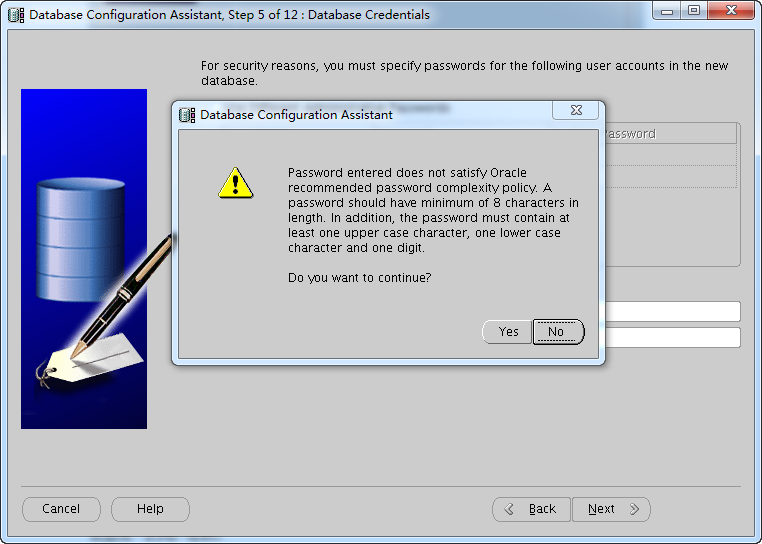
点击Yes按钮。
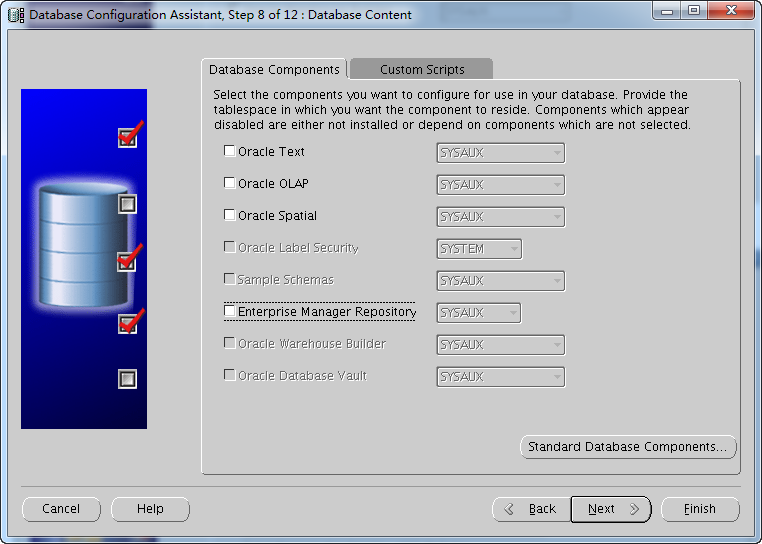
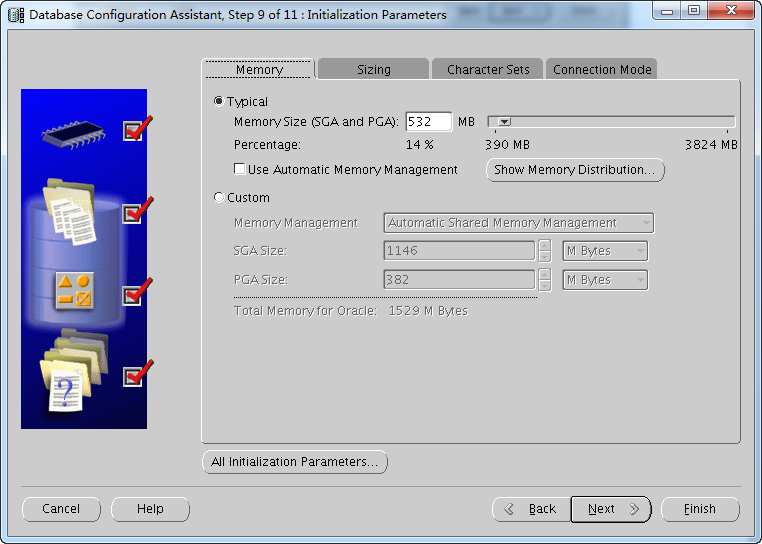
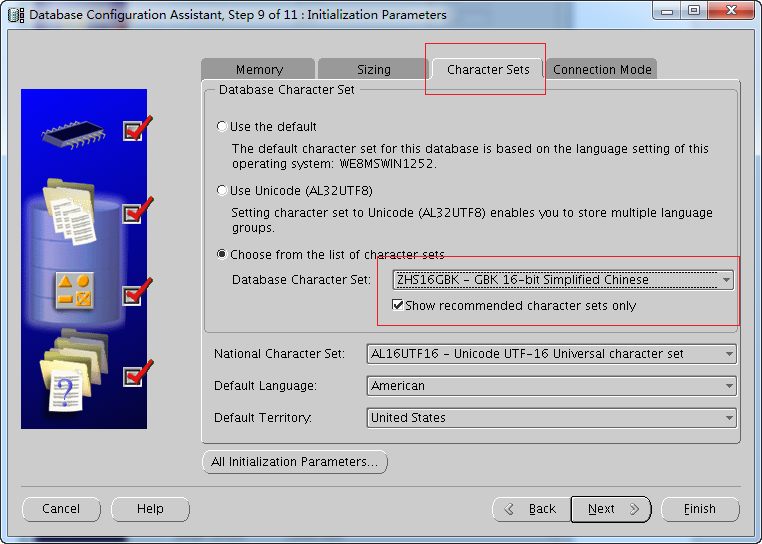
设置数据库字符编码。
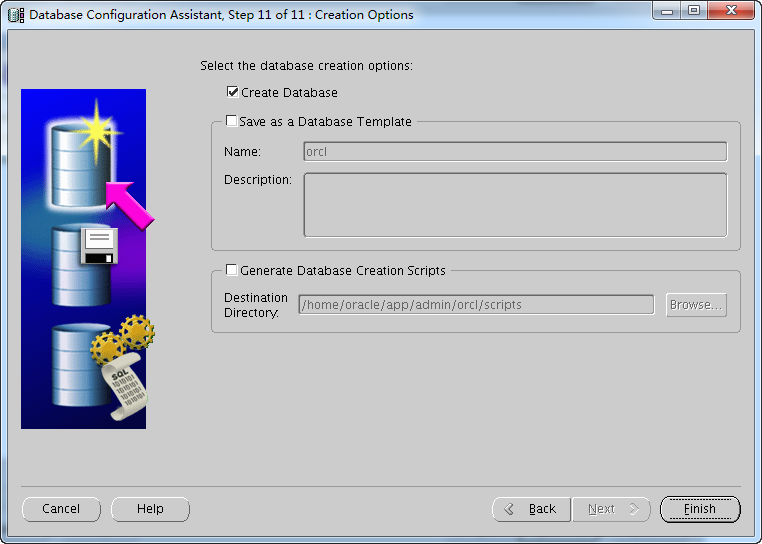
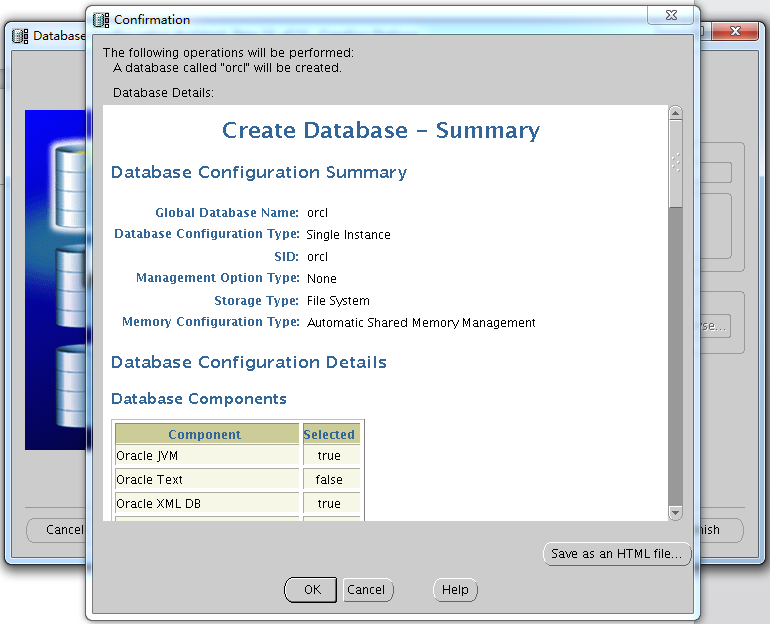
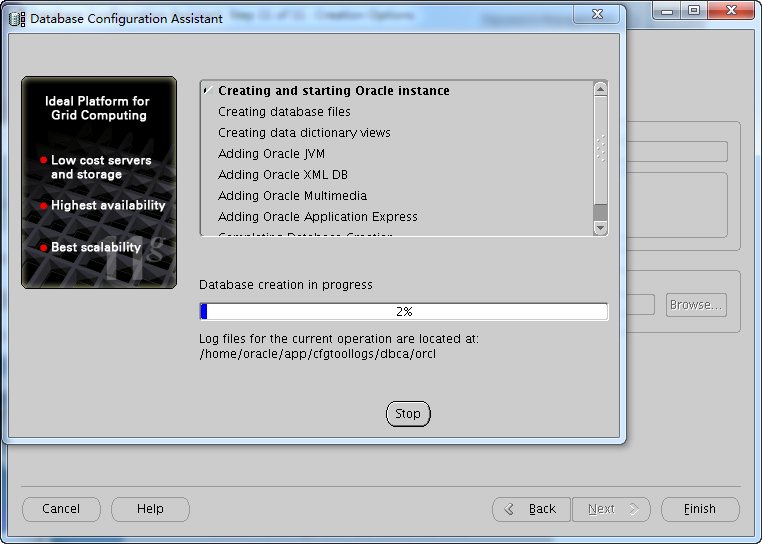
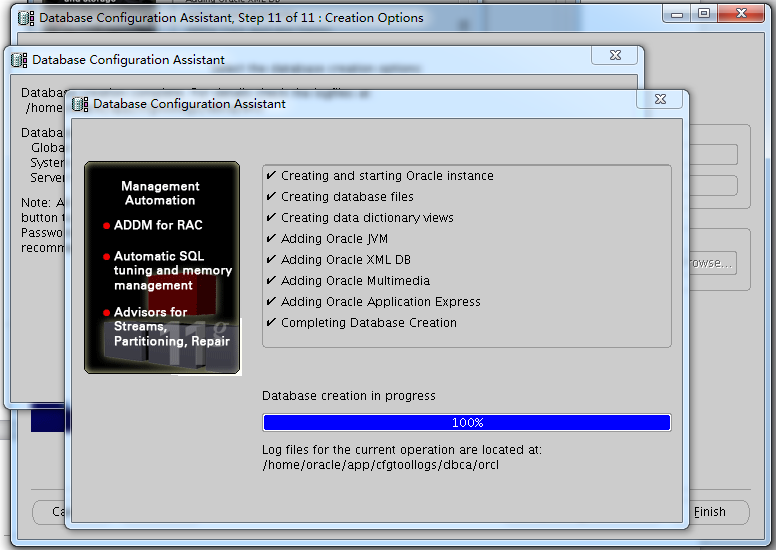

建库完成,点击Exit按钮退出。
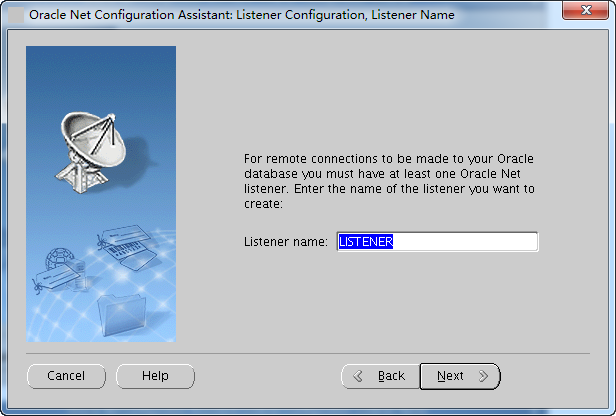
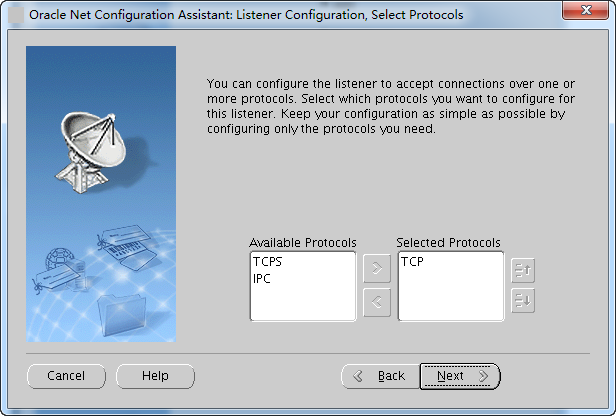
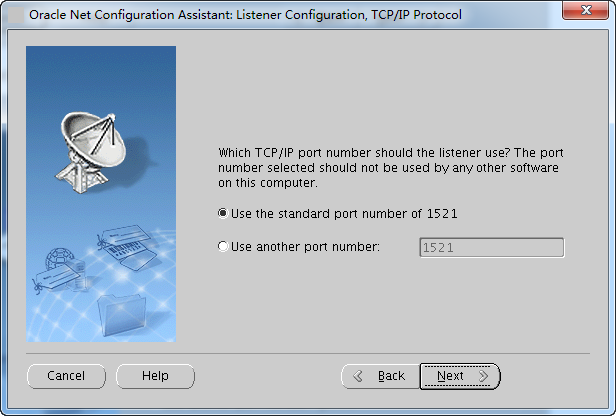
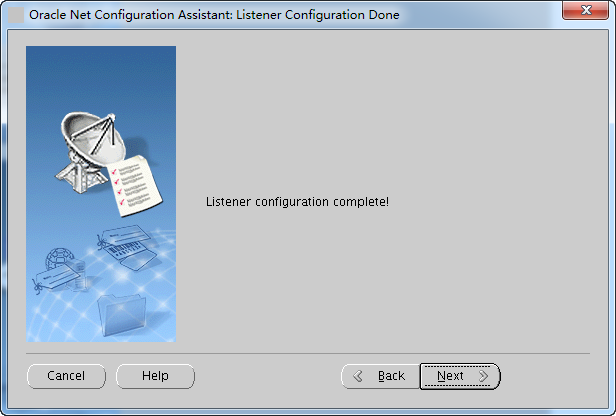
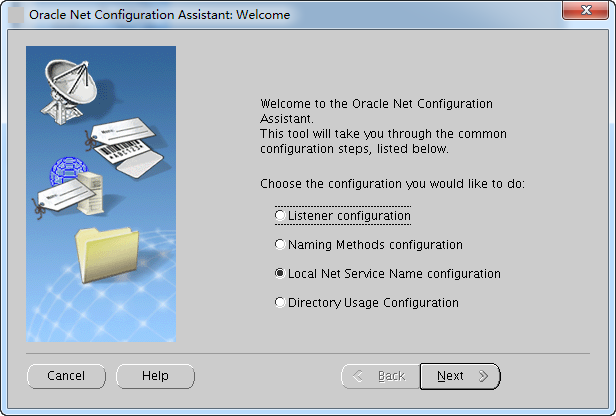
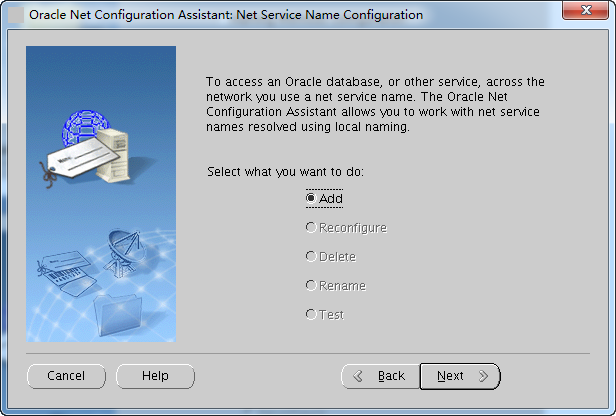
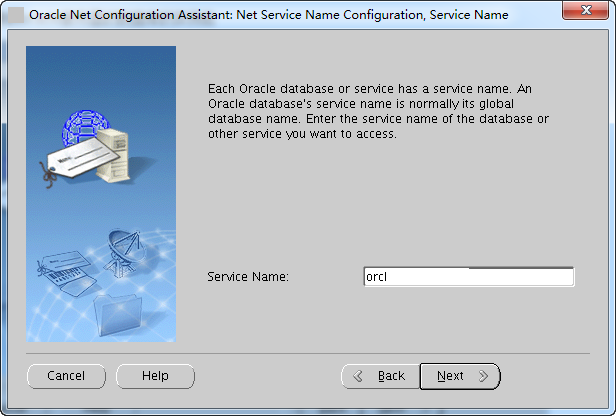
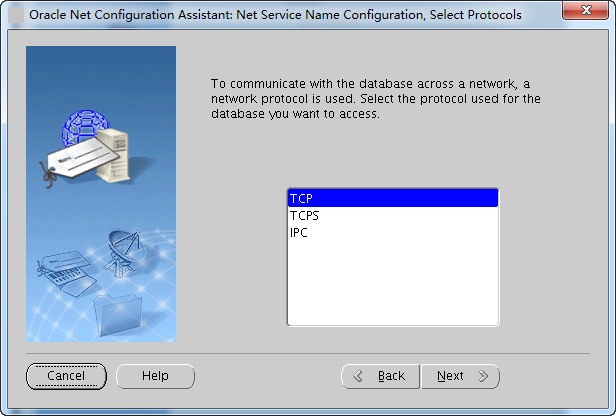
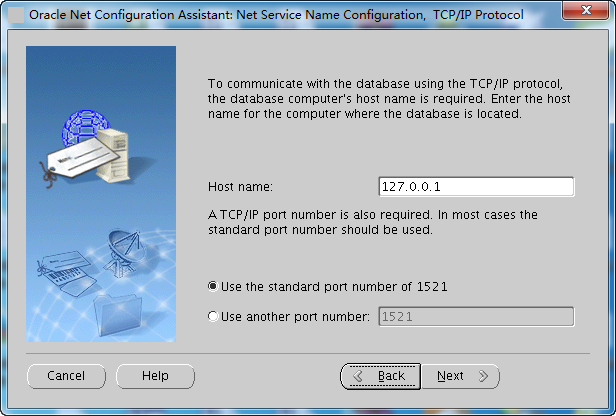
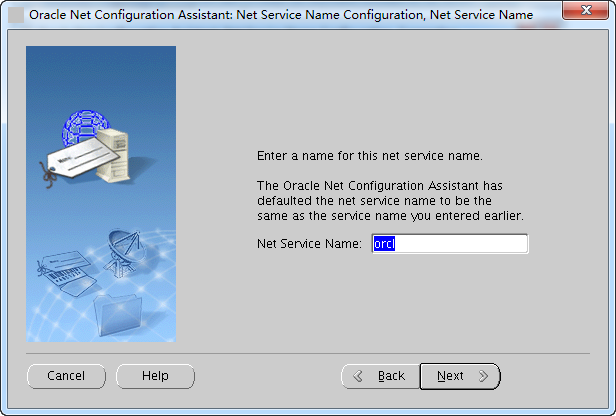
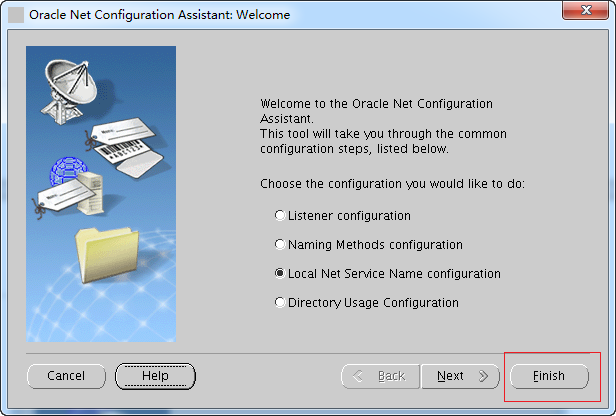
四、配置监听及本地网络服务
在当前终端窗口中输入命令netca,弹出配置界面。
[oracle@localhost database]$ netca
[root@localhost dbhome_1]# netca
-bash: netca: command not found
如果没有弹出配置界面,或找不到netca命令。按如下操作进行。
- [root@localhost bin]# su - oracle
- [oracle@localhost ~]$ cd /home/oracle/app/oracle/product/11.2.0/dbhome_1/bin
- [oracle@localhost bin]$ DISPLAY=192.168.0.107:0.0
- [oracle@localhost bin]$ export DISPLAY
- [oracle@localhost bin]$ export LANG=en-US
- [oracle@localhost bin]$ ./netca
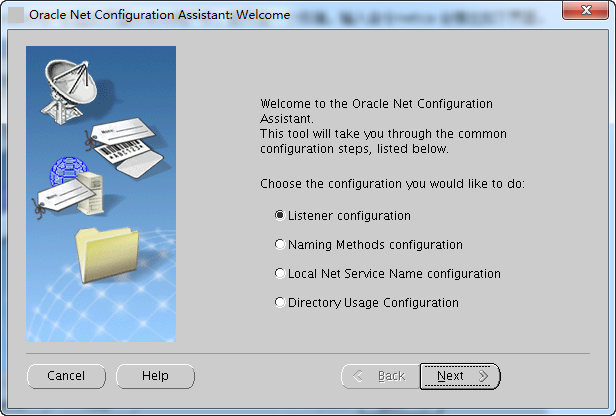

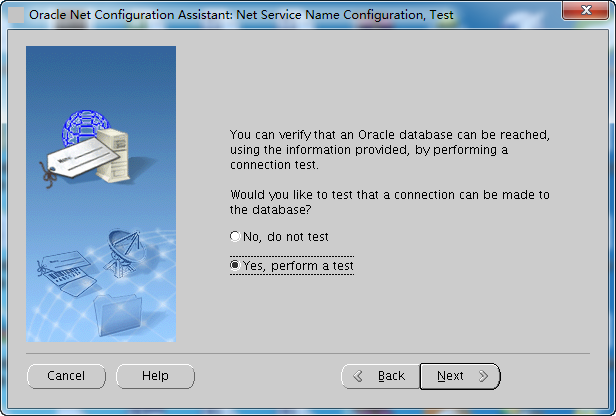
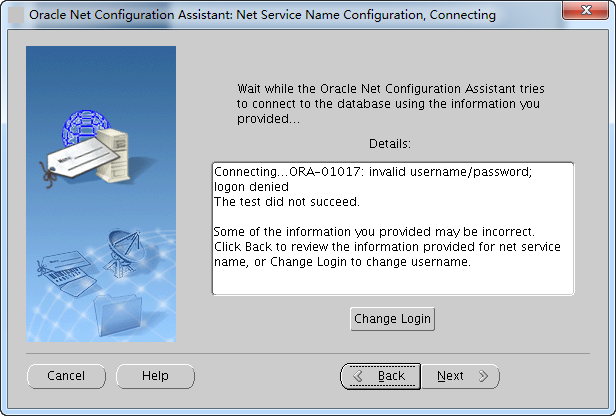
点击Change Login按钮,输入用户名和密码,测试连接是否成功。
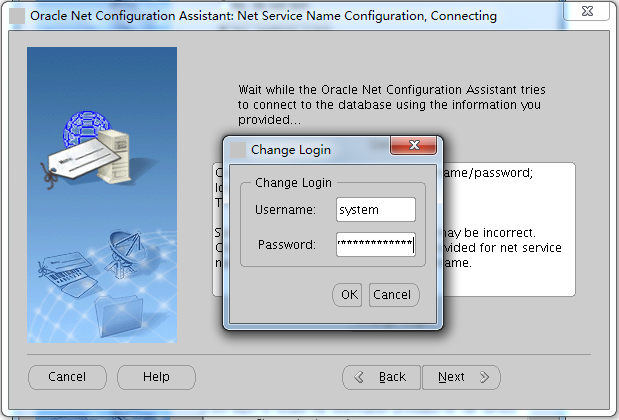
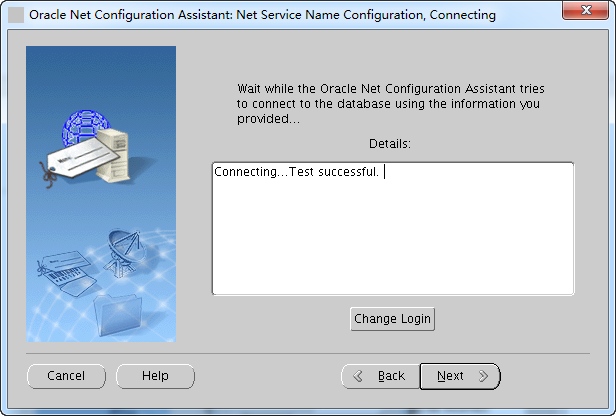


配置监听及本地网络服务完成。
五、基本操作、基本操作
oralce安装完成,以后基本操作是要知道的。
一.启动
1.#su - oracle 切换到oracle用户且切换到它的环境
2.$lsnrctl status 查看监听及数据库状态
3.$lsnrctl start 启动监听
4.$sqlplus / as sysdba 以DBA身份进入sqlplus
5.SQL>startup 启动db
二.停止
1.#su - oracle 切换到oracle用户且切换到它的环境
2.$lsnrctl stop 停止监听
3.$sqlplus / as sysdba 以DBA身份进入sqlplus
4.SQL>SHUTDOWN IMMEDIATE 关闭db
要是有兴趣的,剩下的很多重要的知识,只能靠自己学习了。这里知识给引出了一个开头。
====================================================================================================
====================================================================================================
六、Linux下卸载Oracle 11g
第一种方法: 使用oracle自带的runInstaller 卸载;
[oracle@localhost /]$ cd /opt/oracle/product/11.2.0/dbhome_1/deinstall/

[oracle@localhost deinstall]$ export LANG=en

[oracle@localhost deinstall]$ ./deinstall
第二种方法:通过删除文件的方式卸载;(即:删除Oracle安装目录下的所有文件和文件夹)
1.使用SQL*PLUS停止数据库
[oracle@OracleTest oracle]$ sqlplus /nolog

SQL> connect / as sysdba

SQL> shutdown [immediate]

SQL> exit
2.停止Listener
[oracle@OracleTest oracle]$ lsnrctl stop
3.停止HTTP服务
[root@OracleTest /root]# service httpd stop
4.用su或者重新登录到root(如想重新安装可以保留oracle用户,省得输入环境变量了)
5.将安装目录删除
[root@OracleTest /root]# rm -rf /u01/app/oracle/
6.将/usr/bin下的文件删除
[root@OracleTest /root]# rm /usr/local/bin/dbhome

[root@OracleTest /root]# rm /usr/local/bin/oraenv

[root@OracleTest /root]# rm /usr/local/bin/coraenv
7.将/etc/oratab删除
[root@OracleTest /root]# rm /etc/oratab
8.将/etc/oraInst.loc删除
[root@OracleTest /root]# rm /etc/oraInst.loc
9.将oracle用户删除(若要重新安装,可以不删除)
[root@OracleTest /root]# userdel –r oracle
10.将用户组删除(若要重新安装,可以不删除)
[root@OracleTest /root]# groupdel oinstall

[root@OracleTest /root]# groupdel dba
11.将启动服务删除
[root@OracleTest /root]# chkconfig --del dbora
到此为止重启后,你的Linux系统下的Oracle数据库已完全删除了!!!
linux (centOS)安装 oracle 11g 以及卸载oracle的更多相关文章
- Linux(Centos)安装Java JDK及卸载
步骤一.下载安装包 a. 因为Java JDK区分32位和64位,所以安装之前需先判断一下我们操作系统为多少位·,命令如下: uname -a 解释:如果有x86_64就是64位的,没有就是32位 ...
- Oracle 11g 完全卸载
停止所有Oracle 11g相关的服务 1.打开"服务"窗口 键入命令:"services.msc",回车,如下图: 2.停止所有Oracle 11g相关的服务 ...
- Oracle 11g完全卸载(Windows)(转)
Oracle 11g完全卸载(Windows) 1.关闭oracle所有的服务.可以在windows的服务管理器中关闭: 一般有以下服务: (1)Oracle SID VSS Writer ...
- oracle 11g的卸载
oracle 11g 的卸载主要有两种方式:一种是使用Oracle Universal Installer管理工具,该工具以向导模式进行,比较简单.这里主要讲解第二种卸载数据库的方式-----使用”d ...
- Oracle 11g 的卸载
Oracle 11g 的卸载 停止 oracle 相关的所有服务. 使用 Oracle 自带的 Universal Installer 卸载工具卸载 Oracle. 删除注册表 HKEY/LOCAL_ ...
- oracle 11g完美卸载
oracle 11g完美卸载 CreateTime--2018年4月22日17:07:19 Author:Marydon 对于oracle数据库的卸载,一定要卸载干净,否则,再次想装oracle时 ...
- Oracle 11g XE 是 Oracle 数据库的免费版本
Oracle 11g XE 是 Oracle 数据库的免费版本,支持标准版的大部分功能,11g XE 提供 Windows 和 Linux 版本. 做为免费的 Oracle 数据库版本,XE 的限制是 ...
- Oracle 11g XE 与 Oracle SQL Developer 的配置与使用(重制版)
Oracle 11g XE 与 Oracle SQL Developer 的配置与使用(重制版) 前提概要 项目上需求要适应Oracle数据库,当然这和某EF框架也有关. 因为Oracle 的表名和列 ...
- 阿里云服务器Linux CentOS安装配置(零)目录
阿里云服务器Linux CentOS安装配置(零)目录 阿里云服务器Linux CentOS安装配置(一)购买阿里云服务器 阿里云服务器Linux CentOS安装配置(二)yum安装svn 阿里云服 ...
随机推荐
- Celery 实现异步任务-one
celery异步任务: 环境准备 安装celery ,django-celery. 就是一个专注于实时处理和任务调度的分布式队列. 可以异步执行的任务交给后台处理,以防网络阻塞,减小响应时间 cele ...
- 剑指offer(8)跳台阶
题目描述 一只青蛙一次可以跳上1级台阶,也可以跳上2级.求该青蛙跳上一个n级的台阶总共有多少种跳法. 题目分析 题目很简单,稍微分析就知道这是斐波那契数列,所以可以动态规划来做 a.如果两种跳法,1阶 ...
- 事件Event实现消费者模型
import timeimport randomfrom multiprocessing import Process,Queue def consumer(q,name): while True: ...
- Delphi10.2 Tokyo试用(1)
最近下载了Delphi10.2 Tokyo,试用了一下,感觉不错,尤其是针对Linux的开发,总算出来了,可以考虑把原来服务器重新编译成RedHat上使用了,免得客户一天到晚喊Windows不安全,要 ...
- ECharts上手例子
ECharts,一个使用 JavaScript 实现的开源可视化库,可以流畅的运行在 PC 和移动设备上,兼容当前绝大部分浏览器 (IE8/9/10/11,Chrome,Firefox,Safari等 ...
- vue进行文件下载
本文为博主原创,未经允许不得转载: 总结一下,最近在vue中实现一个文件下载的功能,用了vue中ajax的方式请求下载接口, 但是返回报错,在网上查询之后,找到用ajax请求下载文件报错的原因:aja ...
- win8外包公司——技术分享:参数传递
页面之间传递参数 windows phone 的参数传递和web 差不多.用“?”号传递 多个参数的时候用 “&”做分隔. 我接着昨天的项目继续添加一个FourPage.xaml 在昨天的Th ...
- python+selenium,实现带有验证码的自动化登录功能
python+selenium的环境准备,请自行安装完成,这里直接贴代码,方便做项目时直接使用. import time from selenium import webdriver from PIL ...
- Bellman-Ford算法模板题
POJ 3259 虫洞(Bellman-Ford判断有无负环的问题) 描述: 在探索他的许多农场时,Farmer John发现了许多令人惊叹的虫洞.虫洞是非常奇特的,因为它是一条单向路径,在您进入虫洞 ...
- 学习GT一书前九章的体会
学习Gilbarg和Trudinger一书前九章的体会 本书第二章,调和函数的基本性质进行展示.特别的对比较定理有深刻的阐述以及Perron方法的基本说明,并对Wiener准则作了简要说明. 第三章的 ...